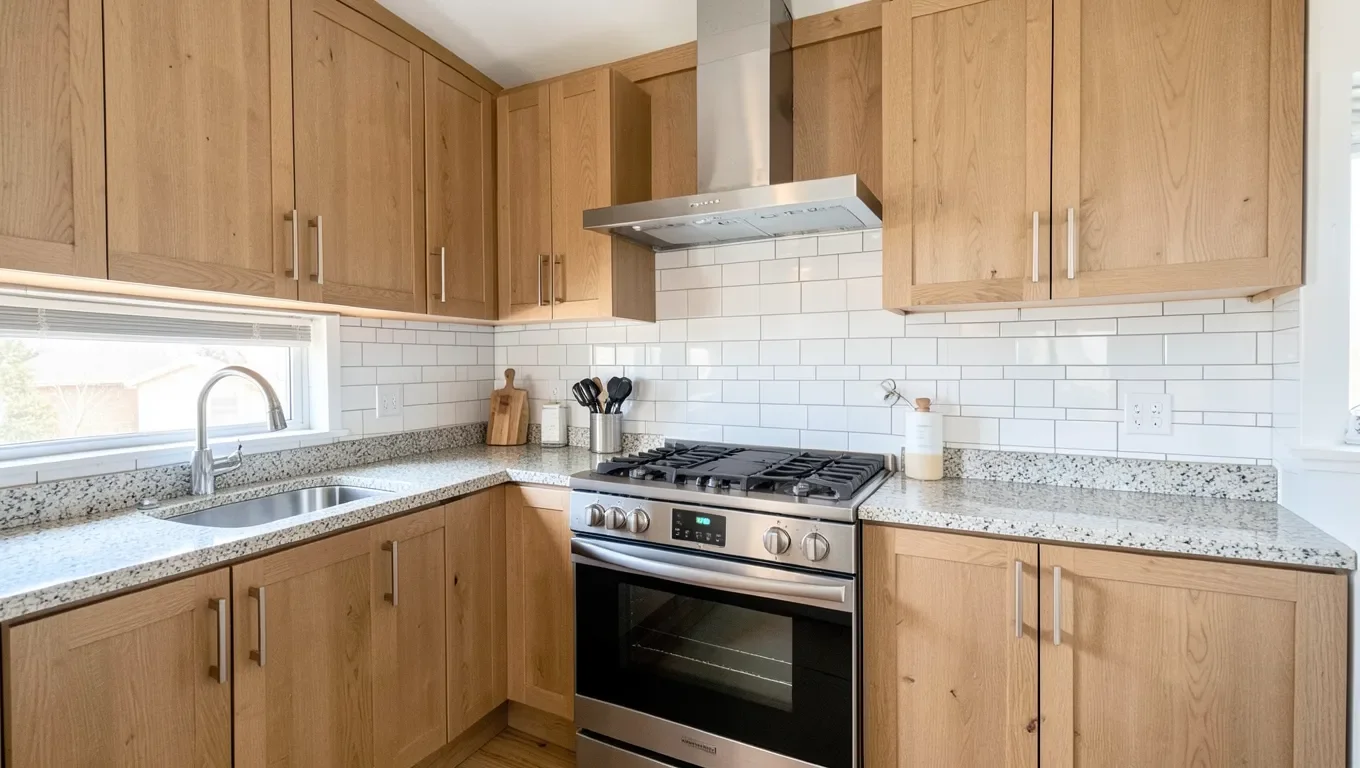
Kitchen Backsplash Ideas for Wood Cabinets: Match, Contrast, or Go Bold
Picking a backsplash for wood cabinets really comes down to one decision: do you want it to blend into the cabinet’s tone for a calm, cohesive kitchen, or contrast with it so both surfaces stand out? Below is a practical breakdown of both approaches, the materials that actually hold up behind a stove or sink, and one real risk – using wood itself as the backsplash – that most “backsplash ideas” roundups skip entirely.
Contrast or Match: Which Approach Fits Your Kitchen
A backsplash that sits within a shade or two of your cabinet’s undertone reads as “matched.” Think cream or warm beige tile against honey oak, or a soft taupe stone against golden maple. The effect is quiet and cohesive – nothing in the room fights for attention, which is a safe choice if your cabinets already have a strong grain pattern you want to showcase.
Contrast works the opposite way: you deliberately pick a backsplash with a different value (light against dark, or vice versa) or a different color temperature (a cool white or blue-gray tile against warm wood tones). Done well, contrast makes both the cabinets and the backsplash look more intentional. Done poorly – too many competing colors, patterns, or finishes at once – it reads as busy. A good rule of thumb: if you’re contrasting color, keep the tile shape simple (a plain subway or square format). If you’re contrasting pattern or texture (herringbone, mosaic, textured stone), keep the color close to neutral.
Best for Testing a Look Before You Commit
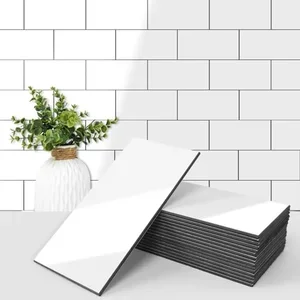 |
Art3d 102-Pack Peel-and-Stick Subway Tile Backsplash – $39.99 A low-cost way to hold a real contrast or matched-tone tile up against your actual cabinets before committing to grout and adhesive.
|
If you’re not sure whether you want contrast or a matched tone, a peel-and-stick tile like this is a cheap way to test it directly against your cabinet doors before buying enough material for the full wall.
Backsplash Materials That Hold Up With Wood Cabinets
Subway Tile (Ceramic or Porcelain)
Subway tile is the default for a reason: it’s inexpensive, widely available, easy to clean, and neutral enough to work with almost any wood tone. Glossy white or cream subway tile is the classic matched-or-contrast option depending on your cabinet color, but the same rectangular shape also comes in gray, black, and colored glazes if you want more of a statement. Ceramic and porcelain are both waterproof once grouted and sealed at the grout lines, and neither needs the ongoing sealing that natural stone does.
Natural Stone: Marble and Travertine
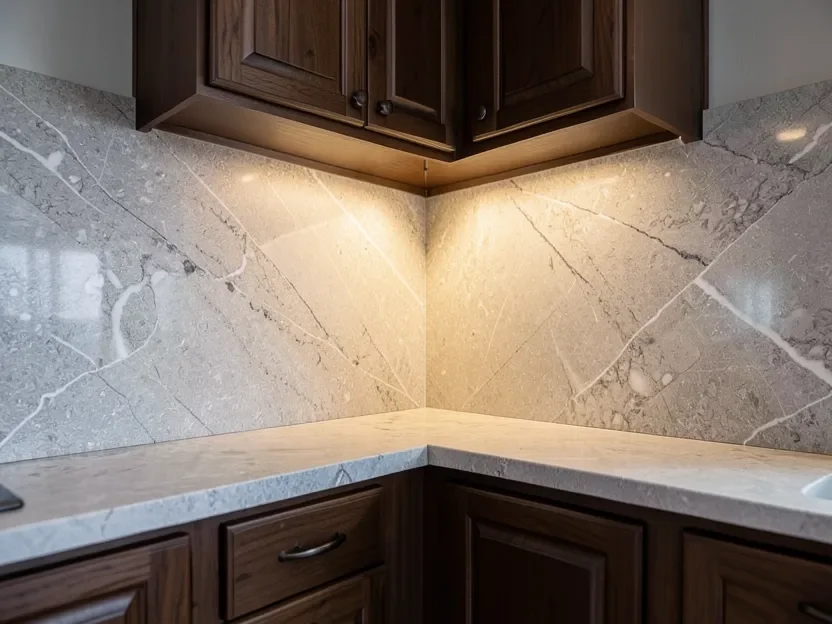
Marble and travertine read as higher-end and pair especially well as a contrast material against darker wood cabinets – the light veining brightens a dark corner without going stark white. The tradeoff is maintenance: both are porous stone, which means they need a penetrating sealer applied when installed and reapplied periodically (check the specific stone’s care sheet, but every 12 to 24 months is typical for a kitchen backsplash) or they’ll absorb oil splatter and grease stains permanently. If you like the look but don’t want the upkeep, a porcelain tile printed with a marble pattern gets you most of the visual effect with none of the sealing requirement.
Glass Tile
Glass tile reflects light in a way ceramic and stone don’t, which makes it a good pick for a kitchen with limited natural light or one wall that always feels dim. It works especially well against lighter wood cabinets – oak, maple, birch – for an airy, modern look, and it comes in colors saturated enough to act as a real contrast accent. The downside is practical, not aesthetic: glass shows water spots and fingerprints more readily than matte tile, so it needs more frequent wiping to stay looking sharp.
Wood-Look Tile
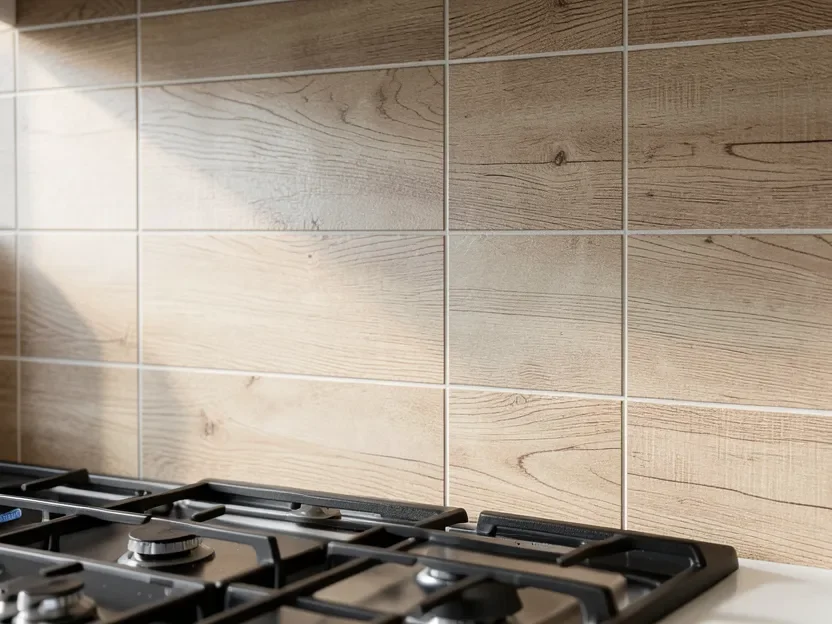
Wood-look porcelain tile gives you the plank texture and grain pattern of a real wood backsplash without the water sensitivity – it’s fired ceramic underneath a printed and textured glaze, so it’s fully waterproof and can go directly behind a stove or sink the way actual wood shouldn’t (more on that below). It’s a strong choice if you want the backsplash to visually match the cabinets rather than contrast with them, since you can often find a tile finish close to your cabinet’s wood species and stain color.
Quick comparison:
| Material | Upkeep | Best use |
|---|---|---|
| Ceramic/Porcelain Subway | Wipe clean, no sealing needed | Budget-friendly, works matched or contrast |
| Marble/Travertine | Needs periodic sealing, avoid unsealed near oil splatter | High-end contrast against darker wood |
| Glass Tile | Wipe frequently, shows smudges | Brightening a dim kitchen, lighter wood |
| Wood-Look Porcelain | Wipe clean, no sealing needed | Matching the cabinet’s wood tone safely |
| Real Wood | Heavy sealing, keep away from heat/water | Accent zones only – see warning below |
The Backsplash Mistake Most Guides Skip: Real Wood Behind the Stove or Sink
A lot of “backsplash ideas” articles show reclaimed wood or shiplap installed as a full backsplash and stop there. In practice, real wood directly behind a stove or sink is one of the riskier choices you can make, and it’s worth understanding why before you commit to it.
Wood is porous. Even sealed, it absorbs grease splatter and steam over time in a way tile and stone don’t, and repeated moisture exposure near a sink can cause the panel to swell, cup, or separate at the seams – especially at any edge or cut end where the sealer coverage is thinner. Near a range, the risk changes from moisture to heat and direct scorching: most household wood finishes, including polyurethane, aren’t rated for sustained close-range heat, and a wood backsplash set at standard countertop-to-cabinet clearance can discolor, dry out, or even char over years of cooking.
None of that means you have to skip the wood look. It means being deliberate about where real wood goes:
- Keep real wood panels to accent zones away from the stove and sink – a run of open shelving, an island end panel, or the wall behind a coffee station.
- If you do want wood directly in a splash zone, use a marine-grade or bar-top epoxy finish (multiple coats, fully cured) rather than a standard interior polyurethane, and increase the clearance from the cooktop beyond code minimums where your layout allows.
- For anywhere in the true splash-and-heat zone, use wood-look porcelain tile instead of real wood – it gives you the same visual warmth without the moisture or heat exposure risk.
Matching Color and Pattern to Your Cabinet Tone
Light Wood Cabinets (Oak, Maple, Birch)
Light wood gives you the most room to experiment. White or cream tile keeps things classic and matched. For contrast, navy, forest green, or charcoal tile reads as intentional rather than clashing, because the wood is light enough to still anchor the space. A simple subway layout keeps the focus on the color; save herringbone or mosaic patterns for when you want the backsplash itself to be the statement.
Medium Wood Cabinets (Cherry, Walnut)
Medium-toned wood has enough warmth that neutral tile – beige, taupe, soft gray – tends to look matched without disappearing. For contrast, black, charcoal, or deep green tile plays well against the wood’s warmth without competing with it. If your cabinets are cherry specifically, our dedicated guide to backsplash ideas for cherry wood cabinets goes deeper into how cherry’s color shifts as it ages and what that means for your tile choice.
Dark Wood Cabinets (Espresso, Mahogany)
Dark cabinets benefit from a lighter backsplash to keep the kitchen from feeling closed in – white subway tile, cream stone, or a light wood-look tile all brighten the space while still reading as matched in undertone. If you want more drama instead, a dark metallic or charcoal tile leans into the moodiness rather than fighting it, but pair it with strong task lighting so the kitchen doesn’t feel dim.
Installation and Care
Ceramic subway tile in a straightforward brick pattern is a reasonable DIY project for anyone comfortable with a tile cutter, level, and notched trowel – budget a weekend. Natural stone, large-format tile, and intricate patterns like herringbone are where hiring a pro pays off, since mistakes in cutting or spacing are harder to fix after the adhesive sets.
On cost, ceramic and porcelain tile are the most budget-friendly option; natural stone and glass run noticeably higher per square foot once you add sealer and, often, professional installation. Get an exact quote for your square footage before committing, since price varies a lot by tile brand and pattern complexity.
For upkeep: ceramic, porcelain, and glass just need a damp cloth and mild soap. Natural stone needs a stone-safe (pH-neutral) cleaner, never anything acidic like vinegar, which will etch the surface. If you went with real wood in an accent zone, plan on reapplying the finish on roughly the same schedule as any other high-touch wood surface in the kitchen – check for dullness or raw spots and reseal before they show visible wear.
Frequently Asked Questions
Should my backsplash match or contrast with wood cabinets?
Either works. Matching (a tile within a shade or two of the cabinet’s undertone) gives a calm, cohesive kitchen and is the safer choice if your cabinets already have strong grain you want to showcase. Contrast (a different value or color temperature) makes both surfaces stand out more, but keep the tile shape simple if you’re contrasting on color, and keep the color neutral if you’re contrasting on pattern or texture.
Is real wood a good backsplash material?
Only in accent zones away from the stove and sink. Real wood is porous, so it absorbs grease and moisture over time and can swell, discolor, or scorch near heat even when sealed. If you want the wood look directly behind a stove or sink, use wood-look porcelain tile instead – it’s waterproof and won’t degrade from heat exposure.
What’s the most affordable backsplash option for wood cabinets?
Ceramic or porcelain subway tile is the most budget-friendly standard option, and a peel-and-stick tile kit is even cheaper if you want a temporary or low-commitment install. Natural stone and glass tile both cost more, especially once you factor in sealer or professional installation for stone.
Does natural stone backsplash need to be sealed?
Yes. Marble, travertine, and other natural stone are porous and will absorb oil and stains without a penetrating sealer, applied at installation and reapplied periodically (commonly every 12 to 24 months in a kitchen, though check your specific stone’s care guidance). Porcelain tile printed with a marble or stone look doesn’t need sealing and is a lower-maintenance alternative if you like the appearance.
Can I install a tile backsplash myself?
A simple subway tile layout is a doable weekend DIY project with basic tools – a tile cutter, level, notched trowel, adhesive, and grout. Natural stone, large-format tile, and complex patterns like herringbone are harder to recover from if you make a cutting or spacing mistake, so those are usually worth hiring a professional for.
Sponsored / affiliate links. As an Amazon Associate I earn from qualifying purchases. I may earn additional commission from eligible campaigns.