Replacing Door Casing When Installing Wood Flooring (Or Skipping It)
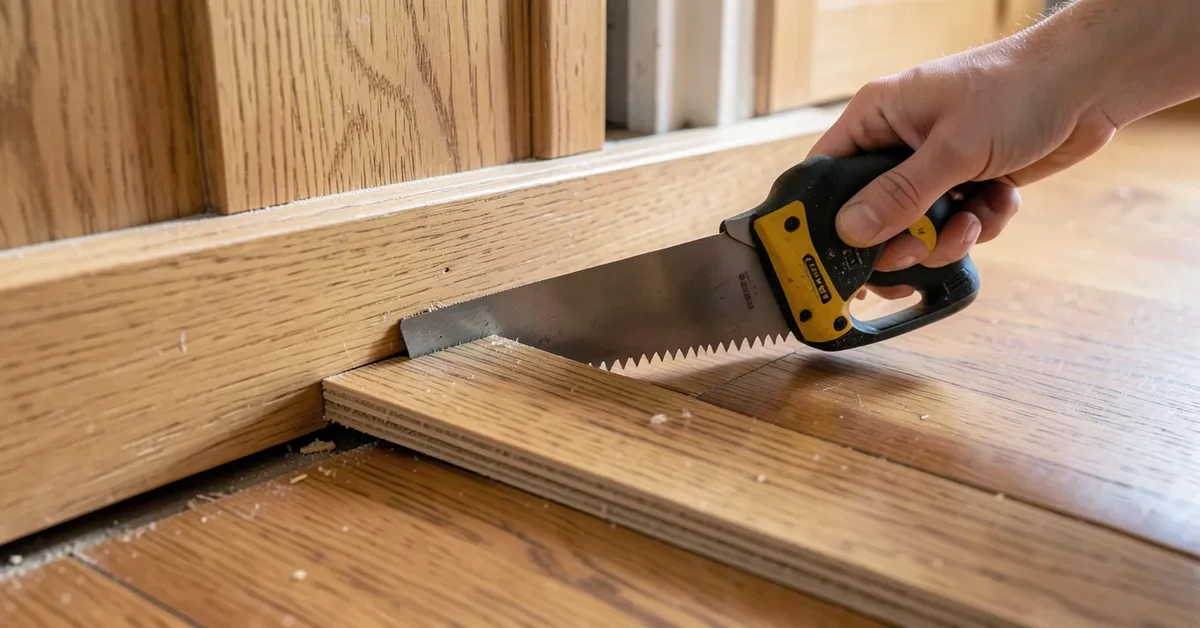
Most of the time you don’t need to fully remove and replace the door casing at all – undercutting it with a flush-cut jamb saw so the new flooring slides underneath is faster, less destructive, and gives a cleaner result than tearing off and reinstalling the trim. Full casing replacement is really only necessary when the existing casing is damaged, the wrong height for a much thicker new floor, or you’re changing the trim style anyway.
Undercutting vs. Full Replacement: Which Do You Actually Need?
Best Tool for Undercutting Door Casing
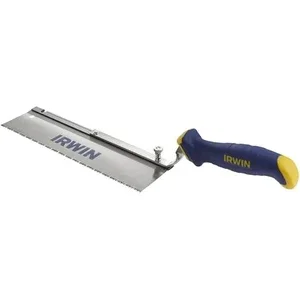 |
IRWIN ProTouch Dovetail Jamb Saw A dedicated flush-cut saw with a reversible, offset blade built specifically for cutting door casing and jambs flush to the floor – the actual right tool for this job, not a regular hand saw.
|
Before tearing anything off the wall, figure out which situation you’re in:
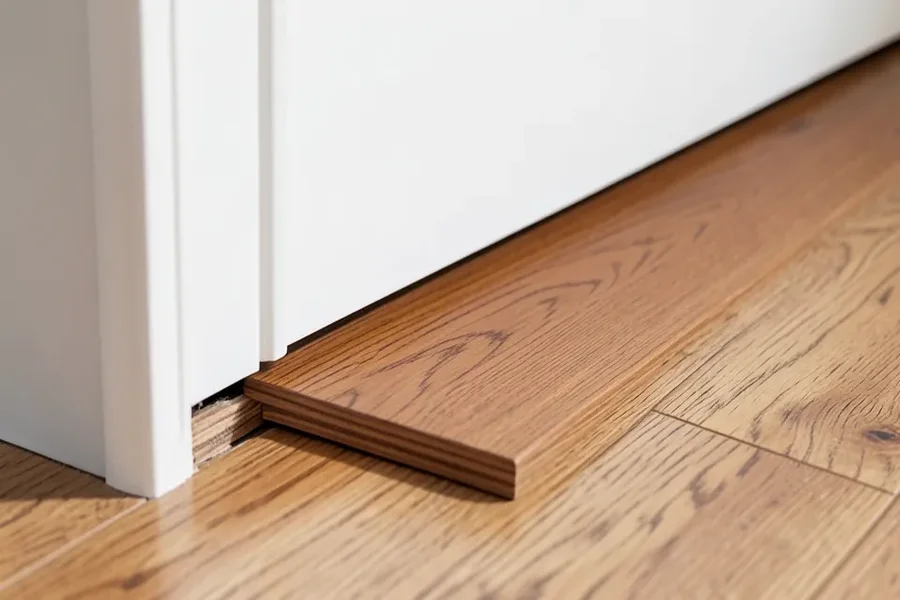
- Undercut the existing casing (most common): The casing and door jamb are in good condition, and the new flooring is a similar thickness to (or only slightly thicker than) the old one. A jamb saw trims the bottom of the casing and jamb so the new flooring’s edge tucks cleanly underneath, with no visible gap and no cut trim edges showing.
- Full removal and replacement: The casing is damaged, rotted, or the wrong style for the renovation, or the new flooring is dramatically thicker than the old one (for example, going from thin vinyl to a thick solid hardwood) such that undercutting alone can’t make up the difference without cutting into the jamb’s structural section.
Undercutting the Casing: Tools and Steps
- Get an offcut of the new flooring (including underlayment, if used) to use as a depth gauge – this is the single most useful trick for getting a clean cut.
- Lay the offcut flat against the casing where the new floor will meet it, and use it as a guide for the saw so the cut height matches the new floor’s exact thickness.
- Use a flush-cut/jamb saw – a specialty hand saw with a flexible, offset blade designed to cut flush along the floor without the handle hitting the ground. This is a genuinely different tool from a standard hand saw; trying to force a regular saw into this cut usually results in a ragged, uneven line because there’s no way to keep the blade flat against the floor.
- Cut in one or two smooth passes rather than sawing aggressively – let the fine teeth do the work. Support the offcut guide with your other hand so it doesn’t shift mid-cut.
- Test-fit a piece of the actual flooring in the new gap before installing for real. It should slide under with a light touch, not need to be forced or leave a visible gap above it.
If You Do Need Full Replacement
- Score the paint line between the casing and the wall with a utility knife before prying, so removal doesn’t tear the wall’s paint or drywall paper.
- Pry gently, working from both ends toward the middle, using a flat pry bar backed by a scrap of wood or cardboard to protect the wall. Remove finish nails as you go rather than yanking the whole piece free at once.
- Measure the new floor height and account for it when cutting new casing to length – the casing’s bottom edge should land right at (or a hair above) the new flooring surface, not floating above a visible gap.
- Reinstall with finish nails, set below the surface with a nail set, and fill the holes before painting or staining to match.
Getting the Sequence Right
Whichever method you use, the general order matters: undercut (or remove) the casing before the flooring goes down, install the flooring, then either slide the existing casing’s cut edge over the new floor or install new casing/base shoe molding on top of it. Installing casing or trim before the floor is down almost always leads to a visible gap once the floor’s actual thickness is accounted for – trim goes in after flooring specifically so it can land precisely on the new surface.
Filling a Gap If One Ends Up There Anyway
Small gaps happen even with careful work. A gap under 1/4″ is easily hidden with flexible paintable caulk along the trim line. A larger gap is better addressed with quarter-round or shoe molding nailed to the base of the casing/baseboard (not the floor, so the floor can still expand and contract with humidity) rather than filled with caulk or foam, which can crack or crumble under foot traffic in a walkway like a doorway.
Frequently Asked Questions
Do you need to remove door trim to install flooring?
Not always. In most cases it’s faster and cleaner to undercut the existing casing and door jamb with a flush-cut jamb saw so the new flooring slides underneath, leaving the trim in place. Full removal is really only needed if the casing is damaged, being replaced anyway, or the new floor is dramatically thicker than the old one.
How do you fill a gap between the floor and door casing?
For a small gap (under about 1/4″), flexible paintable caulk along the trim line works well. For anything larger, quarter-round or shoe molding nailed to the casing or baseboard – not the floor – covers the gap while still letting the floor expand and contract with humidity.
Should flooring go under the door casing?
Yes – the flooring should extend under the casing (whether it’s undercut or newly installed) rather than butting up against it with a visible seam. This is what gives a professional, seamless look at every doorway.
Do you install trim before or after flooring?
After. Whether you’re undercutting existing casing or installing new trim, it should be cut and fitted to the floor’s actual finished height – not the other way around. Installing trim first almost guarantees a visible gap once the real floor thickness is in place.
Bottom Line
Reach for a jamb saw and undercut the existing casing before assuming you need to tear it all out – it’s the technique pros actually use for this exact problem, and it leaves less to repair, paint, and match afterward. Save full replacement for casing that’s genuinely damaged or being upgraded anyway. If you are upgrading casing anyway, see our wood rosette guide for a corner detail that skips miter cuts entirely.
Sponsored / affiliate links. As an Amazon Associate I earn from qualifying purchases. I may earn additional commission from eligible campaigns.