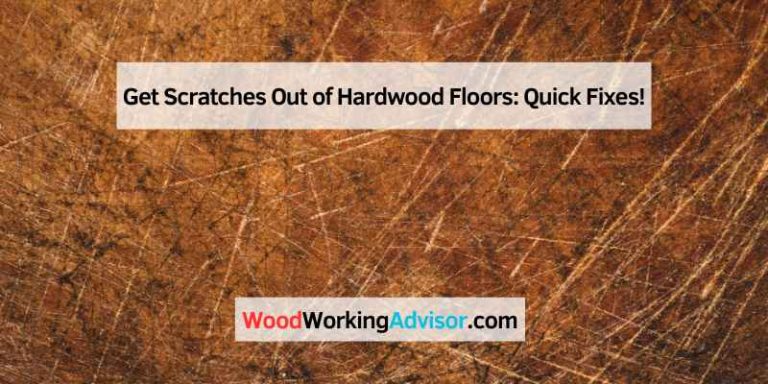
How to Remove Scratches from Hardwood Floors
Hey there! If you’re anything like me, your hardwood floors are the heart of your home. They’re warm, timeless, and add so much character to a space. But let’s be real—those scratches that creep up over time? They can drive you up the wall! Whether it’s from dragging furniture, your dog’s enthusiastic zoomies, or just daily wear and tear, scratches on hardwood floors are a pain. I’ve spent years figuring out how to tackle them, and I’m excited to share everything I’ve learned with you. From quick fixes for surface scratches to deeper repairs, I’ve got you covered with practical, tried-and-true methods to make your floors look as good as new. Let’s dive in and get those scratches out of your hardwood floors!
Why Hardwood Floors Get Scratched
Hardwood floors are stunning, but they’re not invincible. Understanding why scratches happen can help you prevent them in the future. In my experience, scratches come from a few common culprits. Furniture without protective pads is a big one—chairs and tables get moved around, and their legs can leave marks. Pets, especially dogs with untrimmed nails, can leave fine scratches as they scamper across the floor. Even something as simple as dirt or grit tracked in on shoes can act like sandpaper over time. Dropping heavy objects or dragging appliances doesn’t help either.
The type of finish on your floor matters too. Polyurethane finishes, which are common, can scratch more easily than harder finishes like aluminum oxide. Also, high-traffic areas like hallways or living rooms tend to show wear faster. Knowing these causes helped me be more mindful about protecting my floors, and I’ll share some prevention tips later. For now, let’s focus on fixing those scratches!
Assessing the Damage: Surface vs. Deep Scratches
Before you start fixing scratches, you need to know what you’re dealing with. Not all scratches are created equal, and the repair method depends on how deep they go. I learned this the hard way when I tried a quick fix on a deep gouge and ended up frustrated.
Surface scratches are the most common. They only affect the finish, not the wood itself. These look like faint white or cloudy marks, often caused by light scuffing. If you run your fingernail over the scratch and it feels smooth, it’s likely surface-level. Deep scratches, on the other hand, cut into the wood. They’re darker, more noticeable, and you can feel a groove when you touch them. Gouges are even worse—think dents or chunks missing from the wood.
Here’s a quick way to assess:
| Scratch Type | Characteristics | Repair Difficulty |
|---|---|---|
| Surface Scratch | Faint, affects only finish, smooth to touch | Easy, DIY-friendly |
| Deep Scratch | Visible groove, affects wood, rough to touch | Moderate, may need sanding |
| Gouge | Deep dent or chunk missing | Advanced, may need professional help |
Once you know the type of scratch, you can pick the right repair method. I’ll walk you through solutions for each, starting with the easiest fixes.
Quick Fixes for Surface Scratches
Surface scratches are the easiest to fix, and I’ve had great success with some simple household items. These methods work best for light scuffs or marks that haven’t penetrated the wood. Here’s what I’ve tried and loved.
Walnut Trick
One of my favorite hacks is using a walnut. Yes, the nut! The natural oils in walnuts can fill in light scratches and blend them into the wood’s color. I grab a raw walnut, crack it open, and rub the meat of the nut over the scratch in a circular motion. After a minute, I wipe the area with a soft cloth and buff it gently. It’s amazing how well this works for minor scratches, especially on darker floors. It’s like magic, and it smells nice too!
Olive Oil and Vinegar Mix
Another go-to is a mix of olive oil and white vinegar. I mix one part vinegar with three parts olive oil in a small bowl. Using a soft cloth, I dab a little of the mixture onto the scratch and rub gently. The oil moisturizes the finish, while the vinegar cleans and helps the scratch blend in. After wiping away the excess, I buff the area with a clean cloth. This works great for light scratches on polyurethane finishes, and it’s super affordable.
Baking Soda Paste
For slightly stubborn surface scratches, I’ve used baking soda. I mix a teaspoon of baking soda with a few drops of water to make a paste. Using a soft cloth, I rub the paste into the scratch, then wipe it clean with a damp cloth. Baking soda is mildly abrasive, so it smooths out the scratch without damaging the finish. Just be gentle—you don’t want to overdo it and dull the shine.
These quick fixes are perfect for small scratches you notice after a dinner party or a playdate with kids. They’ve saved my floors countless times!
Tackling Deep Scratches
Deep scratches are trickier, but don’t worry—I’ve been there, and you can fix them with a little patience. These scratches go into the wood itself, so you’ll need to fill or sand them. Here’s how I’ve handled them.
Wood Filler for Minor Deep Scratches
For scratches that are deep but not gaping, wood filler is my go-to. I pick a filler that matches my floor’s color as closely as possible. You can find these at any hardware store. I clean the scratch with a damp cloth to remove dust, then apply the filler with a plastic putty knife, pressing it into the groove. After it dries (usually 30 minutes to an hour), I sand the area lightly with fine-grit sandpaper (220-grit works well). Then, I apply a matching stain or touch-up marker and seal it with a thin layer of polyurethane. This method blends the repair seamlessly, and I’ve used it on scratches from moving furniture.
Sanding and Refinishing
For deeper scratches or multiple scratches in one area, sanding is the way to go. I’ll be honest—this takes more effort, but it’s worth it. I start by sanding the scratched area with 120-grit sandpaper to smooth out the groove. Then, I switch to 220-grit for a finer finish. You want to sand just enough to level the scratch without creating a dip. After sanding, I clean the area thoroughly with a tack cloth to remove dust.
Next, I apply a wood stain that matches my floor. I use a small brush and work in thin layers, letting each layer dry completely. Once the stain looks even, I seal it with a clear polyurethane finish. I prefer water-based polyurethane because it dries fast and doesn’t yellow. Apply it with a foam brush in thin, even coats, and let it dry for at least 24 hours. This method restored a section of my living room floor after my dog scratched it up chasing his ball.
Dealing with Gouges
Gouges are the worst—those deep dents or chunks missing from your floor. I had one in my kitchen from dropping a cast-iron skillet, and it felt like a disaster. But I fixed it, and you can too. For gouges, you’ll need to fill and refinish, and sometimes replace a board.
Filling Gouges
For smaller gouges, wood filler works, but you’ll need a sturdier product, like an epoxy-based filler. I clean the gouge thoroughly, then apply the filler with a putty knife, making sure it’s level with the surrounding floor. After it dries, I sand it smooth with 220-grit sandpaper, stain it to match, and seal it with polyurethane. This takes patience, but it can make a gouge nearly invisible.
Replacing a Board
If the gouge is too deep or in a prominent spot, replacing the damaged board might be better. I’ve done this once, and it’s not as scary as it sounds. You’ll need a replacement board that matches your floor’s species and finish. I used a circular saw to cut out the damaged board, being careful to follow the grain. Then, I chiseled out the old board and glued in the new one. After sanding and staining, it blended perfectly. If this feels overwhelming, a professional can handle it, but I found it rewarding to do myself.
Polishing and Restoring Shine
After fixing scratches, your floor might look patchy. Polishing brings back the shine. I use a hardwood floor polish, like Bona, and apply it with a microfiber cloth in thin, even coats. This not only restores the gloss but also adds a protective layer. I do this every few months to keep my floors looking fresh. Just make sure the floor is clean and dry before polishing, or you’ll trap dirt under the finish.
Preventing Future Scratches
Fixing scratches is great, but preventing them is even better. I’ve learned a few tricks to keep my floors scratch-free. Felt pads on furniture legs are a game-changer—stick them on chairs, tables, and anything that moves. Rugs in high-traffic areas, like entryways, catch dirt and reduce wear. I also trim my dog’s nails regularly and keep a doormat at every entrance to trap grit. For heavy furniture, I use furniture sliders when moving things. These small habits have made a huge difference in keeping my floors pristine.
When to Call a Professional
Sometimes, scratches or gouges are too much to handle on your own. If you have widespread damage, an old floor with a worn finish, or you’re unsure about matching stains, a professional can save you time and stress. I called one when my dining room floor had deep scratches across multiple boards. They sanded and refinished the whole room, and it looked brand-new. If you’re not comfortable with sanding or board replacement, pros have the tools and expertise to get it right.
Conclusion
Dealing with scratches on hardwood floors can feel daunting, but I’ve learned that with the right approach, you can make them disappear and keep your floors looking gorgeous. From quick walnut fixes to sanding deep scratches, there’s a solution for every type of damage. I’ve loved experimenting with these methods and seeing my floors come back to life. It’s not just about fixing scratches—it’s about caring for a part of your home that tells a story. So grab your supplies, take your time, and enjoy the process of restoring your floors. You’ve got this! And with a little prevention, your hardwood floors will stay beautiful for years to come.
Frequently Asked Questions
Can I use a magic eraser to remove scratches from hardwood floors?
Magic erasers are too abrasive for hardwood floors. I tried one once, and it dulled the finish. Stick to gentler methods like walnuts or olive oil for surface scratches to avoid damaging the protective coating.
How often should I polish my hardwood floors?
I polish my floors every three to six months, depending on traffic. It keeps them shiny and protected. Just make sure to clean them thoroughly first to avoid sealing in dirt.
Will fixing scratches affect my floor’s warranty?
Most warranties don’t cover scratches from normal wear, but DIY repairs could void them if done improperly. I always check my warranty terms before starting a repair, especially for sanding or refinishing.
Can I prevent my dog from scratching my hardwood floors?
Trimming your dog’s nails regularly helps a lot. I also use rugs in areas where my dog runs the most. Training them to avoid certain areas or using booties can work too, though my pup wasn’t a fan!
How do I know if my floor’s finish is polyurethane?
If your floor is shiny and modern, it’s likely polyurethane. I test a small, hidden spot with a drop of water—if it beads up, it’s probably polyurethane. If you’re unsure, check with your flooring installer or manufacturer.