How to Fix a Hole in Hardwood Floor: Filler vs. Plug
Small to medium holes in a hardwood floor are fixed with color-matched wood filler; larger or deeper holes hold up better with a glued wood plug. Both are doable as a weekend DIY repair with basic tools.
Which method to use depends on the hole itself — a nail pop or shallow gouge doesn’t need the same fix as a hole that goes through the board. Getting that choice right the first time saves you from redoing the repair later.
Below, we walk through both methods step by step, plus how to handle two specific cases that come up a lot: screw holes left behind by old hardware, and telling a natural knot or mineral streak apart from actual insect damage.
Understanding Hardwood Floor Holes
Holes in hardwood floors can pop up for various reasons. Sometimes, it’s from dropped tools or furniture legs shifting. Other times, it might be the result of an old nail backing out or a particularly stubborn knot in the wood. The size and depth of the hole will determine the best repair method. Small dents and scratches are often easy fixes, while larger gouges or actual holes require a bit more attention. With the right approach and a bit of patience, most of these blemishes can be repaired well enough that you won’t notice them from a normal viewing distance — see our full Hardwood Flooring hub for more care and repair guides.
Assessing the Damage: What Kind of Hole Are We Fixing?
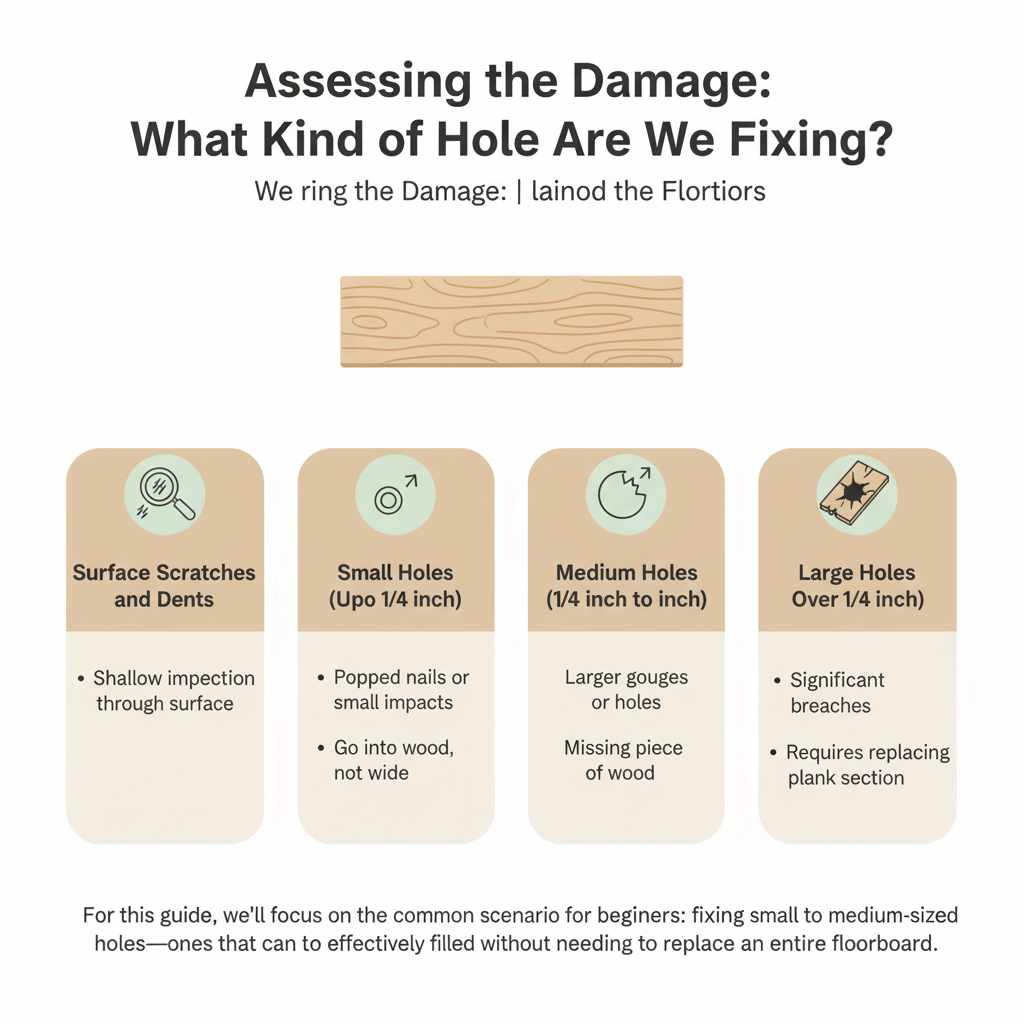
Before we grab any tools, let’s take a good look at the hole. This is the most important first step to choose the right solution. We can generally categorize holes into a few main types that DIYers often encounter:
- Surface Scratches and Dents: These are shallow imperfections that haven’t broken through the surface of the wood.
- Small Holes (Up to 1/4 inch): These are typically caused by popped nails or small impacts. They go into the wood but aren’t very wide.
- Medium Holes (1/4 inch to 1 inch): These are larger gouges or actual holes that go deeper into the wood. They might be from a more significant impact or a missing piece of wood.
- Large Holes (Over 1 inch): These are significant breaches in the floor. Filling these often requires more extensive work, possibly involving replacing a section of the plank.
For this guide, we’ll focus on the most common scenario for beginners: fixing small to medium-sized holes—ones that can be effectively filled without needing to replace an entire floorboard. Smaller issues can be handled with simple touch-ups, while larger ones might be a job for a professional if you’re just starting out.
Choosing Your Repair Method: Filler vs. Plug
We have two main DIY-friendly paths to fixing a hole in your hardwood floor: using wood filler or installing a custom wood plug. Each has its advantages, and the best choice often depends on the hole’s size and how seamlessly you want the repair to blend in.
Method 1: Wood Filler for Small to Medium Holes
Wood filler is a versatile material perfect for filling in gouges, nail holes, and shallow damage. It’s easy to work with, dries relatively quickly, and can be sanded and finished to match your existing floor. This is often the go-to for beginners due to its simplicity.
What You’ll Need for Wood Filler Repair:
- Wood Filler: Choose a stainable or paintable wood filler that matches your floor’s color as closely as possible. Some fillers come in various wood tones.
- Putty Knife or Small Trowel: For applying the filler.
- Sandpaper: Start with a medium grit (around 100-120) and finish with a fine grit (around 220).
- Tack Cloth or Damp Cloth: For cleaning dust.
- Small Brush or Cloth: For applying stain or finish.
- Matching Stain or Finish: If needed, to blend the repair.
- Gloves: To keep your hands clean.
- Safety Glasses: Always protect your eyes!
- Vacuum Cleaner: For cleanup.
Step-by-Step Guide to Using Wood Filler:
- Clean the Area: Thoroughly vacuum the hole and surrounding floor to remove all dust, debris, and loose particles. A clean surface is crucial for the filler to adhere properly.
- Prepare the Filler: Read the manufacturer’s instructions. Some wood fillers are ready to use straight from the container, while others may require mixing.
- Apply the Filler: Using your putty knife, press the wood filler firmly into the hole. Overfill slightly, as many fillers shrink a bit as they dry. Ensure the filler is packed tightly into every crevice of the hole. Work the filler in different directions to make sure it’s snug.
- Smooth the Surface: Scrape off any excess filler with the putty knife, leaving the filled area slightly proud (higher) of the surrounding floor. This accounts for any shrinkage.
- Let it Dry: Allow the wood filler to dry completely according to the product’s instructions. Drying times can vary significantly based on humidity and the thickness of the application. Patience here is key.
- Sand the Repair: Once dry, carefully sand the filled area smooth. Start with medium-grit sandpaper, holding it flat against the surface to avoid creating a dip. Work your way up to fine-grit sandpaper for a smooth finish. Your goal is to make the filled area completely flush with the rest of the floor. You can lightly run your hand over it to feel for any unevenness.
- Clean Again: Vacuum up all the sanding dust. Then, use a tack cloth or a slightly damp cloth to wipe away any remaining fine dust. This ensures a clean surface for staining or finishing.
- Match the Color: This is where you get creative! If your floor has an existing stain or finish, you’ll need to match it as closely as possible. Test your stain or finish on a scrap piece of wood or an inconspicuous area first. Apply the stain or finish with a small brush or cloth, dabbing rather than brushing if needed to mimic the wood grain. You might need a few thin coats.
- Apply Finish (if necessary): Once the stain is dry, apply a clear protective finish (like polyurethane) if the rest of your floor has one. This will protect the repair and help it blend in. Apply thin, even coats, allowing each to dry thoroughly before applying the next.
Method 2: Wood Plug for Deeper or More Structural Holes
For larger, deeper holes, or areas where a significant piece of wood is missing, a custom wood plug can provide a more durable and aesthetically pleasing repair. This involves cutting a piece of wood to fit exactly into the hole and then securing it in place. It’s a bit more involved than wood filler but offers a professional-looking result.
What You’ll Need for Wood Plug Repair:
- Hardwood (Matching Species and Grain): You’ll need a piece of solid hardwood that matches your floor as closely as possible in species, grain pattern, and color. Plywood will not work for this.
- Drill: For making pilot holes and potentially driving screws.
- Hole Saw or Plug Cutter: A tool designed to cut clean, circular plugs of wood. Sizing is crucial here. You might need a plug cutter that matches the hole size exactly, or one slightly larger so you can refine the plug’s fit.
- Wood Glue: A strong adhesive for securing the plug.
- Chisel: For trimming and shaping the plug if necessary.
- Sandpaper: Medium (100-120 grit) and fine (220 grit).
- Sanding Block or Electric Sander: For efficient sanding.
- Jigsaw (optional): For irregular-shaped holes.
- Wood Screws (small): If you need to secure the plug from underneath or to reinforce it.
- Wood Putty or Filler: To fill any small gaps around the plug.
- Tack Cloth or Damp Cloth.
- Matching Stain and Finish.
- Safety Gear: Safety glasses, gloves, and a dust mask are essential.
Step-by-Step Guide to Creating a Wood Plug:
- Prepare the Hole: Clean out the hole thoroughly. If the edges are ragged, you may need to carefully trim them with a chisel for a cleaner fit. For irregular holes, you might need to cut a more precise shape using a jigsaw, making sure to keep all cuts as square as possible.
- Cut the Wood Plug:
- Using a Plug Cutter: If your hole is perfectly round and you have a plug cutter that matches the diameter (or slightly larger), this is the easiest method. Drill into your matching hardwood piece, creating a plug that’s a snug fit for the hole.
- Using a Hole Saw: If your hole isn’t perfectly round, you can use a hole saw slightly larger than the hole to cut a round plug, then carefully shape it to fit the hole.
- Irregular Holes: For odd shapes, you’ll need to trace the hole onto your matching hardwood and then carefully cut it out with a jigsaw. This requires precision!
- Test Fit the Plug: Gently insert the plug into the hole. It should fit snugly. If it’s too tight, you might need to shave a tiny bit off the edges with a chisel. If it’s too loose, you can try using a bit of wood glue and shims, or you might need to cut a new, slightly larger plug and refine its fit precisely. You can also use wood glue and sawdust to create a paste that can fill very minor gaps.
- Glue in the Plug: Once you have a good fit, remove the plug. Apply a generous amount of wood glue to the inside edges of the hole and to the sides of the plug. Insert the plug firmly into the hole, twisting it slightly if it’s a round plug to help spread the glue evenly.
- Secure the Plug (Optional but Recommended): For added security, especially with larger plugs, you can drive a couple of small wood screws from the underside of the floorboard into the plug if accessible. If not, and the plug is slightly recessed after being tapped in, you can reinforce it with a carefully placed screw from the top, countersunk, and then filled.
- Clamp and Cure: If possible, use a clamp to hold the plug in place while the glue dries. Wipe away any excess glue that oozes out with a damp cloth immediately. Allow the glue to cure completely, usually 24 hours.
- Sand to Flush: Once the glue is dry, sand the plug down so it’s perfectly flush with the surrounding floor. Start with medium-grit sandpaper and finish with fine-grit. A sanding block is best for control.
- Fill Small Gaps: Even with a good fit, there might be tiny gaps around the plug. Use a small amount of matching wood putty or filler to carefully fill these. Let it dry.
- Sand Again: Lightly sand over the putty/filler until it’s smooth and flush with the floor.
- Clean and Finish: Vacuum and tack cloth the area. Then, meticulously match the stain and apply the finish, following the same steps as with the wood filler method.
Tools and Materials Comparison: Filler vs. Plug
To help you decide, here’s a quick comparison of the tools and materials you’ll need for each method:
| Feature | Wood Filler Method | Wood Plug Method |
|---|---|---|
| Primary Material | Wood filler (stainable/paintable) | Solid hardwood piece, wood glue |
| Key Tools | Putty knife, sandpaper | Plug cutter/hole saw/jigsaw, chisel, glue, sandpaper |
| Skill Level | Beginner-friendly, very easy | Beginner to Intermediate, requires more precision |
| Best For | Small to medium holes, nail pops, shallow gouges. Quick fixes. | Medium to larger holes, deeper damage, areas needing structural integrity. Aesthetically critical repairs. |
| Durability | Good for typical wear; can crack over time with significant flexing. | Very durable, essentially replacing the damaged wood. |
| Aesthetics | Can blend well, but may be noticeable if not perfectly matched. | Can achieve a near-invisible repair if wood match and grain are perfect. |
| Cost | Generally lower | Can be higher, depending on the cost of matching hardwood and specialized tools. |
Our Picks: Tools for Repairing a Hole in Hardwood Floor
Best for: deeper, structural holes where a glued wood plug is the better fix than filler.
Why we picked it: includes both straight and tapered cutters, so you can size the plug to the hole rather than the other way around.
Main drawback: needs a drill press or steady hand with a hand drill for clean, round plugs — not ideal for irregular-shaped holes.
Check Price on Amazon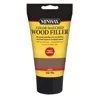
Best for: small to medium holes, nail pops, and shallow gouges — the quick-fix route.
Why we picked it: pre-tinted to match common hardwood tones instead of needing a separate stain step.
Main drawback: can crack over time under flexing floors, not as durable as a plug.
Check Price on Amazon →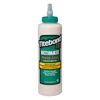
Best for: gluing in a wood plug securely for a structural, long-lasting repair.
Why we picked it: waterproof once cured and a woodworking-industry standard for strength.
Main drawback: short open time — have the plug test-fitted before you apply glue.
Check Price on Amazon →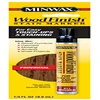
Best for: blending a filler or plug repair into the surrounding floor’s existing stain color.
Why we picked it: a marker tip gives more control than brushing stain from a can for small touch-up areas.
Main drawback: only covers touch-ups — won’t fully re-stain a large repaired patch on its own.
Check Price on Amazon →Safety First! Essential Precautions
Working on your floors involves using tools and materials, so safety should always be your top priority. Even with simple DIY projects, taking a few precautions can prevent accidents and ensure a smooth experience.
- Eye Protection: Always wear safety glasses when sanding, drilling, chiseling, or applying finishes. Small wood particles or droplets of finish can cause serious eye injury.
- Dust Mask: When sanding, finely ground wood and filler particles can become airborne. A dust mask will protect your lungs from inhalation. You can find good ones at most hardware stores.
- Gloves: Protect your hands from splinters, glues, stains, and finishes using work gloves or disposable nitrile gloves.
- Ventilation: Work in a well-ventilated area, especially when using stains, glues, or finishes. Open windows and doors, or use a fan to circulate air. Ensure you are following the safety guidelines provided by the manufacturer of any chemicals you use. For more on workshop safety, the Occupational Safety and Health Administration (OSHA) offers valuable resources on preventing common workplace injuries.
- Tool Safety: Read the manuals for any power tools you use. Ensure blades are sharp and guards are in place. Handle sharp tools like chisels with care.
- Proper Footwear: Wear sturdy, closed-toe shoes to protect your feet from falling objects or dropped tools.
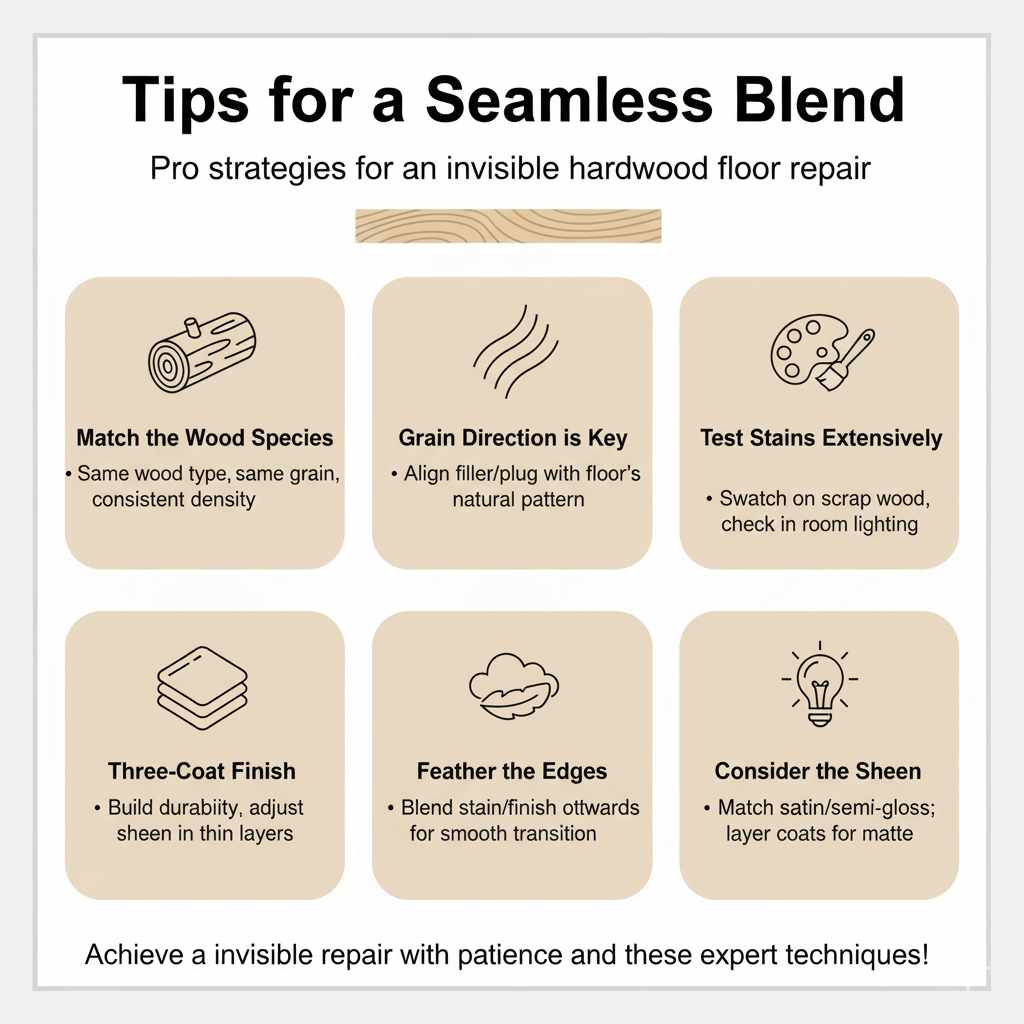
Tips for a Seamless Blend
The goal is to make the repair as invisible as possible. Here are a few pro tips to help you achieve a beautiful, blended finish:
- Match the Wood Species: If you’re plugging a hole, try to find wood of the exact same species as your floor. Different woods have different grain patterns and densities, which affect how they take stain.
- Grain Direction is Key: When using wood filler, try to smooth it in the direction of the wood grain. If you’re plugging, orient your plug so its grain flows naturally with the surrounding boards.
- Test Stains Extensively: Never apply stain directly to your repair without testing it first. Use scrap pieces of the same wood under the same conditions as your floor. Different lighting conditions can make stains look very different.
- Three-Coat Finish: Apply your protective finish in at least three thin coats. This builds up durability and allows you to slightly adjust the sheen to match your existing floor better.
- Feather the Edges: When staining or applying finish, don’t stop abruptly at the edge of your repair. Gently feather it out onto the surrounding floor a little bit. This helps to create a smooth transition rather than a hard line.
- Consider the Sheen: Most hardwood floors have a satin or semi-gloss finish. Ensure your final top coat matches this sheen. If your floor has a matte finish, finding a perfect match can be trickier, but layering thin coats helps.
Sometimes, even with the best efforts, a slight difference in color or sheen is unavoidable. In such cases, you can use an artist’s brush to very lightly scumble or over-dye the area with a slightly darker or lighter stain or glaze, working to blend it with the surrounding color. This takes a steady hand and a good eye, but it can make a big difference.
FAQ: Your Common Questions Answered
How do I know if I should use wood filler or a wood plug?
For small holes like nail pops or shallow gouges, wood filler is usually sufficient and easier. For larger, deeper holes, or if you want a more structurally sound and seamless repair, a wood plug is the better choice.
Can I repair a hole in an engineered hardwood floor this way?
Engineered hardwood has a thin top layer of real wood. You can repair minor dents and scratches with wood filler. However, for deeper holes that go through the wear layer, it’s much trickier, and sometimes replacement of the plank is the only true solution, since you can’t easily plug it without exposing the plywood core. Always test in an inconspicuous area first.
How do I fix screw holes in a hardwood floor?
Screw holes (from removed brackets, old thresholds, or shelf hardware) are usually small and shallow, so wood filler colored to match the floor is normally enough — press it in, let it dry, then sand flush and refinish that spot. If the screw hole goes through the full thickness of the board, treat it like a small structural hole and use a glued wood plug instead of filler alone.
Are the tiny holes in my wood floor from insects?
Not always. Small, randomly placed round holes with fine sawdust (frass) nearby can be exit holes from wood-boring insects like powderpost beetles and are worth having inspected. But many “tiny holes” are just natural mineral streaks, pin knots, or old nail holes from the original installation, which are cosmetic and not a structural concern. If you see fresh, powdery frass or multiple new holes appearing over time, that’s the sign of an active insect issue rather than a one-time cosmetic flaw.
Sponsored / affiliate links. As an Amazon Associate I earn from qualifying purchases. I may earn additional commission from eligible campaigns.