What Size Finish Nails for 3/4 Quarter Round? (18-Gauge)
Use 18-gauge brad nails between 1 and 1-1/4 inches long for 3/4-inch quarter round — not the 15- or 16-gauge finish nails several guides recommend, which are sized for thicker baseboard and casing and will split quarter round’s thin profile. Getting the gauge wrong is the single biggest cause of split trim and popped nail heads on this job. This guide covers gauge selection, spacing, corner technique, and how to fix a split piece.
What’s the Difference Between “Finish Nails” and “Brad Nails”?
Best 18-Gauge Brad Nailer Pick
 |
Metabo HPT NT50AE2 18-Gauge Brad Nailer – $69.00 Fires the 18-gauge, 5/8 to 2 inch brads this guide recommends for 3/4 quarter round, with a tool-less depth-adjustment dial so heads sit flush instead of tearing through thin trim.
|
The confusion around quarter round nail size almost always comes down to loose terminology. A finish nail technically means a 15- or 16-gauge fastener (0.072″ and 0.0625″ shank diameter) designed for baseboard, door casing, and crown molding — material thick enough to absorb a wider nail without splitting. A brad nail is an 18-gauge fastener (0.0475″ shank) built for thin, delicate trim like quarter round, shoe molding, and cabinet face frames. Many retailers and even some manufacturers still label 18-gauge brads as “finish nails” on the packaging, which is exactly why searches for this topic turn up three different gauge recommendations. For 3/4-inch quarter round specifically, the brad nailer (18-gauge) is the correct tool almost every time. (Sizing nails for the flat baseboard itself instead, at 1/2 inch or thicker? See what size brad nails for baseboard for the gauge/length chart by thickness.)
Nail Size and Gauge Chart for 3/4 Quarter Round
Use this chart to match nail length and gauge to the job in front of you. All three options below will work on a basic install; the differences show up in split risk and holding power.
| Gauge | Shank Diameter | Recommended Length | Best For |
|---|---|---|---|
| 18-gauge (brad) | 0.0475 in | 1 to 1-1/4 in | 3/4 quarter round, shoe molding, thin trim — recommended default |
| 16-gauge (finish) | 0.0625 in | 1-1/2 to 2 in | Baseboard, window/door casing — too thick for quarter round alone |
| 15-gauge (finish) | 0.072 in | 1-1/4 to 2-1/2 in | Crown molding, stair treads, pre-hung doors — not for quarter round |
Step-by-Step: Nailing Quarter Round Without Splitting It
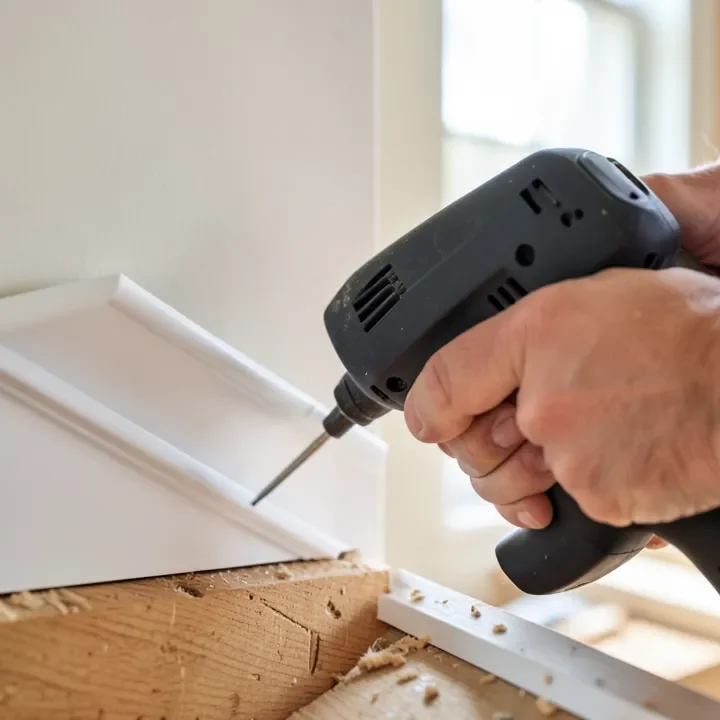
- Cut and dry-fit first: Miter corners at 45 degrees and set every piece in place before nailing anything, checking for gaps against the baseboard.
- Load 18-gauge brads, 1 to 1-1/4 inch: Set the nailer’s depth-adjustment dial so the head sits flush without crushing the wood fibers around it.
- Angle the nail slightly downward: Firing at a slight angle into the baseboard (not straight in) gives a stronger bite and keeps the point from exiting through the face of the trim.
- Pre-drill mitered corners in hardwood: Oak and maple quarter round split at the miter far more easily than pine — a 1/16-inch pilot hole at each corner prevents it.
- Nail every 12 to 16 inches: Add one nail within 2 inches of every end and every corner, closer to 12 inches in bathrooms or kitchens where humidity moves the wood more.
- Set nail heads and fill: Use a nail set to sink any proud heads slightly below the surface, then fill with paintable wood filler before caulking and painting.
Nail Spacing and Corner Technique
Spacing that’s too wide is the second most common cause of quarter round pulling away from the wall over time, right behind using the wrong gauge. Stick to a 12–16 inch interval on straight runs. At inside corners, angle the last nail on each piece toward the corner itself rather than straight down, which pulls the two mitered faces together instead of just pinning each piece independently. On outside corners, back-nail through the return whenever the miter is tight enough to hide the fastener, since face-nailing an outside corner is far more likely to blow out the point of the miter.
Hardwood vs. Softwood Quarter Round: Does Nail Size Change?
The gauge recommendation doesn’t change between species — 18-gauge, 1 to 1-1/4 inch stays correct for both. What changes is technique: pine and poplar quarter round rarely need pre-drilling and can take a nail close to full speed. Oak, maple, and other hardwood quarter round are far more prone to splitting at mitered corners with the same 18-gauge brad, so pre-drilling a 1/16-inch pilot hole at every corner joint is worth the extra two minutes per piece. If a hardwood piece still splits at the corner despite pre-drilling, drop to a shorter 5/8-inch brad near that specific joint rather than forcing the full 1-1/4-inch length through already-stressed wood.
Fixing Split Trim and Popped Nail Heads
A hairline split at a corner can usually be saved: run a thin bead of wood glue into the crack, clamp or hand-press it closed for a few minutes, then re-nail 3/4 inch further from the original split rather than through it. A popped nail head — one that backs partway out after the wood dries and shrinks — should be pulled fully, not just tapped back down; re-drive a new brad about an inch to either side, then fill both the old and new holes. If a piece is split cleanly in two, it’s faster to recut and replace it than to repair it — quarter round is inexpensive enough that patching a bad split rarely saves real time.
📊 An 18-gauge brad’s 0.0475-inch shank is roughly a third thinner than a 16-gauge finish nail’s 0.0625-inch shank — that difference in diameter is what determines whether thin quarter round splits or not. Source: This Old House, nailer gauge guide.
“A smaller-gauge brad leaves a much smaller hole and puts far less stress on thin, delicate trim than a heavier finish nail does — which is exactly why 18-gauge is the safer call on quarter round and other narrow moldings.”
Frequently Asked Questions
What size nails for 3/4 quarter round?
Use 18-gauge brad nails between 1 and 1-1/4 inches long. That length passes through the 3/4-inch quarter round and bites into the baseboard or subfloor behind it, without being so long it blows out the back of the trim or the wall material.
Can I use 16-gauge finish nails for quarter round?
You can, but it’s not the best choice. A 16-gauge nail’s 0.0625-inch shank is nearly a third wider than an 18-gauge brad’s 0.0475-inch shank, and that extra diameter is much more likely to split quarter round’s thin, narrow profile, especially near mitered corners.
How far apart should nails be spaced on quarter round?
Space nails every 12 to 16 inches along straight runs, with one nail within 2 inches of every end and every corner. Bathrooms and kitchens do better closer to the 12-inch end of that range since humidity moves the wood more.
Should I glue quarter round in addition to nailing it?
Yes. A thin bead of paintable construction adhesive or wood glue behind the quarter round adds real holding power that nails alone don’t provide, especially on uneven walls or flooring. Run the bead, press the piece into place, then nail it while the glue is still wet.
Why does my quarter round keep splitting when I nail it?
Almost always because the nail gauge is too heavy for the wood, the nail landed too close to the end of a piece, or a mitered corner wasn’t pre-drilled. Switch to 18-gauge, keep nails at least 3/4 inch from any end, and pre-drill corners in hardwood species like oak or maple.
Eighteen-gauge, 1 to 1-1/4 inch brads are the correct default for 3/4 quarter round in almost every situation — reach for 16- or 15-gauge finish nails only when you’re also running baseboard or casing in the same session and don’t want to swap tools. Combine the right gauge with 12–16 inch spacing, pre-drilled hardwood corners, and a bead of adhesive, and split trim becomes the exception instead of the norm. For the full cut-and-install process, see our complete quarter round installation guide.
Sponsored / affiliate links. As an Amazon Associate I earn from qualifying purchases. I may earn additional commission from eligible campaigns.