DeWalt Zero-Clearance Insert: Which Models Fit + How to Install
A DeWalt zero-clearance insert closes the wide factory gap around the blade on portable saws like the DWE7491 and DWE7480 – but only a handful of DeWalt jobsite models share the same throat opening, so an insert that fits a DWE7491 will not drop into a DWE7485. Using the wrong insert leaves gaps that let offcuts fall into the cabinet or jam against a spinning blade. This guide covers which DeWalt models take a stock-fit insert, how to install one, and how to cut a custom zero-clearance slot safely if none exists for your saw. It pairs well with a crosscut sled if you’re upgrading more than one accessory at once.
Quick Answer
Off-the-shelf zero-clearance inserts exist for the DeWalt DWE7491/DWE7491RS, DWE7490 (Type 1 only), DWE7480, and the older DW744/DW745/DW746. The DWE7485 uses a different throat shape and needs its own insert – check your model number before buying. No insert fits every DeWalt saw.
Which DeWalt Table Saws Take a Zero-Clearance Insert
DeWalt doesn’t use one universal throat plate across its table saw line, so the first step is matching the insert to your exact model number, stamped on the saw’s front rail or motor housing.
| DeWalt Model | Fits a Stock-Sized Zero-Clearance Insert? | Notes |
|---|---|---|
| DWE7491 / DWE7491RS | Yes | Most widely stocked aftermarket insert size on this saw line |
| DWE7490 (Type 1) | Yes | Later production runs changed the throat casting – check “Type” on the data plate |
| DWE7480 / DWE7480XA | Yes | Shares the same opening as the 7491 family |
| DW744 / DW745 / DW746 | Yes | Older jobsite line, same insert footprint |
| DWE7485 | No – needs its own insert | Compact-saw throat is a different shape; do not force a 7491-size insert into it |
| DWE7499GD (flexvolt) | Not standardized | Verify fit against the manufacturer’s listing before ordering; cut a custom blank if unsure |
If your model isn’t a confirmed match, don’t force a stock insert into the opening – a plate that rocks or doesn’t sit flush is worse than the factory insert it replaces. Cutting a custom blank (covered below) works on any saw regardless of throat shape.
Best DeWalt Zero-Clearance Insert Pick
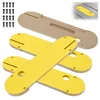 |
Zero Clearance Table Saw Insert for DeWalt (Riving Knife Slot Pre-Cut) High-density fiberboard insert sized for the DWE7491, DWE7491RS, DWE7490 (Type 1), DW744/745/746, and DWE7480 – includes offset leveling screws to seat it flush.
|
As an Amazon Associate we earn from qualifying purchases.
Installing a Pre-Made Zero-Clearance Insert
- Unplug the saw. Never work around the throat plate or blade with the saw powered.
- Lower the blade fully using the height adjustment wheel so it sits below the table surface.
- Remove the factory insert – most DeWalt jobsite saws use a lever or finger-notch at one end to lift it out.
- Set the new insert in place without the blade raised, and check it sits flush with the table surface at every edge.
- Adjust the leveling screws (most aftermarket inserts include 4-16 offset screws) until there’s no rock or gap between the insert and the table.
- Confirm the riving knife still aligns with its slot in the insert before plugging the saw back in.
- Plug in, then slowly raise the blade through the insert’s pre-cut kerf to confirm clearance before making a real cut.
How to Cut a Custom Zero-Clearance Slot (No Stock Insert Available)
If your model isn’t listed above, or you’re using a plain MDF or plywood blank, the slot is cut by the saw’s own blade – not with a jigsaw or router. This is the standard method builders use and it works on any table saw that accepts a flat blank insert.
- Cut a blank to size: trace your factory insert onto 1/2 inch MDF or hardwood and cut it slightly oversized, then sand down to a snug fit in the opening.
- Lower the blade completely and unplug the saw before dropping the blank into the opening.
- Secure the blank: slide the rip fence over the top of the insert (not over the blade path) to hold it flat and prevent it lifting when the blade contacts it.
- Clear the area and plug in. Stand to the side, not in line with the blade.
- Slowly raise the spinning blade up through the blank to full height, cutting its own zero-clearance kerf.
- Lower the blade, unplug the saw, and remove any burrs or fuzz left around the new slot.
Warning: A blank you cut yourself has no factory slot for the riving knife. If your saw’s riving knife or splitter can’t pass through a solid blank, it must be removed to cut the kerf – and reinstalled immediately after, before the saw is used for any other cut. Running the saw for general work with the riving knife left out removes a real anti-kickback safeguard, not just a formality.
What a Zero-Clearance Insert Actually Does – and What It Doesn’t
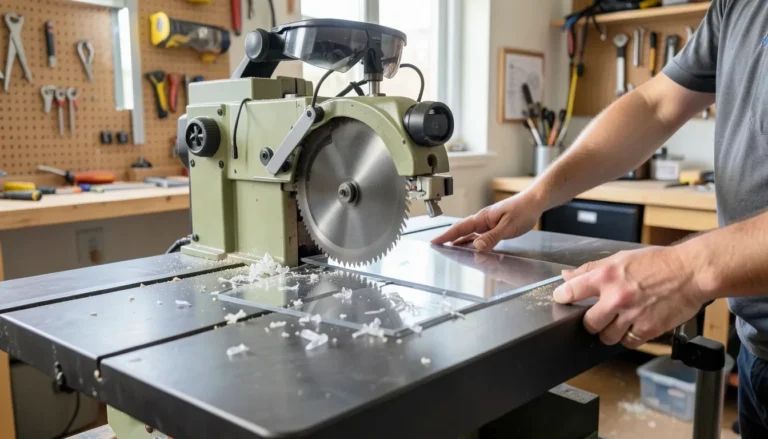
A zero-clearance insert is a flat throat plate that closes the gap around the blade to nearly nothing. That tight fit supports wood fibers right at the cut line, which is what reduces splintering and tear-out on the underside of a cut – and it also stops thin offcuts and small parts from dropping into the saw cabinet.
It is not, on its own, a kickback-prevention device. Kickback happens when a workpiece binds against the blade and gets thrown back toward the operator – that’s controlled by the riving knife (which keeps the kerf from closing on the back of the blade) and anti-kickback pawls, not by the throat plate. Keep your riving knife installed for normal ripping and crosscutting even after adding a zero-clearance insert; the two work together, one doesn’t substitute for the other. An anti-kickback featherboard or hold-down adds a second layer of control on narrow rip cuts, and it’s worth reviewing your full table saw safety accessory setup at the same time you install a new insert.

Maintenance and When to Replace It
Clear dust and offcut debris from under the insert after every session with a brush or compressed air – trapped sawdust is the most common cause of an insert sitting slightly proud of the table. Wipe MDF or phenolic inserts dry; moisture swells MDF edges and throws off the flush fit.
- Replace it once the kerf has widened from repeated blade changes or bevel cuts – a wide kerf stops supporting the cut edge and defeats the purpose of the insert.
- Replace it if it’s cracked, chipped, or no longer sits flush after adjusting the leveling screws.
- Cut a new blank rather than patching a damaged one – a shim or filler under a cracked insert won’t stay flat under blade vibration.
Troubleshooting Fit and Alignment
The insert doesn’t sit flush or rocks slightly
Check for sawdust or debris under the insert first – it’s the most common cause. If it’s clean, adjust the leveling screws at each corner until the insert sits level with the table surface with no gap on any edge.
The blade contacts the insert when raised
This means the insert either isn’t seated correctly or its kerf was cut for a different blade diameter or bevel angle than you’re currently using. Re-seat the insert, unplug the saw, and confirm the blade has clear travel before proceeding – never force a bevel or height change while the blade is in contact with the insert.
Frequently Asked Questions
Does a DeWalt DWE7491 use the same insert as a DWE7480?
Yes. The DWE7491, DWE7491RS, and DWE7480 share the same throat opening, so inserts sized for one fit the others. The DWE7485 does not share this opening and needs a model-specific insert.
Can I use a zero-clearance insert with a dado stack?
Only if the insert is made for it. A standard zero-clearance insert has a slot cut for a single blade’s kerf width; a dado stack is wider and will bind or lift a standard insert. Some aftermarket inserts, including dado-rated versions, are sold specifically for dado stacks – check the listing before running one on a saw blade insert.
Do I need to remove the riving knife to install a zero-clearance insert?
Not for a pre-made insert with a factory-cut riving knife slot – it drops in around the riving knife. If you’re cutting a custom blank with no slot, the riving knife has to come out to cut the kerf, then go back in immediately afterward for regular use.
How do I know which insert my DeWalt table saw needs?
Check the model number stamped on the saw’s front rail or motor housing, then match it against the compatibility table above. If your exact model isn’t listed by a seller, cutting a custom MDF blank works on any saw regardless of throat shape.
A zero-clearance insert is a cheap, worthwhile upgrade on any DeWalt jobsite saw – but match it to your exact model, keep the riving knife in place for normal cuts, and replace the insert once its kerf widens. None of that requires guesswork if you check the model number first.
Sponsored / affiliate links. As an Amazon Associate I earn from qualifying purchases. I may earn additional commission from eligible campaigns.