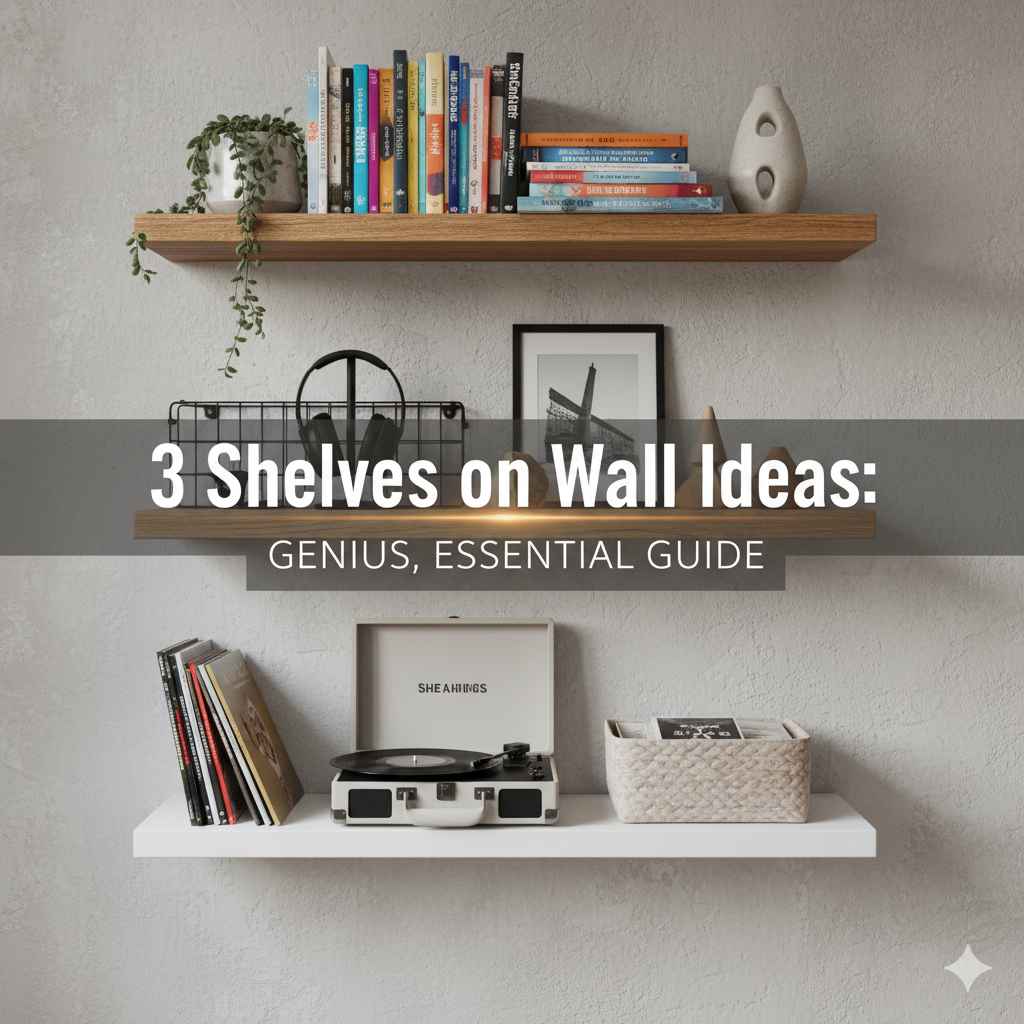
3 Shelves on Wall Ideas: Genius, Essential
Discover 3 genius and essential wall shelf ideas perfect for beginners. These simple projects will add much-needed storage and style to any room, enhancing your home’s look and function with ease and confidence.
Hello, fellow DIYers! Are your walls looking a little bare, or are clutter piles starting to take over your favorite spaces? You’re not alone. Many of us struggle with finding smart, stylish, and simple ways to add storage without breaking the bank or needing advanced skills. That’s where shelves come in – they’re like magic for organizing and decorating! But sometimes, even the thought of putting up a shelf can feel a bit daunting. Don’t worry! I’m here to guide you through three absolutely genius and essential wall shelf ideas that are perfect for beginners. We’ll tackle these projects together, step-by-step, making sure you feel confident and capable every inch of the way. Get ready to transform your walls!
Why Wall Shelves Are a Must-Have for Every Home
Wall shelves are more than just a place to stack things; they are versatile design elements that can completely change the feel and utility of a room. They are essential for maximizing vertical space, which is especially important in smaller homes or apartments. Think about it: every square foot counts! Shelves allow you to keep often-used items within easy reach, from your favorite books and decorative pieces to everyday essentials like keys and mail.
Beyond storage, shelves are fantastic for displaying family photos, artwork, or plants, adding a personal touch and visual interest to otherwise plain walls. They can make a room feel more organized, spacious, and visually appealing. Plus, they offer a fantastic opportunity for DIY projects, allowing you to customize your storage to perfectly fit your needs and style.
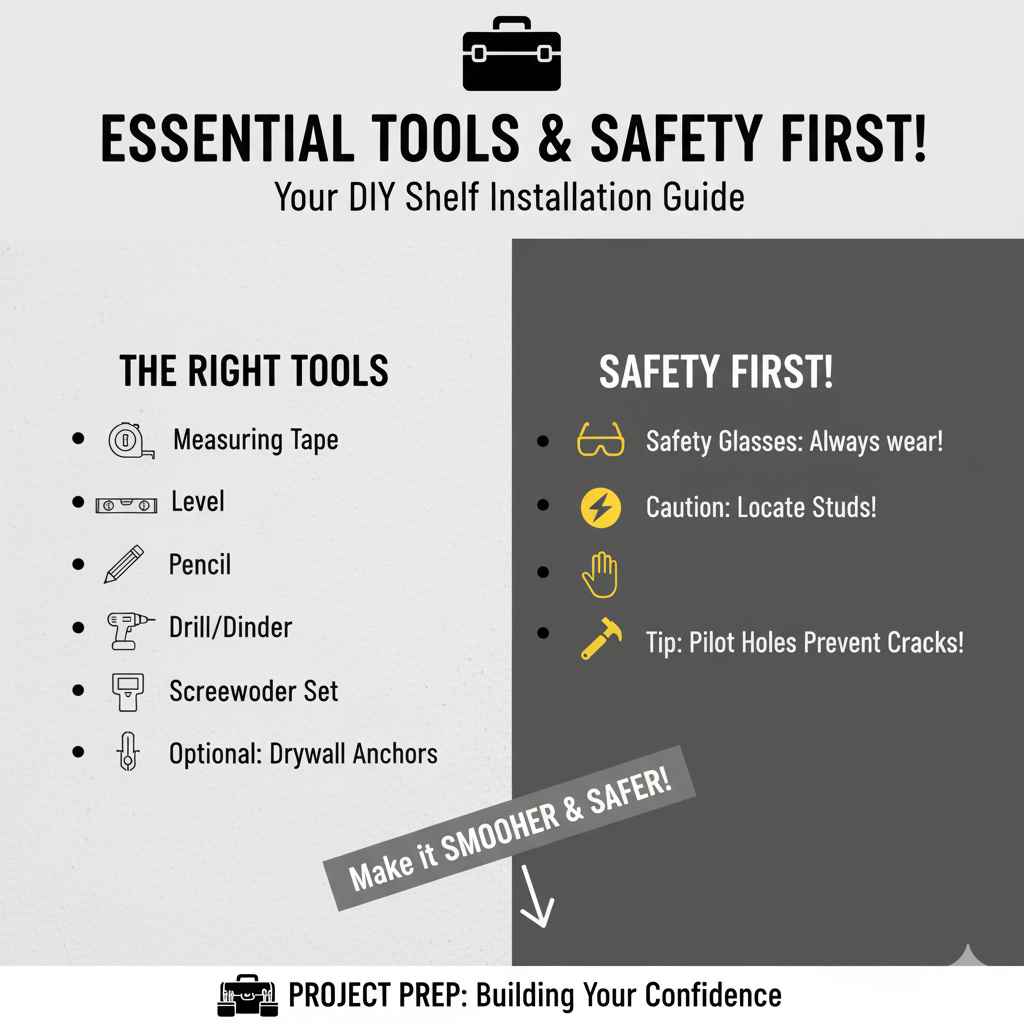
Essential Tools and Safety First!
Before we dive into our shelf ideas, let’s talk tools and safety. Having the right tools makes any project smoother and safer. For basic shelf installation, you’ll likely need:
- Measuring Tape: For accurate placement.
- Level: Crucial for ensuring your shelves are straight and even. A small torpedo level is great for this.
- Pencil: For marking drill points.
- Drill/Driver: For making pilot holes and driving screws. A cordless one is super convenient! If you’re new to drilling, always start with a small drill bit for pilot holes.
- Stud Finder: This is a game-changer! It helps you locate wall studs, which provide a solid anchor for your shelves. Attaching shelves only to drywall can lead to trouble. You can learn more about finding studs at This Old House.
- Screwdriver Set: For any final screw adjustments.
- Safety Glasses: Protect your eyes from dust and debris. Always wear them when drilling or hammering!
- Optional: Drywall Anchors: If you absolutely cannot find a stud for a very light item, appropriate drywall anchors can be used, but studs are always preferable.
Safety Tip: Always know what’s behind your wall before you drill. Avoid electrical wires and plumbing. If you’re unsure, it’s best to consult a professional or do more research on safe drilling practices.
Genius Idea #1: The Classic Floating Shelf – Simple Elegance, Maximum Impact
Floating shelves are incredibly popular for a reason. They offer a clean, modern look with no visible brackets, making it seem like the shelf is magically attached to the wall. This illusion creates a sophisticated and minimalist aesthetic that works in almost any room.
Why It’s Genius:
- Sleek Design: The clean lines and hidden support create a minimalist, uncluttered look.
- Versatile: Perfect for displaying decor, books, or essentials in living rooms, bedrooms, kitchens, and hallways.
- Customizable Size: You can make them any length to fit your space.
- Beginner-Friendly Installation: Once you understand the bracket system, it’s quite straightforward.
Materials You’ll Need:
- Pre-made hollow floating shelf with mounting bracket: These are readily available at most hardware and home improvement stores. They come in various materials (wood, MDF, laminate) and finishes.
- Screws: Choose screws long enough to go through the bracket and securely into the wall studs.
- Wall anchors: Only if you can’t hit studs, and even then, consider the weight limit carefully.
Step-by-Step Installation Guide:
- Choose Your Location: Decide where you want to hang your shelf. Use your level and pencil to mark a straight line for the top or bottom edge of the shelf, depending on your preference and the shelf instructions.
- Find the Studs: Use your stud finder to locate the wall studs that will be behind your shelf. Mark their centers. This is the MOST important step for a strong installation. Reputable sources like Family Handyman offer excellent diagrams for this.
- Position the Bracket: Hold the mounting bracket up to your marked line. Align the screw holes on the bracket with the stud marks you made. Use your level to ensure the bracket itself is perfectly level.
- Mark and Drill Pilot Holes: While holding the bracket in place and ensuring it’s level, mark where the screw holes will go. Remove the bracket and drill pilot holes at your marked spots. The pilot hole should be slightly smaller than the screw diameter.
- Mount the Bracket: Reposition the bracket over the pilot holes. Drive screws through the bracket and into the studs. If you must use anchors, follow the anchor manufacturer’s instructions precisely. Double-check that the bracket is secure and doesn’t wobble.
- Slide the Shelf On: Most hollow floating shelves have rods or a channel that slides onto the mounting bracket. Carefully slide the shelf onto the bracket until it sits flush against the wall.
- Secure the Shelf (if applicable): Some shelves have small set screws on the bottom that lock the shelf onto the bracket. Tighten these if present.
Weight Capacity Considerations:
Floating shelves often have specific weight limits, especially hollow ones. Always check the manufacturer’s specifications. The weight capacity is significantly reduced if not anchored into studs. For a standard 3-foot (approx. 1 meter) hollow shelf anchored into studs, you might expect a capacity of 15-25 pounds (7-11 kg), but this varies greatly.
Genius Idea #2: The Simple Plank Shelf – Rustic Charm, DIY Delight
This idea brings a warm, rustic, or farmhouse feel to your home. It’s essentially a solid piece of wood mounted with visible brackets. It’s incredibly forgiving for beginners and adds a touch of handmade charm.
Why It’s Genius:
- Customizable Look: Choose your wood type, finish, and bracket style to match your decor perfectly.
- Sturdy: Solid wood and visible brackets mean these shelves can hold a good amount of weight.
- Affordable: You can often find affordable lumber and brackets.
- Easy to Mount: Attaching brackets to studs is very reliable.
Materials You’ll Need:
- Wood Plank: A piece of solid wood like pine, poplar, or even a reclaimed board. The size depends on your needs. You can have it cut to size at the hardware store.
- Shelf Brackets: Choose sturdy brackets that match your style (e.g., industrial pipe, L-brackets, decorative scroll brackets). Ensure they are rated for the weight you intend to put on the shelf.
- Wood Screws: Shorter screws for attaching the shelf to the brackets, and longer screws for attaching the brackets to the wall studs.
- Sandpaper: For smoothing the wood if needed.
- Wood Finish (Optional): Stain, paint, or sealant to protect the wood and enhance its look.
- Wall Anchors: Again, only if studs are impossible.
Step-by-Step Installation Guide:
- Prepare Your Plank: If your plank isn’t pre-finished, sand it smooth. Apply your chosen stain, paint, or sealant. Let it dry completely according to the product instructions. Make sure to work in a well-ventilated area.
- Mark and Locate Studs: Decide on the shelf’s placement. Use your level and pencil to draw a faint line where the bottom of the shelf will sit. Then, use your stud finder to mark the stud locations along that line or slightly above, depending on your bracket design.
- Position Brackets: Hold a bracket against the wall, aligning its screw holes with the stud marks. Ensure it’s level. Mark the screw hole positions. Repeat for all brackets, making sure they are the same distance from the wall and at the same height.
- Drill Pilot Holes: Remove the brackets and drill pilot holes at your marked spots into the studs.
- Mount Brackets: Securely attach the brackets to the wall using screws into the pilot holes. Ensure they are firmly anchored and level.
- Attach the Shelf: Place your prepared wood plank on top of the mounted brackets. Position it so it overhangs evenly at the front and sides, if desired.
- Secure the Shelf to Brackets: From underneath, drive wood screws through the bracket holes and into the bottom of your wood plank. Ensure the screws are not too long; they shouldn’t poke through the top of the shelf!
Pros and Cons Table:
| Pros | Cons |
|---|---|
| Very strong and can hold significant weight. | Visible brackets may not suit all minimalist styles. |
| Highly customizable in terms of wood, finish, and bracket style. | Requires accurate bracket placement for a professional look. |
| Adds warmth and character to a room. | Wood preparation (sanding, finishing) adds an extra step. |
| Generally more affordable for material costs than some pre-made systems. | Can be heavier than hollow shelves, requiring robust mounting. |
Genius Idea #3: The Grid/Wire Shelf – Industrial Chic or Modern Simplicity
Wire or grid shelving units offer a modern, industrial, or even minimalist look. They are often modular, allowing for flexibility in configuration, and their open design can make a space feel less visually cluttered.
Why It’s Genius:
- Lightweight but Strong: Despite appearing airy, they are designed to hold a good capacity.
- Modular and Flexible: Many systems allow you to adjust shelf heights or even reconfigure the unit.
- Easy to Clean: The open design means dust doesn’t accumulate as much, and they are simple to wipe down.
- Stylish Versatility: Can lean into industrial, urban, or very modern aesthetics.
Materials You’ll Need:
- Wire Shelving Unit: Available online or at large home improvement stores. They come in various widths and depths.
- Mounting Hardware: These units typically come with hardware, but ensure it’s suitable for your wall type. Some systems use clips that attach to the vertical supports and then screw into the wall.
- Screws and Wall Anchors: As needed for securing the mounting hardware to your wall.
- Optional: Screw Hole Covers: To hide the screw heads for a cleaner look.
Step-by-Step Installation Guide:
- Assemble the Unit (if applicable): For many wire shelving units, you’ll need to assemble the poles and shelves first. Follow the manufacturer’s instructions.
- Determine Shelf Placement: Decide where you want the shelves on your wall. For fixed-height shelves, determine the overall height of the unit. For adjustable systems, you’ll use the unit’s inherent adjustability.
- Mark and Locate Studs: Use your level and pencil to mark the desired vertical position for the top of your unit or the first shelf. Locate wall studs in this area. For larger units, you might need to attach to multiple studs.
- Install Wall Mounts: Many grid systems have specific brackets or clips that attach to the unit’s uprights and then screw into the wall. Follow the manufacturer’s guide. If your unit doesn’t have specific wall mounts, you might use heavy-duty L-brackets screwed into studs, then attach the unit to the brackets. This process is similar to mounting a bookcase. For guidance on secure wall mounting, the Federal Trade Commission offers vital safety information on furniture anchoring, which applies to wall units too.
- Drill Pilot Holes: Drill pilot holes into your marked stud locations for all screw points.
- Secure the Unit: With the help of another person (these units can be awkward!), hold the shelving unit in place. Align the mounting hardware with your pilot holes and secure the unit to the wall using screws. If using anchors, install them first according to their instructions.
- Check for Stability: Gently push on the unit to ensure it is firmly attached to the wall and does not wobble.
Grid Shelving vs. Other Types:
| Feature | Floating Shelf | Plank Shelf | Wire/Grid Shelf |
|---|---|---|---|
| Aesthetic | Modern, minimalist, clean | Rustic, farmhouse, traditional, industrial | Industrial, modern, urban, utilitarian |
| Installation Complexity | Moderate (requires precise bracket mounting) | Easy to Moderate (depends on bracket style) | Easy to Moderate (depends on system) |
| Weight Capacity | Lower to Moderate (hollow type), Moderate (solid type, less common) | High (depends on wood and bracket strength) | Moderate to High (depends on gauge of wire and support) |
| Cost | Moderate to High (pre-made) | Low to Moderate (DIY) | Low to Moderate |
| Maintenance | Easy (surface wipe) | Easy to Moderate (depends on finish) | Very Easy (dust passes through) |
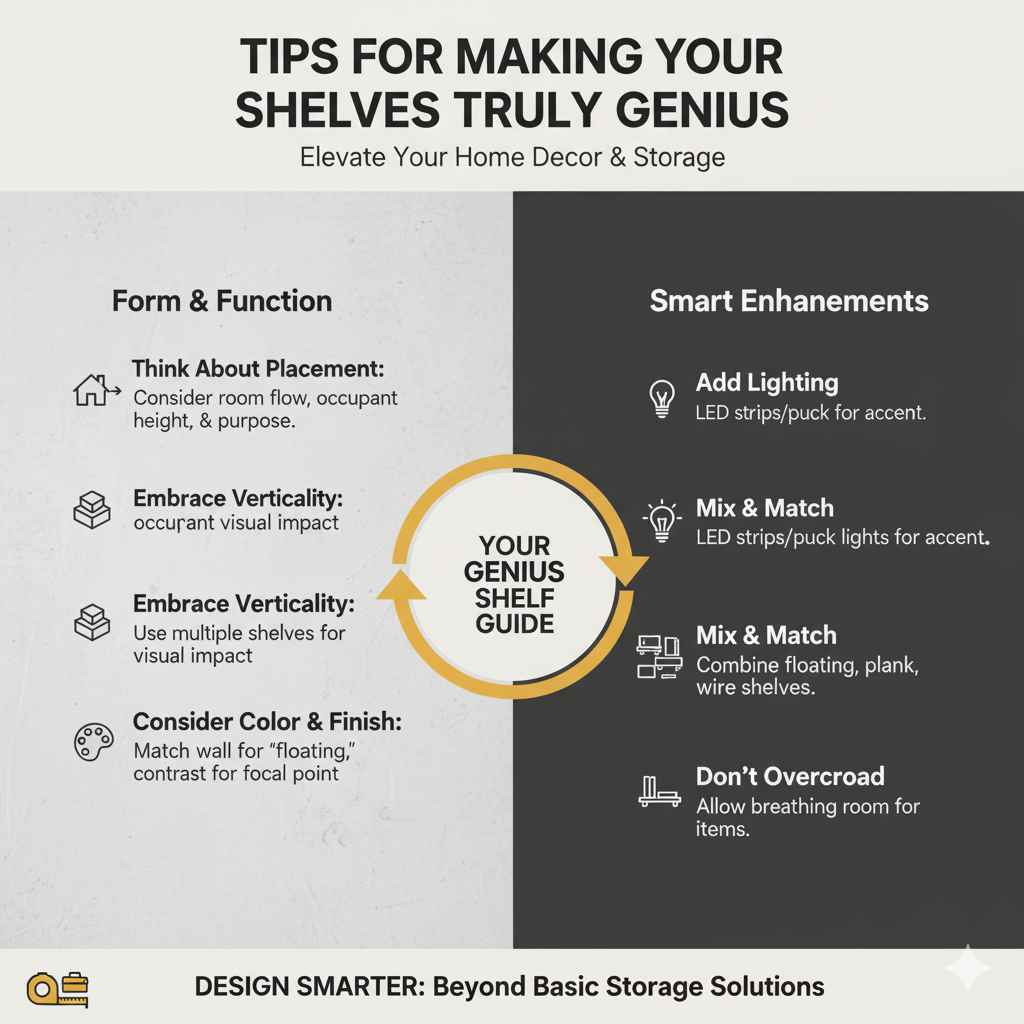
Tips for Making Your Shelves Truly Genius
Beyond just putting them up, here are a few extra tips to make your shelves not just functional, but truly genius additions to your home:
- Think About Placement: Don’t just put a shelf anywhere. Consider the flow of the room, the height of the occupant, and what you’ll be storing or displaying. A shelf above a door frame can be great for seasonal decor. A shelf beside a desk can hold office supplies.
- Embrace Verticality: Stack shelves or use them in multiples to create a strong visual statement and maximize storage in a small area.
- Add Lighting: Small LED strip lights or puck lights can be added under shelves to highlight displayed items or provide subtle accent lighting.
- Mix and Match: Don’t be afraid to use different types of shelves in different areas. A floating shelf in the living room, a plank shelf in the kitchen, and wire shelves in a utility room can all work harmoniously if the style is cohesive.
- Consider Color and Finish: Painting shelves the same color as the wall can make them disappear for a truly “floating” effect. Contrasting colors can make them a focal point.
- Don’t Overcrowd: Even the best shelves look cluttered if they are packed too full. Leave some breathing room for your displayed items.
The key to genius shelf placement is to think about both form and function. How will this shelf serve your needs visually and practically?
Frequently Asked Questions (FAQ)
What is the easiest type of shelf to install for a beginner?
The plank shelf with visible brackets is often the easiest for beginners. The brackets are straightforward to mount, and the solid plank is forgiving, making it hard to go wrong. Pre-made floating shelves are also quite simple once you understand how the bracket works.