5 Year Anniversary Wood Gift Ideas: Essential Picks
Discover the best 5 year anniversary wood gift ideas that celebrate five years of memories with handcrafted, meaningful keepsakes. These beginner-friendly options focus on simple wood projects or easily sourced items built to last, ensuring your gift is both beautiful and manageable for any DIY skill level.
Five years is a big milestone! Congratulations! It’s natural to want a gift that truly shows how much those five years mean to you. The tradition suggests wood, which symbolizes strength, deep roots, and durability—just like your relationship. But if you aren’t a seasoned carpenter, ideas can get tricky fast. You might worry about complicated cuts or expensive tools. Don’t sweat it! As your woodworking mentor, I’m here to show you that creating a stunning, heartfelt wooden gift is totally achievable, even if your biggest project so far was assembling IKEA furniture. We will explore five fantastic, beginner-friendly gift ideas that honor this special wood anniversary.
The Meaning Behind Wood: Why It’s the Perfect 5-Year Gift
Have you ever noticed how wood grains are unique? No two pieces are exactly alike, much like your partnership. The tradition of giving wood for the fifth anniversary dates back centuries. It’s not just for looks; it carries deep meaning. Wood represents the strong, established foundation you have built together. After five years, your love has taken root, growing stronger and more complex, like the rings inside a mature tree.
For beginners, wood is forgiving. It’s easy to sand, stain, and personalize. This focus on wood allows you to concentrate on the sentiment rather than struggling with tricky materials like glass or metal. Let’s dive into five essential and achievable ideas that carry maximum meaning!
5 Essential 5 Year Anniversary Wood Gift Ideas for Beginners
We are focusing on projects that require minimal specialized machinery, concentrating instead on assembly, finishing, and personalization. These ideas balance heartfelt effort with practical woodworking skills.
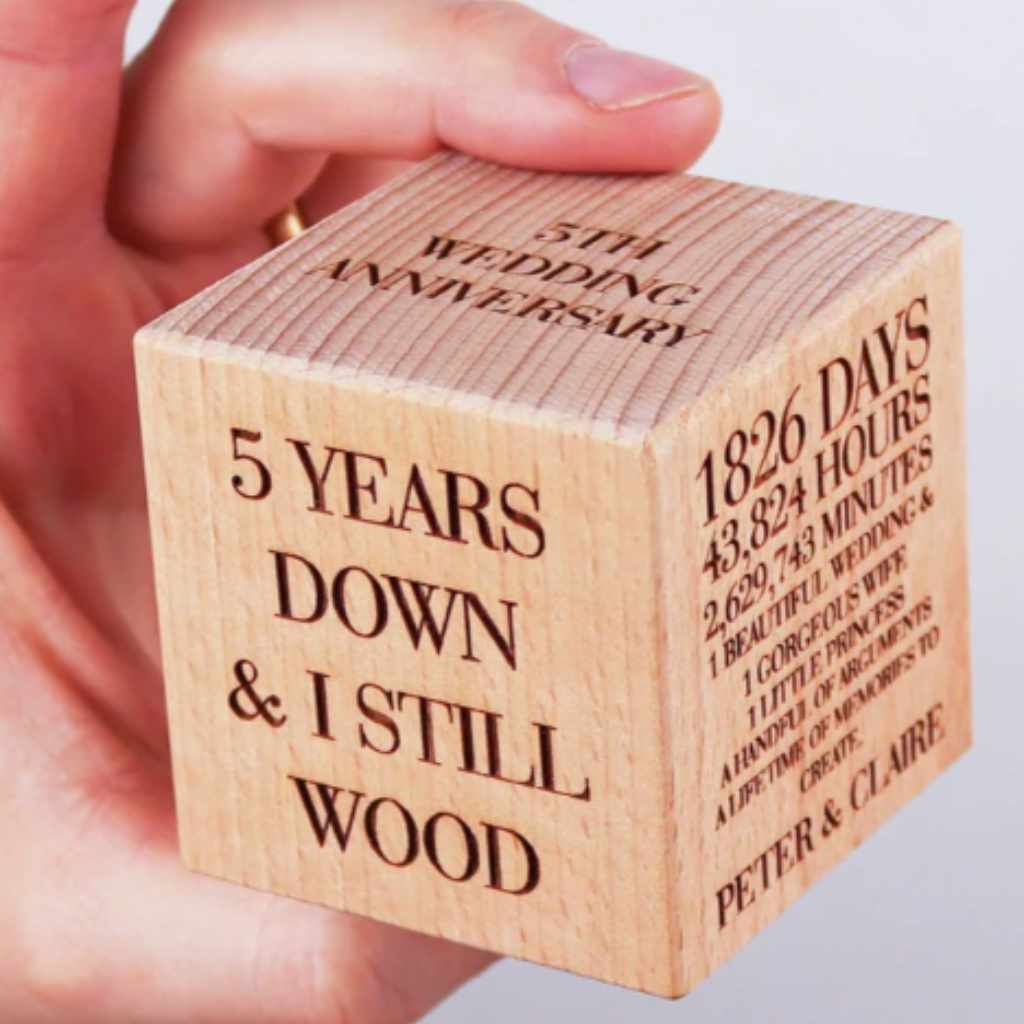
Idea 1: Personalized Wooden Photo Block or Memory Keepsake
A collection of your favorite five years of photos deserves more than a simple frame. A solid wooden block, printed or engraved with cherished images, becomes a tactile piece of art that sits proudly on a shelf. This is perhaps the simplest way to achieve a professional look.
Tools You Might Need:
- A square piece of hardwood (Maple or Birch work beautifully) cut to size (around 6″ x 6″ x 1.5″). You can often get this cut at a local lumber yard or home improvement store.
- Sandpaper (120 grit and 220 grit).
- Wood glue (if layering blocks).
- Clear polyurethane or wax finish.
- A high-quality printer or access to an online wood transfer service (like wood transfer printing).
Simple Steps to a Stunning Block:
- Prepare the Wood: Sand all surfaces smooth, working up from 120 grit to 220 grit paper. Wipe away all dust with a tack cloth.
- Transfer the Image: If you are using a special gel medium transfer method (easily found with simple online tutorials), apply the medium to the wood, press the printed image face-down, and carefully rub the back of the paper away once dry. If you are using a direct printing service, send your prepared image file to them.
- Seal and Protect: Once the transfer is completely dry (this can take up to an hour), apply a thin, even coat of your chosen finish. This seals the image and protects the wood.
- Add a Date: Using a fine-tip permanent marker or wood-burning pen (if you feel brave!), burn or write “5 Years” and your date onto the side or bottom.
Safety Check: Always work in a well-ventilated area when applying finishes or using transfer mediums. Check the product safety data sheet.
Idea 2: Custom Engraved Wooden Serving Tray or Charcuterie Board
Everyone loves sharing food beautifully. A charcuterie board is a functional piece of art. Even if you only need to cut a simple oval shape, the real magic here is in the finish and the personalized engraving—perfect for displaying those five years of shared meals!
Wood Choice Matters:
For food surfaces, you must use food-safe wood. Avoid softwoods like pine. Good choices include Maple, Walnut, or Cherry. These woods are dense and look incredible when oiled.
| Wood Type | Color/Grain | Beginner Friendliness |
|---|---|---|
| Maple | Light, tight, uniform grain | Excellent (Easy to finish) |
| Walnut | Deep, rich brown | Good (Takes oil finish beautifully) |
| Cherry | Reddish-brown, darkens with age | Good (Slightly softer, may scratch easier) |
Personalization Tip:
If you don’t have an engraving machine, use a wood-burning (pyrography) tool to carefully burn a small message or your initials into a corner. Practice on scrap wood first!
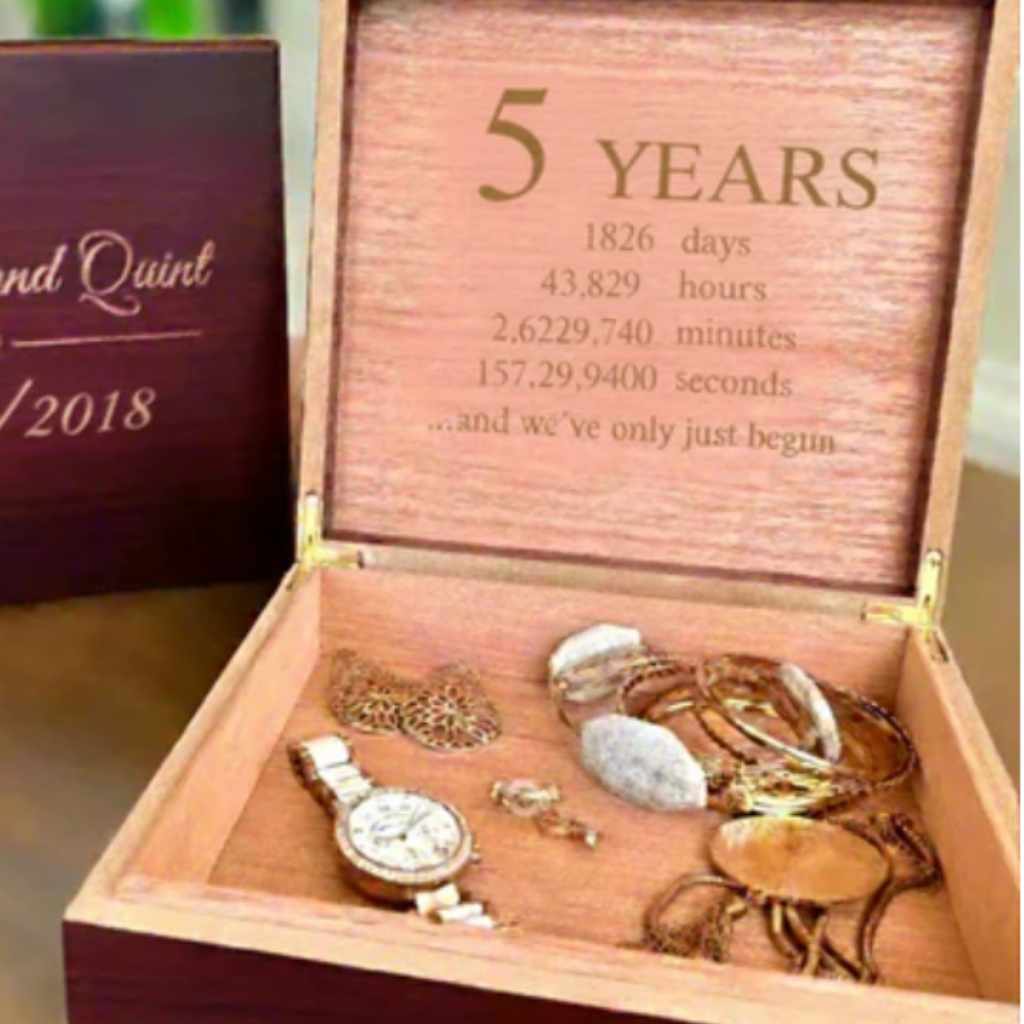
Idea 3: Simple Wooden Recipe Box or Keepsake Box
This gift holds tangible memories. Fill a sturdy, attractive box with handwritten favorite recipes, love notes, or tickets from past adventures. The construction is straightforward: four sides, a bottom, and a hinged lid.
Key Beginner Technique: Pocket Holes
For strong, hidden joints without needing complicated dovetails, I highly recommend pocket hole joinery. You can rent or buy an inexpensive pocket hole jig. This method essentially screws the side pieces together quickly and securely from the inside, hiding the fastener head.
To learn more about reliable joinery techniques suitable for small projects, resources like Woodworking FAQ on Joinery offer great visual guides.
Steps Overview:
- Cut five pieces of wood: four sides (two long, two short) and the bottom piece.
- Drill pocket holes along the edges of the side pieces that will meet the adjacent sides.
- Assemble the four sides using wood glue and pocket hole screws to form a square (or rectangle).
- Attach the bottom piece using glue and small brad nails or screws from the bottom side.
- Measure and cut the lid piece. Attach the lid using simple butt hinges at the back.
- Sand thoroughly and choose an oil finish (like Tung oil) for a hand-rubbed look that feels wonderful to the touch.
Idea 4: Handcrafted Wooden Map Stencil or Coordinates Plaque
Does your relationship have a special location—where you met, where you got engaged, or where you bought your first home? Commemorate that spot with a wooden plaque featuring the GPS coordinates or a map outline.
This project heavily relies on precision cutting, which can be easily outsourced or simplified.
Simplifying the Map Cutout:
Instead of trying to jigsaw a complex map shape, take a simpler approach:
- Cut a nice, sturdy backing board (like 10” x 10” Walnut).
- Find a simple vector outline of the state or country you want to represent.
- Have a local sign maker or even a sophisticated maker space cut that outline shape out of a thinner piece of contrasting wood (like Maple).
- Glue the cutout onto the backing board.
- Engrave the coordinates using the lettering method described in Idea 1, or simply use permanent paint markers to write them underneath.
This method lets you focus 90% of your effort on sanding and finishing the beautiful base wood, giving a professional result without needing a specialized scroll saw.
Idea 5: Wooden Coasters with a Meaningful Stain or Burn Mark
Coasters are fantastic beginner wood gifts because they are small, require minimal material, and you can make a set of four or six. The goal here isn’t complex shapes, but showcasing contrast through stain or burning.
Choosing Your Contrast:
Get a standard piece of smooth hardwood (like 3/4″ thick Maple). You can make the five-year theme literal:
- Cut five coasters into circles or squares.
- For the first four coasters, use standard clear or natural oil finish.
- For the fifth coaster, use a dark, rich stain (like Jacobean) or burn the entire surface lightly with a wood-burning tool.
The set tells a story: Four years of solid foundation, and the fifth year (the dark one) is the deepest, darkest, most refined part of your journey so far.
For guidance on selecting safe, durable wood finishes, the US Department of Agriculture Forest Products Laboratory offers excellent information on wood finishing and durability that can help you choose the right sealant.
Finishing Touches: Sanding, Staining, and Sealing Like a Pro
Any woodworking mentor will tell you: 90% of a good project is the finish. A sloppy finish hides great woodworking; a great finish elevates simple woodworking. Since we are focusing on beginner projects, mastering the finish is your superpower.
The Golden Rule of Sanding
You must sand before staining, and lightly sand between coats of finish. Never skip grits. If you start with 120 grit sandpaper, the very next step must be 150 or 180, followed by 220. You are not trying to scratch the wood; you are trying to remove the scratches left by the previous, coarser paper.
Always sand with the grain. Going against the grain leaves visible scratches that stain will highlight mercilessly.
Choosing Your Color: Stains vs. Dyes vs. Oils
For gifts, we want depth. Here is a quick breakdown:
| Type | Best For | Beginner Consideration |
|---|---|---|
| Oil-Based Stain | Deep color saturation, classic look. | Can be tricky to apply evenly on soft woods (can lead to blotching). |
| Dye Stain | Allowing the natural wood grain to fully show through. | Very beginner-friendly, absorbs quickly, generally blotch-resistant. |
| Tung Oil or Mineral Oil | A natural, hand-rubbed look, excellent for food contact (like cutting boards). | Requires multiple coats, but very safe and easy to repair later. |
Sealing for Longevity
If the item will be handled frequently (like a box or keepsake), you need a protective topcoat. Water-based polyurethane is an excellent, low-odor choice for beginners. Apply thin coats. It dries fast, meaning you can often put down two or three coats in one afternoon. Always lightly sand with 320 grit paper between clear coats for a perfectly smooth final feel.
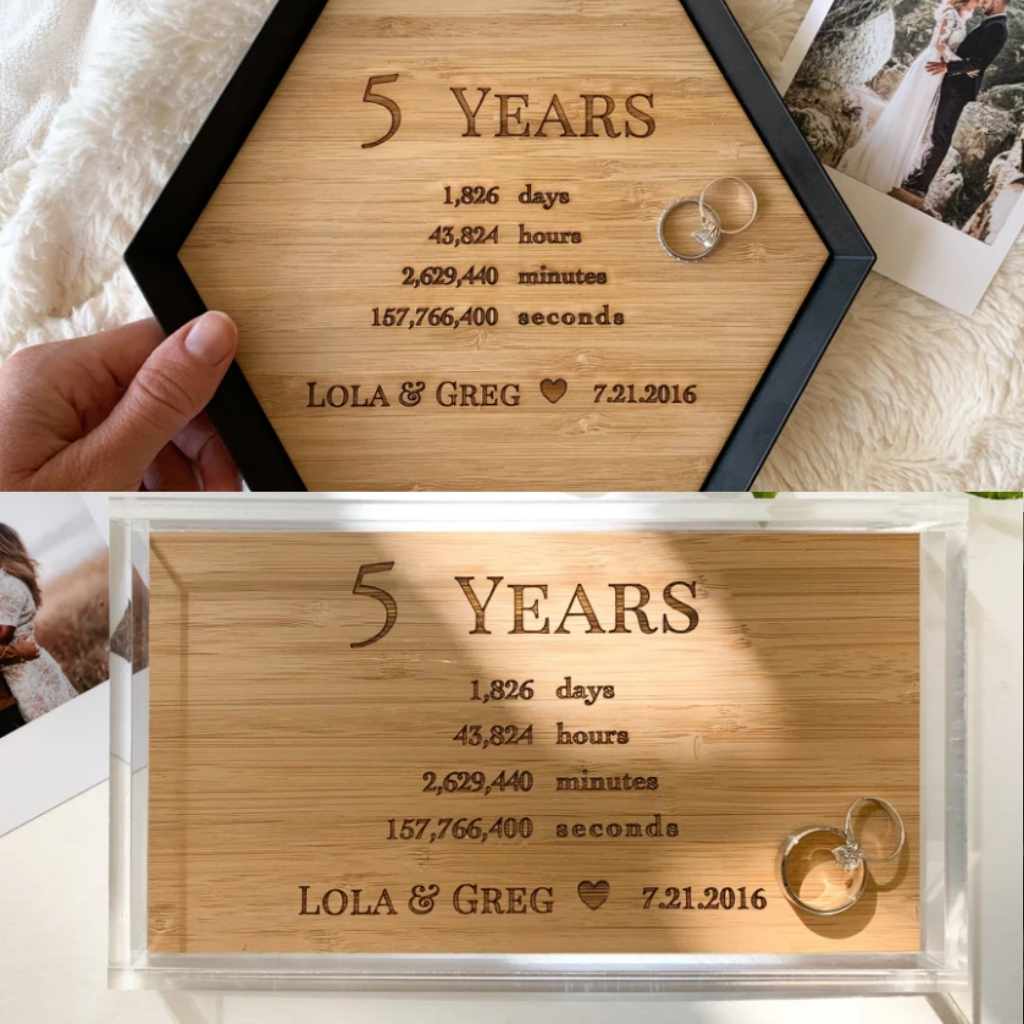
Making It Personal: Adding the “Five Years” Touch
The wood material honors the tradition; the personalization honors your partner. Focus on engraving or marking the number five specifically.
- The Number Five: Use the number “5” visibly but subtly. This could be five small drilled holes along the edge of a plaque, or having the number “V” (Roman numeral five) subtly integrated into the carving or burning.
- Five Memories: For the recipe box, include five pre-written recipe cards for meals you shared in the last five years.
- Five Adjectives: Burn or stencil five words that describe your relationship onto the back of any item (e.g., Loyal, Kind, Deep, Funny, Strong).
Remember, tools don’t make the craftsman; intention does. The most beautiful gifts are those poured over with thought, not just expensive machinery.
Frequently Asked Questions (FAQ) About 5-Year Wood Anniversary Gifts
Q1: Do I have to use expensive hardwoods for a beginner wood gift?
A: Not necessarily. For decorative items where you plan to heavily stain or paint, a high-quality cabinet-grade plywood or clear pine that has been sanded perfectly can look great. However, for high-touch items like cutting boards or boxes, stick to Maple, Cherry, or Walnut because they are denser and less likely to dent.
Q2: What is the easiest way to cut wood shapes without a power saw?
A: The easiest way is often buying the wood pre-cut to size from a local lumberyard or home center. If you need a simple curve or shape, a hand coping saw or a small Japanese pull saw can handle thinner wood pieces effectively, though it requires patience.
Q3: How do I prevent blotchy stain results on my project?
A: Blotching happens when some parts of the wood absorb stain faster than others (common in pine). To fix this, always apply a pre-stain wood conditioner first, available at hardware stores. This evens out the wood’s absorption rate, leading to smooth color.
Q4: Is it better to stain or just seal the wood for a gift?
A: If you love the natural color of the wood (like light Maple or dark Walnut), skip the stain entirely and use a clear finish like Tung oil or clear polyurethane. This showcases the natural beauty and the unique grain pattern, which ties perfectly into the “rooted” theme of the 5th anniversary.
Q5: Should I use wood glue if I am also using screws or nails?
A: Yes, absolutely! Wood glue creates a bond that is often stronger than the wood fibers themselves. Screws or nails provide clamping pressure while the glue dries, but the glue does the long-term holding work. Always use both for maximum durability.
Q6: What is a safe finish to use if my partner handles the item often?
A: For items frequently held or eaten off of, consider finishing with pure Tung Oil or a food-grade mineral oil mixed one-to-one with beeswax. These finishes penetrate the wood, provide good moisture resistance, and require no harsh chemical sealants.
Conclusion: Building Memories That Last
Reaching the five-year mark is a testament to patience, growth, and mutual support. By choosing a wooden gift, you are choosing a material that mirrors the very qualities that have kept your relationship strong. You don’t need a professional shop full of tools to create something truly meaningful. By mastering a few simple finishing techniques—sanding thoroughly, applying stain evenly, and sealing with care—you can transform a simple slab of wood into an heirloom.
Take that first step, whether it’s buying a nice piece of Walnut for a serving board or finding the perfect photo for a memory block. Remember the encouraging feeling you get when you finish a project successfully. That feeling of accomplishment, wrapped up in a handmade gift, is a powerful way to celebrate five incredible years. Happy Anniversary, and enjoy the rewarding process of making something timeless!