3 Floating Shelf Ideas: Builds, Hardware and Load Limits
A floating shelf holds its load through leverage, not magic: every pound sitting 5 inches from the wall pulls outward on the top screws, so stud-mounted fasteners and thick stock matter more than looks. Here are three builds, a hidden-rod shelf, a hollow box on a cleat, and a steel-bracket shelf, with the hole sizes, screw lengths and pull-out math most tutorials skip.
Which Floating Shelf Build Holds the Most Weight?
Best Hidden Bracket Pick
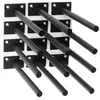 |
8-Inch Black Steel Hidden Floating Shelf Brackets, 12-Pack: $18.95 Solid steel blind supports with an 8-inch, 12 mm rod on a 2 x 1-1/8 inch backplate, packed with screws and drywall anchors. The rod length suits shelves roughly 8-1/2 to 10 inches deep.
|
As an Amazon Associate we earn from qualifying purchases.
The build with the tallest, widest fastening pattern into studs wins, and that is usually a steel bracket, not a hidden rod. A hidden-rod backplate is about 1-1/8 inches tall (per the pick above), so its screws sit close together and take the most pull-out. A visible L-bracket can spread screws 5 inches apart. The table compares all three builds side by side.
| Build | What holds it up | Depth it suits | Main weak point |
|---|---|---|---|
| 1. Hidden-rod slab | 12 mm steel rods in drilled holes, plate screwed to studs | Rod length plus about 1/2 to 2 inches | Needs stock at least 1-1/2 inches thick; short screw spread |
| 2. Hollow box on cleat | 2×2 cleat screwed to studs, box slides over it | Cleat projects 1-1/2 inches, box 6 to 10 inches deep | Box skins and glue joints limit the load; cleat screws must be long |
| 3. Steel L-bracket | Visible bracket, screws through the arm into the shelf underside | Bracket arm length | Bracket shows; 3/4-inch boards need short screws from below |
Floating Shelf Idea 1: Hidden-Rod Shelf From Thick Stock
Hidden-rod shelves look the most “floating” because the rods vanish inside the board. The catch most guides skip: a 12 mm rod is 0.47 inch across, so a standard 1×6 or 1×8 board (3/4 inch thick) leaves only about 1/8 inch of wood above and below the hole. That splits. Use stock at least 1-1/2 inches thick, which leaves about 1/2 inch on each side of the hole.
What You Need
- A 2×8 (1-1/2 x 7-1/4 inches actual) or two 3/4-inch boards glued face to face
- Hidden shelf brackets with a rod 1 to 2 inches shorter than the shelf depth (see the guide to attaching metal rod to wood for the drilling basics)
- 1/2-inch brad-point bit and a drill guide or drill press
- 4-foot level, stud finder, pencil, 120 and 220 grit sandpaper
Steps
- Glue up the board if needed: Two 3/4-inch boards glued face to face give 1-1/2 inches of thickness; clamp until the glue sets, since glue alone carries this joint when the faces are flat.
- Find studs and mark them: Studs are usually 16 inches apart center to center and 1-1/2 inches wide, so aim each plate’s screws at a stud center.
- Fix the plates first: Level each plate, then drive the screws into the stud. Skip the included drywall anchors for anything heavier than decor.
- Transfer the hole positions: Dab pencil graphite on the rod tips, press the board’s back edge against them, and drill at the marks.
- Drill straight: Use a 1/2-inch bit, a guide and a hole depth equal to the rod length plus 1/8 inch. An angled hole is the usual reason a shelf will not seat flat.
- Slide on and check level: Push the shelf fully home; if it stands proud of the wall, a hole is too shallow.
Floating Shelf Idea 2: Hollow Box Shelf on a Cleat
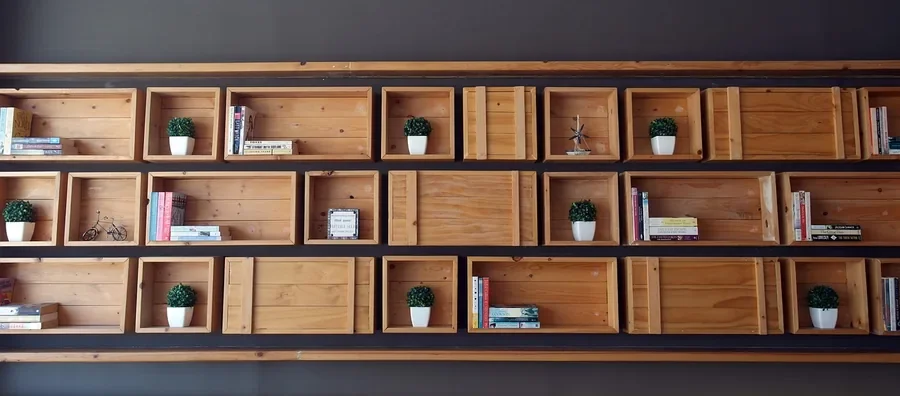
A hollow box gives a thick, solid look from thin plywood. The box slides over a 2×2 cleat (1-1/2 x 1-1/2 inches actual) that is screwed to the studs, so all the strength comes from the cleat’s fasteners.
What You Need
- Plywood for the top, bottom and front strip of the box, plus a 2×2 cleat
- 4-inch screws (#10 or larger) for the cleat, and 1-1/4-inch screws for the box
- Wood glue, clamps or a brad nailer, and a level
Steps
- Screw the cleat to studs: Level it and drive 4-inch screws at every stud. Through 1/2-inch drywall and a 1-1/2-inch cleat, that puts 2 inches of screw in the stud.
- Build the box slightly loose: Make the inside about 1/16 inch taller than the cleat so it slides on without binding.
- Glue and clamp the box: Wood glue on every joint; the box’s top and bottom skins are what press against the cleat under load.
- Slide it on: Push the box fully to the wall.
- Lock it down: Drive 1-1/4-inch screws up through the bottom skin into the cleat. With a 1/2-inch skin, that leaves 3/4 inch in a 1-1/2-inch cleat and cannot poke through the top.
Floating Shelf Idea 3: Steel-Bracket Shelf
Not truly hidden, but the strongest of the three. A visible L-bracket has a tall vertical leg, so its screws are far apart and the pull-out force on each is low. It also works with ordinary 3/4-inch boards. For more layouts, see these stylish shelf bracket ideas.
Steps
- Pick bracket size: Choose an arm that reaches close to the front edge of the shelf.
- Land on studs: Space the brackets on stud centers, typically 16 inches apart, and let the shelf overhang each end a few inches.
- Mount with 2-1/2-inch screws: Through 1/2-inch drywall, that gives about 2 inches of thread in the stud.
- Screw up from below: Use screws no longer than 5/8 inch on a 3/4-inch board so the tips stay inside the wood.
- Check level twice: Set the shelf on the arms and confirm level before the final tightening.
Why Floating Shelves Pull Out: The Screw Math
A shelf rotates about the bottom of its bracket, so the top screws resist a pull equal to the load times its distance from the wall, divided by the vertical spacing between screws. This is a simplified rigid-plate estimate, not a lab test, but it shows the trend clearly.
| Support | Depth | Load per bracket (at center) | Screw spread | Pull-out on top screws |
|---|---|---|---|---|
| Hidden-rod plate | 8 in | 10 lb at 4 in | about 1 in | about 40 lb |
| Hidden-rod plate | 12 in | 10 lb at 6 in | about 1 in | about 60 lb |
| Steel L-bracket | 8 in | 10 lb at 4 in | about 5 in | about 8 lb |
| Steel L-bracket | 12 in | 10 lb at 6 in | about 5 in | about 12 lb |
Seller ratings do not resolve this. Listings for brackets with the same 8-inch, 12 mm rod claim 80 pounds in one pack and 120 pounds in another, and a 12-inch rod is rated 40 pounds, all “when mounted to a stud”. We have not tested any of them. Treat the number as a ceiling, and note that it falls as the rod gets longer.
Screw length that actually reaches the stud
| What the screw passes through | Total before the stud | 3-inch screw in stud | 4-inch screw in stud |
|---|---|---|---|
| 1/2 in drywall + 3/4 in cleat or plate | 1-1/4 in | 1-3/4 in | 2-3/4 in |
| 1/2 in drywall + 2×2 cleat (1-1/2 in) | 2 in | 1 in | 2 in |
Some tutorials pair a 2×2 cleat with 3-inch screws. On 1/2-inch drywall that leaves 1 inch in the stud. Step up to 4-inch screws.
Mounting Level Without Drilling Twice
Most redrilling comes from measuring against the floor, which is rarely level. Mark stud centers first, set the level on the plate or cleat, and check both ends.
For decor shelves without a build, see three shelves on wall ideas, and for closets, how to install closet shelves so they never sag.
Common Floating Shelf Mistakes
- Drilling a 1/2-inch hole in 3/4-inch stock, which splits the board
- Trusting the drywall anchors packed with hidden brackets for anything heavier than decor
- Using 3-inch screws with a 2×2 cleat
- Letting the shelf depth run far past the rod or bracket length
- Skipping the level check before drilling the second set of holes
Floating Shelf FAQ
How much weight can a floating shelf hold?
It depends on how many screws reach studs and how far the load sits from the wall, not on the shelf board. Listings for hidden brackets with the same 8-inch, 12 mm rod claim anywhere from 80 to 120 pounds, so treat any rating as a stud-mounted ceiling. Doubling the shelf depth roughly doubles the pull-out force on the top screws.
Can you install a floating shelf without studs?
Only for light, decorative loads, and never with a hidden-rod bracket. Its plate is about 1 inch tall, so the top screws see roughly 40 to 60 pounds of pull-out for a 10-pound share of load at typical depths, far more than a plastic drywall anchor is meant to take in tension. Use toggle-style anchors rated in tension, or move the shelf to a stud.
How deep should a floating shelf be?
Match depth to the support. Hidden-rod listings pair an 8-inch rod with shelves about 8-1/2 to 10 inches deep, and a 12-inch rod with shelves about 12-1/2 to 14 inches deep. Deeper shelves add leverage, so a 12-inch shelf loads the top screws 50 percent harder than an 8-inch shelf carrying the same weight at its center.
What screw length should I use for a floating shelf cleat?
Count everything the screw passes through. With 1/2-inch drywall, a 3/4-inch cleat needs about a 3-inch screw for 1-3/4 inches in the stud, while a 2×2 cleat (1-1/2 inches thick) needs a 4-inch screw to reach 2 inches. A 3-inch screw through a 2×2 cleat leaves only 1 inch in the stud.
Sponsored / affiliate links. As an Amazon Associate I earn from qualifying purchases. I may earn additional commission from eligible campaigns.