ACE Hardware Polyurethane: Best Products & How To Apply
It can be super frustrating when you’re working on a project, and the finish just isn’t what you hoped for. You pick out a product, thinking it’s the one, only to find it doesn’t quite hold up or look as good as you imagined. This happens a lot with wood finishes.
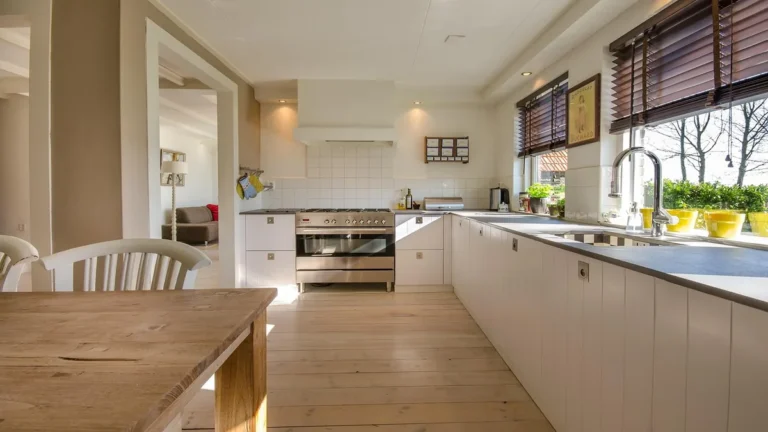
Getting that smooth, protective layer on furniture, floors, or crafts is important. We want it to look good and last a long time. If you’re looking at Ace Hardware’s polyurethane options, you’re probably wondering which one is best and how to put it on right.
Let’s break it down so you can get that perfect, lasting shine.
Ace Hardware offers a range of polyurethane finishes, each suited for different project needs. Choosing the right product involves considering the type of wood, the desired sheen, and the level of durability required. Proper application, including surface preparation and careful application techniques, is key to achieving a professional and long-lasting result.
Understanding Polyurethane Finishes
Polyurethane is a type of plastic that hardens into a tough, protective coating. It’s often used on wood. Think of it like a clear shield for your furniture or floors.
It stops scratches, water, and wear and tear from damaging the wood underneath. This makes your items look better for longer.
There are two main types of polyurethane you’ll find. One is oil-based. The other is water-based.
They both do a good job protecting wood. But they behave a little differently. Knowing these differences helps you pick the right one for your task.
This is the first step to a great finish.
Types of Polyurethane at Ace Hardware
Ace Hardware carries a few different brands and types of polyurethane. You’ll often see options from brands like ZAR, Minwax, and their own Ace brand. The biggest choice usually comes down to oil-based versus water-based.
Let’s look closer.
Oil-Based Polyurethane
Oil-based poly is a classic choice. It’s known for being very durable. It also gives wood a warm, amber tone.
This can look really nice on darker woods. It dries slower than water-based poly. This slow drying can be good.
It lets the finish level out smoothly. This means fewer brush marks if you apply it carefully.
However, oil-based poly has a strong smell. You need good ventilation when you use it. It also requires mineral spirits to clean up your brushes and tools.
This can be a bit messier. The amber color it adds isn’t always what people want. It can change the original color of lighter woods.
It might make them look more yellow or orange.
Water-Based Polyurethane
Water-based poly, sometimes called polycrylic, is a more modern option. It dries much faster. This is great if you need to get a project done quickly.
It also has less of a smell. Cleanup is super easy. You just need soap and water for your brushes.
This makes it a favorite for many DIYers.
Water-based poly dries clear. It doesn’t add much color to the wood. This is ideal if you want to preserve the natural look of light woods like pine or maple.
It’s also very durable. Some people think oil-based is tougher. But modern water-based formulas are very strong too.
They are good for high-traffic areas like tabletops or bar tops.
Sheen Levels Explained
Polyurethane comes in different sheens. This affects how shiny your finish will be. It’s important to pick the right one for the look you want.
- High-Gloss: This is the shiniest. It reflects a lot of light. It makes wood look very smooth and almost like glass.
- Semi-Gloss: This has a nice shine, but not as much as high-gloss. It’s a popular choice for many projects.
- Satin: This offers a soft, low-sheen look. It hides minor imperfections well. It feels smooth to the touch.
- Matte/Flat: This has almost no shine at all. It gives wood a very natural, non-reflective look. It’s good for a very rustic or modern style.
Most brands offer these sheens in both oil and water-based formulas.
Choosing the Right Polyurethane for Your Project
Now that you know the types, how do you pick? It depends on what you’re finishing. And what you want it to look like.
Ace Hardware’s staff can help guide you. But here are some general rules.
For furniture that will see a lot of use, like a dining table or coffee table, durability is key. Both oil-based and good quality water-based poly will work. If you want a warm, antique look, oil-based might be your pick.
If you want to keep the wood color light and bright, go with water-based.
For floors, oil-based polyurethane is often recommended for its extreme hardness. However, modern water-based floor polyurethanes are also very good. They dry faster, meaning less downtime for your room.
Check the product label for specific floor use recommendations.
For craft projects or items that don’t get much wear, like picture frames or decorative boxes, almost any type will do. Water-based is usually easier to work with here. It dries fast and is easy to clean up.
This lets you move on to the next step of your craft more quickly.
Consider the existing finish too. If you’re refinishing something that already has an oil-based finish, it’s usually best to stick with oil-based. Applying water-based over oil-based can sometimes lead to adhesion problems.
Always test in an inconspicuous area if you’re unsure.
My Own Polyurethane Pickle
I remember one time, I was working on an old wooden chest for my living room. It was a family heirloom, and I wanted it to look its best. I sanded it down perfectly.
It was so smooth. I wanted a finish that would protect it but also give it a nice, deep glow. I went to Ace Hardware.
I saw a can of what I thought was the perfect oil-based polyurethane. It promised amazing durability.
I started applying it. The smell was strong, even with the garage door open. I used a good brush.
But I wasn’t really used to how slow oil-based poly dries. I thought I had it spread evenly. But as it dried, I started seeing little streaks.
And some spots looked thicker than others. I got a little panicked. I tried to fix it while it was still wet, but that just made it worse.
It looked blotchy and uneven. I was so disappointed. It felt like I had ruined the chest.
I learned then that even with good products, the application method is super important. And sometimes, faster-drying is better for beginners.
Polyurethane Application Steps
Getting a smooth finish is all about preparation and technique.
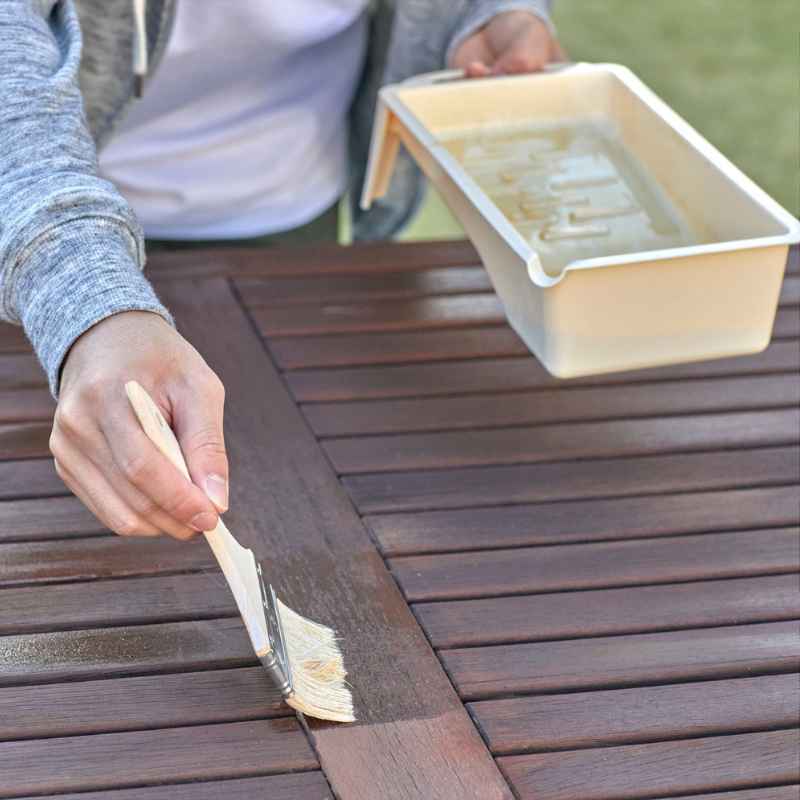
- Prepare the Surface: Sand the wood smooth. Start with a medium grit and move to a fine grit. Clean off all dust thoroughly. A tack cloth is great for this.
- Stir, Don’t Shake: Always stir polyurethane gently. Shaking creates air bubbles. These bubbles can end up in your finish.
- Apply Thin Coats: Use a good quality synthetic brush for water-based. Use a natural bristle brush for oil-based. Apply thin, even coats. Brush in the direction of the wood grain.
- Feather Your Strokes: Overlap your brush strokes slightly. Work quickly but carefully. Avoid going back over an area that has started to dry.
- Let Coats Dry Fully: Wait for each coat to dry completely. Check the product can for drying times. This is usually longer for oil-based.
- Light Sanding Between Coats: After each coat dries (except the last one), lightly sand the surface. Use a very fine grit sandpaper (220 or higher). This knocks down any dust nibs or rough spots. Clean off all dust again.
- Apply Multiple Coats: Most projects need at least 2-3 coats. More durable surfaces like floors might need 4-5 coats.
Surface Preparation is Crucial
This is probably the most important step. No matter how good the polyurethane is, if the surface isn’t ready, your finish won’t look good. Or it won’t last.
Take your time here. It’s worth it.
First, you need to sand the wood. Start with a medium grit sandpaper, like 100 or 120 grit. This gets rid of any old finish or imperfections.
Then, move to a finer grit. Use 180 or 220 grit. This makes the wood surface super smooth.
A smooth surface means the polyurethane will go on evenly. It also helps it stick better.
After sanding, you MUST get rid of all the dust. Wood dust is tiny. It gets everywhere.
Use a vacuum cleaner with a brush attachment. Then, wipe the surface down with a tack cloth. A tack cloth is sticky.
It picks up the very fine dust particles that a dry cloth might miss. If you don’t get all the dust off, it will get trapped in the wet polyurethane. This makes your finish look bumpy.
It will be visible. And it will weaken the finish.
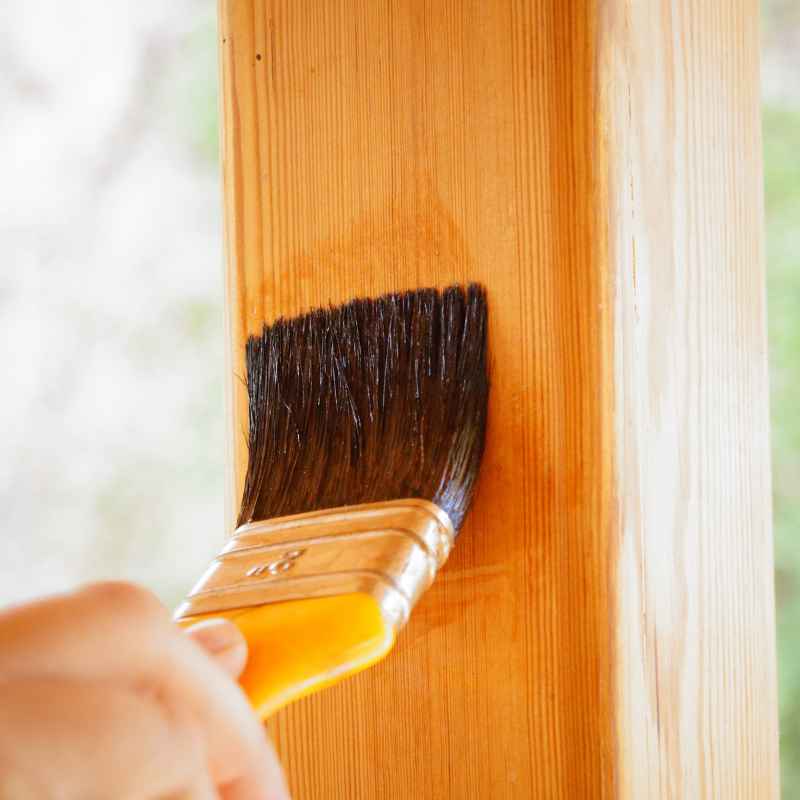
Application Techniques for a Smooth Finish
How you put on the polyurethane matters a lot. You want an even layer. You don’t want drips or runs.
And you want to avoid brush marks as much as possible.
First, read the can! Each product might have slightly different advice. But generally, you want to stir the polyurethane.
Do NOT shake the can. Shaking introduces air bubbles. These bubbles can pop when the finish dries.
This leaves little craters. Gently stir it with a stir stick. Mix it well but slowly.
Use a good quality brush. For water-based poly, a synthetic brush is best. For oil-based poly, a natural bristle brush is often recommended.
Dip the brush into the can. Don’t load it up too much. You want a thin, even coat.
Start at one end of the wood surface. Brush in the direction of the wood grain. Apply steady pressure.
When you get to the end of a stroke, slightly lift the brush. This helps to feather the edge. It blends it into the next stroke.
Try to make long, even strokes. Don’t stop in the middle of a large area. Work your way across the entire surface.
If you have to stop, try to do it at a natural edge or seam.
Work fairly quickly. Polyurethane starts to skin over as it dries. If you try to go back over an area that has already begun to dry, you’ll create drag marks.
These are hard to fix. It’s better to do a light coat and let it dry. Then apply another one if needed.
Most projects need at least three thin coats for good protection and a nice look.
Fast Facts: Polyurethane Drying Times
Drying times can vary based on humidity and temperature. Always check the product can for specific times.
- Water-Based Polyurethane:
- To touch: 30 minutes – 1 hour
- To recoat: 2-4 hours
- Full cure: 7-14 days
- Oil-Based Polyurethane:
- To touch: 6-8 hours
- To recoat: 12-24 hours
- Full cure: 30 days or more
Note: “Full cure” means the finish has reached its maximum hardness and durability.
Sanding Between Coats: The Secret to Smoothness
This is a step many people skip. But it makes a huge difference. After a coat of polyurethane dries, the surface might feel a little rough.
This can be from tiny dust particles that settled. Or it could be from a few small imperfections in the coat itself.
Take some very fine-grit sandpaper. I like to use 220 or 320 grit. You can also use a fine-grit sanding sponge.
Gently sand the entire surface. You’re not trying to remove the finish. You’re just knocking down any high spots or rough bits.
It should feel much smoother after this. You’ll see a fine dust in the air. This is what you’re removing.
Again, clean this dust off with a tack cloth. Then apply your next coat.
This process of sanding and cleaning between coats builds up a super smooth finish. Each layer bonds well to the one below. The final result looks professional.
It feels smooth as silk. This is what makes a piece of furniture look truly high-quality. It’s the difference between a DIY project and a store-bought piece.
Real-World Context: Where Polyurethane Shines (Literally)
Polyurethane is used everywhere. You see it on coffee tables in living rooms. It protects the wood from drinks and remotes.
It’s on dining tables where families eat. It handles spills and dropped forks. On kitchen cabinets, it fights grease and moisture.
Bar tops get constant use. They need a super tough finish. Polyurethane handles this well.
Wooden floors are a big one. Especially in U.S. homes.
Hardwood floors are beautiful. But they need protection. Polyurethane is the go-to for this.
It stops shoes from scratching. It resists pet claws. It can handle high traffic from kids running around.
The choice between oil and water-based matters here too. Oil-based gives a classic amber glow. Water-based keeps the wood color lighter.
And it dries much faster, meaning your room is back in use sooner.
Even things like wooden railings on stairs or banisters get polyurethane. They are touched all the time. They need a durable, smooth surface.
Picture frames, wooden toys, cutting boards (with food-safe finishes, of course) – polyurethane is versatile. The key is matching the product to the use.
What This Means for You: When is it Normal?
So, what does all this mean for your projects? It means you have options. And with the right knowledge, you can get great results.
It’s normal for polyurethane to:
- Add a slight sheen to the wood, even the matte finishes have a bit of luster.
- Deepen the color of wood slightly, especially oil-based poly.
- Feel smooth and slick to the touch once fully cured.
- Offer excellent protection against moisture and everyday wear.
It’s also normal to need multiple coats. Don’t expect perfection with just one. And it’s normal to have to wait for it to dry and cure.
Rushing the process is a common mistake. Patience really pays off with wood finishes.
When to Worry: Signs of Trouble
There are times when polyurethane doesn’t behave. If you notice these things, it might be a sign of a problem:
- Peeling or flaking: This usually means the surface wasn’t prepped right. Or the new polyurethane isn’t bonding to an old finish.
- Sticky spots that don’t go away: This can happen if a coat was applied too thickly. Or if it wasn’t allowed to dry or cure long enough. High humidity can also cause this.
- Cloudy or milky finish: This is often a sign of moisture. It could be from applying it in a humid environment. Or water getting into the finish while it’s wet. It can also happen if you used water-based poly over an oil-based primer that wasn’t fully cured.
- Brush marks that are very obvious: This usually points to poor application technique. Or using the wrong type of brush. Or trying to overwork the finish.
- Cracking: This is rare but can happen if the finish is applied too thick in one coat. Or if the wood expands and contracts a lot.
If you see these issues, don’t despair. Sometimes you can fix them. Often, it involves sanding down the affected area and reapplying the finish correctly.
Learning from mistakes is part of the process.
Quick Checks Before You Start
A few simple things to do before you even open the can:
- Check the Temperature: Most polyurethanes apply best between 60-80°F (15-27°C). Avoid applying in very cold or very hot conditions.
- Ventilation: Ensure good airflow. Open windows or use fans. This helps with drying and fume dissipation. Oil-based needs more ventilation than water-based.
- Your Tools: Have your brushes, rollers, or foam applicators ready. Make sure they are clean and suitable for the type of polyurethane.
- Test Area: If you’re unsure about how the finish will look, test it on a scrap piece of the same wood. Or on an inconspicuous spot of your project.
Quick Tips for Ace Hardware Polyurethane Projects
Here are some handy tips to make your polyurethane project go smoother:
- Always buy a little extra. It’s better to have too much than to run out mid-project. Running out means you might have a color or sheen difference if you try to match it later.
- Use a foam brush for small items. Foam brushes can give a very smooth finish on small crafts or edges. They don’t leave brush marks like bristles can.
- Consider a pre-stain conditioner. For blotchy woods like pine or maple, a pre-stain conditioner helps the stain go on more evenly. Then apply polyurethane over the stain.
- Don’t rush the cure time. Even though a finish might be dry to the touch, it needs time to cure fully. This is when it gets its hardest. Be gentle with your finished item for the first few weeks.
- Store leftover polyurethane properly. Seal the lid tightly. Store the can upside down on a level surface. This creates a seal that prevents the lid from rusting shut.
- For very smooth finishes, use a spray polyurethane. Ace Hardware might carry spray cans. These offer a very fine mist and can be great for intricate pieces. Practice on scrap wood first.
Frequently Asked Questions About Polyurethane
What is the difference between oil-based and water-based polyurethane?
Oil-based polyurethane is more durable and adds a warm, amber tone to wood. It dries slower and requires mineral spirits for cleanup. Water-based polyurethane dries clear, much faster, and cleans up with soap and water.
Can I apply polyurethane over latex paint?
Yes, you can apply water-based polyurethane over fully cured latex paint. It acts as a protective topcoat. Make sure the paint is completely dry and clean before applying the poly.
How many coats of polyurethane should I use?
Most projects need at least 2-3 thin coats of polyurethane for good protection and a smooth finish. High-traffic items like tabletops or floors may require 4-5 coats.
Do I really need to sand between coats of polyurethane?
Yes, sanding lightly between coats with a very fine-grit sandpaper (220-320) is highly recommended. It removes dust nibs and imperfections, creating a much smoother final finish.
Can I use polyurethane on outdoor furniture?
For outdoor furniture, you need a polyurethane specifically designed for exterior use. These contain UV inhibitors and are formulated to withstand weather. Standard interior polyurethanes will break down quickly outdoors.
What’s the best way to apply polyurethane without brush marks?
Use a high-quality brush, apply thin, even coats, and work in the direction of the wood grain. Avoid overworking the finish and allow each coat to dry completely before applying the next. Feather your strokes at the end of each pass.
How do I clean up polyurethane brushes?
For water-based polyurethane, clean brushes with soap and warm water immediately after use. For oil-based polyurethane, clean brushes with mineral spirits, then wash with soap and water.
Final Thoughts on Your Polyurethane Journey
Choosing and applying polyurethane might seem a bit daunting at first. But by understanding the types available at Ace Hardware and following good preparation and application steps, you can achieve beautiful, lasting results. Remember that practice makes perfect.
Each project is a chance to learn and improve your skills. Enjoy the process of bringing out the best in your wood projects!