How To Fix A Cloudy Polyurethane Finish (Step-By-Step)
This guide will help you understand why your polyurethane finish gets cloudy. More importantly, it will show you simple, clear steps to fix it. We’ll cover everything from identifying the cause to making your wood shine like new again.
Get ready to bring back that crystal-clear look you worked so hard for.
Fixing a cloudy polyurethane finish involves identifying the cause, such as moisture or improper drying, and then applying targeted solutions like gentle buffing, re-coating with proper application, or using specialized cleaners to restore clarity and protect your wood.
Understanding Why Polyurethane Finishes Turn Cloudy
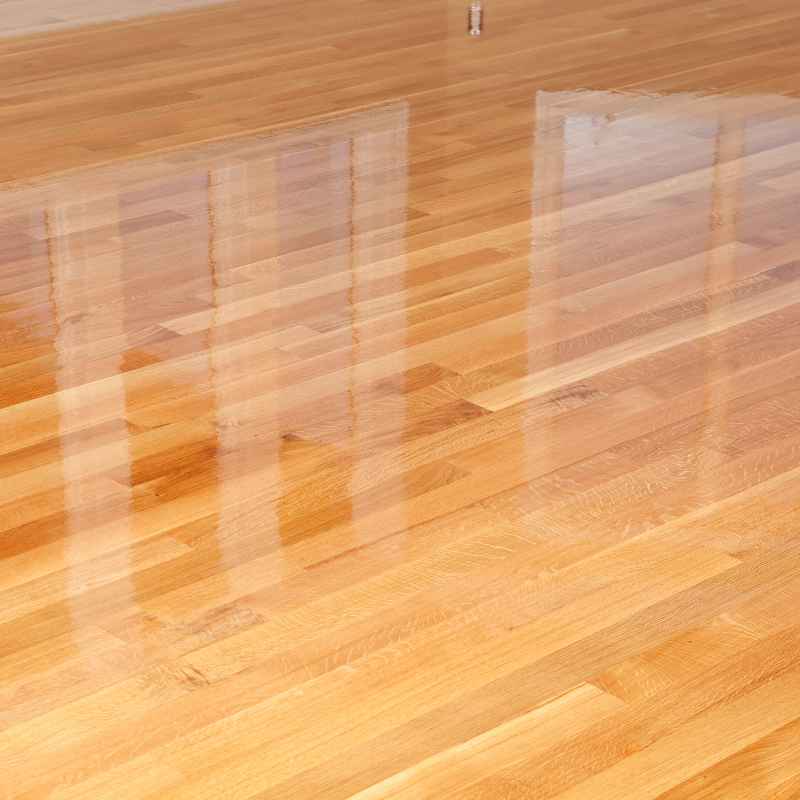
Cloudy polyurethane, often called hazing or blushing, is a common issue. It makes your wood look dull instead of shiny and clear. This usually happens when the finish doesn’t dry clear.
It traps moisture or doesn’t cure right. This traps air bubbles. These tiny bubbles scatter light.
That’s what makes it look cloudy or milky.
There are a few main reasons this happens. Knowing them helps you fix it. It also helps you avoid it next time.
We’ll look at common causes like moisture. We’ll also talk about how you apply the finish. The temperature matters a lot too.
Even the type of polyurethane you use plays a part.
My Own Cloudy Finish Nightmare
I remember working late one night on a wooden dresser. It was a beautiful antique piece I found at a flea market. I’d sanded it down perfectly.
I carefully applied the first coat of oil-based polyurethane. The next morning, I went to check on it. My heart sank.
The entire top surface was milky white. It looked like a ghost had spilled milk all over it. I felt a wave of panic.
All that work seemed wasted. I almost wanted to throw the dresser out. But I took a deep breath.
I knew there had to be a way to fix it.
Common Causes of Cloudy Polyurethane
Let’s dive deeper into why your finish might be cloudy. Understanding these reasons is key to fixing and preventing the problem.
Moisture in the Air
This is a big one. Polyurethane, especially oil-based kinds, doesn’t like humidity. If the air is too damp when you apply it, moisture can get trapped.
This moisture interferes with the drying process. It causes the finish to turn white or milky. It’s like trying to paint in a steamy bathroom.
The finish gets foggy.
High humidity is common in certain seasons. It can also happen if you work in a damp basement or garage. Even breathing on the surface while it’s wet can add moisture.
Tiny water droplets can get stuck. They make the finish cloudy.
Humidity’s Impact
High Humidity: When humidity is over 70%, it’s risky.
Trapped Moisture: Water droplets get into the wet finish.
Result: Hazing, blushing, and a dull look.
Tip: Always check your local weather report before starting.
Temperature Issues
Polyurethane needs the right temperature to cure properly. If it’s too cold, it dries too slowly. This gives moisture more time to get trapped.
If it’s too hot, it can dry too fast on the surface. This seals in solvents and moisture underneath. This causes cloudiness too.
The can of polyurethane will tell you the best temperature range. It’s usually between 65°F and 80°F (18°C to 27°C). Working outside this range is a gamble.
It’s best to wait for good weather. Or find a climate-controlled space.
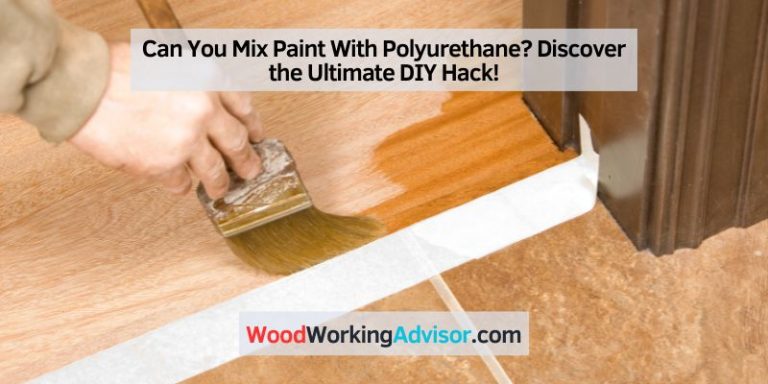
Application Errors
How you apply the polyurethane matters a lot. Putting it on too thick is a common mistake. Thick coats dry unevenly.
The outside might dry first. This traps the wet finish underneath. It can’t release solvents or moisture properly.
This leads to cloudiness. It can also cause drips and sags.
Another error is not stirring the finish. Many people shake the can. This creates air bubbles.
You should gently stir it. This mixes the contents without adding too much air. Brushing too vigorously can also whip air into the finish.
Application Dos and Don’ts
DO: Stir gently. Apply thin coats.
DON’T: Shake the can. Apply thick coats. Brush too hard.
Why: Thin coats cure evenly. Proper stirring prevents air bubbles.
Contamination
Sometimes, tiny particles get into the wet finish. This could be dust, lint, or even oil from your hands. These particles disrupt the smooth curing process.
They can create small weak spots. These spots might look cloudy. They can also catch moisture and cause blushing.
Always work in a clean area. Wear clean clothes. Use a clean brush or applicator.
Make sure your workspace is free from dust. Wiping down surfaces before applying is a good habit.
Type of Polyurethane
Not all polyurethanes are the same. Water-based and oil-based finishes have different properties. Water-based finishes dry faster.
They are less prone to moisture issues. However, they can sometimes dry too quickly in dry air. This can also cause problems.
Oil-based finishes dry slower. They can be more susceptible to blushing if humidity is high.
Also, some formulas are better than others. Cheaper or older formulas might not perform as well. Always choose a quality product.
Read reviews if you’re unsure.
How to Fix a Cloudy Polyurethane Finish
So, your finish is cloudy. Don’t despair! There are several ways to fix it.
The best method depends on how bad the cloudiness is. And what caused it.
Step 1: Identify the Cause and Severity
First, look closely at the cloudy areas. Is it a light haze? Or are there distinct white spots?
Does it feel sticky? Or is it hard but dull?
If it’s just a slight haze, you might be able to buff it out. If it’s bad, you might need to reapply. We’ll go through these options.
Method 1: Buffing Out Light Hazing
This method works for minor cloudiness. It’s like polishing a car. You’re gently removing a thin layer.
Materials You’ll Need
- Soft cloths (microfiber is best)
- Rubbing compound (for cars or furniture)
- Mineral spirits (for oil-based finishes)
- Fine-grit steel wool (0000 grade)
- Your preferred furniture polish or wax
The Buffing Process
First, make sure the finish is completely dry and hard. This can take a few days, even if it feels dry to the touch. Patience is important here.
Take a clean, soft cloth. Dip it into a small amount of rubbing compound. Gently rub the cloudy area in a circular motion.
Don’t press too hard. You want to polish away the cloudy layer. This takes time and effort.
You might need to do this for a while.
As you work, wipe away the excess compound with another clean cloth. You should start to see the clarity return. If the rubbing compound seems too harsh, try a milder polish.
For stubborn spots, you can try 0000 grade steel wool. Use it very lightly. Always test in an inconspicuous spot first.
After buffing, clean the surface with mineral spirits if you used an oil-based finish. This removes any residue. For water-based finishes, a damp cloth is usually enough.
Finally, apply a good furniture polish or wax. This will restore shine and add protection. Buff it out to a nice sheen.
Buffing Tips
Test First: Always try on a hidden spot.
Gentle Pressure: Don’t scrub hard.
Clean Cloths: Use fresh cloths often.
Patience: This takes time.
Method 2: Using Mineral Spirits for Mild Blushing
Mineral spirits can sometimes lift trapped moisture. This is especially true for oil-based polyurethanes. It works best on light to moderate cloudiness.
How to Use Mineral Spirits
Ensure the finish is fully dry. Get a clean, soft cloth. Dampen it with mineral spirits.
Don’t soak it. Gently wipe the cloudy areas. Work in small sections.
Wipe in the direction of the wood grain.
As you wipe, you might see the cloudiness disappear. Keep wiping until the area looks clear. Use a clean, dry cloth to wipe away any excess mineral spirits.
Let the surface dry completely. You should see improved clarity.
If this works, you can apply a thin coat of paste wax afterward. This adds protection and shine. Be aware that mineral spirits can slightly soften some finishes.
So, do a small test first. This method is less abrasive than buffing. It’s a good first step for oil-based finishes.
Mineral Spirits Check
For: Oil-based polyurethanes only.
Action: Lifts trapped moisture and solvents.
Use: Dampen cloth, wipe gently.
Caution: Test first; may soften finish.
Method 3: Reapplying the Finish (When Other Methods Fail)
If buffing or mineral spirits don’t work, the cloudiness is likely deep. It means the finish didn’t cure correctly. In this case, you’ll need to remove the bad finish and reapply it.
This sounds daunting, but it’s often the best way to get a perfect result.
Step 3a: Remove the Damaged Finish
You’ll need a chemical stripper. Choose one safe for wood finishes. Wear gloves and eye protection.
Work in a well-ventilated area. Follow the stripper’s instructions carefully.
Apply the stripper with a brush. Let it sit for the recommended time. The old finish should start to bubble or soften.
Use a plastic scraper or putty knife to gently lift the softened finish. Be careful not to gouge the wood. You might need steel wool or a stripper-wash solvent to clean up residue.
Once all the old finish is removed, clean the wood thoroughly. Let it dry completely. You may need to do a light sanding.
Use fine-grit sandpaper (like 220-grit). This smooths the wood for the new finish.
Step 3b: Prepare for Reapplication
Clean the wood again. A tack cloth is great for this. It picks up fine dust.
Make sure your workspace is as dust-free as possible. Check the weather again. Aim for low humidity and moderate temperatures.
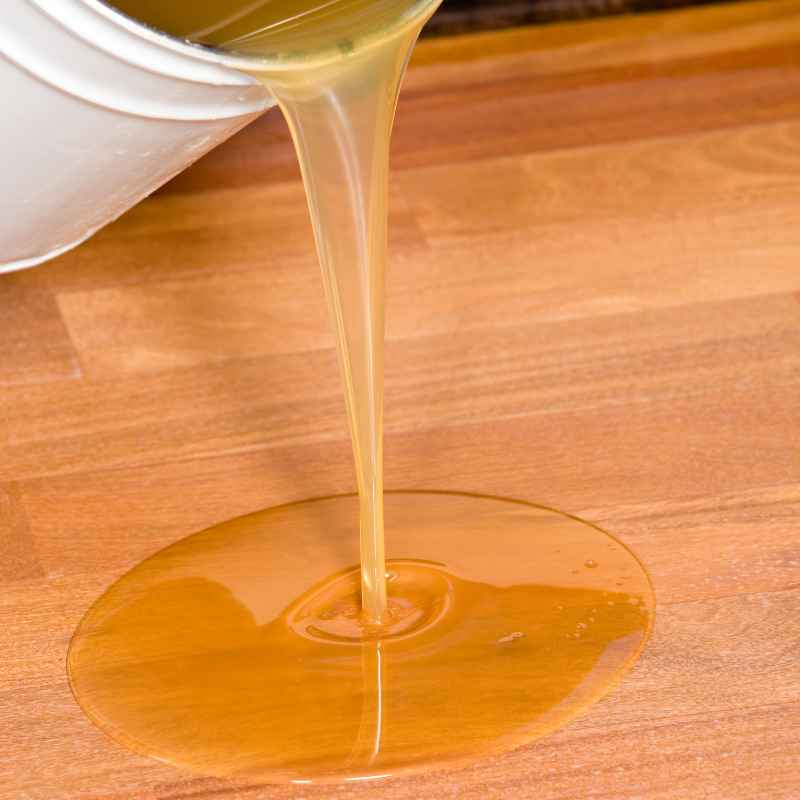
Stir your polyurethane gently. Do not shake the can. If you’re using oil-based polyurethane, ensure it’s the same type as before.
You can sometimes mix brands, but it’s risky. Water-based is usually fine to go over cured oil-based, but not the other way around.
Step 3c: Apply New Coats
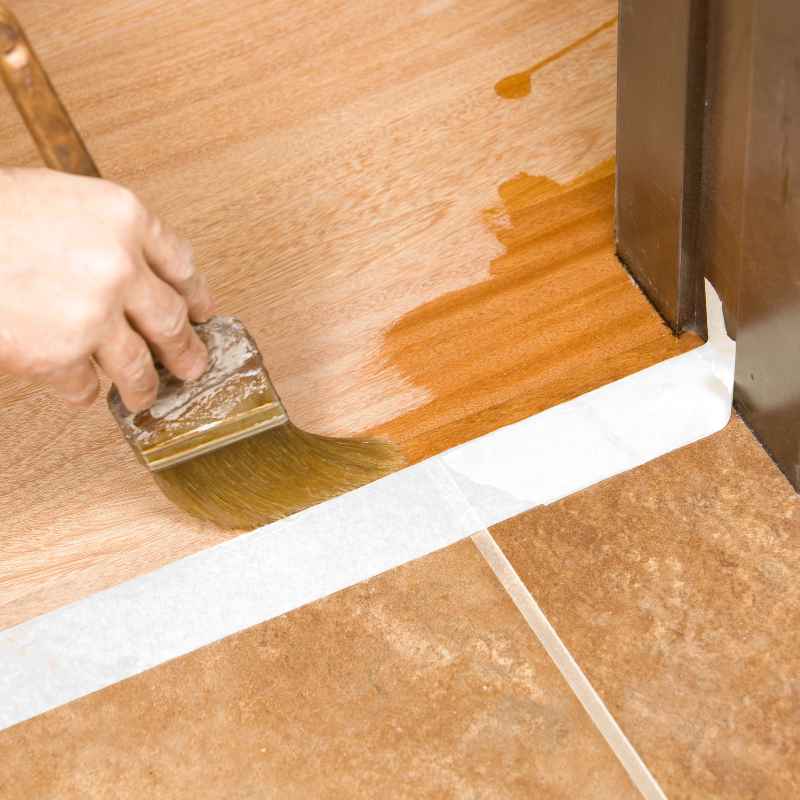
Apply thin, even coats. Use a good quality brush or foam applicator. Work in the direction of the wood grain.
Avoid overloading your applicator. Brush out any drips immediately. Let each coat dry completely according to the manufacturer’s instructions.
This usually means at least 4-6 hours.
Lightly sand between coats. Use 320-grit sandpaper or finer. This helps each new coat adhere better.
After sanding, clean off the dust with a tack cloth. Apply your final coat. Let it cure fully.
Curing can take several days to a week.
Reapplication Checklist
1. Strip: Remove old, cloudy finish.
2. Clean: Make wood spotless.
3. Prep: Light sand, dust off.
4. Apply: Thin, even coats. Stir, don’t shake.
5. Sand: Between coats (220-320 grit).
6. Cure: Allow full drying time.
Real-World Contexts and Scenarios
Let’s think about where and why this might happen in your home.
The Garage Workbench Project
Many people do woodworking in their garages. Garages are often uninsulated. Temperatures can swing wildly.
Humidity can also be high, especially after rain. If you apply polyurethane on a cool morning, it might not dry properly. Then, the afternoon sun heats it up.
This can trap moisture and solvents.
I once saw a friend refinish a table in his garage. He applied the finish late in the evening. The next day was humid and warm.
The table top developed a cloudy patch near the edge. It was from the moisture in the air.
Renovating a Bathroom Vanity
If you’re refinishing a vanity for a bathroom, humidity is a major factor. Bathrooms are naturally steamy. Applying polyurethane to a vanity right after its shower use is a recipe for disaster.
The finish needs a dry environment to cure.
The wood itself can also absorb moisture from the air. This moisture can then get trapped under the curing polyurethane. This causes hazing.
It’s why many pros recommend waiting until the room is aired out and dry before finishing.
Finishing Wooden Toys or Crafts
When making items for kids, safety is key. But so is appearance. If a child accidentally breathes on a wet finish, it can cause a small cloudy spot.
Or if the craft is done in a room with a humidifier on, that can affect the finish. Even indoor plants can raise humidity.
It’s important to use finishes that are safe for children. But also to apply them in ideal conditions. A well-ventilated room with stable temperature and low humidity is best.
What This Means for You
Understanding cloudiness helps you avoid headaches. It means your finished wood projects can look their best. It’s about paying attention to the details.
When a Cloudy Finish Is Normal (or Less Concerning)
Sometimes, a very slight cloudiness is just part of the process. For certain types of finishes, like a matte or satin polyurethane, there are additives to reduce shine. These can sometimes make the finish look slightly less clear in the can or on application.
This is normal and part of achieving that specific sheen.
Also, some very cheap or old formulas might inherently be less clear. But for most standard polyurethanes, a clear finish is the goal. If your project looks significantly cloudy, it’s usually a problem.
When to Worry and Act
You should worry if the cloudiness is widespread. Or if it’s very noticeable and detracts from the beauty of the wood. If the finish feels sticky or uneven after it should be dry, that’s a sign of a curing problem.
This usually needs more than just buffing.
Persistent stickiness or very thick white patches mean the finish didn’t cure properly. This can happen due to moisture, temperature, or improper application. Acting quickly can save your project.
Simple Checks You Can Do
- Touch Test: After the recommended drying time, gently press a fingernail into an inconspicuous area. If it leaves a dent, it’s not fully cured.
- Visual Check: Look at the finish in different lights. Does it have a uniform sheen? Or are there milky spots?
- Smell Test: Does the finish smell strongly of solvents after days? This can indicate it’s not curing correctly.
Quick Tips for a Clear Finish
Preventing cloudiness is easier than fixing it. Here are some tips.
1. Choose the Right Conditions
Always check the temperature and humidity. Aim for low humidity (under 50-60% is ideal for oil-based). Keep the temperature between 65°F and 80°F (18°C to 27°C).
Work in a well-ventilated, dust-free area.
2. Apply Thin Coats
Thin coats dry more evenly. They allow solvents and moisture to escape. Apply one thin coat.
Let it dry completely. Then apply the next. Two or three thin coats are better than one thick one.
3. Stir, Don’t Shake
Shaking introduces air bubbles. These bubbles can cause cloudiness. Gently stir the polyurethane to mix the ingredients.
If you need to transfer it to a smaller container, pour slowly.
4. Use Quality Materials
Buy good quality polyurethane from a reputable brand. Use good brushes or applicators. Cheap materials can lead to poor results.
Make sure the product is fresh.
5. Allow Full Cure Time
Don’t rush things. Even if the finish feels dry, it may not be fully cured. Curing is when the finish reaches its maximum hardness and durability.
This can take several days or even weeks. Avoid heavy use of the item until it’s fully cured.
Prevention Secrets
Environment: Low humidity, moderate temp.
Application: Thin coats, gentle stirring.
Materials: Quality brand, clean tools.
Patience: Allow full drying and curing.
Frequently Asked Questions
What is the quickest way to fix a cloudy polyurethane finish?
For light cloudiness, try buffing with a soft cloth and rubbing compound. For more severe issues, you may need to remove the finish and reapply. Always test any fix on an inconspicuous area first.
Can I fix cloudy water-based polyurethane?
Yes, but gently. Water-based poly is less forgiving. For light haze, try buffing with a very fine steel wool (0000 grade) or a soft cloth and a specific water-based finish restorer.
If it’s bad, removal and reapplication are best.
Will mineral spirits damage a clear coat of polyurethane?
Mineral spirits can soften some finishes, especially when used heavily. They are generally safe for oil-based polyurethane when used as a cleaner or to address slight blushing. Always test first and use sparingly.
They are not recommended for water-based finishes.
How long does it take for polyurethane to fully cure?
Polyurethane usually feels dry to the touch in 4-6 hours. However, full curing can take anywhere from 7 days to 30 days, depending on the product and conditions. Avoid heavy use or cleaning during this time.
Why did my polyurethane turn white after applying it outdoors?
Applying polyurethane outdoors, especially in humid or damp conditions, is risky. Moisture in the air can get trapped in the wet finish as it dries. This moisture causes the finish to blush and turn white or milky.
Is it okay to apply a new coat of polyurethane over a cloudy finish?
No, it’s generally not a good idea. Applying a new coat over a cloudy or poorly cured finish can seal in the problem. It might also lead to adhesion issues.
It’s best to fix the cloudy layer first, or remove it and start fresh for the best results.
Conclusion
Seeing a cloudy polyurethane finish can be disheartening. But it’s a common issue with clear solutions. By understanding the causes—like moisture, temperature, and application—you can take steps to fix it.
Whether it’s gentle buffing or a full reapplication, your wood can regain its clear, beautiful sheen. Remember, patience and proper technique are your best tools.