Are Metal Studs Stronger Than Wood? Essential Guide
While often perceived as stronger in specific ways, it’s not a simple “yes” or “no.” Metal studs offer superior resistance to moisture, pests, and fire, and are dimensionally stable. Wood studs are easier to work with for the beginner DIYer and offer better acoustic insulation. Your choice depends on your project’s needs and your comfort level.
Welcome to the workshop, aspiring builders! Have you ever stood in the aisle at a home improvement store, staring at the different framing materials, and wondered which one is truly the best? It’s a common question, especially when you’re starting a new project, whether it’s building a simple partition wall or something a bit more ambitious. You see the shiny metal studs and the familiar wooden ones, and a big question pops into your head: Are metal studs stronger than wood? It feels like a big decision, and you want to get it right. Don’t worry, I’m here to break it down for you, step by easy-to-understand step. We’ll look at what “stronger” really means in this context, and by the end, you’ll have the confidence to choose the right material for your next DIY adventure!
Metal Studs vs. Wood Studs: Understanding “Stronger”
When we talk about building materials, “stronger” can mean a few different things. It’s not just about how much weight something can hold before it bends or breaks. For framing, strength also involves how well a material stands up to everyday challenges in a home. Let’s see how metal and wood stack up in different areas.
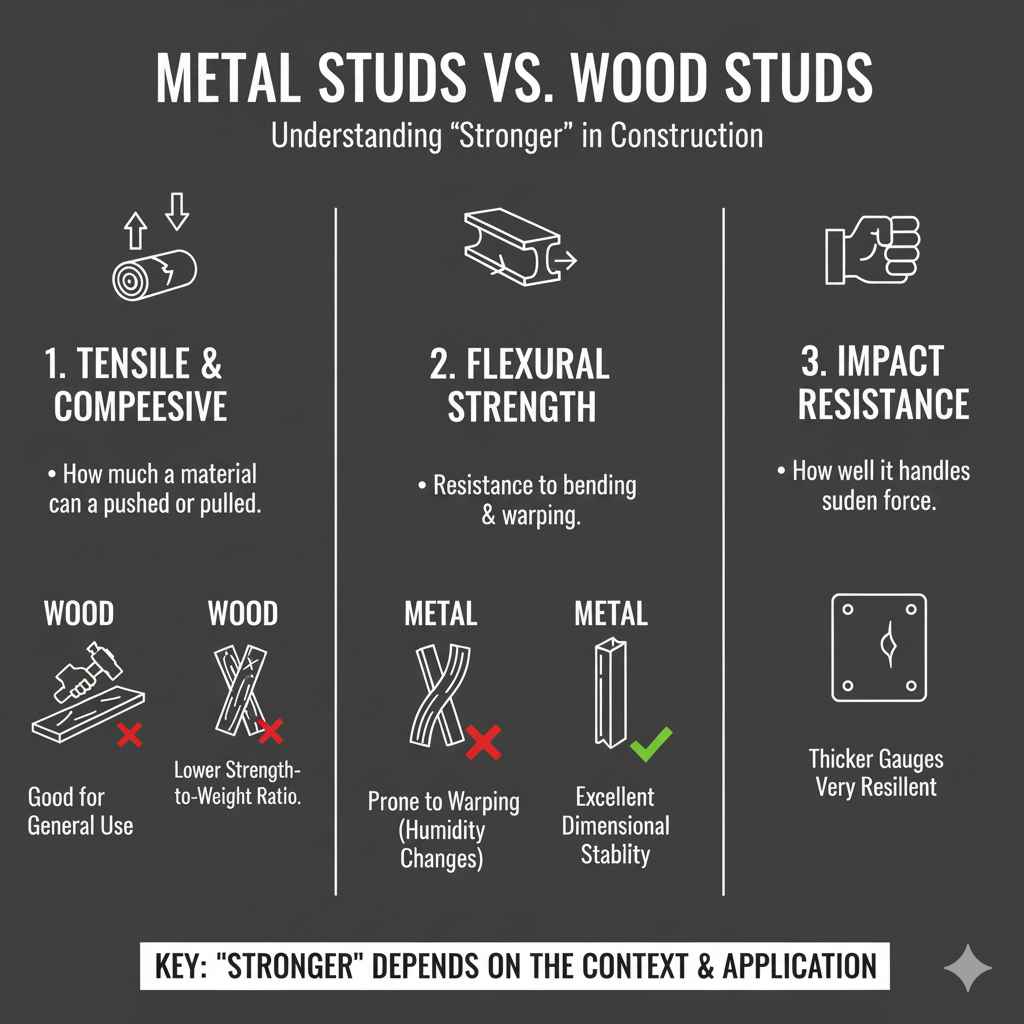
Tensile Strength and Compressive Strength
These are the more technical ways we measure how much a material can be pulled (tensile) or pushed (compressive) before it fails. In pure laboratory tests, cold-formed steel studs often show higher tensile and compressive strength per unit of weight compared to wood. This means a steel stud of a certain size might handle more direct load than a wood stud of the same size. This is a big reason why steel is used in large commercial buildings.
Flexural Strength
This refers to a material’s ability to resist bending. Again, steel generally excels here. Steel studs are less likely to warp or twist over time compared to wood. This dimensional stability is a key advantage, especially in environments where humidity fluctuates.
Impact Resistance
How well does the material handle a sudden force? Both materials can be strong enough for typical home construction. Thicker gauge steel studs can offer excellent impact resistance. Wood, especially denser hardwoods, can also be very resilient. For most DIY applications, the difference in impact resistance between standard studs isn’t a primary concern.
Key Differences: What Sets Them Apart?
Beyond just raw strength, metal and wood studs have very different characteristics that impact how you use them and how they perform in your home. Thinking about these differences will help you make a more informed decision.
Moisture and Pest Resistance
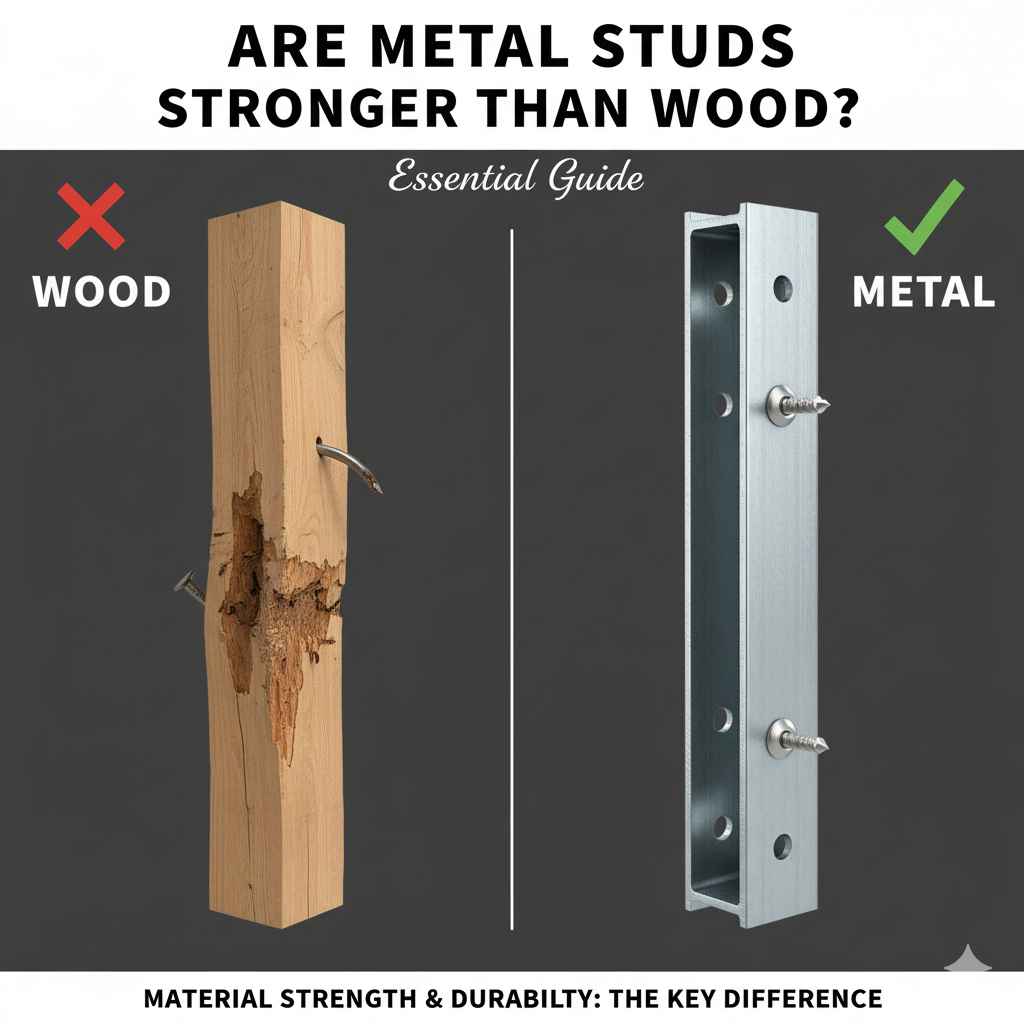
This is where metal truly shines. Wood studs, especially if not treated, can be susceptible to termites, powderpost beetles, and rot if they get wet. Metal studs are completely immune to these issues. They won’t warp, swell, or degrade due to moisture. This makes them a fantastic choice for basements, bathrooms, or areas prone to humidity. The Environmental Protection Agency (EPA) provides information on wood treatments that can enhance durability, but for pest and moisture immunity, metal is the clear winner.
Fire Resistance
Metal studs are non-combustible. This means they won’t catch fire and won’t contribute to a fire’s spread. While wood studs can be treated for fire resistance, they will eventually burn. In terms of fire safety, steel framing is a significant advantage. Building codes often reflect these safety differences, and the National Fire Protection Association (NFPA) has extensive resources on fire safety in construction.
Weight and Handling
Metal studs are significantly lighter than wood studs of comparable structural value. This can make them easier for one person to lift and maneuver into place, which can be a big plus for DIYers working alone. However, their lighter weight can also mean they can be blown around more easily on windy job sites until they are secured.
Workability: The DIYer’s Friend
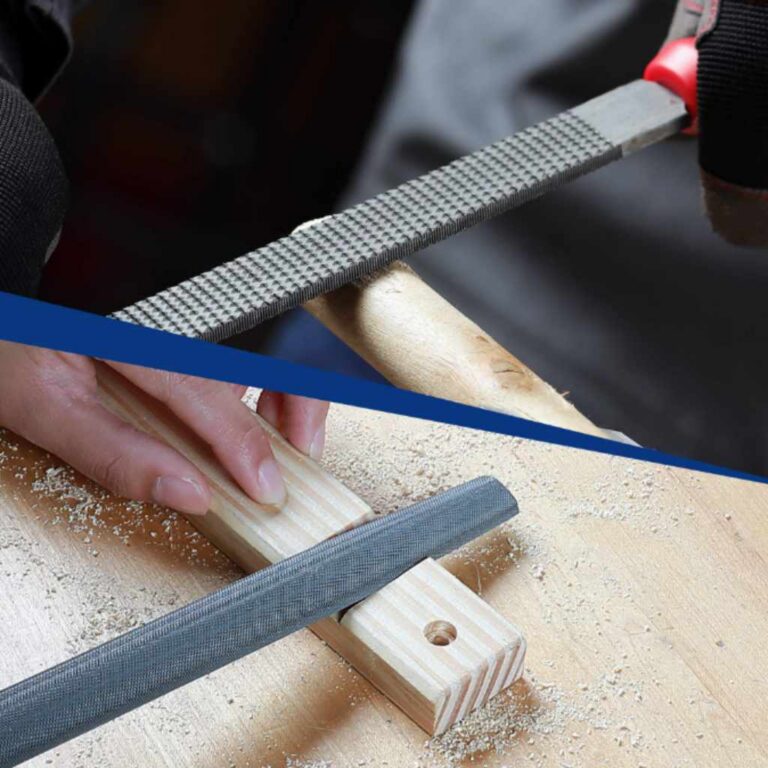
This is a huge factor for beginners. Cutting, screwing, and fastening wood studs is generally more straightforward and forgiving than working with metal. Most DIYers are familiar with basic carpentry tools, and wood is very forgiving. Metal studs typically require specialized metal cutting tools like snips or a reciprocating saw with a metal blade, and they are fastened with metal screws (often self-tapping) which can be a bit trickier to start and drive without stripping. While an experienced builder can work quickly with metal, a beginner might find wood much easier to learn on.
Sound Insulation
Wood studs generally offer better natural acoustic insulation than metal studs. The fibers in wood absorb sound vibrations more effectively. Metal studs, being harder and more conductive, can transmit sound more easily unless specific soundproofing measures are taken, such as using resilient channels or specialized insulation. For a quiet home, wood often has an edge here, though modern soundproofing techniques can level the playing field.
Cost
The cost comparison can vary based on location, market conditions, and the specific type of wood and metal being considered. Historically, wood has often been more affordable for framing residential homes. However, with fluctuating lumber prices, steel can sometimes be competitive. When you factor in the specialized tools needed for metal, the initial cost for a DIYer might seem higher.
Pros and Cons: A Quick Comparison
To help you visualize the differences, here’s a handy table:
| Feature | Metal Studs | Wood Studs |
|---|---|---|
| Structural Strength (per weight) | Generally higher tensile and compressive strength. | Good, but typically lower than steel for equivalent weight. |
| Dimensional Stability | Excellent; do not warp, twist, or shrink/swell. | Can warp, twist, or shrink/swell with humidity changes. |
| Moisture Resistance | Excellent; immune to rot and mold. | Susceptible to rot and mold if exposed to moisture. |
| Pest Resistance | Excellent; immune to termites and other pests. | Susceptible to termites and wood-boring insects. |
| Fire Resistance | Non-combustible; excellent fire rating. | Combustible; will burn and contribute to fire spread. |
| Weight | Lighter; easier to lift. | Heavier; can be more challenging to handle. |
| Workability (for beginners) | Requires specialized tools and techniques; less forgiving. | Easier to cut, fasten, and modify with common tools; very forgiving. |
| Sound Insulation | Can transmit sound more easily unless soundproofing is added. | Offers better inherent acoustic properties. |
| Durability Over Time | Very durable, consistent performance. | Durable, but performance can be affected by environmental factors. |
| Cost | Can be comparable or higher, especially when factoring in tools. | Often more affordable for DIY projects. |
When to Choose Metal Studs
Metal studs are a fantastic choice for specific applications where their unique advantages are most beneficial. If any of these situations sound like your project, metal might be the way to go:
- High Moisture Areas: Basements, garages, bathrooms, laundry rooms, or any space where condensation or potential water exposure is a concern.
- Pest Prone Zones: If you live in an area with high termite activity or concerns about other wood-boring insects.
- Fire Safety is Paramount: In areas with strict fire codes or for projects where maximum fire resistance is desired.
- Building Large Structures: For commercial buildings or large partitions where structural integrity over long spans is critical.
- Seeking Maximum Dimensional Stability: When you need a frame that will absolutely not warp or move, ensuring perfectly plumb walls over long periods.
- Working with Prefabricated Systems: Metal studs are often integrated into modular or prefabricated wall systems.
When to Choose Wood Studs
Wood studs remain the workhorse of residential construction for many good reasons, especially for DIYers.
- Beginner-Friendly Projects: If this is one of your first framing projects, wood is much more forgiving and easier to learn on.
- Renovations and Remodels: In existing homes, wood is familiar, easy to cut and fit, and integrates well with existing structures.
- Acoustic Needs: When good sound insulation is a priority and you don’t want to add extra soundproofing materials.
- Easier Electrical and Plumbing Runs: While both can accommodate it, some find it slightly easier to drill and run wires and pipes through wood.
- Budget-Conscious Projects: Often, wood will be the more economical choice for materials, especially if you have basic tools already.
- Working in Cold or Wet Conditions: While wood shouldn’t be exposed long-term, it’s generally less of a hassle to work with in slightly damp or cold outdoor conditions before everything is enclosed.
How Metal Studs Are Made (A Quick Look)
Metal studs, often referred to as light gauge steel framing, are manufactured through a process called roll forming. This involves taking coils of sheet steel and passing them through a series of rollers. These rollers progressively bend the steel into the desired stud shape (typically a C-shape with lips at the edges for stiffness), including pre-punched holes for wire and pipe passage. This precision manufacturing ensures consistent dimensions and quality. The steel used is usually galvanized to prevent rust.
For more on the manufacturing process and standards, you can refer to resources from organizations like the Steel Framing Alliance.
How Wood Studs Are Prepared
Wood studs come from lumber mills, where trees are harvested and processed into dimensional lumber. Common lumber used for framing includes species like pine, spruce, and fir. These are graded based on their strength and appearance. They are typically kiln-dried to reduce moisture content, which helps prevent shrinkage and warping after installation. Sometimes, lumber is treated with chemicals to enhance its resistance to pests and rot, especially if it will be used in basements or exterior applications. Understanding lumber grades is important; for instance, #2 grade lumber is a common choice for framing. The Forest Products Laboratory (FPL), part of the U.S. Forest Service, offers extensive research on wood properties and uses.
Building with Metal Studs: A Beginner’s Approach
If you decide to go with metal studs, here’s a simplified look at what the process involves. Remember, practice makes perfect, and patience is key!
- Layout: Mark the position of your wall on the floor and ceiling using a chalk line or pencil. This is similar to wood framing.
- Installing Tracks: Metal studs are installed within “tracks.” These are U-shaped channels that the studs slide into. Screw the bottom track to the floor and the top track to the ceiling joists, ensuring they are plumb and level.
- Cutting Studs: Measure the distance between the bottom and top tracks. Cut your metal studs to size using aviation snips (for thinner gauges) or a reciprocating saw with a metal-cutting blade (for thicker gauges). Wear safety glasses and gloves!
- Installing Studs: Slide the cut studs into the tracks, typically spaced 16 inches or 24 inches on center, depending on your needs and local building codes.
- Fastening Studs: Secure the studs to the tracks by driving metal screws (often called self-tapping screws) through the sides of the stud and into the track. It’s helpful to pre-drill holes or use a drill with a clutch setting to avoid overtightening.
- Adding Blocking and Headers: For hanging heavy items like cabinets or mounting fixtures, you’ll need to add solid blocking. This is often done by screwing solid wood blocking between the metal studs or using specialized metal blocking products.
- Finishing: Once the framing is up, you’ll attach drywall, sheathing, or other wall coverings using metal gypsum screws.
Building with Wood Studs: The Familiar Path
Wood framing is what many DIYers are most comfortable with. Here’s a quick rundown:
- Layout: Mark your wall’s position on the floor and ceiling.
- Cutting Studs: Measure and cut your wood studs to the desired height, typically allowing for the thickness of the top and bottom plates. A standard circular saw or miter saw works well for this.
- Assembling the Wall Frame: Typically, you’ll build the wall flat on the floor. Lay out your bottom plate and top plate, then insert the vertical studs between them, usually 16 inches on center. Nail or screw the studs to the plates.
- Raising the Wall: Carefully lift the assembled wall into its final position.
- Securing the Wall: Shim the top plate if needed to make it plumb, then nail or screw the top and bottom plates to the ceiling joists and floor framing.
- Adding Headers and Cripples: For windows and doors, you’ll install structural headers above the openings and cripple studs below or above them.
- Finishing: Attach your sheathing or drywall to the wood studs.
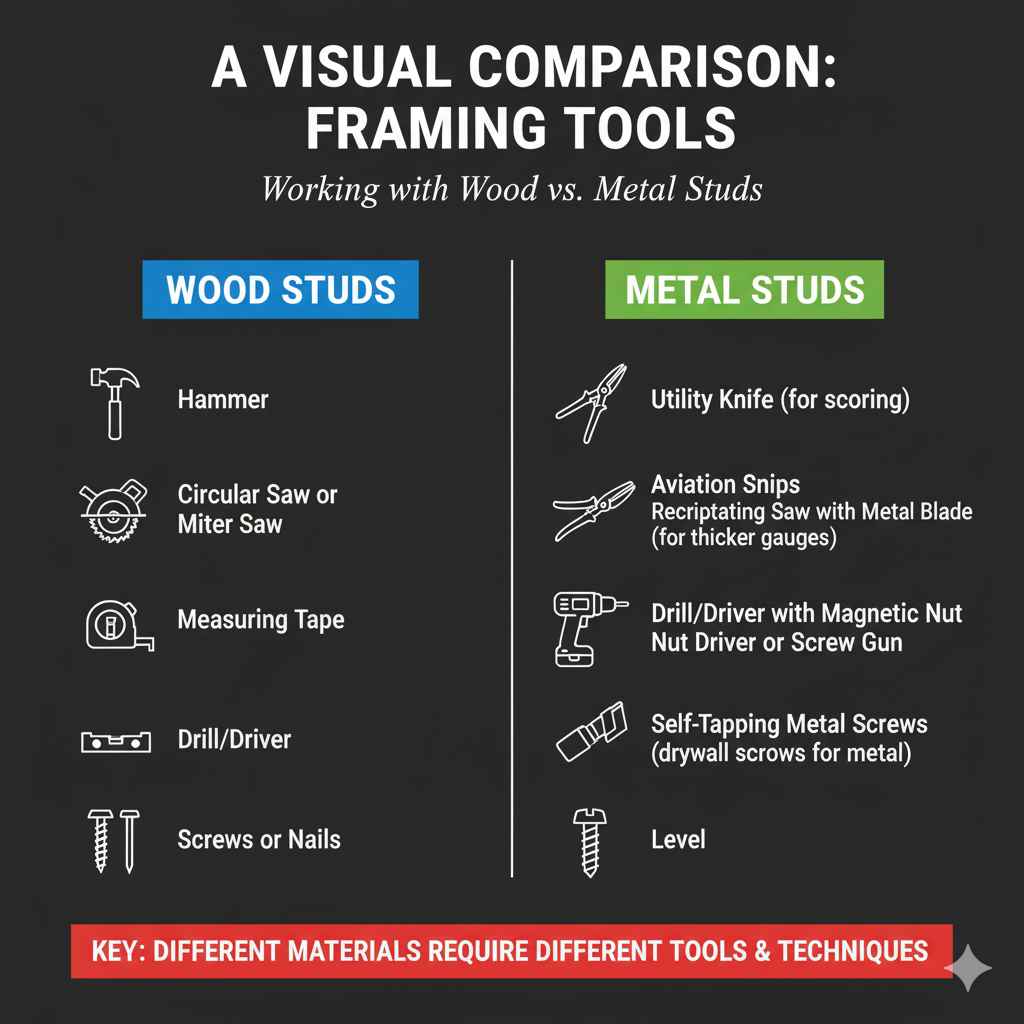
A Visual Comparison: Framing Tools
To illustrate the workability difference, here are some common tools you might use:
Tools for Wood Studs:
- Hammer
- Circular Saw or Miter Saw
- Measuring Tape
- Level
- Drill/Driver
- Screws or Nails
Tools for Metal Studs:
- Utility Knife (for scoring)
- Aviation Snips (for thinner gauges)
- Reciprocating Saw with Metal Blade (for thicker gauges)
- Drill/Driver with Magnetic Nut Driver or Screw Gun
- Self-Tapping Metal Screws (drywall screws for metal)
- Level
- Measuring Tape
As you can see, the toolset for metal studs often includes items more specialized for cutting and fastening metal, whereas wood framing relies on more universally common carpentry tools.
Frequently Asked Questions (FAQs)
Q1: Are metal studs really stronger than wood studs?
A: In terms of resisting bending, warping, and damage from moisture, pests, and fire, metal studs are generally stronger and more durable. For pure weight-bearing capacity, steel often has an advantage per unit of material. However, wood is easier for beginners to work with and offers good structural integrity for most residential needs.
Q2: Can I mix metal and wood studs in the same wall or building?
A: While it’s technically possible, it’s generally not recommended to mix them within the same framing system without careful consideration of how they connect and bear loads. If you’re building a new wall, it’s best to stick to one material for consistency. For renovations, you might encounter existing wood and add new framing with metal, but experts advise consulting building plans or a professional.
Q3: Is it harder to hang pictures or cabinets on metal studs?
A: It can be. You can’t just hammer a nail into a metal stud and expect it to hold much. For lightweight items, self-tapping screws into the metal stud work well. For heavier items like cabinets or TVs, you’ll need to locate studs precisely and use appropriate screws, or install solid wood blocking between studs for a secure anchor point.
Q4: Which is better for soundproofing: metal or wood studs?
A: Wood studs generally provide better natural sound insulation due to their fibrous nature. Metal studs are more conductive and can transmit sound more easily. However, with the right insulation (like dense fiberglass or mineral wool) and techniques such as using resilient channels or resilient clips when attaching drywall, you can achieve excellent soundproofing with either system.