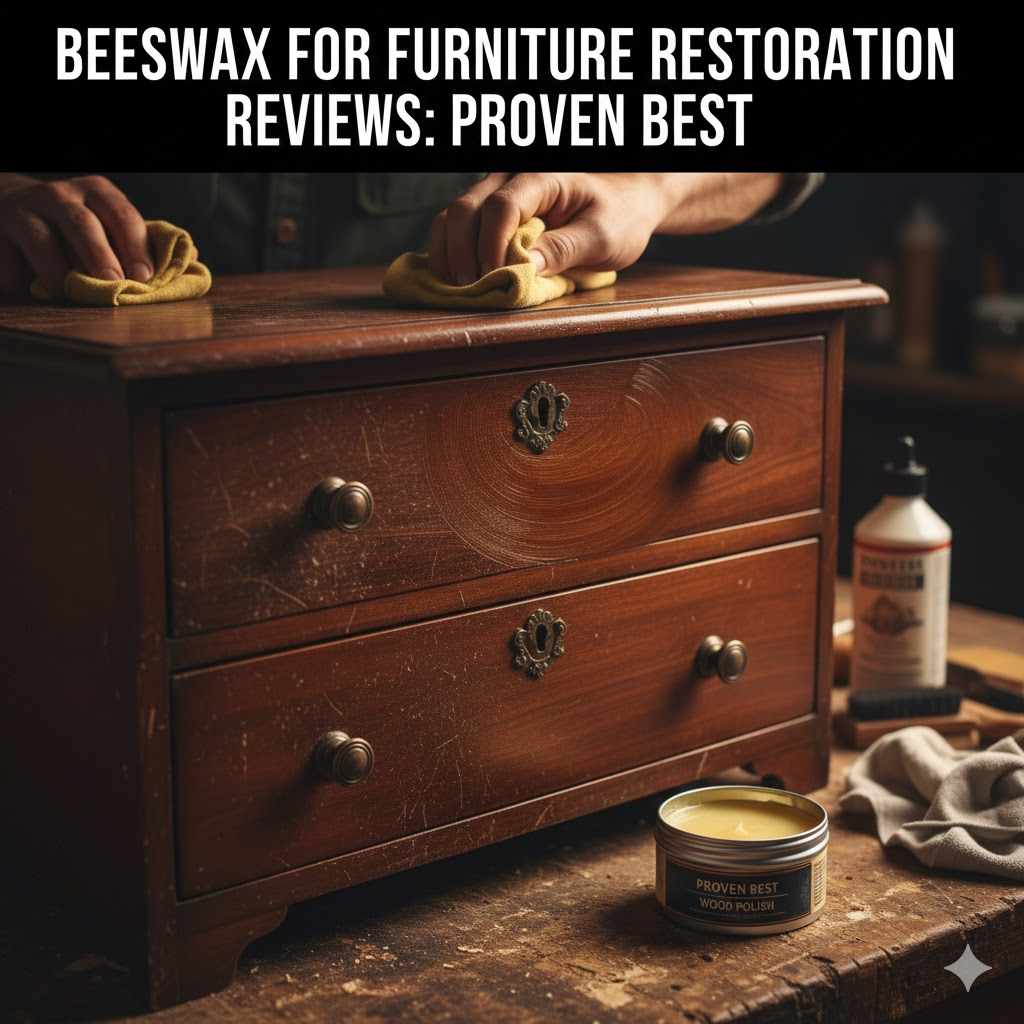
Beeswax For Furniture Restoration Reviews: Proven Best
For furniture restoration, the best beeswax polish is typically a soft paste made from pure beeswax and natural oils like mineral or jojoba oil. This blend nourishes dry wood, restores a warm, low-gloss sheen, and provides a protective layer. Look for products with simple, non-toxic ingredients for a safe and effective finish.
Hello there, fellow creator! I’m Md Meraj, and I’m so glad you’re here in my virtual workshop. Have you ever looked at a beloved piece of wooden furniture and noticed it looks a bit tired? Maybe it’s dull, dry, or has lost its beautiful glow. It’s a common issue, but the solution is simpler and more satisfying than you might think.
Don’t worry, you don’t need any fancy equipment or professional skills. We’re going to bring that wood back to life with a timeless secret: beeswax. Let’s walk through this simple process together and give your furniture a new story to tell.
There’s something special about wood. It has character, warmth, and history. Over time, that history can show up as dullness or minor wear. That’s where beeswax comes in. For centuries, craftspeople have used this natural wonder to protect and beautify wood. It’s not a complicated chemical finish; it’s a simple, honest way to care for your furniture. Think of it as a moisturizing treatment that feeds the wood, bringing out its natural depth and color.
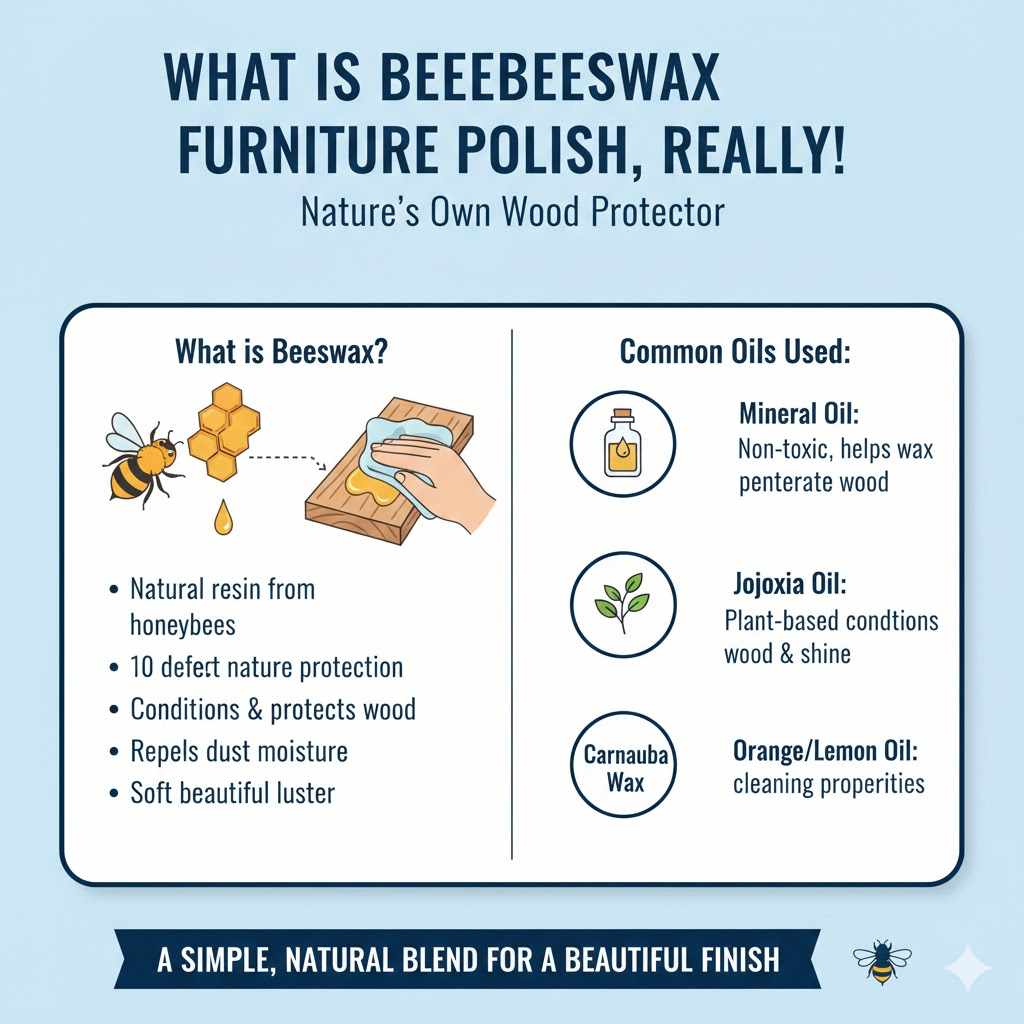
What is Beeswax Furniture Polish, Really?
At its heart, beeswax furniture polish is a blend of natural ingredients designed to condition and protect wood. The main ingredient, of course, is beeswax. Honeybees produce this amazing wax to build their honeycombs. When we use it on furniture, we’re tapping into nature’s own protection.
Most beeswax polishes aren’t just pure wax. They are usually mixed with oils to create a soft, easy-to-apply paste. Common oils include:
- Mineral Oil: A non-toxic, clear oil that helps the wax penetrate the wood fibers.
- Jojoba Oil: A plant-based oil that conditions the wood.
- Carnauba Wax: Often added for extra hardness and a slightly higher shine. It comes from the leaves of a palm tree.
- Orange or Lemon Oil: Sometimes added for a pleasant scent and extra cleaning properties.
This simple blend works wonders. It adds a protective layer that repels dust and moisture while giving the wood a soft, beautiful luster that feels wonderful to the touch.
Why Choose Beeswax? The Top Benefits for Your Furniture
In a world full of complex chemical finishes, beeswax stands out for its simplicity and effectiveness. It’s a go-to choice for restoration enthusiasts for many good reasons. Here’s why it’s a favorite in my workshop:
- It’s Completely Natural and Safe: Unlike many modern finishes that contain harsh chemicals and release fumes (volatile organic compounds, or VOCs), beeswax is a gift from nature. Polishes made with pure beeswax and natural oils are safe to use around your family and pets. Many are even “food safe,” perfect for wooden cutting boards or salad bowls.
- It Nourishes and Conditions the Wood: Think of wood as skin. Over time, it can dry out and look tired. Beeswax polish works like a high-quality moisturizer, seeping into the wood grain to restore lost moisture and oils. This simple act prevents the wood from drying out and cracking.
- It Enhances Natural Beauty: Beeswax doesn’t create a thick, plastic-like film on top of the wood. Instead, it creates a delicate, low-gloss sheen that enhances the wood’s natural color, depth, and grain pattern. Your furniture will look richer and healthier, not artificially shiny.
- It Provides a Protective Barrier: A good coat of beeswax helps repel water spills, guards against dust, and protects the wood from minor scuffs and scratches. While it’s not as tough as polyurethane, it offers excellent protection for everyday use.
- It’s Incredibly Easy to Apply and Repair: You don’t need brushes, sprayers, or special training. Applying beeswax is as simple as wiping it on and buffing it off. Better yet, if a spot gets a scuff, you can easily touch it up by applying a little more wax to the area. No need to sand down the entire piece!
- It Smells Amazing: A pure beeswax polish has a subtle, sweet, honey-like scent. It makes the entire process of caring for your furniture a pleasant and sensory experience.
The “Proven Best” Beeswax: What to Look for in a Great Polish
The term “best” can be subjective, but when it comes to beeswax for furniture, there are key qualities that separate a great product from a mediocre one. You don’t need a specific brand name; you just need to know what to look for on the label. This will help you choose with confidence.
Key Features of a High-Quality Beeswax Polish
Here’s a simple table to guide you. Think of this as your personal checklist when you’re at the store or browsing online.
| Feature | What to Look For | Why It Matters for Beginners |
|---|---|---|
| Ingredients | A short list of natural ingredients: beeswax, natural oils (mineral, jojoba, coconut), and maybe carnauba wax. Avoid products with “petroleum distillates” or other synthetic chemicals. | Simple, natural ingredients are safer to use, better for the wood, and don’t produce harsh fumes. It’s a worry-free choice for your home. |
| Consistency | A soft, buttery paste. It should be easy to scoop out with a soft cloth. | A soft paste is much easier to apply evenly than a hard, solid wax. It spreads smoothly and requires less effort to buff to a beautiful shine. |
| Color | Usually a pale yellow or creamy white. Some might have a slight amber tint. | The natural color of the wax means it won’t drastically change the color of your wood. It will only enrich and deepen the existing tone. |
| “Food Safe” Label | Look for this label if you’re working on kitchen items like cutting boards, countertops, or a dining table. | This guarantees the polish is non-toxic and safe to come into contact with food, giving you complete peace of mind. |
Your Tools and Materials Checklist
One of the best parts about working with beeswax is that you don’t need a lot of tools. You probably have most of what you need at home right now. Let’s get everything ready before we start.
- Beeswax Furniture Polish: Your hero product! Choose one based on the tips above.
- Clean, Soft Cloths: You’ll need at least two. Lint-free cotton cloths, like old t-shirts or microfiber towels, are perfect. One is for application, and one is for buffing.
- Mild Soap and Water: For cleaning the furniture first. A gentle dish soap works well.
- A Soft Brush (Optional): An old, soft toothbrush is great for getting into detailed carvings or corners.
- 0000 Steel Wool (Optional): For very grimy or stubborn spots. Use this with extreme care, as it is abrasive. Always test it on a hidden area first.
How to Apply Beeswax to Furniture: A Step-by-Step Guide
Alright, let’s get to the fun part! This process is so rewarding. Seeing the wood come back to life with each step is incredibly satisfying. Just follow these simple steps, and you can’t go wrong.
Step 1: Clean the Surface Thoroughly
You can’t wax over dirt. Giving the furniture a good cleaning first ensures the beeswax can properly penetrate the wood. Mix a few drops of mild dish soap into a bowl of warm water. Dip a soft cloth in the soapy water, wring it out so it’s damp (not dripping wet), and gently wipe down the entire piece of furniture. Follow up with a second cloth dampened with just plain water to rinse away any soap residue. Finally, dry the surface completely with a clean, dry cloth. Let the furniture air dry for at least an hour to make sure it’s totally dry.
Step 2: Always Test in a Hidden Spot
This is a golden rule in any finishing project. Before you apply the wax to the whole piece, test it on a small, inconspicuous area first—like the back of a leg or the underside of a tabletop. Apply a little wax, let it sit, and buff it off. This allows you to see how the wax looks on your specific type of wood and ensures you’re happy with the result.
Step 3: Apply a Thin, Even Coat of Beeswax
A little wax goes a long way! Scoop up a small amount of beeswax paste with your application cloth. Using a circular motion, rub the wax onto the wood surface, going with the grain. Your goal is a thin, even layer. Don’t slather it on; that will just make it harder to buff later. Imagine you are lightly buttering a piece of toast. If your furniture has detailed carvings, use a soft brush to gently work the wax into the crevices.
Step 4: Let the Wax Penetrate the Wood
Patience is key here. Once you’ve applied the wax, walk away and let it do its magic. Allow the wax to sit on the surface for at least 20-30 minutes. For very dry or thirsty wood, you can even leave it for a few hours or overnight. This gives the oils in the polish time to soak into the wood fibers and nourish them from within. The surface might look a bit hazy or oily at this stage—that’s perfectly normal.
Step 5: Buff to a Beautiful Shine
Now it’s time for the big reveal! Take your clean, dry buffing cloth and begin wiping the surface, again moving with the grain of the wood. Use long, sweeping strokes. At first, you’ll be removing any excess wax. As you continue to buff, you’ll start to feel the surface become incredibly smooth. Keep buffing with a bit of light pressure, and you’ll see a soft, warm glow appear. The more you buff, the higher the shine. Stop when you are happy with the luster.
Step 6: Repeat if Necessary
For furniture that was very dry to begin with, one coat might not be enough. If the wood still looks a bit patchy or dry after the first application, feel free to apply a second thin coat. Just follow steps 3, 4, and 5 again. Usually, two thin coats are more than enough to restore a beautiful, protective finish.
Common Mistakes to Avoid (And How to Fix Them)
Even the simplest projects can have little hiccups. Here are a few common mistakes beginners make with beeswax and how to easily avoid them.
- Using Too Much Wax: This is the most common mistake. Piling on too much wax will leave your furniture feeling sticky or greasy, no matter how much you buff.The Fix: Remember, thin coats are best! If you’ve already applied too much, just keep buffing with a clean, dry cloth. The friction and cloth will help lift the excess wax.
- Not Cleaning the Furniture First: Applying wax over dust and grime will just seal the dirt in, resulting in a cloudy or streaky finish.The Fix: Always start with a clean, dry surface. If you already waxed a dirty piece, you may need to clean it with a wood cleaner designed to remove wax buildup and start over.
- Buffing Too Soon: If you don’t give the wax enough time to set and penetrate, you’ll end up just wiping most of it off instead of buffing it to a shine.The Fix: Be patient! Let the wax sit for at least 20 minutes before you start buffing. This ensures the oils have nourished the wood.
Beeswax vs. Other Finishes: A Quick Comparison
It’s helpful to understand how beeswax compares to other common wood finishes. This table shows where it shines and what its limitations are, making it clear why it’s such a great choice for gentle restoration.
| Finish Type | Protection Level | Appearance | Ease of Application | Best For |
|---|---|---|---|---|
| Beeswax Polish | Low to Medium (Protects from dust, minor spills) | Soft, natural, low-gloss sheen. Enhances wood grain. | Very Easy (Wipe on, wipe off) | Nourishing dry wood, gentle restoration, and regular maintenance. |
| Polyurethane | Very High (Waterproof, scratch-resistant) | Thick, durable film. Can look like plastic. Gloss or satin. | Moderate (Requires brushes, good ventilation, sanding between coats) | High-traffic surfaces like tabletops, floors, and kitchen cabinets. |
| Shellac | Medium (Protects from dirt, some water resistance) | Warm, amber glow. Classic, traditional finish. | Moderate to Difficult (Dries very fast, requires skill with a pad or brush) | Fine furniture and antiques. Often used as a sealer under other finishes. |
| Lacquer | High (Durable and moisture-resistant) | Clear, high-gloss finish. Can be sprayed or brushed. | Difficult (Requires spraying equipment and strong ventilation due to fumes) | Modern furniture and cabinets. Used in professional production. |
As you can see, while polyurethane and lacquer offer more protection, they also create a permanent film that is much harder to apply and repair. For restoring the natural beauty of an existing piece without a full refinishing job, beeswax is the friendliest and most forgiving option.
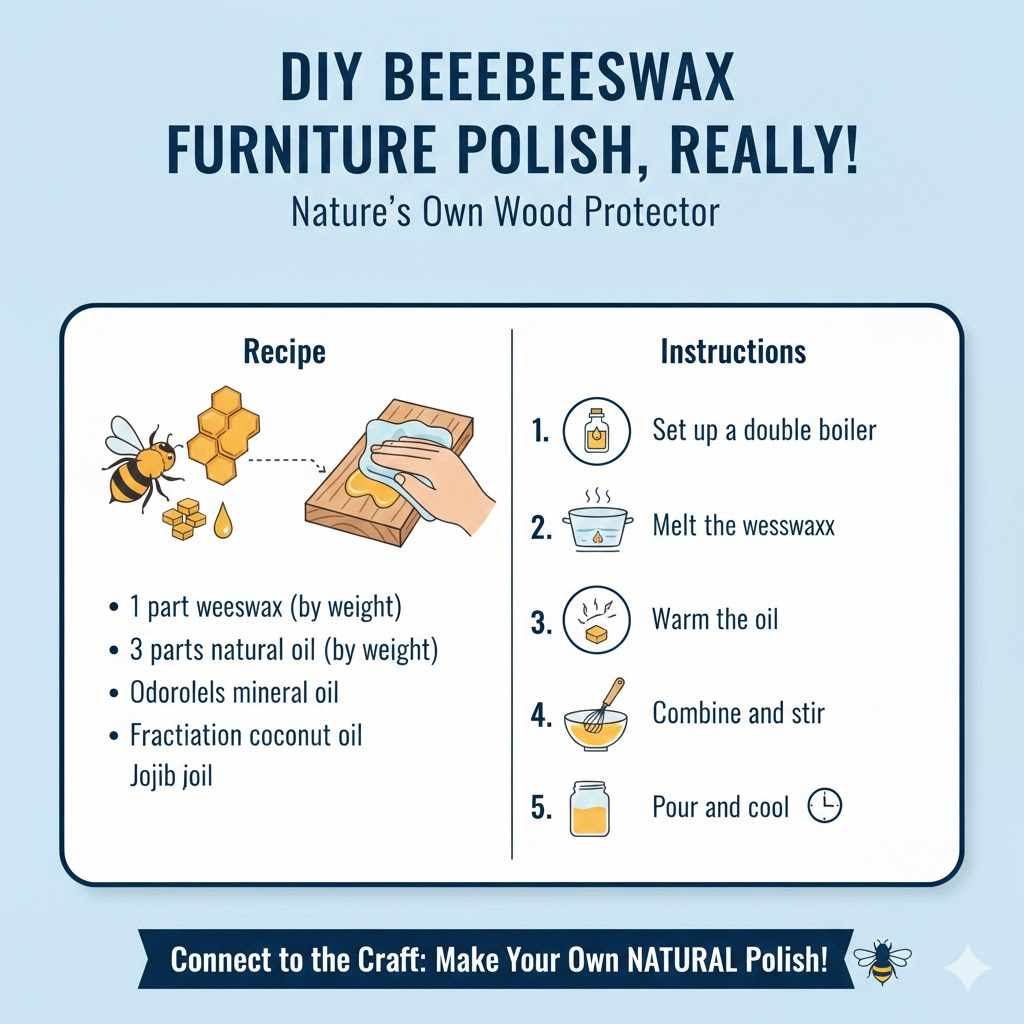
Want to Go Fully DIY? Make Your Own Beeswax Polish!
For those who love a good DIY project, making your own beeswax polish is simple and fun. It connects you even more deeply to the restoration process. Plus, you get to control exactly what goes into it.
Super Simple DIY Beeswax Polish Recipe
This two-ingredient recipe is a classic for a reason. It works beautifully.
Ingredients:
- 1 part beeswax (by weight). You can use beeswax pellets or a block grated up.
- 3 parts natural oil (by weight). Odorless mineral oil is a great choice. You can also use fractionated coconut oil or jojoba oil.
Instructions:
- Set up a double boiler. If you don’t have one, place a heatproof glass or metal bowl over a saucepan with a few inches of simmering water. Do not heat wax directly on the stove, as it is flammable.
- Melt the beeswax. Add your beeswax pellets or shavings to the double boiler and let them melt slowly, stirring occasionally.
- Warm the oil. In a separate container, gently warm your oil. You can do this in the microwave for a few seconds. Warming the oil helps it combine more easily with the melted wax.
- Combine and stir. Once the beeswax is fully melted, remove it from the heat. Slowly pour in the warm oil, stirring continuously until the mixture is well combined.
- Pour and cool. Pour the liquid mixture into a wide-mouthed jar or tin. Let it sit at room temperature for several hours to cool and solidify into a soft paste. Once it’s set, it’s ready to use!
Frequently Asked Questions (FAQ)
Is beeswax good for all wood furniture?
Beeswax is fantastic for most unsealed or oil-finished wooden furniture. It nourishes the wood beautifully. However, it’s not ideal for pieces with a hard, film-forming finish like polyurethane or lacquer, as the wax can’t penetrate and may just sit on top, creating a smeary mess. If you’re unsure, test it in a hidden spot.
How often should I apply beeswax to my furniture?
For most furniture, applying a coat of beeswax polish once or twice a year is plenty. For items that see a lot of use, like a dining room table, you might want to do it every three to six months. You’ll know it’s time when the wood starts to look a little dull or dry again.
Will beeswax make my furniture sticky?
If applied correctly, beeswax will not make your furniture sticky. A sticky or greasy feeling is almost always a sign that too much polish was used or that it wasn’t buffed enough. Remember to use a very thin coat and buff thoroughly with a clean cloth until the surface feels smooth and dry.
Can beeswax fix deep scratches or water rings?
Beeswax is a nourishing polish, not a repair kit. It can beautifully hide or blend in minor surface scuffs and hairline scratches by enriching the color of the surrounding wood. However, it will not fill in deep gouges or magically remove dark water stains. For a great resource on dealing with more significant damage, check out this guide from the Canadian Conservation Institute on caring for wooden furniture.
Is beeswax polish waterproof?
No, beeswax polish is not waterproof, but it is water-resistant. It will cause water to bead up on the surface, giving you time to wipe away spills before they can soak in and cause damage. It provides a good level of protection against everyday mishaps but won’t stand up to a puddle of water left for hours.
How long does beeswax polish take to dry?
Beeswax polish doesn’t “dry” in the same way that paint or varnish does. Instead, the oils penetrate the wood, and the wax sets on the surface. You should let the polish sit for at least 20 minutes before buffing, but the piece is essentially ready for light use right after you’ve buffed it to a shine.
Is beeswax safe to use on antique furniture?
Yes, beeswax-based polishes have been used on furniture for centuries and are generally considered a safe and traditional choice for caring for antiques. Because it’s a gentle, reversible finish, it’s often preferred by conservators over modern, permanent finishes. As always, test on a small hidden area first, especially on a valuable piece.
Your Next Step: Bringing Your Furniture Back to Life
And there you have it! You are now fully equipped with the knowledge and confidence to restore your wooden furniture with the simple magic of beeswax. It’s not about achieving a factory-perfect, flawless finish. It’s about a conversation with the wood, about honoring its history and giving it the care it deserves so it can continue to be a part of your home for years to come.
Don’t be afraid to just dive in. Choose a small piece to start with—perhaps a little side table or a wooden chair. The process is forgiving, and the result is so rewarding. You’ll not only have a beautiful piece of furniture but also the pride of knowing you brought it back to life with your own two hands. Happy restoring!