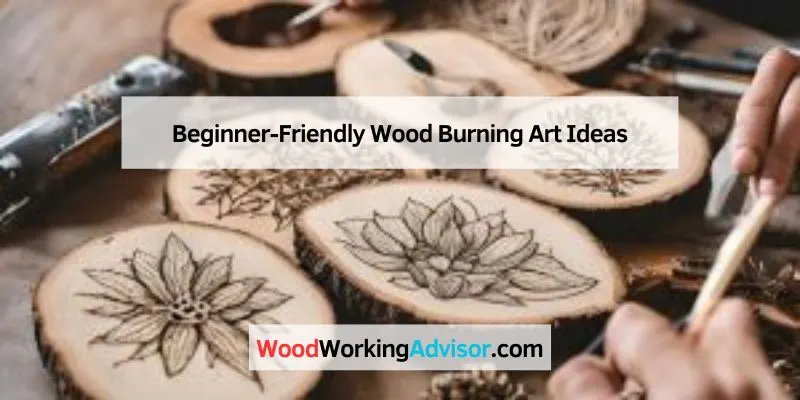
Beginner-Friendly Wood Burning Art Ideas
Wood burning art, also known as pyrography, is a fun craft. It’s perfect for beginners looking to explore their creative side.
Wood burning involves using a heated tool to create designs on wood surfaces. This craft offers endless possibilities, from simple patterns to detailed images. It’s an accessible art form with a low-cost entry. All you need is a wood burning tool and some wood pieces to start.
In this blog post, we’ll explore beginner-friendly wood burning art ideas. These projects are easy to follow and will help you gain confidence. By the end, you’ll have beautiful pieces of art to show off. Let’s dive into the world of wood burning and spark your creativity!
Introduction To Wood Burning Art
Wood burning art, also known as pyrography, is a unique and creative hobby. It involves using a heated tool to burn designs onto wood surfaces. This craft is beginner-friendly and offers endless possibilities. Let’s dive into the world of wood burning art and explore its basics.
What Is Wood Burning?
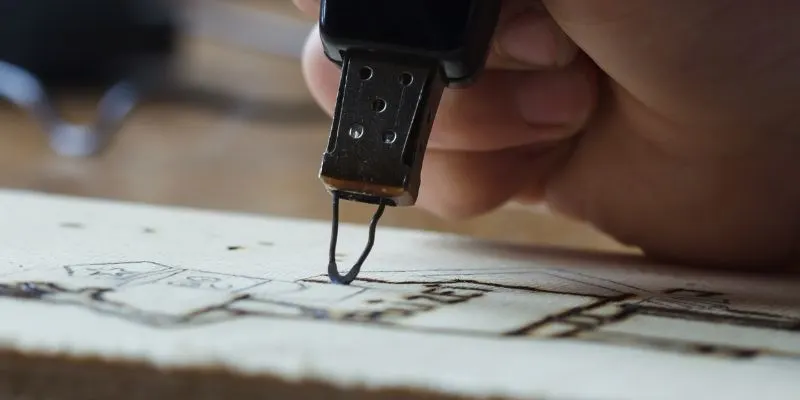
Wood burning is the art of creating designs on wood with a heated pen. The pen has different tips for various effects. Artists can make lines, shading, and textures. The heated pen burns the wood, leaving a permanent mark. This technique can create intricate and beautiful designs.
Benefits Of Wood Burning Art
Wood burning art has many benefits. First, it is a relaxing and therapeutic activity. Many people find it calming and enjoyable. Second, it improves focus and concentration. Creating detailed designs requires attention to detail. Third, it enhances creativity. Artists can experiment with different techniques and styles. Lastly, wood burning art produces unique and personalized pieces. These can be great gifts or home decor items.
Essential Tools And Materials
Creating wood burning art can be a fun and rewarding hobby. It allows you to craft unique and beautiful pieces. But, before you start, you need the right tools and materials. This section will guide you through the essentials you need to begin your wood burning journey.
Basic Tools Needed
The first tool you’ll need is a wood burning pen. This pen, also known as a pyrography pen, helps you create designs on wood. Choose a pen that feels comfortable in your hand. Next, you need different tips for your pen. These tips come in various shapes and sizes for different effects. A simple set with a few basic tips is enough to start.
Another essential tool is a good pair of pliers. Pliers help you change the tips on your pen safely. You also need fine-grit sandpaper. Sandpaper smooths the wood surface before you start burning. Finally, have a soft cloth handy to wipe off dust from the wood.
Choosing The Right Wood
Selecting the right wood is crucial for your wood burning project. Softwoods like pine, basswood, and poplar are great for beginners. These woods are easy to burn and work with. Make sure the wood is untreated and free from chemicals.
Avoid using hardwoods initially. Hardwoods like oak and maple are more challenging to burn. They require more heat and take longer to work on. Choose pieces with a fine grain for a smooth finish. Rough grains can make your design look uneven.
Ensure the wood surface is smooth and clean. Use sandpaper if needed. A smooth surface helps your pen glide easily, making your work look neat.
Safety Tips
Wood burning art, or pyrography, is a fun and creative activity. But safety is key. Following these safety tips ensures a safe and enjoyable experience.
Protective Gear
Wearing the right protective gear is essential. It protects you from burns and inhaling harmful fumes. Here are some items you need:
- Heat-resistant gloves: Protect your hands from burns.
- Safety goggles: Shield your eyes from flying debris.
- Respirator mask: Prevents inhalation of toxic fumes.
- Long-sleeved shirts: Covers your arms and reduces burn risk.
Safe Working Environment
A safe working environment is just as important as protective gear. Here’s how to set up your workspace:
| Action | Details |
|---|---|
| Ventilation: | Ensure good airflow to disperse fumes. |
| Fire extinguisher: | Keep it nearby in case of emergencies. |
| Non-flammable surface: | Work on a surface that doesn’t catch fire. |
| Organized tools: | Keep tools within reach to avoid accidents. |
Make sure your work area is clean. Remove any flammable materials to minimize fire risk.
Simple Designs To Start With
Starting with simple wood burning designs can help you build confidence and skill. Beginner-friendly wood burning art ideas are easy to follow and can be completed with basic tools. Below, you will find some simple designs to start with that are perfect for beginners.
Geometric Patterns
Geometric patterns are great for beginners. They are simple yet visually appealing. Here are a few ideas:
- Lines and Shapes: Begin with straight lines and basic shapes like squares and triangles. This helps with controlling the burning tool.
- Checkerboard Pattern: Draw a grid and burn every alternate square. This creates a checkerboard effect.
- Spiral Designs: Start from the center and create spirals. They can be small or large depending on your preference.
Nature-inspired Designs
Nature offers a vast array of simple designs. Nature-inspired designs are not only beautiful but also calming to work on. Consider these ideas:
- Leaves: Draw and burn different types of leaves. Maple, oak, and fern leaves are good examples.
- Flowers: Start with simple flowers like daisies or tulips. These are easy to outline and fill in.
- Mountains: Simple mountain ranges are easy to burn. They can look stunning with minimal detail.
Using these ideas, you can create beautiful wood burning art while honing your skills.
Personalized Projects
Personalized wood burning projects make perfect gifts and home decor. They are easy to create and add a personal touch to any space. Let’s explore some beginner-friendly ideas.
Monograms And Initials
Monograms and initials are classic choices for wood burning art. They are simple yet elegant. Start by choosing a font style that you like. Print out the initials in the chosen font. Then, trace the outline onto your wood piece.
To make your monogram pop, you can add decorative elements. Think vines, flowers, or simple geometric shapes. Here is a quick guide:
- Select and print your monogram or initials.
- Trace the design onto the wood.
- Burn the outline using a wood-burning pen.
- Add decorative elements around the initials.
This project is perfect for beginners. It helps in learning basic wood burning techniques.
Custom Nameplates
Custom nameplates are another beginner-friendly project. They can be used for doors, desks, or as gifts. Start by choosing a piece of wood that suits the purpose. For example, a small plank for a desk nameplate or a larger one for a door sign.
Here’s how to create a custom nameplate:
- Choose a font and print the name.
- Trace the name onto the wood.
- Burn the outline of the letters.
- Add any additional designs or borders.
These steps are simple. They allow for creativity. You can add small images, like stars or hearts, around the name to make it more attractive.
Both monograms and custom nameplates are great starter projects. They allow for creativity while being easy to execute. Happy wood burning!
Holiday-themed Ideas
Embracing the joy of holidays with wood burning art can be an exciting and fulfilling project. Creating holiday-themed decorations not only adds a personal touch to your home but also makes perfect gifts. Here are some beginner-friendly ideas to get you started.
Christmas Ornaments
Christmas ornaments are a fantastic way to showcase your wood burning skills. You can start with simple designs like stars, snowflakes, and Christmas trees. These shapes are easy to trace and burn onto wooden discs or slices.
- Trace the design onto the wood.
- Use the wood burner to follow the lines.
- Fill in details with simple patterns.
For a more personalized touch, you can add names or messages. This makes the ornaments unique and special. They can be wonderful gifts for family and friends.
Halloween Decorations
Halloween offers a range of fun and spooky designs for wood burning art. Try creating pumpkins, bats, ghosts, and spooky faces on small wooden plaques or signs.
- Choose a simple design suitable for beginners.
- Trace it onto the wood with a pencil.
- Carefully burn the design using steady hands.
These decorations can be placed around your home or garden. They bring a festive spirit and a handmade charm to your Halloween setup.
Experiment with different shading techniques. This will give your designs more depth and interest.
| Holiday | Design Ideas | Materials |
|---|---|---|
| Christmas | Stars, Snowflakes, Trees | Wooden discs, Pencils, Wood burner |
| Halloween | Pumpkins, Bats, Ghosts | Wooden plaques, Pencils, Wood burner |
Wood Burning Techniques
Wood burning art, also known as pyrography, offers endless creative possibilities. Learning various wood burning techniques can enhance your projects. Even beginners can create stunning pieces with the right methods.
Shading Methods
Shading adds depth and dimension to your wood burning art. Start with basic strokes. Use light pressure for lighter shades and more pressure for darker shades. Practice on scrap wood. Experiment with different tips to find what works best. Gradual transitions between light and dark areas can make your art come alive.
Adding Texture
Texture can make your artwork more interesting. To add texture, vary your strokes. Short, quick strokes can create a rough texture. Long, smooth strokes can give a polished look. Try different patterns like cross-hatching or stippling. Each technique adds a unique feel to your design. Always practice on spare wood first to perfect your technique.
Finishing Touches
Finishing touches elevate wood burning art from good to great. They add durability and enhance the appearance of your piece. In this section, we will explore sealing, varnishing, and adding color. These steps ensure your artwork is protected and visually appealing.
Sealing And Varnishing
Sealing your wood burning art protects it from damage. Use a clear sealer to maintain the natural look of the wood. Apply the sealer in a well-ventilated area. A brush or spray sealer works well. Make sure to cover all areas evenly. Allow the sealer to dry completely before handling.
After sealing, consider adding varnish. Varnish provides extra protection and a glossy finish. Choose a varnish suitable for wood. Apply thin, even coats with a brush. Let each coat dry before applying the next. This process enhances the durability and shine of your artwork.
Adding Color
Adding color can make your wood burning art more vibrant. Use water-based or oil-based paints. Water-based paints dry faster and are easy to clean. Oil-based paints offer a richer color and are more durable. Choose colors that complement your design.
Apply the paint carefully with a fine brush. Paint within the burned lines for a neat look. You can also use colored pencils or markers for finer details. Allow the paint to dry completely before sealing or varnishing. This step ensures the colors remain bright and intact.
Common Mistakes To Avoid
Starting with wood burning art is exciting, but beginners often make some common mistakes. These mistakes can affect the final look of your project. Understanding and avoiding these will help improve your skills and results.
Overburning
Overburning is one of the most common mistakes. It happens when you apply too much heat to a single area. This can make the wood look burnt and dark. To avoid overburning, move your tool steadily and do not stay in one spot for too long.
Here are some tips:
- Use a lower heat setting
- Practice on a scrap piece of wood
- Keep your hand steady
Inconsistent Lines
Inconsistent lines can make your art look unprofessional. Beginners often struggle with maintaining even pressure and speed. This leads to lines that are too light or too dark.
To create consistent lines:
- Practice on scrap wood
- Use a pencil to outline your design
- Keep your hand steady and your speed even
| Mistake | How to Avoid |
|---|---|
| Overburning | Use lower heat, keep moving, practice |
| Inconsistent Lines | Practice, outline design, steady hand |
Inspiration And Resources
Starting with wood burning art can be exciting. Finding the right inspiration and resources is key. Here are some ideas to help you get started on your wood burning journey.
Online Tutorials
Online tutorials provide step-by-step guidance. Many websites offer free tutorials. YouTube is a great place to find video lessons. Look for beginner-friendly channels. These videos show you the basic techniques. You can pause and replay as needed. Some popular instructors share valuable tips. They help you avoid common mistakes. Practice along with the videos to improve your skills.
Community Forums
Join community forums for wood burning art. These forums connect you with other beginners. You can ask questions and share your progress. Experienced artists often give advice. They help you learn faster. Look for forums focused on pyrography. Reddit and Facebook have active groups. Engage with the community to stay motivated. You’ll find inspiration from other members’ projects.
Frequently Asked Questions
What Is Wood Burning Art?
Wood burning art, also known as pyrography, involves burning designs onto wood surfaces using a heated tool.
How Do I Start Wood Burning Art?
Begin by choosing simple designs and practicing on scrap wood. Use a basic wood burning tool.
What Tools Are Needed For Wood Burning?
You need a wood burning tool or pyrography pen, tips, and sandpaper for a smooth surface.
Is Wood Burning Art Safe For Beginners?
Yes, with proper safety precautions like working in a ventilated area and using heat-resistant gloves.
Conclusion
Creating wood burning art is a fun and rewarding hobby. Beginners can start with simple designs. Practice and patience help improve skills over time. Enjoy the process and don’t rush. Explore different tools and techniques. Remember, the key is to have fun.
Share your creations with friends and family. Wood burning art can be a relaxing and creative outlet. So, grab your tools and start burning!