Gouache on Wood Panels: How to Prep, Paint & Seal Them
Gouache sticks to a wood panel only after the surface is sanded smooth and sealed with gesso or a watercolor ground — paint brushed straight onto bare wood beads, flakes, or lifts within days. Skipping that prep step is the top reason a beginner’s first wood-panel painting fails. This guide covers picking the right panel, the gesso-vs-watercolor-ground choice, five beginner project ideas, and how to seal the finished piece without reactivating the paint.
Why Paint Gouache on Wood Instead of Paper?
Gouache is usually sold as a paper medium, but it performs just as well on a properly primed wood panel — and a panel solves two things paper can’t. First, it’s rigid: a wood panel won’t buckle, ripple, or need to be taped down while you work with a wet, water-heavy wash the way watercolor paper does. Second, a cradled wood panel is ready to hang or shelve the moment the paint dries; there’s no mat, glass, or frame to buy, which makes it a natural crossover project for anyone who already works with scrap wood, plywood offcuts, or craft boards.
The tradeoff is prep. Paper is manufactured to absorb water-based paint correctly right out of the pad. Raw wood is not — it’s far more absorbent in some spots (open grain, end grain) and less in others (tight grain, any glossy factory coating), so paint applied straight to bare wood dries blotchy, and the wood’s natural oils and tannins can bleed color over time. Every step below exists to fix that mismatch before you pick up a brush.
Best Wood Panels for Gouache Pick
|
FSWCCK 10-Pack 6×6″ Unfinished Wood Panel Boards Solid pine cradle panels sold sanded and ready to prime — a fast way to get several practice surfaces for gesso-and-gouache testing.
|
As an Amazon Associate we earn from qualifying purchases.
Choosing the Right Wood Panel for Gouache
Not every wood surface takes primer and paint the same way. Here’s how the common options compare for a beginner gouache project:
| Panel Type | Surface Texture | Approx. Price (6″×6″) | Best For |
|---|---|---|---|
| Pine or basswood cradle panel | Smooth face, visible tight grain | $1.50–$2.60 per panel | Display pieces you hang without a frame |
| Birch plywood panel | Very smooth, fine even grain | $2–$4 per panel | Detail work and crisp gesso coats |
| MDF or hardboard panel | Ultra-smooth, no visible wood grain | $1–$2 per panel | Flat, solid color blocking |
| Canvas-wrapped wood panel | Textured fabric surface over a wood frame | $3–$6 per panel | A canvas feel with a rigid, ready-to-hang backing |
For a first project, a pine or basswood cradle panel is the easiest starting point: the grain is tight enough to prime evenly in two coats, and the panel’s raised edge means the finished piece stands up on a shelf without any extra hardware.
How to Prepare a Wood Panel for Gouache Painting
Priming takes about an hour of hands-on time spread across an evening, since each coat needs to dry before the next. Follow these five steps:
- Sand the panel: Sand the face and edges with 220-grit sandpaper until smooth, then wipe away dust with a dry cloth or tack cloth.
- Choose your primer: Pick gesso for crisp, bold color or a watercolor ground for a softer, more absorbent surface — see the comparison below.
- Apply thin coats: Brush on two to three thin, even coats, letting each one dry fully (roughly 30–60 minutes) before the next.
- Sand between coats: Lightly sand with 320-grit paper between coats to knock down any wood grain the water-based primer raised.
- Test a swatch: Paint a small color swatch in a corner first to confirm the primer takes gouache evenly before starting the full piece.
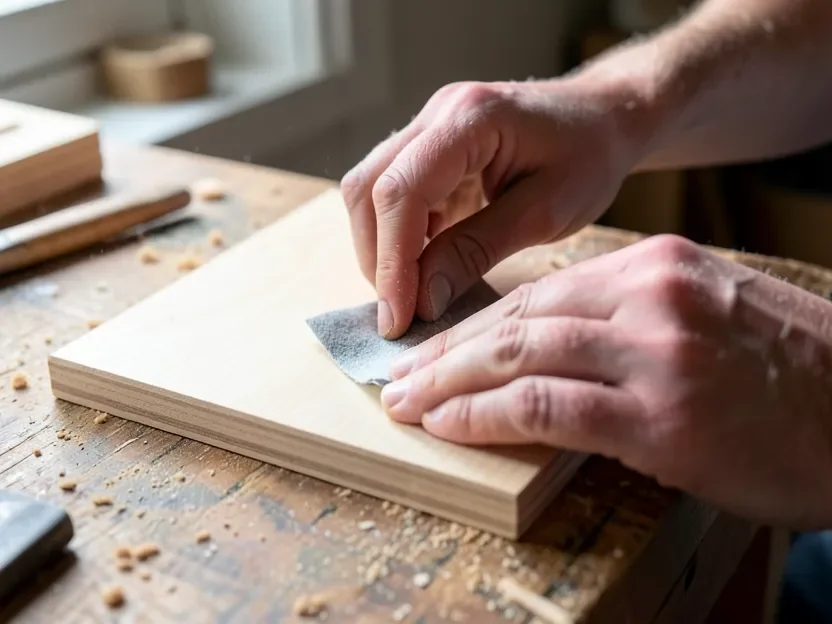
“Water-based gesso raises the wood grain the same way a water-based stain does — expect a light fuzz after the first coat dries. A quick pass with 320-grit sandpaper between coats keeps the panel smooth for painting.”
Gesso vs. Watercolor Ground: Which Primer Should You Use?
Gesso is an acrylic-based primer that dries to a smooth, low-absorbency, matte finish. Gouache sits mostly on top of it rather than soaking in, which keeps colors vivid and edges crisp — the better choice for bold color blocking or detailed line work.
Watercolor ground is more porous, so gouache soaks in slightly for a softer, more velvety, diffused look closer to how the paint behaves on watercolor paper. It’s the better pick for loose washes and blended color rather than hard-edged shapes.
| Primer | Surface Feel | How Paint Sits | Best For |
|---|---|---|---|
| Gesso | Smooth, matte, low absorbency | Sits on top, stays vivid, crisp edges | Bold color blocking, detail work |
| Watercolor ground | More absorbent, slightly toothy | Soaks in slightly, soft diffused edges | Loose washes, blended color |
5 Beginner Gouache-on-Wood Project Ideas
- A small botanical panel. Prime a 6×6″ cradle panel and paint a single leaf sprig or stem — one subject, opaque color, no background to fill in.
- Painted wood ornaments or gift tags. Cut thin plywood or basswood into simple shapes, prime both sides, and paint a small motif for a hand-made holiday tag or ornament.
- A layered abstract on a cradled panel. Gouache’s opacity lets you paint lighter colors directly over darker ones once dry, so a cradle panel is a forgiving surface for building up abstract shapes in stages.
- Sealed wood coasters. Paint a simple pattern on primed 4×4″ squares, then seal heavily with a food-safe, moisture-rated finish — gouache alone isn’t waterproof, so the seal step here isn’t optional.
- A lettering accent panel. Prime a rectangular panel, pencil in a short word or phrase, and paint the letters as solid shapes — a good project for practicing gouache’s opacity and clean edges.
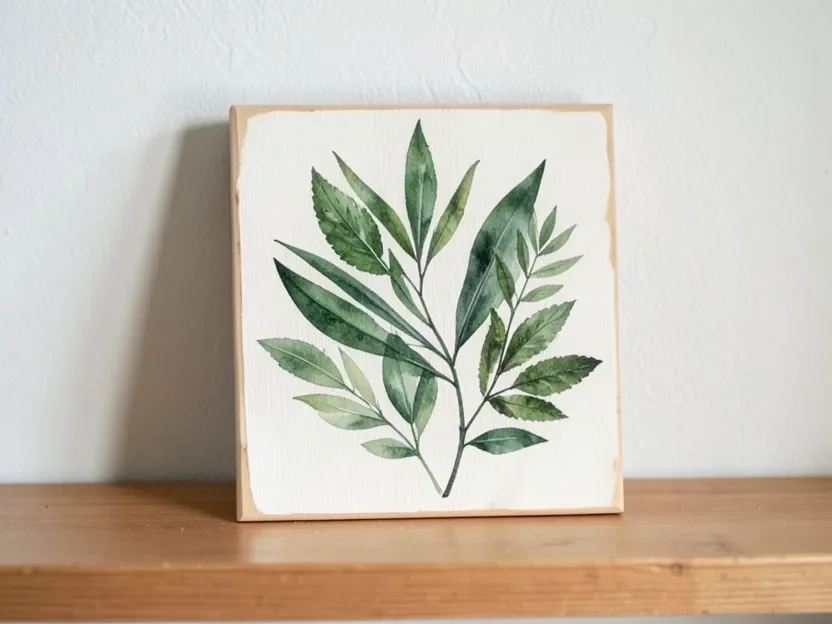
If you already work with scrap plywood or offcuts from other projects, this is a good use for them — check our birch wood craft ideas for more small-panel projects that pair well with leftover material, or browse wood ornament ideas if you want a seasonal project to start with.
How to Seal a Finished Gouache Painting on Wood
Gouache stays water-reactivatable even after it dries, which is exactly why a standard liquid varnish is risky: brushing wet varnish over gouache can lift and smear the paint underneath. A cold wax medium, buffed on and left to cure, seals the surface without reactivating it. A spray fixative rated for gouache is the other safe option for pieces you don’t want to hand-buff.
If you plan to frame the finished panel behind glass, you can skip sealing altogether — the glass does the protecting. For a deeper look at how different topcoats interact with painted wood surfaces generally, our wood finishing guide covers the tradeoffs between wax, oil, and film finishes.
Common Mistakes When Painting Gouache on Wood
- Skipping the sanding step. Rough wood shows through thin paint layers as texture and uneven color.
- Priming over a glossy or sealed panel. Gesso and watercolor ground both need a bit of tooth to grip — a factory-sealed or varnished panel needs a light sanding first so the primer bonds.
- Overworking with too much water. Gouache reactivates with water even after drying; heavy re-wetting during blending can lift a layer you already finished.
- Sealing with the wrong product. Standard varnish can smear dried gouache — use a wax medium or a fixative made for water-based paint instead.
Gouache on Wood: Frequently Asked Questions
Can you use gouache directly on unfinished wood without priming?
No. Bare wood is too absorbent and uneven for gouache’s binder to hold consistently, so color goes patchy and can flake once dry. Sand the panel smooth, then apply two to three thin coats of gesso or a watercolor ground and let each layer dry fully before painting.
Does gouache stick better to plywood or MDF panels?
Birch plywood generally primes more evenly than MDF, since its face veneer sands to a smoother, tighter grain than MDF’s compressed fiber surface, which can show a slightly rougher texture through thin paint. Either works fine once primed with two to three coats of gesso.
Can you seal a finished gouache painting on wood with varnish?
Standard liquid varnish can reactivate gouache’s water-soluble binder and smear the paint, so a cold wax medium or a spray fixative rated for gouache is the safer choice. If you plan to frame the piece behind glass, you don’t need to seal it at all.
Is gouache durable enough for wood ornaments and coasters?
Sealed gouache holds up fine on display pieces like wall panels or ornaments, but it’s not a good choice for anything that gets wet regularly, such as coasters or cutting boards, unless it’s sealed with a wax or resin coat rated for moisture contact. Untreated gouache will reactivate and smear if it gets damp.
What’s the difference between gesso and watercolor ground for gouache on wood?
Gesso creates a smoother, less absorbent surface where gouache sits mostly on top, staying vivid and easy to rework with crisp edges. Watercolor ground is more porous, so paint sinks in slightly for a softer, more matte look with gentler edges — pick gesso for bold color blocking and watercolor ground for a looser, more painterly feel.
A primed wood panel turns gouache from a paper-only medium into a display-ready craft material — the same sanding, priming, and sealing logic that governs any painted wood project on this site. Start with one small cradle panel, get the gesso coat right, and the rest of the technique carries over from there. For more painting and finishing techniques for wood surfaces, browse our Paints section.
Sponsored / affiliate links. As an Amazon Associate I earn from qualifying purchases. I may earn additional commission from eligible campaigns.