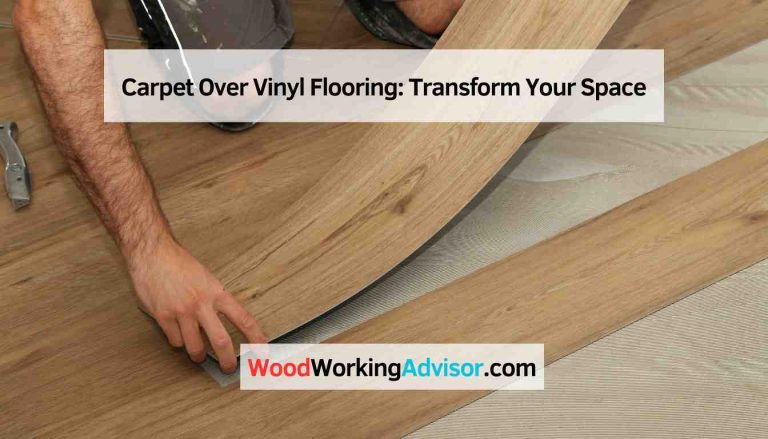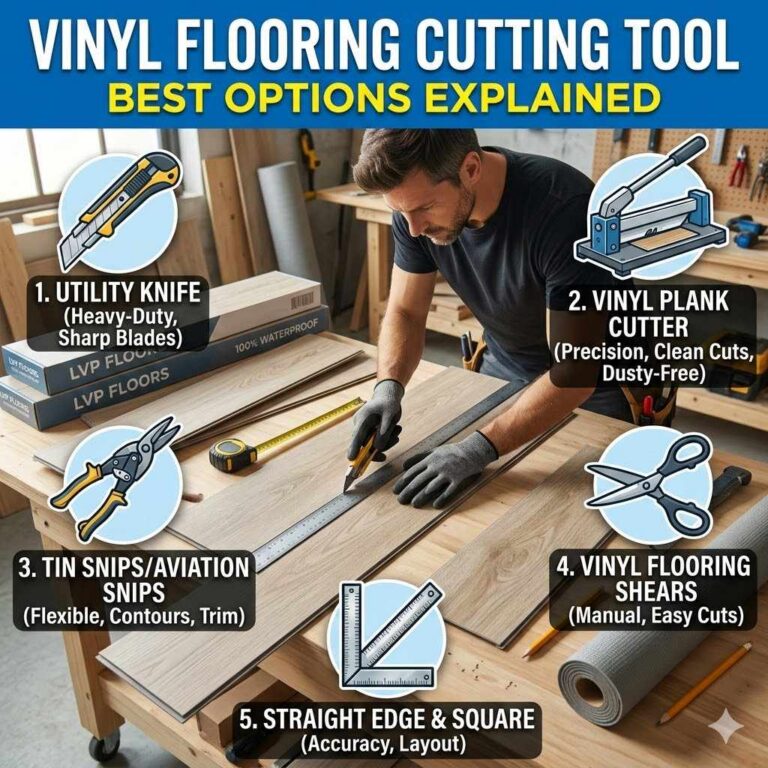
Best Tool To Cut Vinyl Flooring Clean And Without Cracking
It’s one of those tasks that can feel really daunting. You’ve picked out the perfect vinyl flooring for your home. It looks amazing, and you’re ready to get started. But then you think about cutting it. How do you get those straight, clean lines? What if you crack it? That fear of messing up and ruining expensive materials is totally understandable. Many folks feel that same worry. This guide is here to help you feel confident. We’ll walk through the best ways to get clean cuts every time. You’ll learn which tools work best and how to use them without causing cracks.
It is possible to cut vinyl flooring cleanly and without cracking. The best tools involve a sharp blade designed for the material. A utility knife with snap-off blades is often sufficient for thinner vinyl. For thicker luxury vinyl tile (LVT) or plank (LVP), a specialized vinyl cutter or even a jigsaw with the right blade can yield excellent results. The key is using a sharp blade, applying steady pressure, and making multiple passes if needed.
Understanding Your Vinyl Flooring Cuts
Vinyl flooring comes in many forms. There’s sheet vinyl, often used in kitchens and bathrooms. Then there are luxury vinyl planks (LVP) and tiles (LVT).
These are usually thicker and more rigid. Each type behaves a little differently when you try to cut it. The goal is always a smooth, straight edge.
You don’t want jagged lines or pieces that splinter. A clean cut makes for a tighter seam. It also makes the finished floor look much more professional.
You want it to look like a pro did it, right?
Think about the kind of cut you need. Most cuts will be straight lines along walls. Sometimes you need to cut around doorways or pipes.
These are called “intricate cuts.” For straight cuts, you need a good measuring tape and a long, straight edge to guide your tool. For those trickier spots, you might need a different approach. Knowing what you’re up against helps you choose the right tool.
It also helps you prepare for the job ahead.

The Humble Utility Knife: A Powerful Friend
Let’s start with the most common tool: the utility knife. This is often called a snap-off knife or a box cutter. It’s a simple tool, but with the right blade and technique, it’s very effective for many types of vinyl.
The secret is the blade. You need a very sharp blade. Dull blades will drag.
They will tear the vinyl. This leads to those frustrating cracks and jagged edges we want to avoid.
When you use a utility knife, you won’t cut through the vinyl in one go. That’s usually not the best way. Instead, you’ll score the surface.
You make a shallow cut. Then you make another pass, cutting a little deeper. You repeat this process.
You’ll feel the vinyl start to give. Eventually, you’ll cut all the way through. This multi-pass method is key to getting a clean break.
It prevents the vinyl from bending and cracking unevenly.
Most utility knives have snap-off blades. This means you can break off the dull tip. This gives you a fresh, sharp edge to cut with.
Always snap off the dull section before starting a new cut. It makes a big difference. You’ll also want to keep extra blades handy.
You’d be surprised how quickly a blade can dull, even on thinner vinyl.
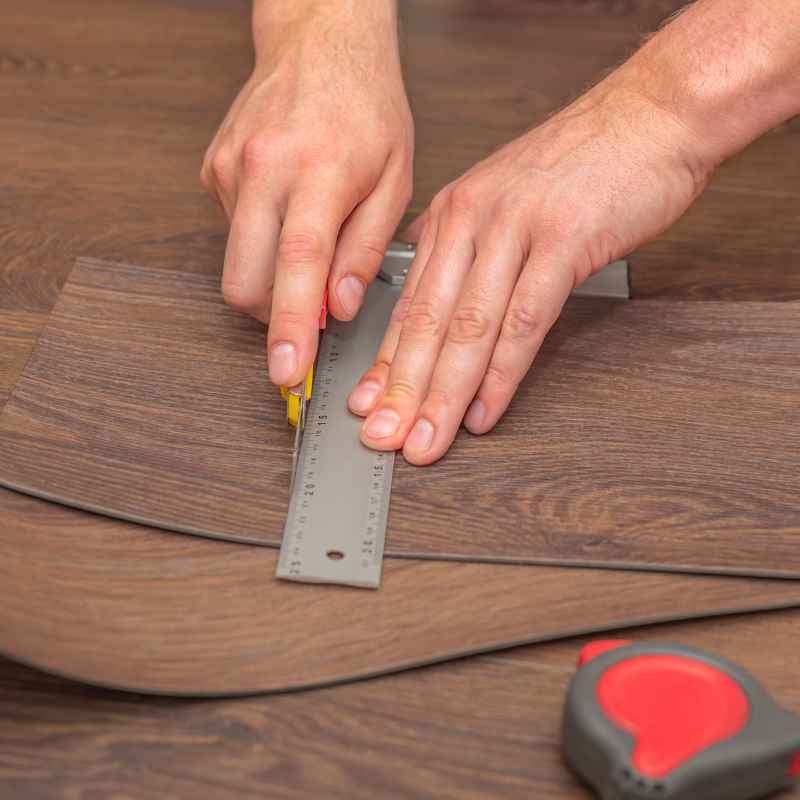
Utility Knife Cutting Tips
Mark Your Line: Use a pencil to draw a clear line where you need to cut. This is your guide.
Use a Straight Edge: A metal ruler or a carpenter’s square is perfect. Place it along your pencil line. This guides your knife.
Score Lightly First: Make a gentle first pass along the edge of your straight edge. Don’t try to cut all the way through yet.
Repeat and Deepen: Go over the scored line several times. Each pass should go a little deeper. You’ll feel it start to cut through.
Bend and Snap: Once you’ve cut most of the way, gently bend the vinyl away from the cut line. It should snap cleanly along the score.
When a Utility Knife Isn’t Enough
Now, not all vinyl is created equal. Thicker, more rigid luxury vinyl planks (LVP) or luxury vinyl tiles (LVT) can be tougher to cut with just a utility knife. While you can often do it with multiple passes and patience, it’s more likely to lead to cracking or an uneven edge.
This is where specialized tools come into play. They make the job easier and give you better results, especially for DIYers.
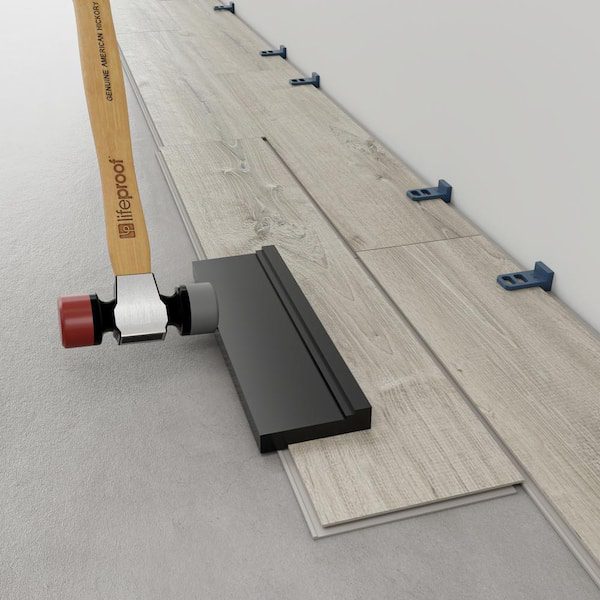
One of the best tools for LVP and LVT is a dedicated vinyl flooring cutter. These are designed specifically for the task. They work a bit like a paper cutter but for vinyl.
You lay the plank or tile in the cutter. You align your cut line with the blade. Then, you pull a lever.
This action pushes a sharp blade through the material. It usually cuts cleanly in one pass.
These cutters are fantastic for straight cuts. They are very accurate. They also minimize the risk of cracking.
Because the cut is quick and decisive, the vinyl doesn’t have much time to bend or warp. They are an investment, for sure. But if you’re doing a large area or working with a lot of LVP, they can save you a lot of frustration.
They also produce very professional-looking results.
Vinyl Cutter vs. Utility Knife
Vinyl Cutter:
- Pros: Fast, clean cuts, low risk of cracking, easy for straight lines, professional finish.
- Cons: Can be expensive, not ideal for intricate cuts, usually requires purchase.
Utility Knife:
- Pros: Inexpensive, readily available, versatile for many cuts (including some intricate ones).
- Cons: Requires multiple passes, higher risk of cracking with thicker vinyl, can be tiring.
Exploring Power Tools for Tricky Cuts
Sometimes, you need to make cuts that aren’t just straight lines. You might need to cut around a toilet flange, a radiator pipe, or an awkward corner. This is where power tools can be incredibly helpful.
They offer more control and precision for these challenging shapes. However, using power tools requires a bit more caution. You need to select the right blade and set the right speed.
A jigsaw is a very popular choice for these types of cuts. A jigsaw is a handheld saw that uses a reciprocating blade. You can guide it along a marked line.
For vinyl flooring, you need a specific type of blade. Look for a blade designed for plastic or fine-tooth blades. A coarse blade will tear the vinyl.
A fine-tooth blade will create a smoother cut. You also want to set your jigsaw to a medium speed.
When using a jigsaw, start the cut from an existing edge if possible. This is often called a “plunge cut.” It means you push the blade directly into the material. Be sure to practice this on a scrap piece first.
Keep the saw’s base plate firmly against the flooring. Move slowly and steadily. Don’t force the saw.
Let the blade do the work. This will help prevent chipping and cracking.
Another tool some people use is a rotary tool, like a Dremel. With the right cutting bit, these can be very precise for small, intricate cuts. They are excellent for trimming tiny bits or making small notches.
However, they produce a lot of dust. Always wear a dust mask and safety glasses when using any power tool. Ensure good ventilation.
Jigsaw Blade Selection for Vinyl
For Lighter Vinyl (Sheet Vinyl): A fine-tooth wood blade or a plastic-specific blade works well. A medium-speed setting is usually best.
For Thicker LVP/LVT: Look for blades labeled for “plastic” or “fine metal.” These have more teeth per inch (TPI). This creates a cleaner, smoother cut. Use a medium to slow speed setting.
Always test on a scrap piece first.
Personal Experience: The Time I Almost Ruined a Plank
I remember the first time I tackled LVP. I was so excited. The planks looked beautiful, and I had a vision for my living room.
I’d watched a few videos, and everyone made it look so easy. I started with my trusty utility knife, thinking it would be just like cutting thicker cardboard. I laid down a plank, measured my cut, and started scoring.
I pressed down hard, making several passes, feeling pretty confident.
But as I got to the end of the plank, I started to feel resistance. The vinyl was flexing. I pushed harder, and then I heard it – a distinct snap.
Not a clean break snap, but a jagged, cracking snap. My heart sank. I lifted the knife, and there it was: a beautiful, deep crack running through the plank where I needed to cut.
It was slightly off my line, too. I felt a wave of frustration wash over me. I had another 500 square feet to go.
Was I going to ruin every single plank?
That was the moment I realized the utility knife had its limits. I needed a different approach for these thicker planks. I took a break, did some more research, and decided to invest in a vinyl plank cutter.
The next day, cutting with the new tool felt like night and day. The plank slid in, the lever went down, and snap – a perfect, clean cut. No flexing, no cracking.
It saved me so much time and saved the rest of my flooring from my shaky knife skills. That experience taught me to match the tool to the material.
Real-World Context: Your Home Environment Matters
The environment in your home can affect how vinyl cuts. For example, if the vinyl is very cold, it can become more brittle. This makes it more prone to cracking, especially when using a utility knife.
If you’re working in a cold garage or basement during winter, let the vinyl warm up inside your home for a day or two before you start cutting. The ideal temperature for cutting vinyl is usually around 65-75°F (18-24°C).
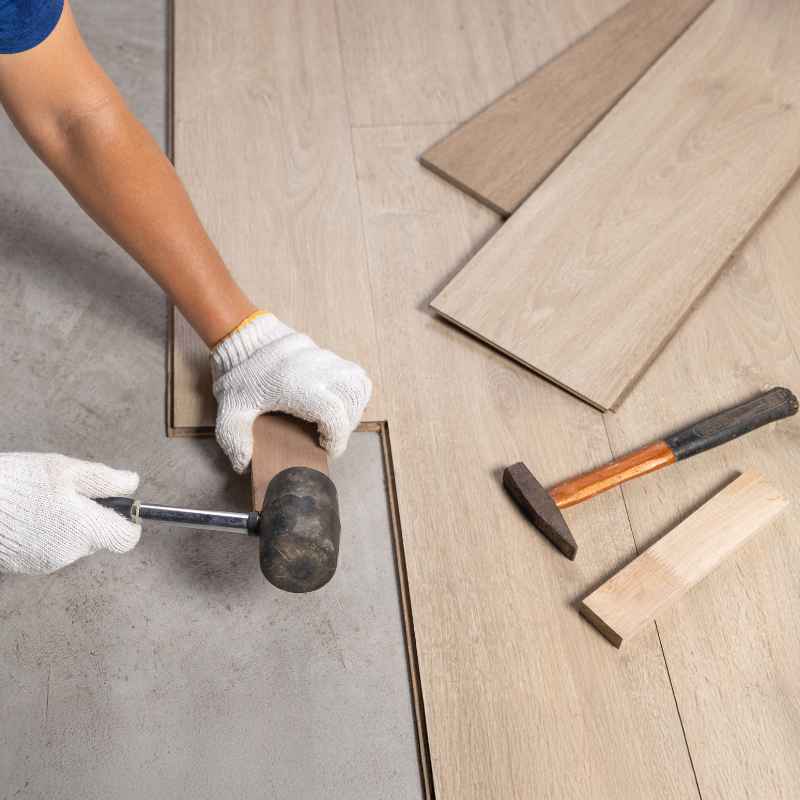
The subfloor also plays a role. If your subfloor is uneven, it can cause the vinyl to flex awkwardly as you cut. This flexing can lead to cracking.
Make sure your subfloor is clean, dry, and as level as possible before you begin. For LVP and LVT, a smooth, flat surface underneath is crucial for both cutting and the final look of the floor.
Your habits during the installation also matter. Are you rushing? Are you trying to cut too deep in one pass?
These habits can lead to mistakes. Taking your time is incredibly important. Measure twice, cut once.
This old saying is true for a reason, especially with flooring. Double-checking your measurements and your cutting path will save you from having to throw away pieces.
Environmental Factors Affecting Cuts
Temperature: Cold vinyl is brittle. Warm vinyl is more pliable. Aim for room temperature.
Subfloor Flatness: An uneven subfloor can cause flexing and cracking during cuts.
Humidity: While less of a factor for cutting, extreme humidity can affect some adhesives and vinyl types over time.
Lighting: Good lighting helps you see your cut lines clearly, reducing errors.
What This Means for You: When to Worry
So, when should you feel concerned about your cuts? The main indicator is cracking. If you see visible cracks, even small ones, radiating from your cut line, your technique or tool might be off.
Another sign is a jagged or uneven edge. This won’t create a tight seam with the next piece. It will look messy and unprofessional.
For sheet vinyl, you might see it start to tear or stretch before it cuts cleanly. This often happens if the blade is dull or you’re pulling too hard. For LVP/LVT, if you’re using a utility knife and it’s not cutting through after many passes, or if it bends excessively, that’s a sign you should switch to a different tool.
If your cuts are consistently off-line, even with a straight edge, it might be a technique issue. You might be pushing too hard or not keeping the guide steady. Don’t beat yourself up about it.
This is why practicing on scrap pieces is so important. Most homeowners will have a few “practice cuts” that don’t turn out perfect. The key is to learn from them and adjust your approach for the rest of the project.
Always inspect your cut edges. Hold two pieces together. Do they meet nicely?
Is there a gap? Can you see any rough spots? If the edge is smooth and the pieces fit snugly, you’ve done a good job.
If not, it’s time to reassess your tool and your method.
Quick Checks for Cut Quality
Visual Inspection: Look closely at the cut edge. Is it smooth or ragged?
Fit Test: Place two cut pieces together. Do they align perfectly with no visible gaps?
Edge Feel: Run your finger lightly along the cut edge. Does it feel sharp and clean, or rough and brittle?
Cracking: Check for any signs of cracks or splitting along the cut line.
Quick Fixes and Tips for Better Cuts
Even with the best tools, a few extra tips can make a big difference. These are simple things that many people overlook but can elevate your results. They are mostly about preparation and attention to detail.
You’ve got this!
1. Use a Sharp Pencil: For marking your cut lines, use a sharp pencil or a fine-tip marker. A thick line can throw off your measurement.
For LVP/LVT, a sharp carpenter’s pencil works great.
2. Score the Back for LVP/LVT: Some people find it easier to score the back of the vinyl plank for the first few passes. This can sometimes give a cleaner starting point and guide the knife better.
3. Clean the Blade Often: If you’re using a utility knife and notice it’s not cutting as easily, wipe the blade with a clean cloth. Sometimes, vinyl residue can build up and make it duller.
4. Cut Slightly Oversized Then Trim: For intricate cuts, it’s often easier to cut a piece that’s slightly larger than needed. Then, use your utility knife or a rotary tool to carefully trim it down to the exact size.
This gives you more room for error.
5. Practice on Scraps: I can’t say this enough. Before you cut your first “real” piece, take a scrap piece and practice your technique.
Try different tools. See what works best for your specific flooring type.
6. Consider a Jigsaw with a Bail Handle: If you’re using a jigsaw, a model with a bail handle (the U-shaped one) can offer more control for curved cuts compared to a barrel grip jigsaw.
7. Safety First: Always wear safety glasses. Cutting vinyl can create small pieces that fly off.
If using power tools, a dust mask is also a good idea.
Essential Tools Recap
For most vinyl:
- Sharp Utility Knife (with snap-off blades)
- Metal Ruler or Straight Edge
- Measuring Tape
- Pencil
For thicker LVP/LVT:
- Vinyl Flooring Cutter
- Jigsaw (with appropriate fine-tooth blade)
- Rotary Tool (for very precise, small cuts)
Frequently Asked Questions About Cutting Vinyl Flooring
What is the easiest way to cut vinyl flooring?
The easiest way often depends on the type of vinyl. For thin sheet vinyl, a sharp utility knife with multiple passes is usually sufficient and easy. For thicker luxury vinyl planks (LVP), a dedicated vinyl flooring cutter is the easiest tool.
It provides clean, fast cuts with minimal effort and risk of cracking.
Can I cut vinyl plank flooring with scissors?
For very thin vinyl tiles or some very thin sheet vinyl, heavy-duty scissors might work for small cuts. However, for standard luxury vinyl plank (LVP) or tile (LVT), scissors are generally not recommended. They often compress the material rather than cutting it cleanly, leading to tearing and cracking.
How do I cut vinyl flooring around corners or pipes?
For intricate cuts around corners or pipes, a jigsaw is often the best tool. Mark your cut line carefully. Use a fine-tooth blade and a medium speed.
For very small notches or adjustments, a rotary tool with a cutting bit can offer precision. Always make sure to measure and mark precisely before cutting.
Should I cut vinyl flooring from the front or the back?
For sheet vinyl and most LVP/LVT, you typically score and cut from the front. However, some installers find it helpful to make the initial score on the back of LVP/LVT for better guide control. For intricate cuts with a jigsaw, you’ll be cutting from the front.
How many times should I score vinyl with a utility knife?
There’s no exact number. It depends on the thickness and type of vinyl, and the sharpness of your blade. The goal is to cut through.
You’ll feel the resistance lessen as you cut deeper. Listen for the vinyl to “snap” or give cleanly. For most LVP, expect 3-6 passes, sometimes more.
For thinner vinyl, it might be less.
Why does my vinyl flooring crack when I cut it?
Cracking usually happens for a few reasons. The blade might be dull, causing it to tear rather than cut. The vinyl might be too cold and brittle.
You might be forcing the cut or bending the material too much before it’s fully cut. Using the wrong tool for the thickness of the vinyl is also a common cause.
Is it better to buy a vinyl cutter or rent one?
For a small project, renting a vinyl cutter might be cost-effective. However, if you have a larger area to cover or plan to do flooring projects in the future, buying a good quality vinyl cutter is often worth the investment. They are not overly expensive and can save you a lot of hassle and mistakes.
Conclusion
Cutting vinyl flooring cleanly without cracking is absolutely achievable. It all comes down to using the right tool for the job. A sharp utility knife works for many situations.
But don’t shy away from specialized cutters or even a jigsaw for tougher materials. Always prioritize a sharp blade and steady technique. With a little patience and the right approach, your vinyl flooring installation will look fantastic!