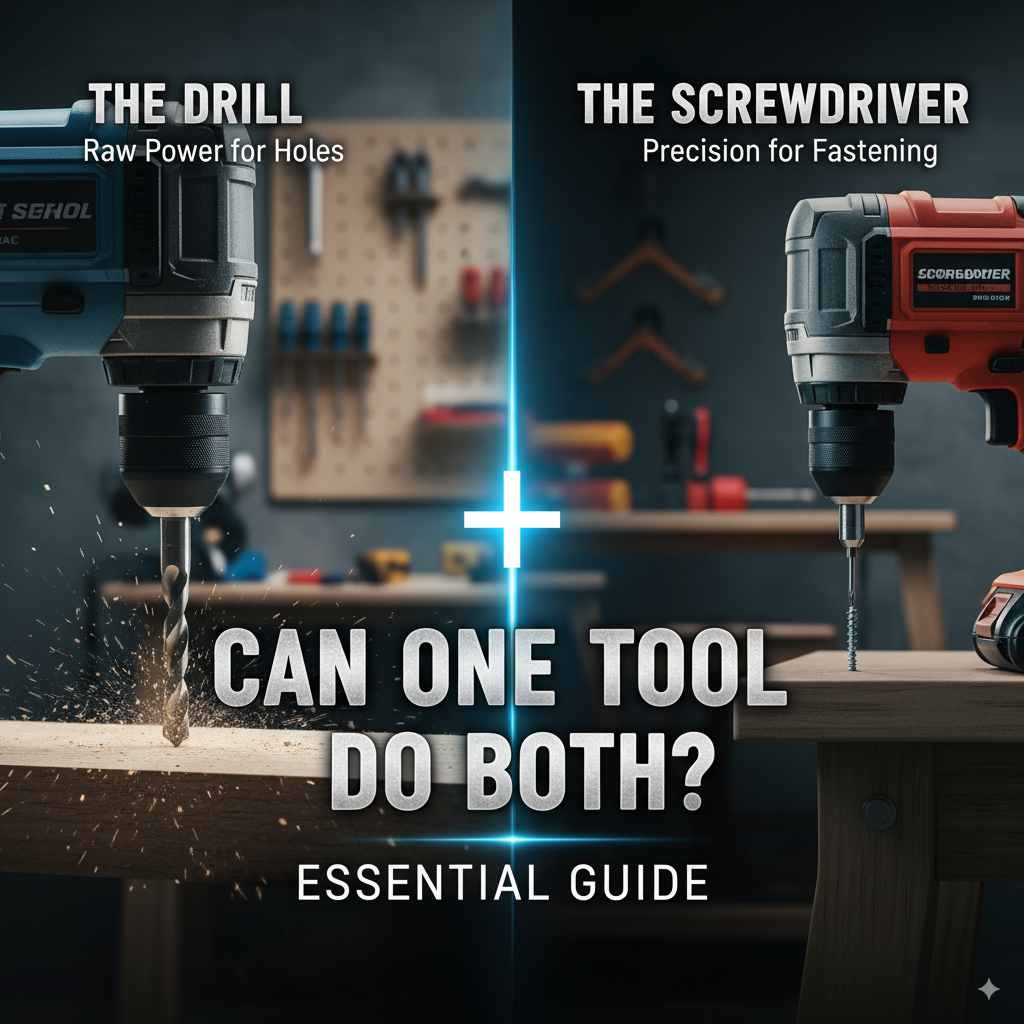
Can a Drill Be Used As a Screwdriver: Essential Guide
Yes, a drill can absolutely be used as a screwdriver with the right attachments and settings. It’s a common and incredibly useful way to speed up tasks that would otherwise be tedious, making it a favorite for DIYers and homeowners. This guide will show you how to do it safely and effectively.
Hey there, fellow DIYer! Ever found yourself staring at a pile of screws, wishing there was a faster way to get them in? You’re not alone! Many of us have a trusty power drill sitting around, and a common question pops up: “Can I use my drill as a screwdriver?” The great news is, yes, you absolutely can! It’s a fantastic way to save time and effort on countless projects around the house, from building shelves to assembling furniture. Don’t worry if you’ve never done it before; it’s simpler than you might think. We’ll walk through everything you need to know, step-by-step, so you can tackle those screwing jobs with confidence and ease. Let’s get started and unlock the full potential of your drill!
The Simple Answer: Yes, With a Few Tricks!
The short answer is a resounding yes! Your power drill is incredibly versatile and can easily double as a screwdriver. Think of it as a super-powered version of a manual screwdriver, capable of driving screws in much faster and with less strain on your wrist. It’s a game-changer for any DIY task that involves a lot of fasteners. We’ll explore exactly how to make this happen and what tools you’ll need to do it right.
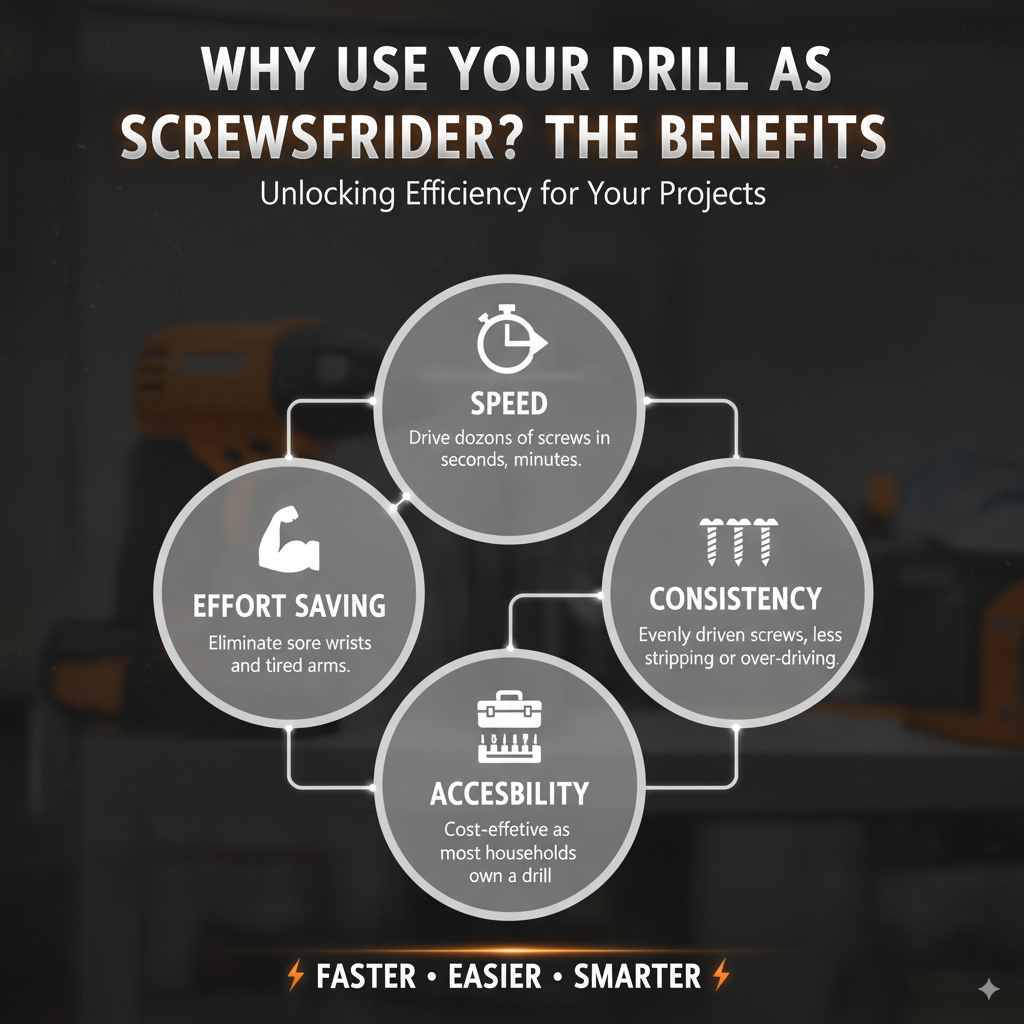
Why Use Your Drill as a Screwdriver? The Benefits
Switching your drill to screwdriving duty offers some fantastic advantages that make projects fly by:
- Speed: This is the biggest win. Driving dozens of screws by hand can take ages. A drill does it in seconds.
- Effort Saving: No more sore wrists or tired arms. Your drill does all the heavy lifting.
- Consistency: It’s easier to drive screws evenly, reducing the chance of stripping heads or pushing them too deep.
- Versatility: With the right bits, your drill can handle virtually any screw type you encounter.
- Accessibility: Most households already own a drill, so this is a cost-effective solution compared to buying a dedicated electric screwdriver.
What You’ll Need: Essential Tools and Accessories
To turn your drill into a super screwdriving machine, you’ll need a couple of key things:
1. Your Power Drill
Any standard cordless or corded drill will work. Modern cordless drills are particularly convenient because they allow for complete freedom of movement. If you’re looking for a new one, consider features like:
- Variable Speed Trigger: Crucial for control, allowing you to start slow and ramp up.
- Adjustable Clutch: This is perhaps the MOST important feature for screwdriving. It prevents over-tightening and stripping screws.
- Forward/Reverse Switch: Standard on most drills, you’ll need this to drive screws in and take them out.
- Keyless Chuck: Most modern drills have these, making it super easy to swap bits without any tools.
2. Screwdriver Bits
These are the interchangeable tips that actually engage with the screw head. They come in various types and sizes to match different screws. The most common ones you’ll need are:
- Phillips Head: Recognizable by their cross shape. These are extremely common.
- Flat Head (Slotted): The simple, single-slot type.
- Torx (Star) Head: These have a six-pointed star shape. Increasingly popular for their grip and resistance to stripping.
- Hex (Allen) Head: Often used in furniture assembly, these have a hexagonal socket.
It’s a good idea to buy a set of assorted screwdriver bits. These sets usually include a variety of head types and sizes, often stored in a handy case.
3. Screw Grab or Magnetic Bit Holder (Optional but Recommended)
A magnetic bit holder can be a lifesaver, especially when working overhead or in tight spaces. It holds the screw securely to the bit, preventing it from falling off before you can engage it with the material. Some drivers come with Screw Grab technology, which is a bit of a misnomer as it’s usually a magnetic tip on the bit holder itself.
Step-by-Step Guide: Using Your Drill as a Screwdriver
Ready to give it a try? Follow these simple steps:
Step 1: Choose the Right Screwdriver Bit
This is critical! Look at the screw head you need to drive. Match the shape and size of the screw head to the correct screwdriver bit for your drill. Using the wrong bit is the fastest way to strip the screw head or damage your drill. For example, a #2 Phillips bit is the most common size for Phillips head screws.
Step 2: Insert the Bit into Your Drill
If you have a keyless chuck, simply loosen the collar by twisting it counter-clockwise. Insert the shank of your screwdriver bit firmly into the chuck. Then, tighten the collar clockwise by hand to secure the bit. Give it a gentle tug to make sure it’s snug.
Step 3: Set Your Drill to the Correct Mode (If Applicable)
Your drill likely has a switch for different functions. Make sure it’s set to the standard drill mode (often indicated by a drill symbol) for driving screws. Some drills have a hammer drill function (indicated by a hammer symbol), which you never want to use for screwdriving, as it can damage the screw head and your material.
Step 4: Set the Forward/Reverse Switch
Locate the forward/reverse switch, usually found above the trigger. Set it so that the drill will spin clockwise to drive screws in. For most drills, this means sliding the switch towards the front of the drill. If you need to remove a screw, you’ll flip this switch to spin the drill counter-clockwise.
Step 5: Adjust the Clutch Setting (Very Important!)
This is where the magic happens for preventing damage. The adjustable clutch on your drill has numbered settings. These settings control how much torque (twisting force) the drill applies before disengaging. The goal is to set it just high enough to drive the screw in flush without damaging the screw head or the material.
Here’s a general guide for clutch settings:
| Setting | Application | Notes |
|---|---|---|
| Low (1-5) | Small screws, soft materials (like drywall or thin plywood) | Prevents over-penetration and stripping. Good for delicate work. |
| Medium (6-15) | General purpose screws, medium-hard woods | The most common range for everyday DIY tasks. |
| High (16+) | Large screws, hard materials, lag bolts | Use with caution, as over-tightening is a risk. |
| Drill Symbol | Drilling holes | No clutch, maximum torque. Do NOT use for screws. |
Tip: Start with a lower setting and incrementally increase it until you find the sweet spot. If the screw stops driving, increase the setting. If the screw head starts to strip or the screw goes too deep, decrease the setting.
Step 6: Position and Engage
Place the tip of the screwdriver bit firmly into the screw head. Make sure it’s seated well. Align the screw straight with the hole you want to drive it into. For best results, hold your drill as straight (perpendicular) to the surface as possible. This helps prevent the screw from going in crooked or stripping.
Step 7: Drive the Screw
Gently squeeze the variable speed trigger. Start slowly! This gives you control and allows the screw to start engaging with the material without wobbling. As the screw begins to enter the material, you can gradually increase your trigger pressure for more speed.
Listen to your drill and feel the resistance. Once the clutch disengages (you’ll often hear a clicking sound and feel the drill stop driving forcefully), the screw is properly seated according to your clutch setting.
Step 8: Removing Screws
To remove a screw, simply flip the forward/reverse switch to the counter-clockwise (reverse) position. Place the bit firmly in the screw head and squeeze the trigger, again starting slowly. The drill will spin the screw out.
Tips for Success and Safety
Here are some extra pointers to make your screwdriving experience even better:
- Always use the correct bit: We can’t stress this enough! It saves your screws and your sanity.
- Pre-drill pilot holes: For most woods, especially hardwoods, drilling a small pilot hole before inserting a screw makes driving much easier and prevents splitting the wood. The pilot hole should be slightly smaller in diameter than the screw’s shank. For a good overview of this technique, check out resources from institutions like the U.S. Forest Products Laboratory which provides in-depth information on wood behavior.
- Maintain straight alignment: Hold the drill perpendicular to the screw head for optimal results.
- Don’t force it: If a screw isn’t going in, check your bit, clutch setting, or if a pilot hole is needed. Forcing it will likely cause damage.
- Manage speed: Start slow, especially when beginning to drive a screw or when removing a tight one.
- Secure your work: Ensure the piece you’re working on is stable and won’t move while you’re driving screws. Clamps are your friends!
- Safety First: Always wear safety glasses to protect your eyes from flying debris.
Drill vs. Dedicated Electric Screwdriver: What’s the Difference?
While a drill can do a great job screwdriving, it’s useful to understand its limitations compared to a dedicated electric screwdriver.
| Feature | Power Drill (as Screwdriver) | Dedicated Electric Screwdriver |
|---|---|---|
| Power & Torque | Higher, more versatile for driving larger screws or into tough materials. | Lower, optimized for speed and precision rather than brute force. |
| Size & Weight | Larger, heavier, can be cumbersome in tight spaces. | Smaller, lighter, much more maneuverable. |
| Clutch Control | Excellent, often with many settings for precise torque. | Good, but may have fewer settings or be less precise for heavy-duty tasks. |
| Speed Control | Variable speed trigger is standard, offering great control. | Often variable speed, but may have fewer options than a good drill. |
| Versatility | Can also drill holes, mix paint, etc. | Primarily designed for driving fasteners. |
| Best For | Versatile DIY tasks, heavy-duty screwing, occasional screwdriving. | Assembling furniture, electronics work, frequent light-duty screwing, tight spaces. |
For most homeowners and general DIYers, using a drill as a screwdriver is perfectly sufficient and incredibly effective. Dedicated electric screwdrivers are excellent for specific niche tasks, but a drill offers more bang for your buck in terms of overall functionality.
Common Problems and How to Fix Them
Even with the best intentions, occasional hiccups happen. Here’s how to troubleshoot:
- Stripped Screw Head: If the bit spins without turning the screw, the head is likely stripped. Try a different, slightly larger bit or a rubber band placed between the bit and screw head for better grip. If it’s still stuck, specialized screw extractors might be needed. Learn more about common screw issues and solutions from reliable carpentry guides like those found through organizations like the National Park Service’s Technical Preservation Services, which often discuss material integrity.
- Screw Not Going In Straight: Ensure you are holding the drill perpendicular to the screw head and the material surface. Don’t force it; back the screw out and try again, perhaps after pre-drilling a pilot hole.
- Clutch Not Disengaging: Your clutch setting might be too high, or the screw is fully driven. If the clicking is very loud and aggressive, you might be over-driving. Lower the clutch setting.
- Screw Going Too Deep: The clutch setting is too high, or you’re using the drill mode instead of a clutch setting. Back the screw out and reset the clutch to a lower number.
- Drill Bit Wobbling: Ensure the bit is fully seated in the chuck and the chuck is tightened securely. Check that the bit itself isn’t bent.
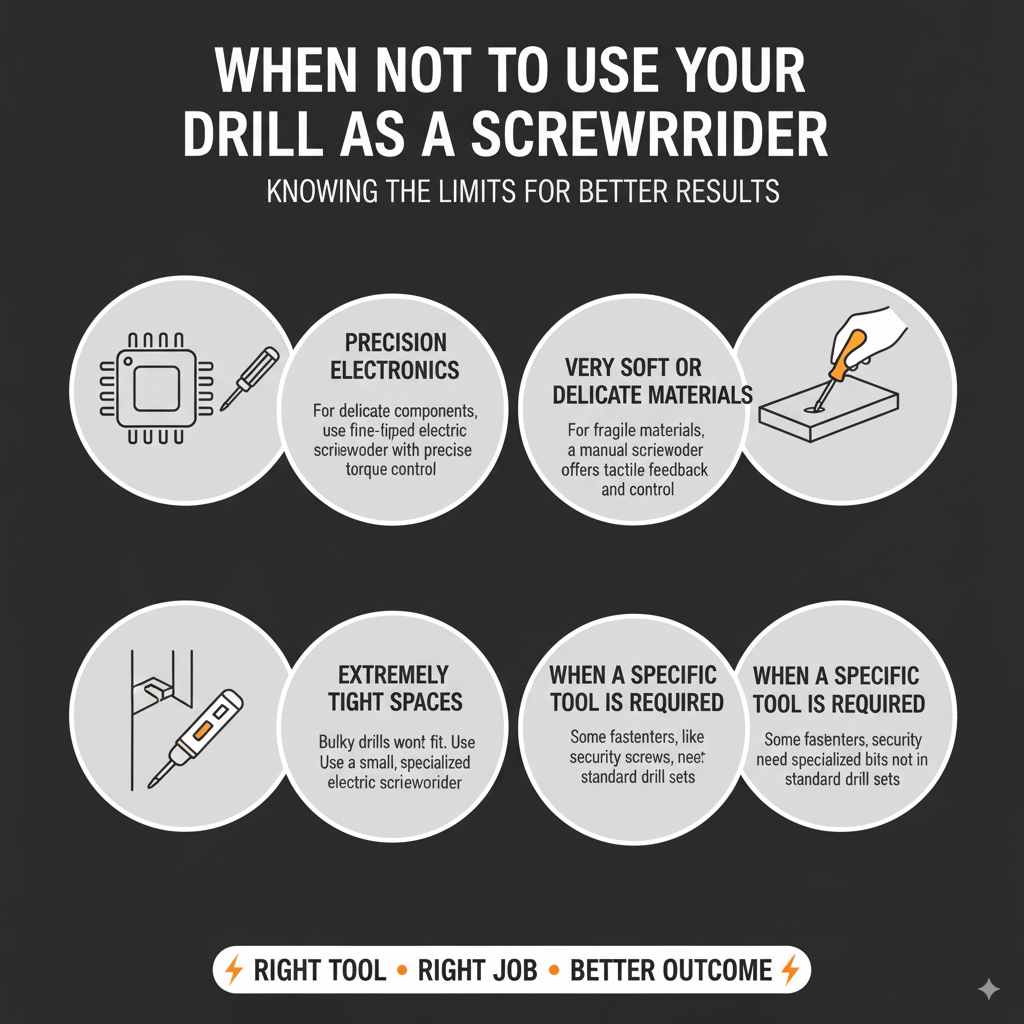
When NOT to Use Your Drill as a Screwdriver
While incredibly useful, there are times when a drill might not be the best tool for the job:
- Precision Electronics: For delicate electronic components, a fine-tipped electric screwdriver with very precise torque control is usually better.
- Very Soft or Delicate Materials: If you’re working with incredibly fragile materials where even the lowest clutch setting might be too much, a manual screwdriver offers the most tactile feedback and control.
- Extremely Tight or Awkward Spaces: Some drills are bulky. A small, specialized electric screwdriver might fit where your drill cannot.
- When a Specific Tool is Required: Some fasteners, like certain types of security screws, require specialized bits that may not be commonly found in drill bit sets.
Frequently Asked Questions (FAQ)
Q1: Can I use a drill without a clutch setting as a screwdriver?
You can, but it’s much harder to control. You’ll need to rely entirely on the variable speed trigger and your own feel for when to stop. Start very slowly and be prepared to stop immediately to avoid stripping screws or damaging your workpiece. It requires more practice and increases the risk of error.
Q2: What’s the difference between a drill bit and a screwdriver bit?
Drill bits are designed to bore holes, typically made of hardened metal that can withstand friction and cutting. Screwdriver bits have shaped tips (like Phillips, Torx, or flat head) designed to engage with the recess on a screw head and turn it. You insert screwdriver bits into the chuck of your drill, not drill bits.
Q3: How do I prevent the screw from stripping when using a drill?
The key is using the correct size and type of screwdriver bit, ensuring it’s fully seated in the screw head, and using the drill’s adjustable clutch. Start with a low clutch setting and increase it only as needed. Drive screws slowly at first.
Q4: Can I use my drill for drywall screws?
Yes, and it’s perfect for it! Drywall screws are designed to drive easily. You’ll want to use the correct Phillips head bit (usually a #2) and a low clutch setting on your drill to avoid driving the screw too deep, which can tear through the drywall paper.
Q5: What is a “screw gun”? Is it different from a drill?
A screw gun is essentially a specialized electric screwdriver, often with a collated screw system for very high-volume work like drywall installation. It’s built specifically for driving screws and usually has features like depth adjustment. A standard drill is a more general-purpose tool that can also drive screws.
Q6: Do I need a special battery for screwdriving?
No, your drill’s standard battery is perfectly fine for screwdriving. The power needed for driving screws is well within the capabilities of most drill batteries. The speed and torque are managed by the drill’s settings and trigger, not the battery type.
Conclusion
So there you have it! Your power drill is a highly capable screwdriver. By understanding the simple steps, using the right bits, and properly adjusting your drill’s clutch and speed, you can tackle a vast range of projects with speed, efficiency, and a lot less effort. It’s a fundamental skill that unlocks so much DIY potential. Remember to always prioritize safety by wearing your safety glasses, and don’t be afraid to start slow and get a feel for your tool. Happy building, and enjoy the satisfaction of a job well done!