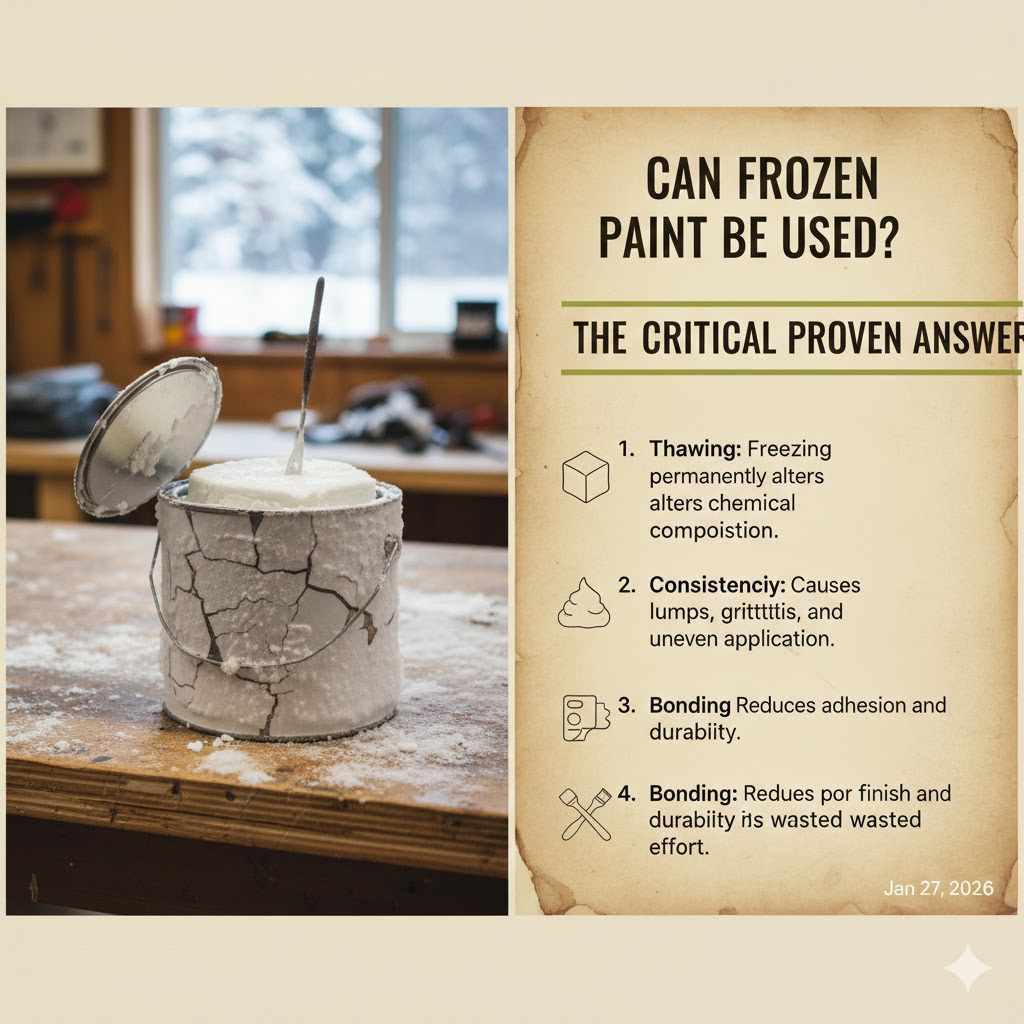
Can Frozen Paint Be Used? The Critical Proven Answer
Yes, frozen paint can sometimes be used, but only after you properly thaw and test it. Water-based (latex) paints that freeze can be permanently ruined if the chemical binders separate. The key is to thaw the paint slowly, mix it thoroughly, and check for a smooth, creamy consistency. If it’s grainy, lumpy, or watery, it’s no longer usable.
It’s a moment that makes every DIYer’s heart sink. You head to the garage or shed on a cold morning, ready to start a project, only to find your can of paint has frozen solid. Did all that money and potential just go to waste? It’s a super common problem, and it can be really frustrating.
Don’t worry, though. Sometimes, that paint can be saved! It all depends on the type of paint and how you handle it. I’m here to walk you through the exact steps to thaw your paint safely, test it like a pro, and know for sure if it’s ready for your project. Let’s figure this out together.
What Really Happens When Paint Freezes?
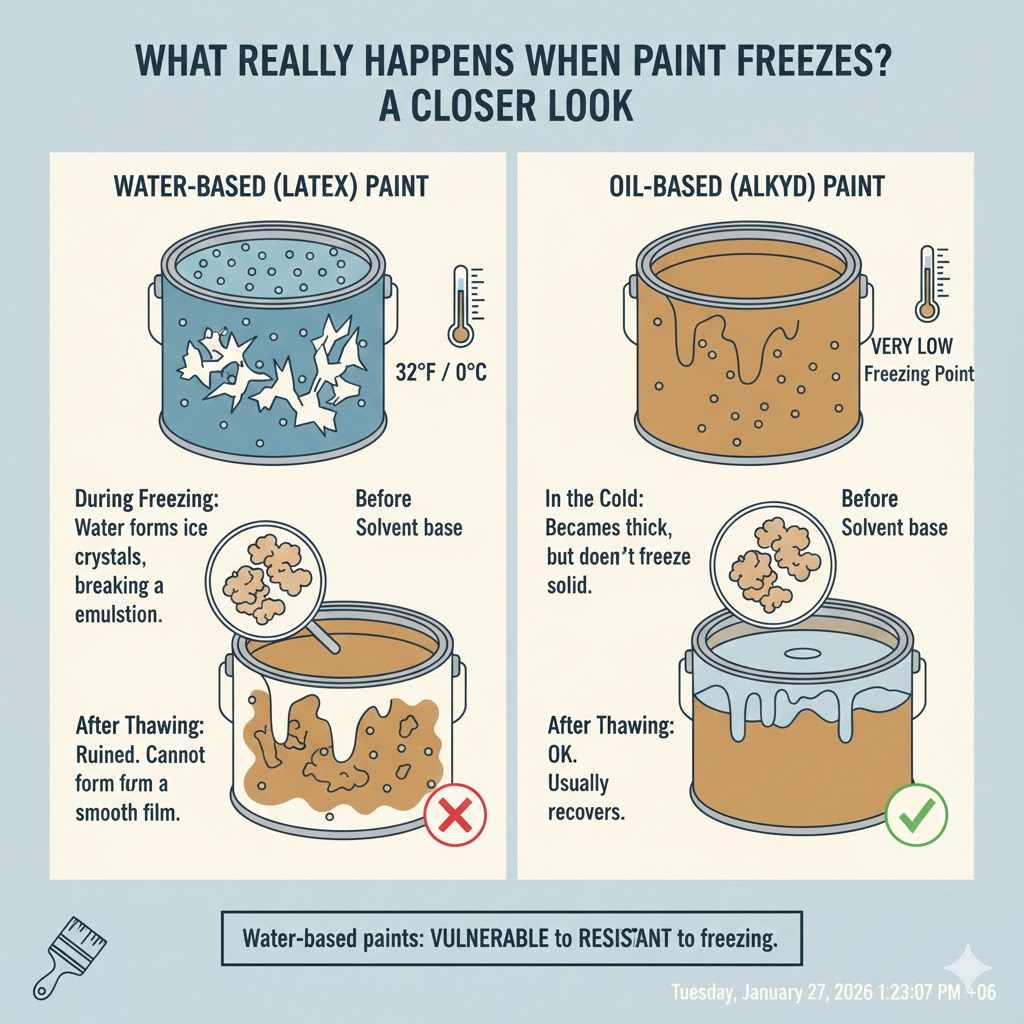
To understand if we can save frozen paint, we first need to know what’s happening inside that can. Think of latex or water-based paint not as a simple liquid, but as a carefully balanced recipe. It’s a suspension of tiny solid particles—pigments for color and binders for adhesion—all floating evenly in water.
When the temperature drops below freezing (32°F or 0°C), the water in the paint begins to form ice crystals. These sharp crystals push the pigments and binders together, forcing them into clumps. This process can break the delicate chemical bonds, called an emulsion, that keep everything mixed perfectly.
Imagine a smoothie. When it’s fresh, everything is blended smoothly. If you freeze it and then let it thaw, you often get a watery layer and a clumpy layer. The same thing can happen to your paint. The emulsion breaks, and the paint can no longer form a strong, even film when it dries. This is why you might see a texture like cottage cheese or a separated, watery mess after thawing.
Water-Based vs. Oil-Based Paint: A Big Difference
Not all paints react to the cold in the same way. The key difference is the liquid base.
- Water-Based (Latex/Acrylic) Paints: These are the most vulnerable to freezing. Because their primary ingredient is water, they freeze easily. One good freeze-thaw cycle might be survivable, but repeated freezing and thawing will almost certainly ruin the paint.
- Oil-Based (Alkyd) Paints: These paints use mineral spirits or other petroleum-based solvents as their liquid base. These solvents have a much lower freezing point than water. While they can get very thick and slow-moving in the cold, they are far less likely to freeze solid and be permanently damaged.
So, if your latex paint has frozen, we have some detective work to do. If it’s oil-based, you’re probably in much better shape.
Step-by-Step Guide: How to Thaw and Test Frozen Paint
Ready to try and rescue that can of paint? Let’s go through the process carefully. Rushing this can do more harm than good, so patience is your best tool here. Follow these steps exactly to give your paint the best chance of survival.
Step 1: Move the Paint to a Warm, Stable Environment
The very first step is to bring the frozen can of paint indoors. Find a spot where the temperature is consistently above 50°F (10°C), like a utility room, a heated basement, or just inside your house. Place it on the floor, away from direct heat sources.
Crucial Tip: Do NOT try to speed up the process. Never use a heat gun, hair dryer, space heater, stove, or microwave to thaw paint. Applying intense, direct heat can cook the paint, permanently ruining the binders and potentially creating a fire hazard. Slow and steady is the only way.
Step 2: Let It Thaw Completely
Now, we wait. A gallon of paint can take a surprisingly long time to thaw all the way through—often 24 to 48 hours. Don’t try to stir it or open it while there are still ice chunks inside. Let it return to a fully liquid state on its own.
Step 3: Open and Stir Thoroughly
Once you’re confident the paint is completely thawed, it’s time to see what you have. Open the can and get ready to mix. Your goal is to see if you can get the paint back to its original smooth consistency.
- Start with a simple paint stick. Stir slowly at first, then more vigorously. Mix for at least 3 to 5 minutes, scraping the sides and bottom of the can to incorporate everything.
- If you have a large amount of paint or it’s very thick, a drill with a mixer attachment can be a huge help. This will give you the power needed to break up any soft clumps and re-blend the ingredients.
As you stir, pay close attention to how it feels and looks. This is our first clue about its health.
Step 4: The Critical Texture Test
After a thorough mixing, it’s time to evaluate the paint’s texture. This is the moment of truth. Here’s what you’re looking for:
- Good Sign (Likely Usable): The paint looks smooth, creamy, and consistent, just like new paint. It flows off the stir stick in an even ribbon.
- Bad Sign (Likely Ruined): The paint has a texture like cottage cheese, ricotta cheese, or sand. You see hard lumps or gritty particles that won’t mix in, no matter how much you stir. It may also look watery, with a clear or milky liquid that refuses to blend with the sludgy pigment at the bottom.
If you see that lumpy or hopelessly separated texture, the paint’s chemical structure is broken. Unfortunately, no amount of stirring or adding water will fix it. It’s time to stop and plan for responsible disposal.
Step 5: The Final Test Patch
If the paint passed the texture test and looks smooth, congratulations! But we have one final, crucial step before you put it on your walls or project: the test patch.
Find a piece of scrap material, like a piece of drywall, some cardboard, or an old piece of wood. Apply a small amount of the paint with a brush or roller, just as you would for your main project. Let it dry completely according to the time listed on the can (this may take longer than usual).
Once dry, inspect the test patch closely:
- Coverage: Does it cover the surface well, or is it thin and streaky?
- Adhesion: Try scratching it lightly with your fingernail. Does it scrape off easily? Good paint should stick firmly.
- Finish: Does the sheen (e.g., matte, satin, semi-gloss) look correct? Is the color even and consistent?
If the paint performs well in the test patch—it adheres properly, covers well, and dries to the correct finish—you can feel confident using it for your project. If it fails any of these checks, it’s not worth the risk of a ruined project.
Summary Table: Is Your Frozen Paint Usable?
Here’s a quick checklist to help you decide. If your paint shows any signs in the “Likely Unusable” column, it’s best to buy a new can.
| Test | Good Sign (Likely Usable) | Bad Sign (Likely Unusable) |
|---|---|---|
| Consistency After Stirring | Smooth, creamy, uniform. Flows evenly off a stir stick. | Lumpy, grainy, “cottage cheese” texture. Hard particles that won’t dissolve. |
| Separation | Mixes back together completely into one consistent liquid. | Watery liquid on top, thick sludge on bottom. Refuses to re-blend. |
| Smell | Smells like normal paint. | Smells foul, rancid, or sour, like spoiled milk. |
| Dry Test Patch Performance | Sticks firmly, provides good coverage, has an even color and sheen. | Scratches or peels off easily. Looks streaky, blotchy, or has an inconsistent sheen. |
How to Prevent Your Paint from Freezing Again
The best way to deal with frozen paint is to prevent it from happening in the first place. Proper storage is easy and saves you from a lot of future headaches and wasted money. Think of your paint as a perishable item, just like food.
Find the Right Storage Spot
The ideal place to store paint is a location that is cool, dry, and never, ever drops below freezing. For most people, this means:
- A heated basement
- A utility closet inside the house
- A temperature-controlled garage
Avoid storing paint in unheated sheds, garages, or outdoor storage units, especially if you live in a climate with cold winters. A single freezing night can be enough to cause damage.
Seal the Can Tightly
After using paint, make sure the lid is sealed airtight. Here’s a simple trick:
- Clean any wet paint from the rim and groove of the can.
- Place the lid back on the can.
- Put a small piece of scrap wood over the lid.
- Gently tap the wood with a rubber mallet, moving around the edge of the lid to create an even, airtight seal.
This prevents air from getting in and drying out the paint, and it helps maintain the paint’s quality for longer. Storing the can upside-down after sealing can also create an even better seal.
Comparing Paint Types and Their Freeze Resistance
As we discussed, different paints have different weaknesses to cold. This table breaks it down simply.
| Paint Type | Freeze Vulnerability | Key Thing to Check After Thawing |
|---|---|---|
| Latex / Acrylic (Water-Based) | High | Texture is everything. Look for any signs of graininess or “cottage cheese” clumps. This is the most common failure. |
| Oil-Based / Alkyd (Solvent-Based) | Low | Consistency. It might become very thick, like jelly. If it doesn’t thin out with stirring, it may not be usable. |
| Chalk Paint / Milk Paint | Medium to High | Both separation and texture. These can separate badly or become gritty. A thorough test patch is essential. |
What to Do with Ruined Paint: Responsible Disposal
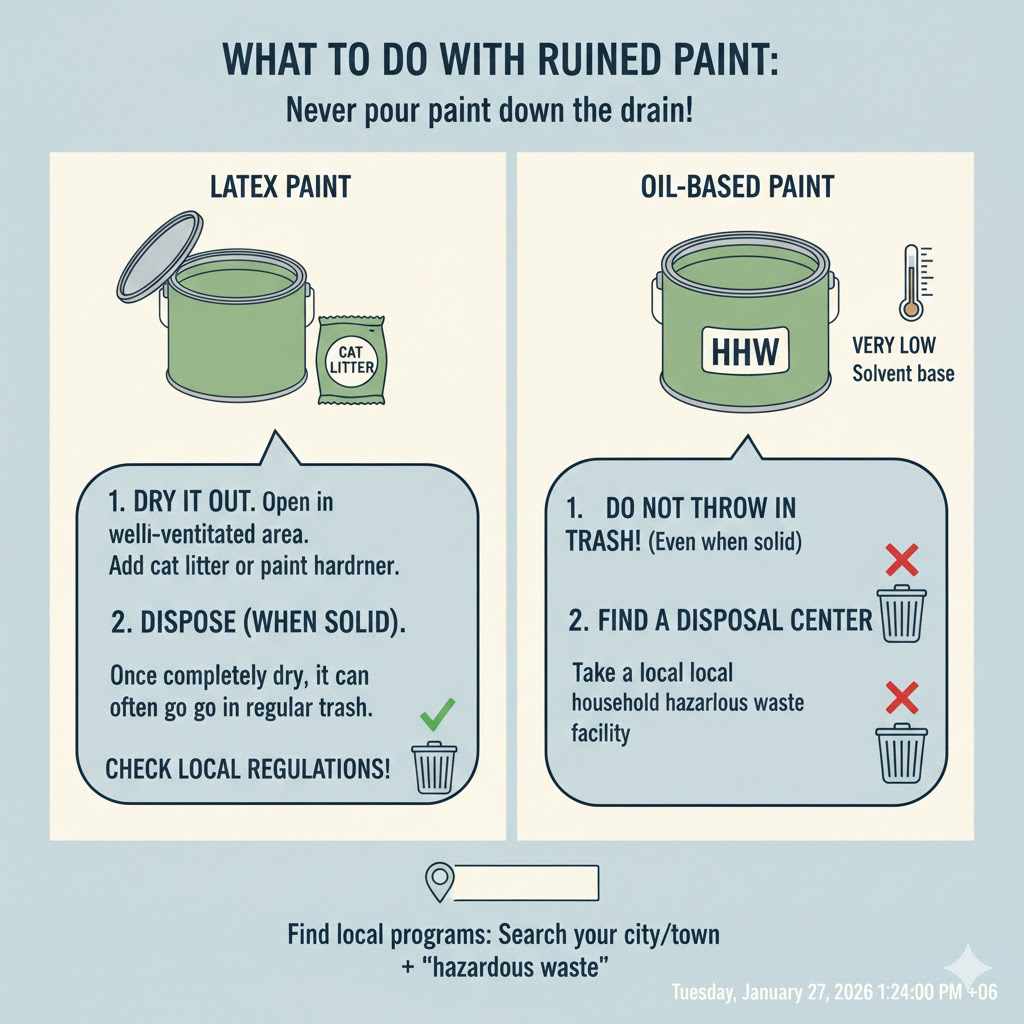
If you’ve followed the steps and determined your paint is beyond saving, it’s very important to dispose of it correctly. Never pour paint down the drain or throw liquid paint in your regular household trash. Paint contains chemicals that can contaminate soil and water systems.
Here’s the right way to handle it:
- Latex Paint: If you only have a small amount of latex paint left, you can dry it out. Open the can in a well-ventilated area away from children and pets. To speed it up, you can add cat litter or a commercial paint hardener. Once the paint is completely solid, you can typically throw it in your regular trash. Check with your local regulations first!
- Oil-Based Paint: This type of paint is considered household hazardous waste (HHW). It cannot be thrown in the trash, even when solid.
- Find a Disposal Center: The best option for all unusable paint is to take it to a local hazardous waste disposal facility. You can find information about local programs on your town or city’s website. The U.S. Environmental Protection Agency provides excellent guidance on disposing of household hazardous waste.
Frequently Asked Questions (FAQ)
Can I speed up the thawing process with a heater?
No, you should never use a direct heat source like a space heater, hair dryer, or stove to thaw paint. This can cook the binders in the paint, ruining it even faster. It can also be a fire hazard, especially with oil-based products. Slow thawing at room temperature is the only safe way.
How many times can paint freeze and thaw before it’s ruined?
Most paint manufacturers agree that latex paint is unlikely to survive more than one freeze-thaw cycle. Some premium paints have additives that allow them to survive a few cycles, but as a general rule, if your paint freezes and thaws multiple times, it is almost certainly ruined.
What does the “cottage cheese” texture in paint mean?
A “cottage cheese” texture is the most obvious sign that water-based paint is ruined. It means the binders (the glue that makes paint stick) and the pigments have permanently separated due to the formation of ice crystals. This damage is irreversible, and the paint will not dry into a durable, protective film.
Is it safe to use paint that was frozen and then thawed?
If the paint passes all the tests (mixes smoothly, has no bad odor, and dries properly on a test patch), then it is safe to use. The primary risk of using improperly thawed paint isn’t a safety hazard to you but a performance hazard to your project. It can result in a finish that peels, cracks, or provides poor coverage.
Can I just add water or paint thinner to fix thick, previously frozen paint?
No, this will not solve the underlying problem. Adding water to ruined latex paint or thinner to ruined oil-based paint won’t fix the broken chemical bonds. You’ll just have a thinner, lumpier liquid that still won’t perform correctly. It may even make the problem worse.
Does an unopened can of paint handle freezing better than an opened one?
Not really. The integrity of the seal doesn’t change the chemical composition of the paint inside. An unopened can will freeze at the same temperature as an opened one. The key factor is the type of paint (water-based vs. oil-based), not whether the can has been opened.
My oil-based paint turned into a thick gel after a cold night. Is it bad?
Oil-based paint can become extremely thick and gelatinous in the cold without being permanently damaged. Bring it into a warm area and let it sit for a day or two. Then, stir it vigorously. If it returns to a smooth, usable consistency, it should be fine. If it remains a stubborn, jelly-like mass that won’t smooth out, it may be too old or has been compromised.
Conclusion: When in Doubt, It’s Better to Start Fresh
So, can frozen paint be used? The answer is a hopeful “maybe.” By patiently thawing it, stirring it completely, and performing a careful test patch, you can often save a can of paint that was caught in the cold. It’s a great way to save a little money and prevent waste.
However, your time and the quality of your finished project are valuable. If you have any doubt about the paint’s integrity—if it stays lumpy, watery, or just doesn’t feel right—it is always the smarter choice to buy a new can. A few dollars spent on fresh paint is a small price to pay to avoid the frustration of a finish that fails weeks or months down the line.
Think of it as protecting your hard work. A great paint job starts with great materials, and now you have the knowledge to make sure your paint is up to the task. Happy painting!