Can I Paint Over Stain Without Sanding? Painting Without Prep
Many people starting home projects ask, Can I Paint Over Stain Without Sanding? It’s a common question because sanding seems like a lot of work. The good news is, sometimes you can skip it! The answer isn’t always simple, and it depends on a few things. Don’t worry, though, because we’re going to break it down step-by-step. Let’s explore how to prepare your surfaces to achieve a great paint job without too much effort. Next, we will cover the best ways to paint over stained surfaces.
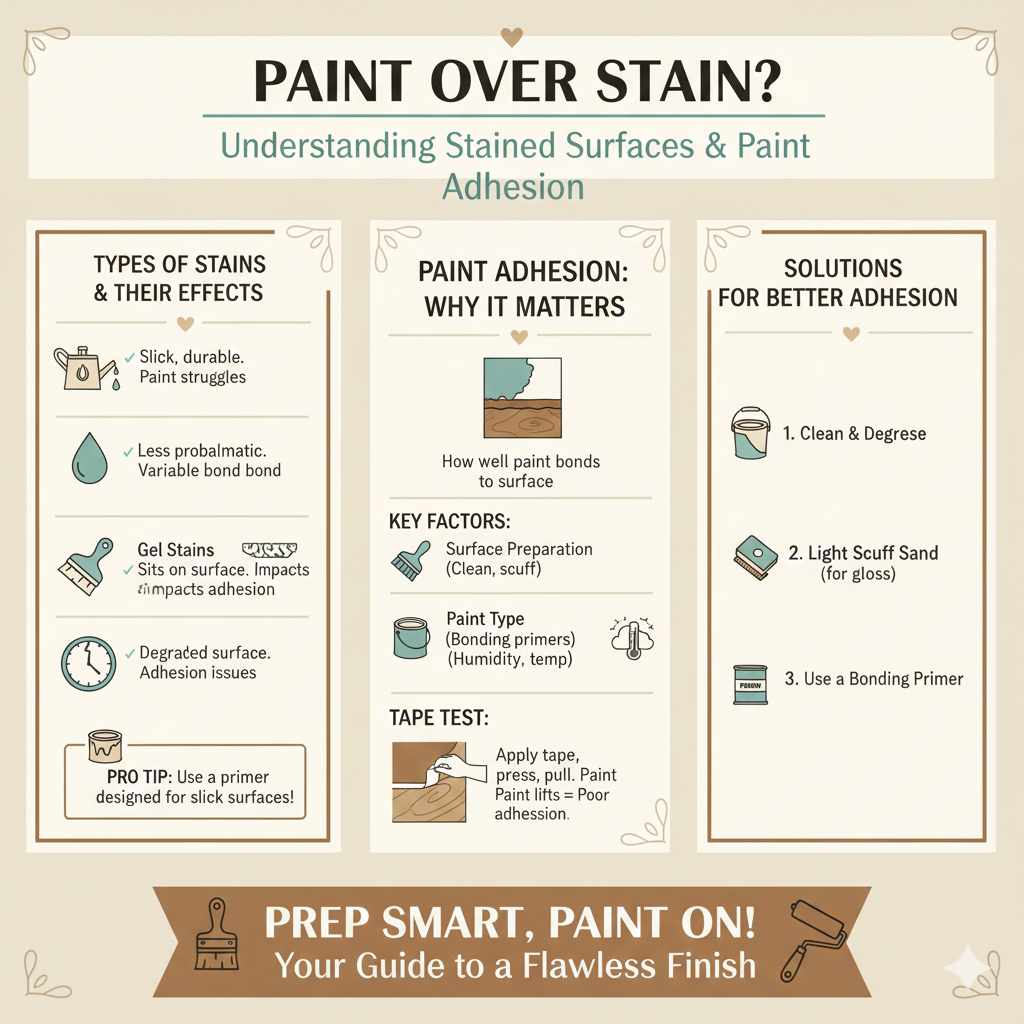
Understanding Stained Surfaces and Paint Adhesion
Before you even think about grabbing a paintbrush, you need to think about what’s going on with your stained surface. Stain and paint interact differently, and that’s why prep work is important. The main issue is that stain soaks into the wood, and paint is supposed to stick to the wood. If the stain is glossy or has a sealant, the paint might not have anything to grab onto. This can cause problems like chipping, peeling, and a generally uneven finish. Different types of stains also have different formulas; some are oil-based, and some are water-based, which also affects how the paint bonds. Knowing what you’re dealing with helps you choose the right approach to ensure your paint job lasts and looks good.
Types of Stains and Their Effects
Stains aren’t all the same. Knowing the type of stain you’re dealing with is key. Oil-based stains, for instance, are known for creating a durable finish, but their slick surface can make paint less sticky. Water-based stains, on the other hand, might be easier for paint to stick to, but they sometimes don’t provide the same level of protection. Also, you may encounter gel stains, which are thicker and can sit on top of the wood more than soaking in. The age of the stain also matters. Older stains may have broken down, making them harder for paint to stick to. Always check what type of stain you have before proceeding, and prepare accordingly. Improper preparation, for example, can make your painting project a frustrating experience, with the results potentially falling short of your expectations.
- Oil-Based Stains: These are often the toughest stains and can create a glossy surface that paint struggles to grip.
- Water-Based Stains: Generally, water-based stains are less problematic, but can still affect how the paint bonds.
- Gel Stains: Gel stains sit on the surface, which impacts paint adhesion.
- Stain Age: Older stains might have a degraded surface, causing adhesion issues.
The type of stain can affect how the paint sticks. For example, if you have an oil-based stain, using a primer designed for slick surfaces is critical. This primer will create a “grabbing” surface for the paint. If you have a water-based stain, you might get away with less prep work, but it’s still good to test the paint adhesion first.
Paint Adhesion: Why It Matters
Paint adhesion is how well the paint sticks to the surface. Good adhesion means your paint job will last and look good for a long time. Bad adhesion leads to problems like peeling, cracking, and blistering. Several things impact paint adhesion, including the surface’s preparation, the type of paint, and the environment. Preparing the surface, such as cleaning and maybe lightly sanding, helps the paint bond. The type of paint also matters; certain paints, like those specifically designed for slick surfaces or bonding primers, are made to stick better. The surroundings, like humidity and temperature, play a part too. High humidity, for example, can weaken paint adhesion, making the surface susceptible to peeling. Proper prep work, appropriate paint selection, and suitable conditions all contribute to successful adhesion, giving you a lasting finish.
- Surface Preparation: A clean and lightly scuffed surface improves paint’s grip.
- Paint Type: Some paints have better adhesion properties than others, especially bonding primers.
- Environmental Conditions: Humidity and temperature impact how well paint bonds.
To test paint adhesion, you can use the tape test. Apply a piece of painter’s tape to the painted surface and press it firmly. Then, quickly pull the tape off. If the paint comes off with the tape, you have a problem. This suggests poor adhesion, and you’ll probably need to sand or use a bonding primer.
When You Can Skip Sanding Before Painting
The good news is that you don’t always need to sand before painting over stain. There are times when it’s possible to skip this step, saving you time and effort. It often depends on the type of stain and the condition of the surface. If the stained surface is in good shape, not glossy, and the stain is relatively fresh, you might be able to get away without sanding. You can test this by cleaning the surface and then applying a bonding primer. If the primer sticks well, you are on the right track. However, it’s very important to note that skipping sanding is not always an option, and the success varies depending on factors like the type of stain, surface conditions, and your painting goals. Doing proper prep work, particularly when dealing with difficult surfaces, sets the stage for a great finish. You also need to keep your expectations realistic. A professional result needs great preparation, so don’t cut corners where it is not possible.
Situations Where Sanding Might Not Be Necessary
Certain situations make it possible to paint over stain without sanding. If the stained surface is in great condition, without any peeling or flaking, you might be okay. Also, if the stain is a matte finish and hasn’t been sealed, sanding might not be needed. Choosing the right primer is key here. A bonding primer is designed to stick to slick or difficult surfaces. If you know the stain is water-based and has been in place for a short time, you might have success. However, always test the paint adhesion before proceeding with the entire project to ensure your paint will stick properly. It’s also worth noting that skipping sanding may result in a slightly less smooth finish, so if a perfect finish is what you want, sanding is still the best route to take.
- Non-Glossy Surfaces: If the surface is not shiny, the paint will have a better grip.
- Good Surface Condition: No peeling or flaking.
- Water-Based Stain: These might be more paint-friendly.
Consider the age of the stain. New stains often have better adhesion qualities. Applying paint on newer surfaces will likely yield better results than older surfaces. Always test the primer and paint adhesion before proceeding, even if you think you can skip the sanding step.
The Importance of a Good Primer
A good primer is a secret weapon when painting over stain without sanding. The right primer can make all the difference, creating a surface that paint can stick to. Bonding primers are made for slick or difficult surfaces. They contain special ingredients that stick to these surfaces and then create a good surface for the paint. They’re often the go-to choice when you’re painting over stain. Make sure you select the proper primer for your specific project. In addition to adhesion, a primer also helps to seal the surface, which prevents the stain from bleeding through the paint. A high-quality primer can also help the paint go on more evenly and improve the overall finish. Therefore, choosing a good primer is a key step that determines if you can successfully paint over stain without sanding.
- Bonding Primers: Designed for slick surfaces.
- Sealing Properties: Prevents the stain from showing through.
- Improved Finish: Helps paint go on evenly.
Always follow the primer’s directions carefully. Apply it in a thin, even layer and allow it to dry completely. A properly primed surface is the foundation for a durable, attractive paint job.
Step-by-Step Guide to Painting Over Stain Without Sanding
Okay, let’s get down to how to do this. Remember, the idea here is to minimize the work but still get a great result. Following these steps helps you prepare the surface and paint it properly. Proper preparation makes your paint job successful. If you decide to paint without sanding, it is very important to complete each step. You don’t want to skip a step, or the paint might not stick. Follow this guide, and you can get excellent results.
Step 1: Clean the Surface
Before you even touch a paintbrush, you need to clean the surface. Use a mild cleaner and warm water to remove dirt, grease, and any other contaminants. Dish soap works great for this. You want a clean surface for the paint to grip onto. Rinse the surface well to remove any soap residue. Use a clean cloth to wipe the surface dry. Make sure the surface is completely dry before proceeding. A clean surface ensures the best results.
- Use a mild cleaner and warm water.
- Remove all dirt, grease, and contaminants.
- Rinse and dry the surface.
If you’re painting cabinets, give the inside a good cleaning as well. This will remove any food particles, dust, or other debris. Use a cleaner designed for kitchen surfaces and rinse well. Letting the surfaces dry is important to paint adhesion.
Step 2: Assess the Surface and Test Adhesion
Take a close look at the stained surface. Look for any issues like peeling or flaking. If the stain is in good condition, and not coming off, it is a good sign. The next step is to test the paint adhesion. Apply a small amount of primer in an inconspicuous area. Let it dry completely. Then, use painter’s tape to do a tape test (as described earlier). If the primer sticks well, you are ready to move on. If it does not, it’s best to sand the surface before proceeding. The tape test will tell you if the primer is sticking properly.
- Inspect for damage like peeling or flaking.
- Apply primer in a small, hidden area.
- Do the tape test to check adhesion.
If your surface has many imperfections, consider sanding before priming. Sanding will smooth out those imperfections. However, if your surface is already in good condition, you may be able to skip the sanding, assuming the primer adheres well.
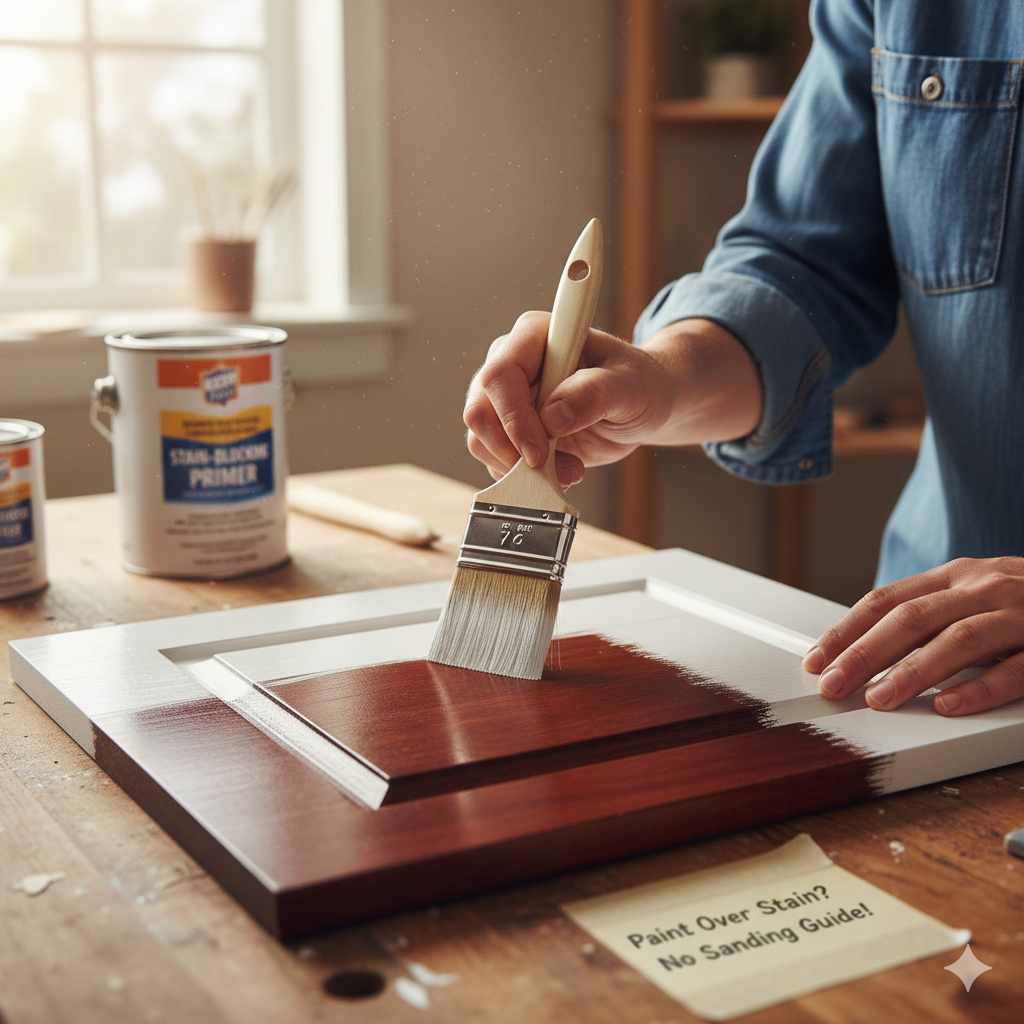
Step 3: Apply a Bonding Primer
Choosing the correct primer is key. A bonding primer is specifically designed to stick to slick or difficult surfaces. These primers contain special ingredients that help the paint adhere. Follow the manufacturer’s instructions on the can for application. Usually, you will need to apply one or two thin, even coats, allowing sufficient time for the primer to dry in between coats. Make sure you use the right tools for the job. A brush or roller is fine for most projects. A smooth, even primer coat is the foundation for a successful paint job. This important step helps to ensure that your paint will stick.
- Choose a bonding primer.
- Follow the manufacturer’s directions.
- Apply thin, even coats.
If your project is cabinets, use a small roller for flat surfaces and a brush for the edges and details. This will help you get a smooth, even primer coat.
Step 4: Apply the Paint
After the primer has fully dried, you are ready to paint. Use a high-quality paint that is suitable for the surface you are painting. For cabinets, an enamel paint is great because it is durable and easy to clean. Apply the paint in thin, even coats, just like the primer. Don’t try to apply too much paint at once, as this can lead to drips and runs. Let each coat dry completely before applying the next coat. Multiple thin coats usually give the best results. Waiting for the paint to dry is crucial to paint adhesion. You can use a brush or roller, depending on the surface. For a smooth finish, consider using a foam roller or a sprayer.
- Choose a high-quality paint.
- Apply thin, even coats.
- Let each coat dry completely.
When painting, work in a well-ventilated area and follow the manufacturer’s instructions. If you’re painting cabinets, consider removing the doors and hardware for easier painting and a cleaner look. With patience and care, you can achieve a great look. Consider wearing protective gear like safety glasses and a mask. Ventilation is also important for the fumes from the paint.
Step 5: Finishing Touches and Curing
Once the paint has completely dried, take a close look at your work. You might need to touch up any areas. Once everything is done, let the paint cure. Curing is the final stage where the paint fully hardens and reaches its maximum durability. The curing time varies depending on the paint, so check the paint can for guidance. During the curing period, treat the painted surface with care. Avoid placing heavy objects on it. Once the paint has fully cured, you can enjoy your freshly painted surface. With a little care, you can have a beautiful finish.
- Inspect for any flaws.
- Do touch-ups as needed.
- Allow the paint to fully cure.
If you’re painting cabinets, you can reattach the doors and hardware after the paint has fully dried and cured. Handle the painted surfaces with care, especially during the curing period. Once you’re done, you will have a beautiful finish.
Real-Life Examples and Case Studies
Seeing real-world examples helps you understand how this works in practice. Many people have successfully painted over stain without sanding. Here are a couple of examples that show the different approaches and the outcomes.
Case Study 1: Painting a Kitchen Table
A homeowner wanted to refresh their old kitchen table. The table had a dark, glossy stain. They decided to see if they could paint it without sanding. After thoroughly cleaning the table, they tested a bonding primer in an area that wasn’t visible. The primer adhered well. They went ahead and applied the bonding primer to the entire table, followed by two coats of a durable enamel paint. The result was excellent. The new paint adhered beautifully to the primed surface, creating a fresh, updated look. They were happy to avoid sanding, which saved them a lot of time. The key steps were cleaning the surface, testing the primer, and using a bonding primer.
- Cleaned and prepped the stained surface well.
- Tested the adhesion with a tape test.
- Used a bonding primer.
- Applied a durable enamel paint.
By using the correct primer and paint, they transformed the table with good results.
Case Study 2: Refinishing a Dresser
Another homeowner wanted to refinish an old dresser. The dresser had an older, oil-based stain that had some scratches and wear. After giving the dresser a good cleaning, they decided to try painting without sanding, as the existing finish was relatively smooth. They started by lightly sanding the dresser, and then applied a bonding primer, and two coats of a satin finish paint. The dresser looked great. The paint adhered well and gave the dresser a fresh appearance. By skipping heavy sanding, they saved a lot of time. This shows that the process works and that proper prep work is crucial.
- Cleaned the dresser and made the surface slightly rough.
- Used a bonding primer, allowing it to dry thoroughly.
- Applied multiple coats of paint for full coverage and a consistent finish.
The results were great, showing that with careful preparation and the right approach, painting over stain without sanding can be a good option.
Advanced Tips and Considerations
While the steps above are a good start, there are some extra things you can do to get an even better result. These advanced tips can assist you in getting great results. Keep in mind that every project is unique, so consider these extra points, especially if you want a professional-looking finish.
Dealing with Glossy Surfaces
Glossy surfaces are the trickiest to paint over. The shine means that the paint might not have anything to “grab” onto, and this could lead to issues. If you have a glossy surface, you will need to prepare the surface by cleaning it thoroughly. After cleaning, apply a bonding primer. These primers are designed to stick to slick surfaces. They create a good base for the paint. In certain instances, you may need to lightly sand the surface to take off some of the gloss, which creates an even better surface for the primer. Always do a test in a hidden area to make sure the primer and paint are sticking well. By properly preparing your surface, you’ll increase your chances of getting a good paint job.
- Clean the surface well to remove any grease or debris.
- Apply a bonding primer to help with adhesion.
- Lightly sand to dull the gloss if needed.
Consider using a degreaser cleaner to remove any waxes or polishes that are on the surface. These cleaners are good at removing these materials. Proper prep is the key.
Choosing the Right Paint
The right paint makes all the difference. When painting over stain, you want a paint that is made for durability and good adhesion. For surfaces like cabinets or furniture, an enamel paint is great. Enamel paints have a hard, durable finish that is easy to clean. They also often adhere well to surfaces, making them a good option for painting over stain. If you are painting a wall, choose a paint that is suitable for walls. The finish of the paint will also affect the appearance and durability. Satin or semi-gloss paints often work well. Always check the manufacturer’s directions on the paint can. Following the directions will help you get the best outcome. Choosing the proper paint gives you the best results.
- Choose a durable enamel paint for cabinets.
- Read the paint’s directions and instructions.
- Consider the finish: satin or semi-gloss for easy cleaning.
When selecting your paint, make sure it is suitable for the primer you are using. The primer and paint should be made for each other. This will maximize the chances of a long-lasting, great-looking finish.
Addressing Surface Imperfections
If your stained surface has any imperfections, such as scratches or dents, you’ll want to address these before you paint. If you are unsure how to tackle these issues, consult with a professional painter or contractor. The primer is a good option for small issues. You can also use wood filler to fill in larger issues. After the filler is dry, you will need to sand it smooth. For other minor issues, you can also use spackle or other fillers. Taking the time to fix these imperfections now will make your painted surface look a lot better. Proper preparation is very important.
- Use wood filler for dents.
- Sand down any imperfections, making sure the surface is smooth.
- Spot-prime any filled areas before painting.
Take your time and fill any imperfections before priming. This will make your final result look much better. You can have a beautiful finish by putting in a little extra effort. The final result will be something you’re proud of.
Frequently Asked Questions
Question: Do I always need to sand before painting over stain?
Answer: Not always! You can often skip sanding, particularly if the surface is in good shape and you use a bonding primer.
Question: What kind of primer should I use?
Answer: Use a bonding primer. These primers are designed to stick to slick or difficult surfaces.
Question: How can I tell if the primer is sticking properly?
Answer: Perform a tape test. After the primer dries, put a piece of painter’s tape on it, press it firmly, and then quickly pull the tape off. If the primer comes off with the tape, the adhesion isn’t good.
Question: How many coats of paint should I apply?
Answer: Apply at least two thin coats of paint, allowing each coat to dry completely before applying the next.
Question: What is the best type of paint to use?
Answer: For cabinets and furniture, an enamel paint is great. It’s durable and easy to clean.
Final Thoughts
So, Can I Paint Over Stain Without Sanding? The answer is: sometimes, yes! You’ve learned about the key things to consider: the type of stain, the surface’s condition, and the importance of a good primer. With the correct prep, and by using the right primer and paint, you can successfully paint over stained surfaces without the headache of sanding. Remember to clean the surface, test adhesion, and use a bonding primer. These steps can save you time and still provide a great-looking finish. Always remember to do your prep work, test the paint adhesion, and use the correct primer. Now you are ready to tackle your painting projects with confidence. Good luck, and enjoy your new paint job!