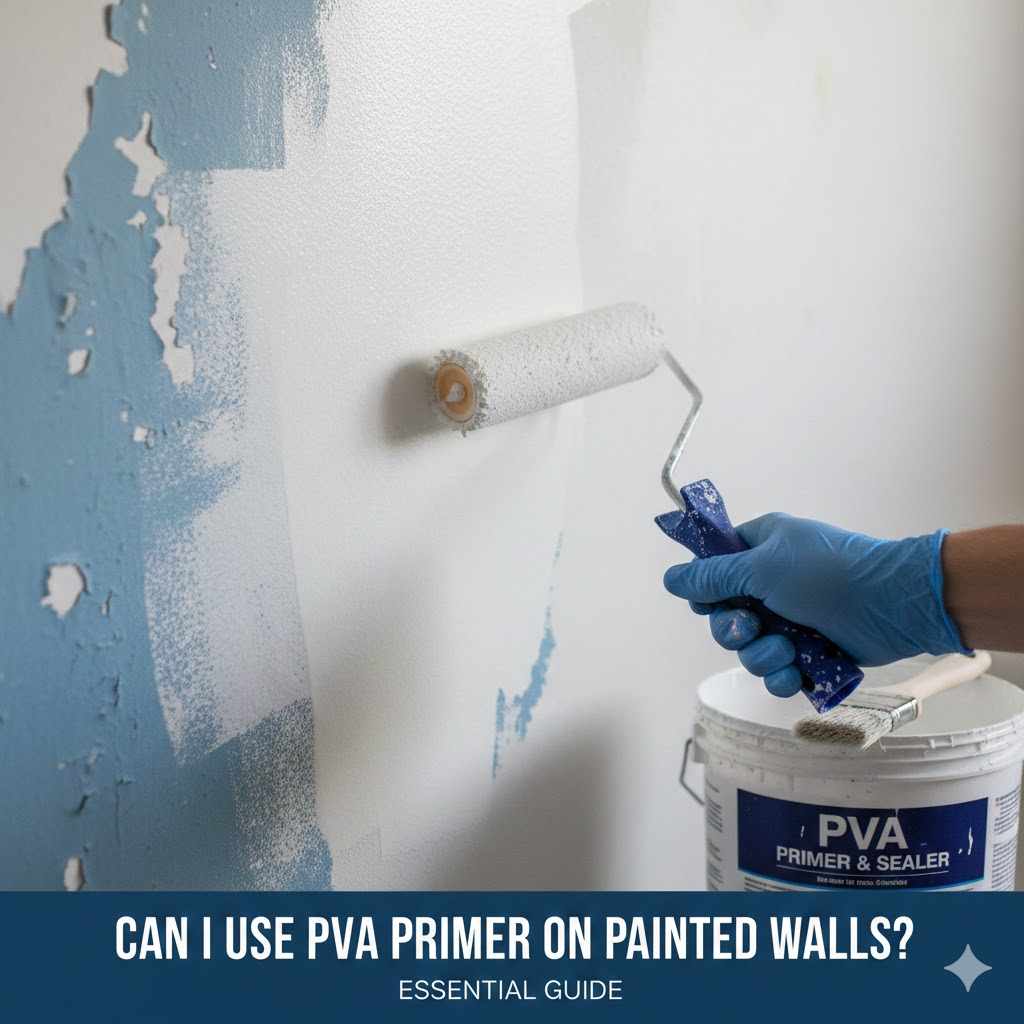
Can I Use PVA Primer On Painted Walls? Essential Guide
Yes, you absolutely can use PVA primer on existing painted walls, but only under specific conditions. It is generally best used on bare, porous surfaces like drywall or new plaster. For already painted walls, ensure the old paint is clean, dull (sanded), and securely bonded before applying PVA primer, or choose a specialized bonding primer instead for guaranteed adhesion.
Welcome to the workshop! It’s common when starting a new paint job to wonder which primer goes best where. You might have a can of Polyvinyl Acetate (PVA) primer sitting around—the kind often recommended for new drywall—and think, “Can I just use this on my old painted walls?” That’s a great, money-saving question. Using the wrong primer can lead to peeling paint down the road, which is nobody’s idea of a good weekend project!
Don’t worry; we will clear up exactly when PVA is safe to use on painted surfaces and when you need a different type of primer. I’ll walk you through the preparation steps needed to ensure your new paint job looks fantastic and lasts for years. Let’s dive into making your painting project smooth and successful!
Understanding PVA Primer: The Basics for Beginners
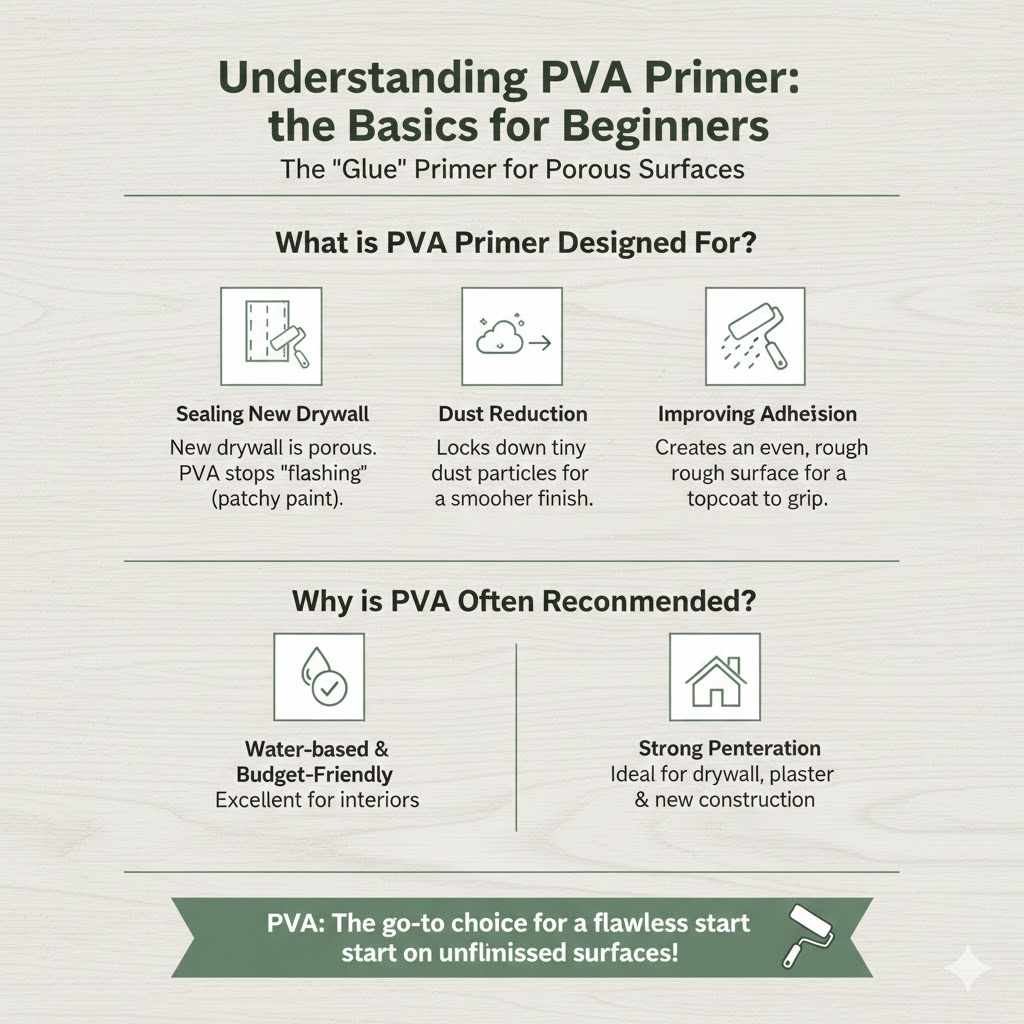
Before we talk about applying PVA primer over old paint, let’s make sure we all speak the same language. PVA stands for Polyvinyl Acetate. Think of it as the ‘glue’ primer.
What is PVA Primer Designed For?
PVA primer is usually the first coat you put on bare, porous materials. Its main job is sealing the surface so that the topcoat paint doesn’t soak unevenly into the material.
Sealing New Drywall: New drywall paper is very absorbent. PVA soaks in just enough to stop “flashing” (where the topcoat looks patchy).
Dust Reduction: It grips tiny dust particles left after sanding or cutting, locking them down so they don’t mix with your final paint layers.
Improving Adhesion (On Porous Surfaces): It creates a slightly rough, even surface for the topcoat to grab onto firmly.
Why is PVA Often Recommended Over Other Primers?
PVA primers are usually water-based and very budget-friendly. They are excellent for interior applications where you need strong penetration into unfinished surfaces like fresh plaster or drywall. If you look at resources for interior finishing, you’ll often see PVA as the go-to choice before any heavy topcoat is applied to new construction.
Can I Use PVA Primer On Painted Walls? The Short Answer
So, can I use PVA primer on painted walls? In short: sometimes, but often, it’s not the ideal choice.
The main issue is that a painted surface is generally non-porous, or at least significantly less porous than bare drywall. PVA needs something to soak into to anchor itself properly. When you put PVA on a slick, glossy, or even a very old, well-adhered latex paint job, the primer may just sit on top. This results in what professionals call “bond failure,” meaning your new paint layers might peel away right along with the primer later on.
The Key Consideration: Surface Condition
Your decision should rest entirely on the condition of the paint underneath:
1. If the Existing Paint is Glossy, Glossy, or Glossy: Do NOT use PVA. It will likely slide off. You need a specialized bonding primer.
2. If the Existing Paint is Dull, Clean, and Secure: You might be able to get away with it if you rough up the surface very well, but a multi-surface or bonding primer is safer.
3. If the Existing Paint is Peeling, Chalky, or Flaking: Primer of any type won’t fix this! You must scrape off the loose paint first.
The Beginner’s Guide: Preparing Painted Walls for Primer
If you’ve determined that you must use your existing PVA primer, or if you are just preparing for the correct primer, preparation is 90% of the job. A properly prepared painted surface is what determines success, not just the primer type.
Step 1: Inspect and Repair the Existing Paint
Walk the wall with a flashlight. Look for bubbles, chips, or loose areas.
Scrape: Use a paint scraper or putty knife to remove any paint that is bubbling or peeling away.
Feather Edges: Sand down the edges of any scraped areas until they are smooth (feathered). You don’t want hard ridges where the old paint stops.
Fill Imperfections: Apply joint compound or spackling paste to any holes or gouges. Let it dry completely, then sand smooth. Aim for a smooth, continuous surface. For more on surface repairs, home repair guides often emphasize the importance of leveling surfaces before recoating.
Step 2: Clean Thoroughly—The Non-Negotiable Step
Paint is rarely perfectly clean. Dust, grease from the kitchen, hand oils near light switches, and mildew near ceilings all act as bond-breaking barriers.
Mild Solution: Use warm water mixed with a mild detergent (like TSP substitute or a good quality dish soap). Avoid harsh cleaners unless absolutely necessary.
Wipe Down: Using a clean sponge or soft cloth, wipe the entire wall surface thoroughly. Work in small sections and rinse the sponge often.
Rinse: This is important! Use a cloth dampened only with clean water to wipe down the soapy residue. Any soap left behind will prevent the primer from sticking.
Dry Time: Allow the walls to air dry completely, which usually takes a few hours, or even overnight in humid conditions.
Step 3: Dull the Surface (The Secret to Success)
This is the step that makes PVA potentially work on smooth paint. Sanding dulls the sheen and creates micro-scratches (tooth) that the primer can grab onto.
Choose Your Sandpaper: For semi-gloss or gloss paint, you need something aggressive enough to dull the shine but fine enough not to leave deep scratches. Start with 120-grit sandpaper. If the paint is very glossy (like a door trim), you might need 100-grit first, followed by 150-grit.
Technique: Use a sanding block or pole sander for large areas. Apply light, consistent pressure. You aren’t trying to strip the paint off; you are just removing the gloss until the entire surface looks matte or dull.
Dust Removal (Again!): After sanding, dust is everywhere. Use a tack cloth (a sticky cheesecloth available at hardware stores) or a microfiber cloth lightly dampened with water to wipe down every square inch again. You must remove all sanding dust.
Primer Showdown: PVA vs. Bonding vs. Stain-Blocking
Now that your wall is prepped, let’s look at which primer truly suits old painted walls versus the PVA you might have on hand. As your woodworking mentor, I always advise using the right tool for the job to prevent future headaches.
| Primer Type | Best Use Case | Adhesion to Glossy Paint | Recommended for Over Existing Paint? |
|---|---|---|---|
| PVA Primer | Bare, new drywall, light patching | Poor | Generally no (unless heavily scuffed and flat) |
| Bonding Primer | Existing glossy paint, tile, laminate, plastics | Excellent | Yes (best choice for slippery surfaces) |
| Stain-Blocking Primer (Shellac/Oil-based) | Severe stains, smoke damage, glossy walls | Very good | Yes (excellent adhesion if the surface is dull) |
When PVA Might Be Okay (With Heavy Caveats)
If your wall was originally painted with a very flat, interior latex paint ten years ago, and it has been scrubbed clean and heavily sanded (down to 150-grit), using a quality PVA primer might work fine as a sealer coat before your finish paint. However, if you are unsure about the surface quality, move on to a bonding primer.
Why Bonding Primer is Usually the Smarter Choice
Bonding primers are specifically formulated with specialized resins that “bite” into hard, non-porous surfaces like old oil-based paint or glossy latex. They are designed to stick firmly when standard primers would slide off. They offer superior peace of mind for re-painting previously finished surfaces. Reputable building science sites, like those advising on home maintenance, often highlight bonding primers for multi-surface applications.
Application Technique: Putting Primer on Painted Walls
If you’ve done the prep work and decided on your primer (PVA or otherwise), the application process is straightforward. Remember, priming is about sealing and providing a uniform base, not about achieving perfect color coverage.
Tools You Will Need:
- Primer (PVA or bonding)
- Paint Tray
- Quality synthetic brush (for cutting in corners)
- Roller frame and covers (3/8” or 1/2” nap usually works well for walls)
- Stir stick
Application Steps:
- Stir Well: Never shake your primer. Stir thoroughly from the bottom up to ensure all components are mixed perfectly.
- Cut In Edges: Using your angled brush, paint a two-to-three-inch band around all edges, corners, baseboards, and window frames. This ensures you don’t leave “holidays” (missed spots) when rolling.
- Load the Roller: Dip your roller into the paint tray, coating it evenly, then roll it a few times on the painted grid section of the tray to squeeze out excess primer. A properly loaded roller should look wet but not drip.
- Roll the Walls: Use a consistent W or M pattern across the wall surface. This technique helps distribute the primer evenly. Then, roll vertically up and down over the pattern to smooth it out. Keep a “wet edge,” meaning overlap the previous section slightly before it dries.
- Second Coat (If Needed): For very dark colors underneath, or if the wall still looks patchy, let the first coat dry according to the label directions (usually 1–4 hours) and apply a second coat of primer.
- Check for Blemishes: Once the primer is dry, lightly sand any areas that feel rough or gritty using 220-grit sandpaper. Wipe clean with a tack cloth. This step improves the final feel of the painted surface.
- Wait: Read the can! Do not paint your topcoat until the primer is fully cured. Rushing this can trap moisture and lead to bubbling. Most primers require 4 to 24 hours before recoating.
The Benefits and Drawbacks of Using PVA Primer
Since you asked if you can use PVA on painted walls, it is important to weigh the pros and cons associated with doing so. As a DIYer, you want the best results for the least amount of trouble.
Pros of Using PVA (Even on Painted Surfaces):
Cost-Effective: If you already own it, you save buying new primer.
Better Than Nothing (Sometimes): If the underlying paint is very flat and dusty, PVA can help lock down loose particles better than skipping primer altogether.
Fast Drying: Water-based PVA generally dries quite quickly.
Cons of Using PVA (Especially on Smooth or Glossy Paint):
Poor Adhesion Risk: This is the big one. If it doesn’t grip the slick surface, the new paint will fail later.
Doesn’t Block Stains Well: If the wall has minor water spots or nicotine residue, PVA is not strong enough to seal them. They will bleed through your new topcoat.
Limited Compatibility: PVA is generally designed for porous materials (drywall, masonry). It’s not truly designed to bridge the gap between two layers of plastic paint film.
A Closer Look at Primer Compatibility and Safety
When painting, compatibility matters, especially concerning solvent (oil-based) versus water-based (latex) products.
Water-Based vs. Oil-Based Primers Over Old Paint
PVA is water-based. If your old painted wall is finished with oil-based paint, the following rule generally applies:
Water-Based Primer (PVA) Over Oil-Based Paint: This can be tricky. If the oil paint is glossy, PVA won’t stick. If you successfully dull the oil paint, a high-quality bonding primer is safer than standard PVA.
Oil-Based/Shellac Primer Over Water-Based Paint: Oil-based and shellac primers generally stick to almost anything (once cleaned and dulled), making them versatile when painting over old latex surfaces.
Safety Note While Working
As you handle sanding and primer application, keep safety in mind. When sanding old painted walls, always wear an N95 dust mask. If the paint predates 1978, you must be aware of potential lead paint hazards; consult the Environmental Protection Agency (EPA) guidelines regarding safe renovation, repair, and painting activities. Always ensure good ventilation when applying any primer.
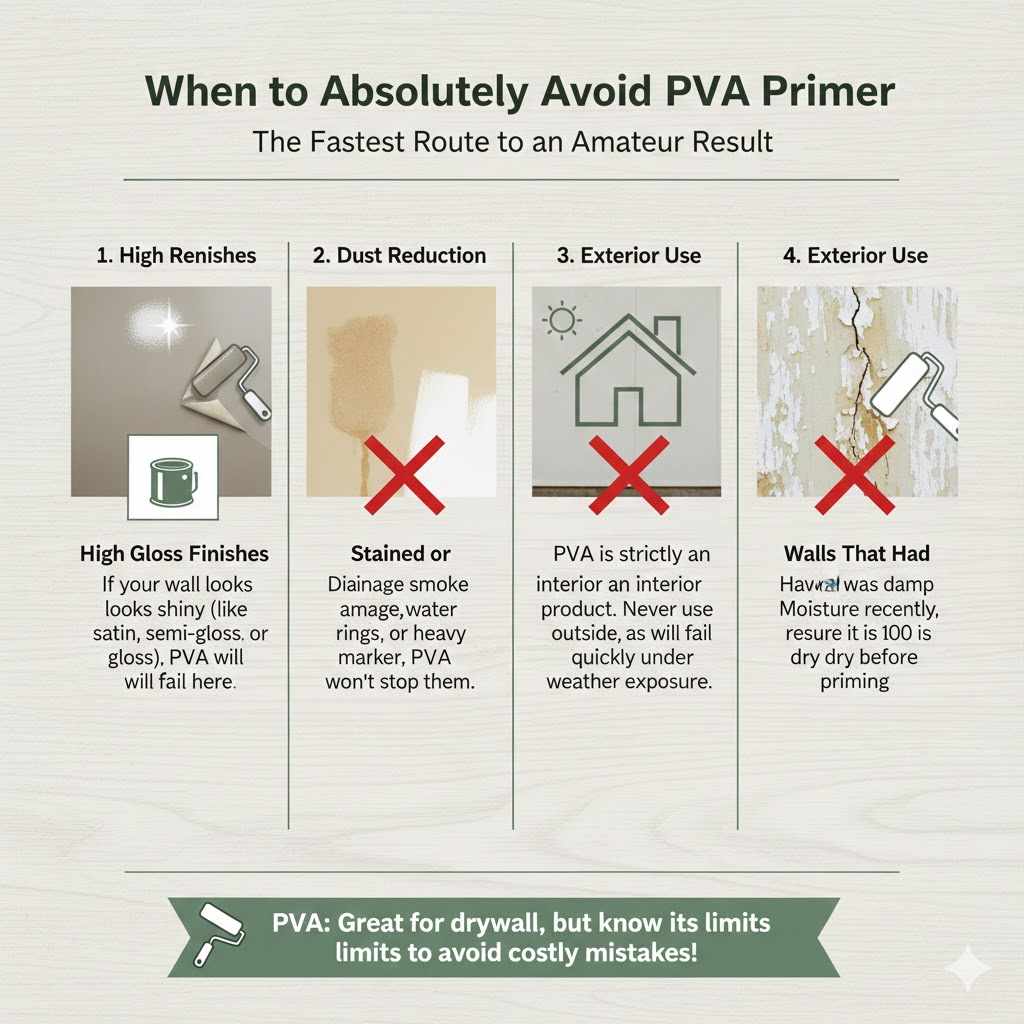
When to Absolutely Avoid PVA Primer
There are clear red flags that tell you PVA is the wrong choice for your painted wall project. Ignoring these warnings is the fastest route to an amateur result.
1. High Gloss Finishes: If your wall looks shiny (like satin, semi-gloss, or gloss), PVA will fail here. These paints are specifically designed to repel moisture and substances—the exact opposite of what PVA needs to bond.
2. Stained or Discolored Walls: If you have smoke damage, water rings, or heavy marker, PVA won’t stop them. You need an oil-based or shellac-based primer designed for stain-blocking.
3. Exterior Use: PVA is strictly an interior product. Never use it outside, as it will fail quickly under weather exposure.
4. Walls That Have Had Moisture Issues: If the wall was damp recently, ensure it is 100% dry before priming, as PVA does not handle persistent moisture well.
FAQs: Quick Answers for Your Painting Prep
Frequently Asked Questions About Priming Painted Walls
-
Do I have to sand painted walls before priming?
Yes, absolutely. Sanding removes the gloss and creates microscopic texture (tooth) that allows any primer, including PVA, to grip the surface firmly instead of peeling off later.
-
Is PVA primer better than using no primer at all on old paint?
It depends. If the wall is perfectly flat and clean, using a dedicated bonding primer is always better than PVA. However, if the wall is dusty or slightly textured, a coat of PVA is better than going straight to the topcoat, though still riskier than using a bonding primer.
-
How long do I have to wait before painting over PVA primer?
Always check the specific can instructions, but typically, water-based PVA primers are ready for top-coating in 1 to 4 hours. Ensure the primer looks and feels completely dry.
-
Can I use PVA primer if the previous paint was oil-based?
It is generally risky. Oil-based paint requires a primer that can adhere tightly, usually a bonding primer or an oil/shellac-based primer. Standard PVA primers struggle to stick to hard oil films.
-
What should I do if my wall feels slightly tacky after priming with PVA?
If the wall feels tacky even after the recommended drying time, it means the primer has not fully cured. Increase ventilation, keep the room temperature steady, and wait longer. Do not proceed with the topcoat until the tackiness is gone.
-
Is there a universal primer I can always use over any existing paint?
A high-quality acrylic bonding primer is the closest thing to a universal solution for existing painted walls, provided the surface is clean and dull.
Conclusion: Making the Right Choice for Your Walls
As you pack away your sanding supplies and get ready to paint, remember this key takeaway: You can* sometimes use PVA primer on painted walls if the surface is thoroughly cleaned, de-glossed through sanding, and generally in good condition. It’s the preparation work—cleaning the grease and creating that perfect surface “tooth”—that saves your project, much more than the specific type of primer.
However, my recommendation, to save you potential future frustration, is this: if you are working over an existing glossy or semi-gloss painted surface, skip the PVA and invest in a dedicated bonding primer.
It costs a bit more upfront, but its superior ability to adhere to slick surfaces offers much higher confidence in the longevity of your new paint job. Whether you choose PVA after exhaustive prep or opt for the specialized bonding alternative, taking this essential priming step ensures your efforts result in a durable, professional-looking finish. Happy painting—you’ve got this!