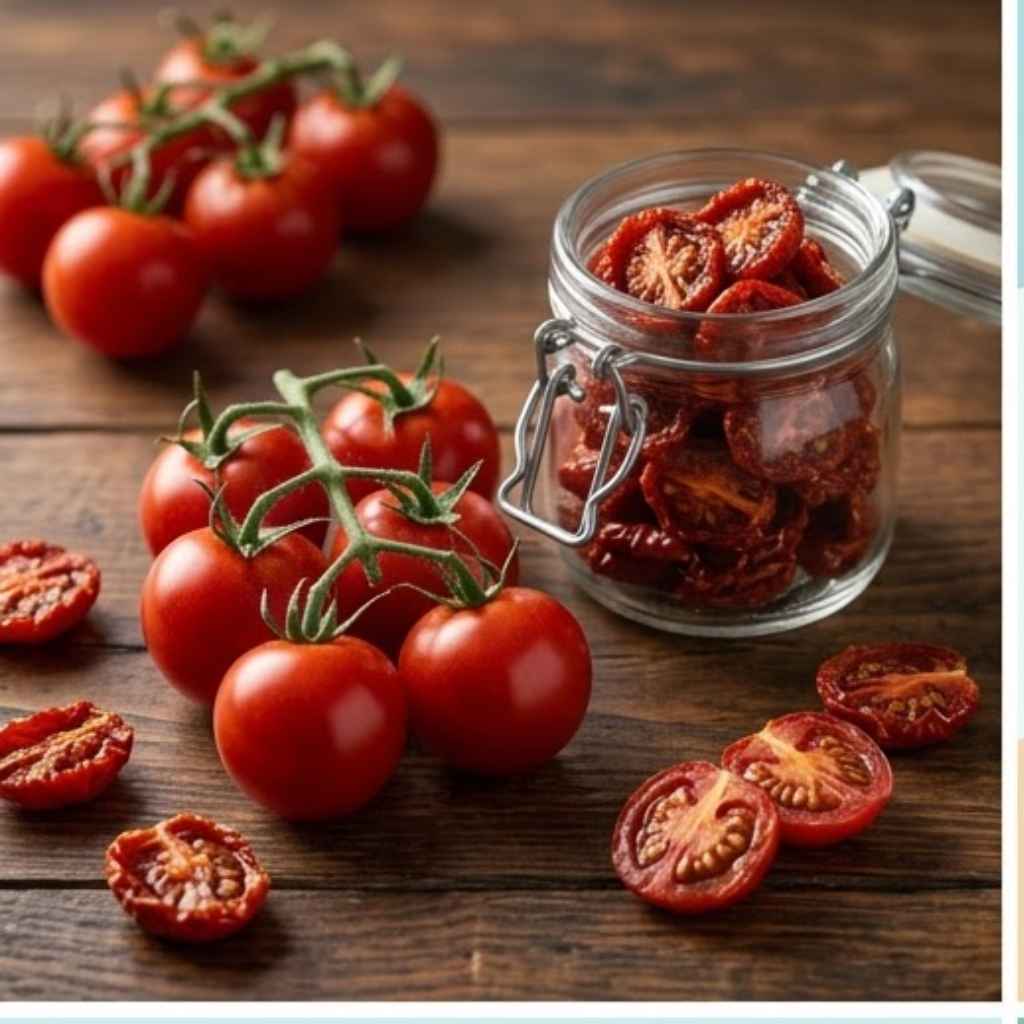
Can You Dehydrate Cherry Tomatoes? Yes, Here Is How
Ever looked at a basket overflowing with cherry tomatoes and wondered if there was a way to keep their sweet, summery taste for longer? You’re not alone! So many of us have faced that dilemma.
The good news is, you absolutely can dry cherry tomatoes. It’s a wonderful way to capture that burst of flavor. This process lets you enjoy them all year round, even when fresh ones aren’t in season.
We’ll walk through exactly how to do it.
You can definitely dehydrate cherry tomatoes. It’s a fantastic method to preserve their sweet flavor and use them in various dishes later. The process is straightforward, whether you use an oven, a dehydrator, or even the sun. Dried cherry tomatoes offer a concentrated taste that adds depth to many meals.
What Does It Mean to Dehydrate Cherry Tomatoes?
Dehydrating is like gently removing the water from food. When you dehydrate cherry tomatoes, you’re essentially drying them out. This makes them smaller and chewier.
It also concentrates their natural sugars. This means they become even sweeter. Plus, removing the water stops tiny germs, like mold, from growing.
This keeps the tomatoes safe to eat for a long time. Think of it as giving them a long, peaceful sleep instead of letting them spoil.
Why would you want to do this? Well, fresh cherry tomatoes are wonderful, but they don’t last very long. If you have too many, they can go bad quickly.
Drying them is a smart way to save them. It’s also a great way to get that intense tomato flavor for recipes. You can add them to pasta, salads, or even pizzas.
They bring a special tang and sweetness.
The process itself is quite simple. You just need to expose the tomatoes to warm, dry air. This air can come from a food dehydrator, your oven, or the sun.
The key is consistent, low heat. This gentle drying is what preserves the nutrients and flavor. It’s not like cooking them at high heat.
It’s more like a slow, careful evaporation.
My Own Cherry Tomato Drying Adventure
I remember one summer vividly. My garden was bursting with cherry tomatoes. I had more than I knew what to do with!
They were everywhere – in salads, on skewers, even just eaten by the handful. But then, the week got busy. Work deadlines piled up.
I looked at my overflowing bowls of tomatoes one evening, and a wave of panic hit me. They were starting to look a little soft. I knew I had to do something fast.
I’d heard about drying tomatoes before, but I’d always thought it was too complicated. The idea of using a fancy dehydrator seemed like a lot. But looking at those beautiful red orbs, I didn’t want them to go to waste.
I decided to try using my oven. I sliced them in half, tossed them with a little olive oil and salt, and laid them on a baking sheet. The house filled with a faint, sweet tomato smell as they slowly shriveled.
It took hours, but seeing those little gems transform was so satisfying. That first bite of a chewy, intensely flavored dried tomato was pure magic. It tasted like concentrated sunshine.
That experience changed how I saw preserving food. It felt like a superpower. Now, I dry tomatoes every summer.
It’s become a ritual. It’s a way to honor the harvest and ensure those flavors stick around. It’s also taught me a lot about patience and the magic of simple processes.
Dehydrating Methods: A Quick Look
Food Dehydrator: This is the easiest and most controlled way. You set the temperature and let it run. It uses a fan to circulate air.
This ensures even drying.
Oven Drying: Many people use their home oven. You set it to the lowest possible temperature. You leave the oven door slightly ajar.
This lets moisture escape.
Sun Drying: This is the oldest method. It requires hot, dry, sunny weather. You lay tomatoes out on screens.
They dry in the sun. This can take several days.
Understanding the Best Way to Prepare Cherry Tomatoes for Drying
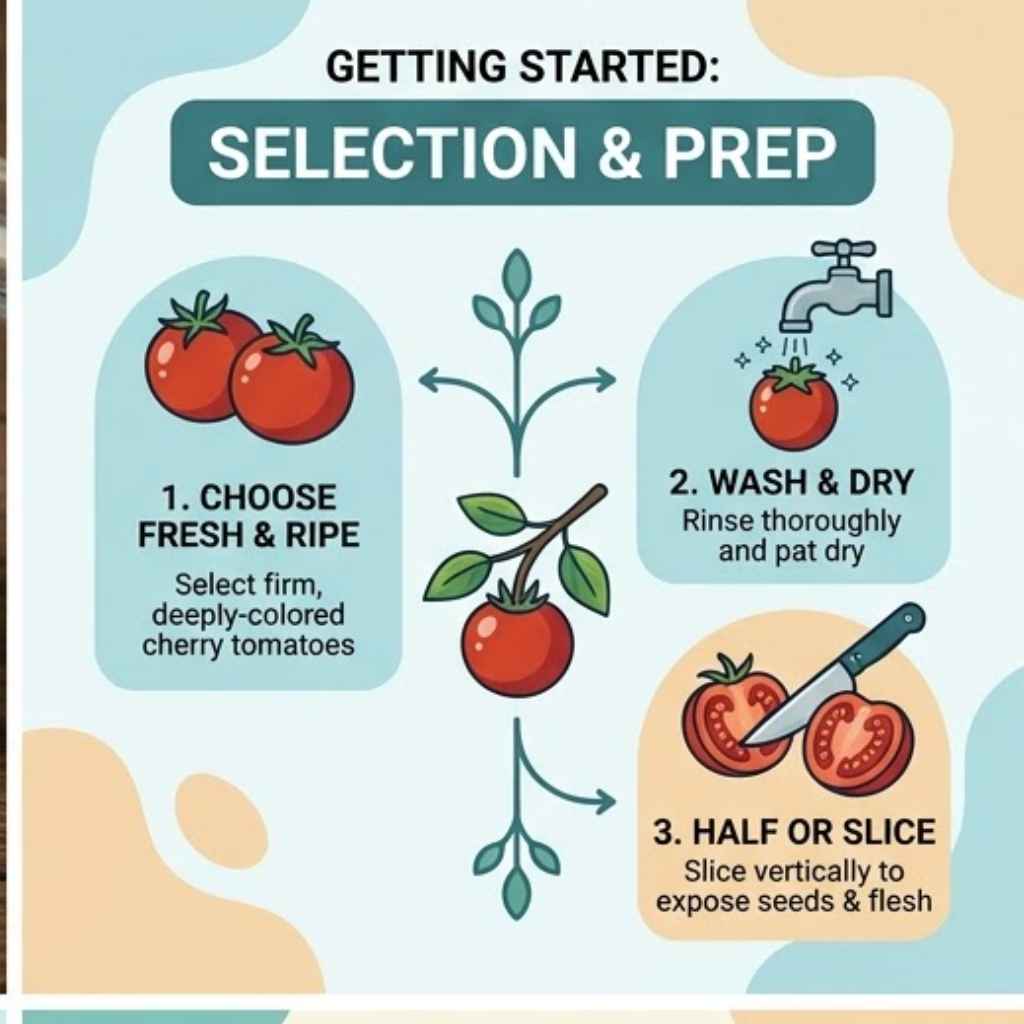
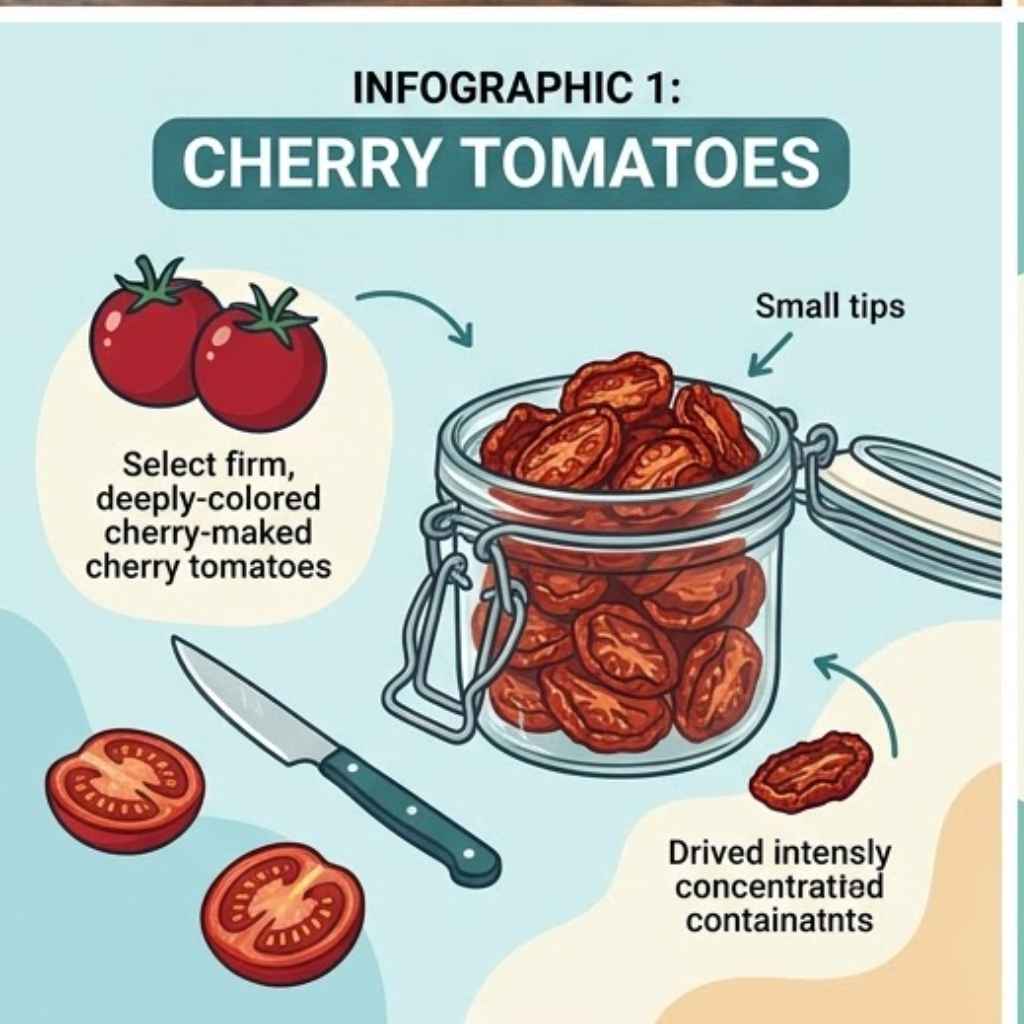
Before you start drying, how you prep your tomatoes matters a lot. It affects how evenly they dry and how good they taste in the end. The first step is always picking the best tomatoes.
You want them ripe and firm. Avoid any with soft spots or bruises. These can lead to mold or spoilage during drying.
Think of it like choosing the best ingredients for any recipe.
The most common way to prepare them is to cut them in half. This exposes more surface area. It lets the water escape faster.
For very small cherry tomatoes, you might be able to dry them whole. But cutting them is usually better. If you cut them, try to make the slices even.
This helps them dry at the same rate.
Some people like to add a little seasoning at this stage. A sprinkle of salt can enhance the flavor. A light coating of olive oil can also add richness.
You can also add herbs like basil or oregano. This infuses extra flavor as they dry. But for a pure tomato taste, just salt is often enough.
Or even nothing at all.
Rinsing them first is also a good idea. This removes any dirt or debris from the garden. Pat them dry very well after washing.
Excess surface water can slow down the drying process. You want the inside water to evaporate, not the water you just added.
One trick I learned is to gently squeeze out some of the seeds and pulp. This isn’t strictly necessary, but it can reduce the drying time. It also helps prevent a soggy center.
Just a gentle squeeze is enough. Don’t mash them.
Preparation Checklist:
- Choose Ripe Tomatoes: Look for firm, unblemished fruit.
- Wash Gently: Rinse under cool water to remove dirt.
- Dry Thoroughly: Pat them completely dry with paper towels.
- Slice Evenly: Cut in half or quarters for faster drying.
- Season (Optional): Add salt, herbs, or a drizzle of olive oil.
Using a Food Dehydrator: The Modern Approach
A food dehydrator is like a specialized oven for drying food. It has trays that stack up. A fan blows warm air around them.
This makes drying food efficient and consistent. For cherry tomatoes, it’s a really reliable method. You get great results without much fuss.
First, make sure your dehydrator is clean. Set it to a temperature of about 125°F (52°C). This is a good, safe temperature for drying fruits and vegetables.
Higher heat can cook them instead of drying them. Lower heat might not be effective.
Arrange your prepared cherry tomato halves on the dehydrator trays. Make sure they aren’t touching each other. This allows air to circulate freely around each piece.
If they touch, they might stick together. They also won’t dry as evenly.
Now, you just let the dehydrator do its job. Drying time can vary. It depends on the size of the tomatoes, how much water they have, and the humidity in your home.
It can take anywhere from 8 to 12 hours. Sometimes even longer.
You’ll know they are done when they are leathery and chewy. They should not be sticky or damp. If you pinch one, it shouldn’t release moisture.
They will shrink a lot. They will feel light. Gently bend one; it should be flexible but not brittle.
Check them periodically. You might need to rotate the trays. This helps ensure even drying.
Some dehydrator models have built-in timers. Others you just turn off when the food is ready. It’s a hands-off process for the most part.
Dehydrator Drying: Key Steps
Temperature: Set to 125°F (52°C).
Arrangement: Place tomato halves on trays, not touching.
Airflow: Ensure good circulation around each piece.
Time: Expect 8-12 hours, or more.
Doneness: Leathery, chewy, no moisture when pinched.
Drying Cherry Tomatoes in Your Oven: The Home Cook’s Best Friend
Don’t have a dehydrator? No problem! Your oven can work wonders.
It’s a bit more hands-on, but totally doable. Most ovens can go down to around 140°F (60°C) or even lower. This is just warm enough to dry things out without cooking them.
Preheat your oven to its lowest setting. This is usually between 140°F and 170°F (60°C to 77°C). If your oven only goes up to 200°F (93°C), that’s still okay, but you need to be extra careful.
You might need to prop the oven door open slightly.
Why prop the door open? This allows moisture to escape. If the oven door is shut tight, the steam can get trapped.
This can make the tomatoes steam rather than dry. You can use a wooden spoon or a crumpled piece of foil to hold it open a crack. Just a little bit is enough.
Line baking sheets with parchment paper. This prevents sticking. Arrange your prepared tomato halves cut-side up.
Again, don’t let them touch. Give them space.
Place the baking sheets in the oven. Now, you wait. This process takes longer than in a dehydrator.
It can take anywhere from 4 to 12 hours. The exact time depends on your oven and its temperature. And on how moist your tomatoes are to begin with.
You’ll need to check on them regularly. About every hour or two. You might want to rotate the baking sheets.
This helps ensure they dry evenly. Especially if your oven has hot spots.
How do you know they’re ready? They should look shriveled and leathery. They should feel dry to the touch.
When you squeeze them, no liquid should come out. They will be quite tough but still a bit pliable. They shouldn’t be crispy or brittle.
If they are too brittle, they are over-dried.
It’s a bit of an art. You learn to read your oven. You learn to feel when the tomatoes are just right.
It’s a rewarding process. The smell that fills your kitchen is amazing!
Oven Drying Tips:
Lowest Setting: Use your oven’s lowest temperature (140-170°F / 60-77°C).
Door Ajar: Prop the oven door open slightly for air circulation.
Parchment Paper: Line baking sheets to prevent sticking.
Cut-Side Up: Place tomatoes cut-side up on the sheets.
Regular Checks: Monitor every 1-2 hours and rotate trays.
Sun Drying Cherry Tomatoes: Nature’s Way
This is the most natural method. It relies on sunshine and warm, dry air. It requires specific weather conditions.
You need several days of strong sun. And low humidity. It’s a beautiful, old-fashioned way to preserve food.
First, you need to select a spot that gets direct sun all day. It should also be protected from pests. Birds, insects, and even pets might be tempted.
You can use a screen box or a mesh cover to keep them safe.
Prepare your tomatoes as usual. Cut them in half and place them cut-side up on drying racks or screens. Make sure they have plenty of space.
The air needs to circulate well around them.
Place the trays in your chosen sunny spot. If the nights are cool or damp, you’ll need to bring them inside. This prevents them from reabsorbing moisture.
You’ll also want to cover them overnight if there’s any chance of dew.
Sun drying takes time. It can take 3 to 7 days. Or even longer.
This depends on the sun’s intensity. And the humidity. You’ll need to check them daily.
When are they ready? They should be leathery and leathery. Similar to oven-dried or dehydrator-dried tomatoes.
They should be chewy. Not sticky. You shouldn’t be able to squeeze any moisture out of them.
This method is free! It uses no electricity. But it requires constant monitoring.
And the right weather. It’s a labor of love. But the taste of sun-dried tomatoes is truly special.
It has a unique flavor from the sun’s gentle heat.
Sun Drying Essentials:
Weather: Needs hot, sunny, dry days (over 85°F / 30°C is ideal).
Location: Choose a sunny spot with good air flow.
Protection: Use screens or covers to deter pests.
Overnight: Bring indoors or cover on cool/damp nights.
Time: 3-7 days, depending on conditions.
What Does “Done” Look Like? Checking for Proper Drying
Knowing when your cherry tomatoes are perfectly dried is crucial. If you under-dry them, they might spoil. If you over-dry them, they can become too hard and lose some of their appeal.
The best test is the feel test. The dried tomatoes should feel leathery. They should be pliable.
You should be able to bend them without them breaking. They will shrink down significantly. They will feel light in your hand.
Try to squeeze one. If any moisture or liquid comes out, they need more time. There should be no stickiness.
They shouldn’t feel damp at all.
Another way to check is to let one cool completely. Sometimes warm food can feel softer. Once cooled, if it still feels pliable and leathery, it’s done.
If it becomes brittle when cool, it’s over-dried.
The appearance will change too. They will shrivel up. Their color will deepen.
They will look like concentrated little flavor bombs. They will lose about 80-90% of their original water content. That’s a lot!
Remember that they will continue to dry slightly as they cool and are stored. So, it’s better to err on the side of slightly under-dried than over-dried. Especially if you plan to store them long-term.
Doneness Indicators:
Texture: Leathery, pliable, not brittle.
Moisture: No liquid when squeezed.
Stickiness: Should not feel sticky or damp.
Appearance: Shriveled, darker color.
Weight: Feel significantly lighter than fresh tomatoes.
Real-World Context: Where and Why This Happens
Drying cherry tomatoes is a practice born out of necessity and a love for flavor. In places with long, hot summers, like California or the Mediterranean, sun-drying is a traditional method. It’s a way to preserve the abundant harvest.
Think of Italian grandmothers drying tomatoes on their balconies!
In modern American homes, it’s often about convenience and flavor enhancement. Many people live in climates that don’t have consistently hot, dry weather for weeks on end. So, they turn to ovens or dehydrators.
It’s a way to get that intense, sweet flavor that dried tomatoes offer.
The design of food dehydrators is key to their success. They mimic natural drying but with control. They ensure constant airflow and a stable temperature.
This is something nature doesn’t always provide. Ovens are adaptable. They are already in most kitchens.
Their ability to hold low temperatures makes them practical.
User behavior plays a big role too. People are increasingly interested in home food preservation. They want to reduce food waste.
They want healthier snacks. They enjoy the process of making something themselves. Dried tomatoes fit perfectly into this trend.
They are a healthy snack option. They are a gourmet ingredient for home cooking.
The materials used are simple. Ripe cherry tomatoes. Basic seasonings.
Heat and air. That’s it. The process transforms a perishable fruit into a shelf-stable food.
It’s a testament to simple science and resourcefulness.
Why We Dry Tomatoes:
Preservation: Extend the shelf life of fresh produce.
Flavor Concentration: Enhance sweetness and create a richer taste.
Food Waste Reduction: Use up surplus harvest.
Convenience: Have a shelf-stable ingredient on hand.
Healthier Snacks: A natural, low-sugar alternative.
What This Means For You: When It’s Normal and When to Worry
So, you’ve dried your cherry tomatoes. What now? Understanding what to expect is important.
It’s normal for them to shrink a lot. They should feel leathery and chewy. They will have a concentrated, sweet-tart flavor.
This is the goal!
When should you worry? The biggest sign is if they still feel damp or sticky after drying. This means there’s too much moisture left.
They might be prone to mold. If you see any fuzzy white or green spots forming during or after drying, that’s mold. You must discard those tomatoes.
Mold can produce harmful toxins.
Another concern is if they develop an off smell. Fresh tomatoes have a sweet, earthy aroma. If your dried tomatoes smell musty, sour, or generally unpleasant, something went wrong.
This usually indicates spoilage.
If you used your oven and left the door shut for too long, they might have ended up steamed instead of dried. These will be soft and wet. They won’t last long.
The USDA recommends a final storage temperature below 60°F (15°C) for dried foods. And humidity below 60%. If you live in a very humid area, storing them can be trickier.
You might need to add a food-grade desiccant packet to your storage container.
Simple checks: After drying, let them cool completely. Store them in an airtight container. Check them every week for the first month.
Look for any signs of mold or spoilage. If they look, smell, and feel good, they are likely safe.
Normal vs. Concerning:
Normal: Leathery, chewy, concentrated flavor, no moisture.
Concerning: Damp, sticky, moldy spots, off smells, brittle (over-dried).
Storage Tip: Use airtight containers in a cool, dry place.
Quick Fixes & Tips for Better Dried Tomatoes
While drying isn’t really a “fix” situation, there are definitely tips that make the process better. Think of these as ways to get the best results possible.
Tip 1: Blanching (Optional). Some people quickly dip their halved tomatoes in boiling water for about 30 seconds, then plunge them into ice water. This loosens the skins. It can help them dry a bit faster.
It’s not essential for cherry tomatoes, as their skins are thin. But it’s an option.
Tip 2: Seed Removal (Optional but helpful). Gently scooping out some of the seeds and juice can speed up drying. It also helps create a more even texture. You can use a small spoon or even your fingers.
Tip 3: Even Slicing. If you’re slicing larger tomatoes, make sure the pieces are all the same thickness. This is critical for even drying. For cherry tomatoes, halving is usually consistent enough.
Tip 4: Air Circulation is King. This is the most important tip. Whether in a dehydrator, oven, or sun, give each piece plenty of space. Don’t overcrowd the trays.
Good airflow prevents spoilage and ensures even drying.
Tip 5: Patience. Drying takes time. Don’t rush it by turning up the heat. Low and slow is the way to go for the best flavor and texture.
Tip 6: Storage Matters. Once completely cooled and dry, store them in airtight containers. Add a food-grade desiccant packet if you live in a humid climate. This absorbs any lingering moisture.
Top Drying Tips:
Even Size: Cut pieces uniformly for consistent drying.
Space Out: Allow air to circulate freely around each tomato.
Low Heat: Use the lowest setting on your appliance.
Monitor Closely: Check for doneness to avoid spoilage or over-drying.
Airtight Storage: Keep them dry and protected once finished.
Frequently Asked Questions About Drying Cherry Tomatoes
Can I dry cherry tomatoes without cutting them?
Yes, you can dry small cherry tomatoes whole. However, cutting them in half exposes more surface area. This allows moisture to escape faster.
Whole tomatoes will take longer to dry. Ensure they are very dry to prevent spoilage.
How long do dried cherry tomatoes last?
When properly dried and stored in airtight containers in a cool, dry place, they can last for 6 months to a year. Check them periodically for any signs of spoilage before using.
What is the best temperature for dehydrating cherry tomatoes?
A temperature of 125°F (52°C) is generally recommended for dehydrating fruits and vegetables like tomatoes. This temperature is warm enough to remove moisture but low enough to prevent cooking and preserve nutrients.
Can I use frozen cherry tomatoes for drying?
It’s best to use fresh cherry tomatoes for drying. Frozen tomatoes have a lot of ice crystals. These break down cell walls.
They can become mushy when thawed. This makes them harder to dry evenly and can affect the final texture.
What happens if I over-dry my cherry tomatoes?
If you over-dry them, they will become very brittle and hard. They might even start to burn. They will lose their chewy texture.
While they are still preserved, their eating quality will be reduced. They may be too hard to enjoy as a snack or in most recipes.
Do I need to add oil or salt when drying tomatoes?
No, it is not required. Adding a light drizzle of olive oil and a pinch of salt can enhance the flavor. But for a pure, concentrated tomato taste, you can dry them plain.
Season them later when you use them in recipes.
Conclusion: Enjoying Your Homemade Dried Cherry Tomatoes
Drying cherry tomatoes is a rewarding process. It allows you to capture the essence of summer. You can use simple tools to preserve this wonderful flavor.
Whether you choose a dehydrator, your oven, or the sun, the result is a delicious, versatile ingredient. Enjoy the fruits of your labor in salads, pasta, or as a healthy snack. It’s a taste of sunshine, preserved.