Can You Epoxy a Wood Floor? Examining Advantages and Disadvantages
Thinking about updating your wood floors? You might be wondering, Can You Epoxy a Wood Floor? Pros and Cons. It’s a popular choice, but it can seem a little complicated if you’re just starting out. Don’t worry, though! This guide will break down everything you need to know in a simple way. We’ll explore the good and bad aspects of this process, and then get you started with a step-by-step approach. Let’s get right to it.
The Basics of Wood Floor Epoxy: What to Expect
Epoxy coatings offer a super durable and stylish finish for many surfaces, including concrete and even wood. For wood floors, it’s about adding a protective layer that resists scratches, spills, and heavy foot traffic. Getting the best result means preparing the wood carefully, applying the epoxy properly, and allowing enough time for it to cure fully. This whole process significantly improves how your floors look and how well they last. Knowing the basics helps you get a good idea if this is the right way to upgrade your floors. This part is about getting ready for the project.
What Is Epoxy and How Does It Work?
Epoxy is a type of resin that hardens when mixed with a hardener. It creates a tough, plastic-like coating. The key to its strength is a chemical reaction between the resin and the hardener. This makes the epoxy molecules bond together tightly, forming a solid, waterproof layer that sticks really well to the surface. It’s like creating a protective shield for your wood floors. You can also mix in things like color or glitter to change the way the floor looks.
- Chemical Reaction: Epoxy systems involve two parts: a resin and a hardener. When combined, these components undergo a chemical reaction called polymerization. This process changes the liquid mixture into a solid, durable coating. The molecules link together, creating a strong, hard surface.
- Adhesion Properties: Epoxy is famous for sticking to many things. This high stickiness comes from its ability to seep into the tiny gaps in a surface. This creates a really tight bond that helps it stay in place even with heavy use and temperature changes. This stickiness is what keeps it from peeling or lifting.
- Curing Process: Once the resin and hardener are combined, the epoxy begins to cure. Curing is the process where the mixture hardens completely. The time it takes for this to happen can depend on the type of epoxy and the conditions around it. It is very important to let it fully cure before walking on the floor.
- Versatile Applications: Epoxy’s versatility means it’s useful in many situations. It is great for garages, kitchens, and other places that see a lot of wear. You can also use it to create beautiful, customized floors with different colors, textures, and designs.
The Science Behind Epoxy’s Durability
The strength of epoxy lies in its molecular structure. The way the molecules are arranged gives it high resistance to damage. It’s also resistant to chemicals, water, and impacts, making it perfect for wood floors. This toughness makes it last for years and still look great. Many products, like paints and coatings, don’t last as long because they lack this same molecular strength. Understanding this science helps you appreciate why epoxy is so effective at protecting wood floors.
- Molecular Structure: The molecules in epoxy link together to form a solid, rigid structure. This tightly bonded structure makes the material very strong. It is very resistant to scratches, dents, and wear. This makes it a great choice for areas that get a lot of use.
- Resistance to Chemicals: Epoxy coatings are resistant to many chemicals, which protects the wood from damage. This is especially helpful in places like kitchens and garages, where spills are common. This chemical resistance helps maintain the floor’s appearance and lifespan.
- Impact Resistance: Epoxy absorbs impacts well, which reduces damage from dropped items or heavy objects. This ability to absorb impacts prevents cracks or chips, maintaining the floor’s integrity. It is very important for floors in busy areas.
- Waterproof Qualities: Epoxy is waterproof. This feature is great for wood floors because it protects against water damage. Preventing water from reaching the wood can help prevent warping or mold. This waterproof quality keeps the floors looking nice for longer.
Advantages of Epoxy Flooring for Wood
Using epoxy on wood floors offers several advantages that make it a great option. It protects against damage, makes cleaning easy, and it gives you a lot of design options. Let’s break down the main reasons why people choose epoxy for their wood floors. Each of these benefits helps you see why epoxy is a smart pick for both looks and function. Considering these factors helps you make the best choice for your home or business.
Enhanced Durability and Protection
Epoxy coatings create a strong shield over wood floors. They protect against scratches, impacts, and daily wear and tear. This level of protection helps extend the life of your wood floors. Epoxy is a better choice compared to other coatings because of how durable it is. The right epoxy can make your floors look good for years. Choosing a protective coating is a great investment, helping reduce the need for repairs.
- Wear and Tear Resistance: Epoxy resists the damage from everyday foot traffic and activities. This keeps the floor looking good, even in busy areas. It’s a great choice for places that see a lot of use, like hallways and living rooms.
- Scratch Resistance: Epoxy coatings are hard to scratch. This keeps your floors from getting those unsightly scratches. This is a big plus because it keeps the floors looking clean and new.
- Impact Resistance: Epoxy can handle impacts from dropped objects better than many other floor options. This feature prevents chips, dents, and other damage. This makes it a durable choice, reducing the chance of needing repairs.
- Water and Chemical Resistance: Epoxy is waterproof and resistant to chemicals. This protection keeps the wood from warping, staining, or getting damaged. It’s an excellent choice for areas prone to spills, like kitchens or bathrooms.
Aesthetic Versatility and Customization
Epoxy lets you customize your wood floors. You can choose from many colors, patterns, and designs. This versatility means you can design floors that fit your exact style. You can also mix in decorative elements, such as flakes or metallic pigments. This turns your floors into a unique design element for your home. This capability makes epoxy a great option for people who want custom floors.
- Color Options: Epoxy is available in a wide range of colors, from basic shades to bright, bold hues. You can match the flooring to your existing décor or use it to create a brand-new style. The many colors give you tons of choices to make your floors match your design.
- Decorative Flakes and Metallic Pigments: You can add decorative flakes or metallic pigments to the epoxy. This gives your floors depth and texture. These elements add visual interest and create custom designs.
- Patterns and Designs: Epoxy can create many patterns and designs. You can do simple patterns or complex custom designs, helping you create a unique floor. This makes epoxy floors stand out.
- Gloss and Finish Options: Epoxy is available in different finishes, such as gloss, matte, or satin. This changes the way your floor looks and feels. Choosing the right finish can complement the room’s lighting and style.
Easy Maintenance and Cleaning
One of the best things about epoxy floors is how easy they are to clean. The smooth surface resists dirt, stains, and spills. Regular cleaning involves simple sweeping and mopping. This simple care keeps your floors clean and looking great with little effort. This low-maintenance aspect makes epoxy a practical choice for busy homes. This is one thing that saves you time and effort.
- Smooth Surface: Epoxy floors have a smooth, seamless surface. This surface prevents dirt and debris from getting trapped in cracks or gaps. It makes cleaning fast and easy.
- Stain Resistance: Epoxy doesn’t stain easily, which protects against spills from food, drinks, and other liquids. Stains won’t soak into the surface, so they are easy to wipe away. This makes cleaning simpler.
- Simple Cleaning Routine: Cleaning epoxy floors is simple. Sweeping and occasional mopping are usually enough. You do not need any special cleaning products. This saves time and effort.
- Reduced Allergen Buildup: Because the surface is smooth, there is less space for dust and allergens to settle. This makes epoxy floors a great choice for people with allergies. Cleaner floors lead to a healthier environment.
Disadvantages of Epoxy Flooring for Wood
While epoxy floors are good, they do have a few drawbacks. Knowing these disadvantages helps you decide if epoxy is the right fit. Consider all aspects before starting any project. This way, you can prevent problems and make the best decision for your needs. Carefully weighing these points helps make sure you’re happy with your floor.
Preparation Challenges and Cost
Applying epoxy over wood floors demands thorough preparation, making the process more involved. This may involve sanding, filling gaps, and cleaning the surface. This preparation stage is vital for the epoxy to stick correctly and look good. Although epoxy offers benefits, the initial costs of materials and the work that goes into preparing can be higher. This is very important when setting your budget.
- Surface Preparation: Before applying epoxy, you need to prepare the surface. This includes sanding the wood to get rid of old finishes, filling any cracks or gaps, and making sure the floor is clean. Careful preparation is important for good results.
- Material Costs: Epoxy materials can be costly. You need to buy resin, hardener, and any additives, such as colorants or decorative elements. The amount of materials you need affects the total cost.
- Labor Costs: If you hire a professional to apply the epoxy, labor costs can be expensive. Professional installers have the skills to get the job done right. This can greatly increase the project’s overall cost.
- Specialized Tools and Equipment: Applying epoxy sometimes requires special tools, such as grinders, mixers, and specific application tools. These tools add to the upfront expenses. Renting or buying them can increase the project cost.
Sensitivity to Moisture and Wood Movement
Epoxy and wood floors can have issues related to moisture and the way the wood moves. Wood expands and contracts with changes in humidity and temperature. This movement can lead to cracks or peeling in the epoxy. This means you must make sure that the wood is dry and sealed. It also calls for managing the environment around the floors. This helps prevent issues like cracking or loss of adhesion.
- Moisture Issues: Wood floors must be completely dry before applying epoxy. Trapped moisture can cause bubbles, blisters, or other problems that ruin the look of the floor. Proper moisture testing is crucial.
- Wood Expansion and Contraction: Wood naturally expands and contracts due to temperature and humidity changes. This movement can create stress on the epoxy coating, possibly leading to cracks or separation. Expansion gaps might be needed to allow for this movement.
- Environmental Control: Controlling the environment can help reduce wood movement. This means keeping humidity and temperature levels stable, especially in areas with significant climate changes. Controlling the climate helps keep the epoxy intact.
- Sealing the Wood: Before applying epoxy, it might be necessary to seal the wood. This seals the wood, which decreases the effects of moisture and helps to ensure a strong bond. Sealing is a great step to stop problems.
Repair and Removal Difficulties
Fixing or removing epoxy flooring can be tricky. Epoxy is incredibly strong, so removing it involves special tools and effort. Repairing damage also requires skill. You might have to sand and reapply the epoxy. This can make repairs expensive and difficult. Understanding the repair and removal process is very important before deciding on epoxy. This helps you figure out the amount of work to keep the floor looking good.
- Difficulty of Removal: Removing epoxy often requires heavy-duty tools, like grinders or sanders. The process can be time-consuming and dusty. This can add to the expense.
- Repairing Damage: If the epoxy floor gets damaged, repairs can be hard. The damaged area may need to be sanded down and then resurfaced with epoxy. Color matching and blending can also be challenging.
- Professional Assistance: Because repairs can be tough, professional help is often needed. Professional repairs can be costly and add to the overall price. The need for professional help should be considered.
- Long-Term Planning: Consider the possibility of repairs when planning your epoxy floor. This helps in budgeting and preparing for any future work. This is very important for the long-term upkeep of your floors.
Step-by-Step Guide to Applying Epoxy on Wood Floors
Applying epoxy on wood floors is a project that takes careful planning and execution. We’ll show you a simple step-by-step process. This guide will walk you through everything, from prepping the wood to the finish. This overview helps you get started. Following these steps helps make sure your epoxy floor looks great and lasts for years.
Wood Floor Preparation
Proper preparation is the most critical part of applying epoxy to wood floors. The surface needs to be ready to accept the epoxy and create a strong bond. This process is about making sure the wood is perfect for the epoxy. Proper preparation makes a big difference in the long-term performance and appearance of the floor. You will save yourself many problems by being careful in this stage.
- Inspection and Cleaning: First, thoroughly examine the wood floor for any damage or imperfections, like cracks, splits, or loose boards. Make sure to remove any existing coatings, like paint or old varnish, because these will impact how the epoxy sticks. Clean the floor with a cleaner that’s made for wood.
For example, if you find old, peeling paint, use a scraper to remove it. Afterward, check for any areas where the wood has been damaged, like scratches or dents. Fill these with wood filler.
- Sanding the Floor: Sanding is very important for getting a smooth surface that helps the epoxy stick. You should start with a coarse sandpaper to remove old finishes and imperfections. Then, switch to finer grits for a smooth finish. This way, the epoxy will stick to the wood easily.
For instance, start with 60-grit sandpaper and work your way up to 120- or 150-grit. Make sure to sand in the direction of the wood grain.
- Filling Gaps and Cracks: Fill any cracks, gaps, or holes with a wood filler that can be sanded. Choose a filler that matches the wood color. This step is about getting a level and seamless surface. Be sure to let the filler dry completely, and then sand it flush with the floor’s surface.
Imagine finding a deep crack in your floor. First, clean the crack. Apply wood filler, making it a bit higher than the floor. Wait for it to dry. After drying, sand the filler until it is smooth and even with the surrounding wood.
- Cleaning and Dust Removal: Before applying the epoxy, make sure the floor is spotless and free of dust or debris. Vacuum the floor very well. Use a tack cloth to make sure every dust particle is gone. The cleanliness of the floor directly affects how well the epoxy adheres.
Suppose you don’t remove the dust. The dust will prevent the epoxy from sticking properly, which could result in an uneven or bumpy finish.
Epoxy Application Process
Applying the epoxy correctly is key to getting a durable and visually appealing floor. This part is about mixing the epoxy, applying it to the floor, and dealing with bubbles and drips. Each step has to be done carefully for the best results. The right method helps you create a professional-looking result.
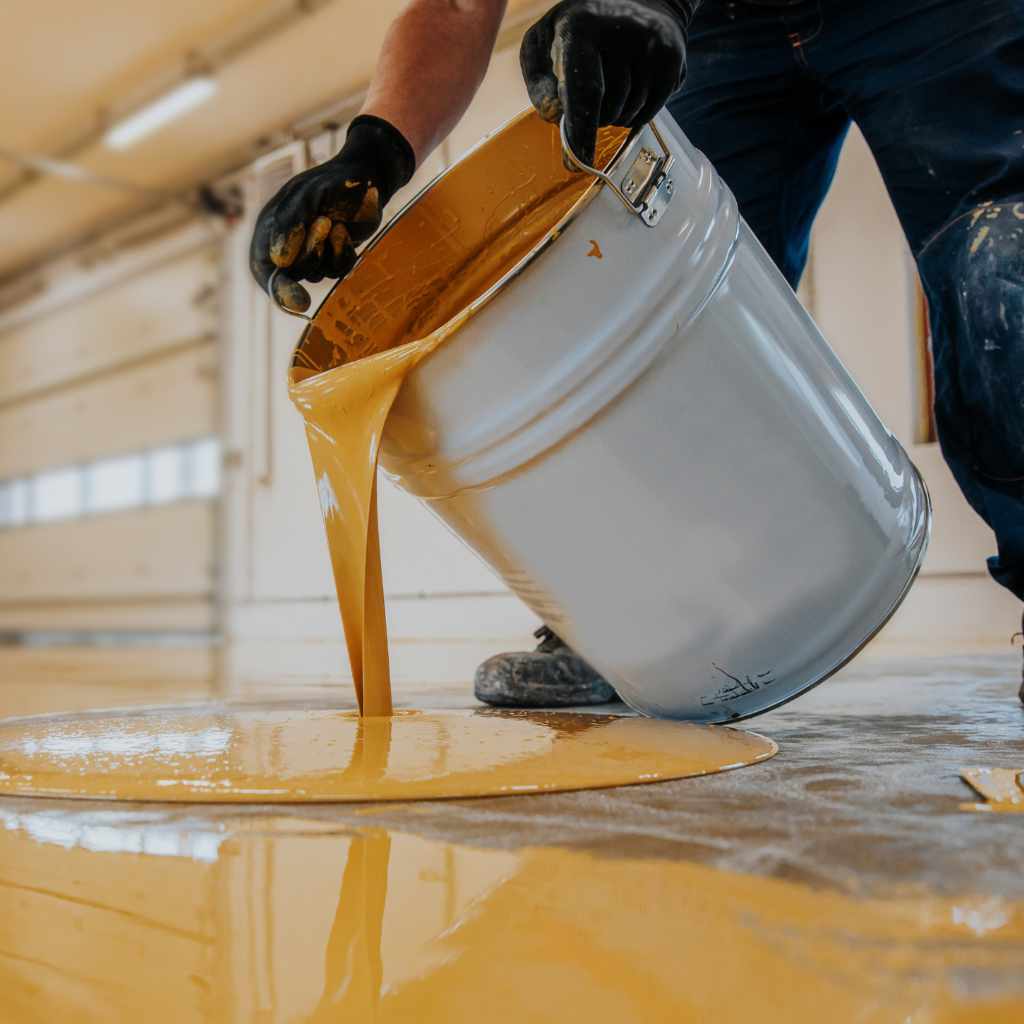
- Mixing the Epoxy: Carefully mix the epoxy resin and hardener according to the manufacturer’s directions. It’s very important to follow the instructions for the right ratio of resin to hardener to make sure that the epoxy cures correctly. Mix slowly and steadily to prevent bubbles.
For example, if the instructions say to mix for three minutes, set a timer and make sure you do not mix longer than required. Doing so could introduce air bubbles or cause the epoxy to harden too quickly.
- Pouring and Spreading: Once mixed, pour the epoxy onto the prepared wood floor. Start in a corner and work your way across the room. Use a squeegee or notched trowel to spread the epoxy evenly. This approach helps get a uniform coating and avoids areas with too much or too little epoxy.
Imagine pouring epoxy onto the floor and spreading it with a squeegee. Make sure you maintain a consistent layer across the entire floor.
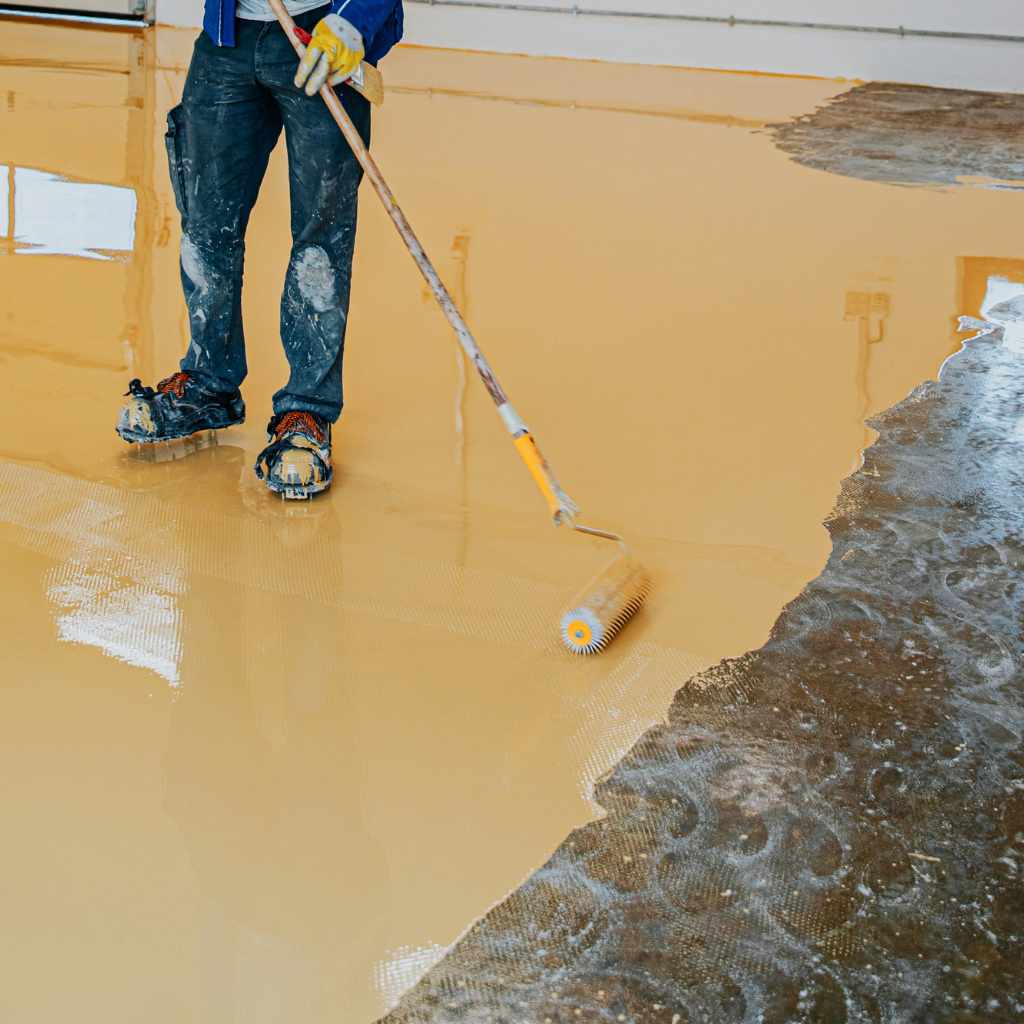
- Bubble Removal: As the epoxy spreads, air bubbles can form. Use a spiked roller or a heat gun to remove these bubbles. The roller has spikes that pop the bubbles. A heat gun is used very carefully to break the surface tension, which releases the bubbles.
When you see bubbles, quickly move the spiked roller or heat gun over them to get rid of them.
- Applying Additional Coats: Depending on the epoxy type and the desired outcome, you might need to apply multiple coats. Each coat should be applied after the previous one has dried and cured, as directed by the manufacturer. Applying multiple coats can enhance durability and create a better finish.
If you’re using a decorative flake system, apply the flakes after the first coat, before it sets. Then, add a second clear coat to seal the flakes.
Curing and Finishing Touches
Curing is the last stage, which is when the epoxy hardens and fully sets. It is very important for the final quality and longevity of the floor. This part involves allowing the epoxy to cure without disturbances. It also requires the care needed to maintain your new epoxy floor. Following these steps helps ensure your epoxy floor looks great and lasts a long time.
- Curing Time: Let the epoxy floor cure without disturbance, as suggested by the manufacturer. Curing times vary based on the epoxy type, the climate, and other factors. It’s essential to be patient and wait.
For example, some epoxies require 24 hours to be ready for light foot traffic and up to a week for full curing.
- Environmental Control: Keep the area clean. Control the temperature and humidity to make sure that the epoxy cures right. Extremes in temperature or humidity can affect curing times and the outcome.
Protect the floor by keeping it away from heavy objects, excessive moisture, and direct sunlight during the curing process.
- Surface Inspection: Once the epoxy has completely cured, inspect the surface for any imperfections. Check for bubbles, uneven spots, or other issues. You can fix minor issues by lightly sanding and applying a new coat of epoxy.
If you see tiny bubbles or uneven areas, gently sand the affected spots with fine-grit sandpaper. Apply a thin layer of epoxy and let it cure.
- Floor Maintenance: After the epoxy has cured, implement a regular cleaning routine. Use gentle cleaning methods, such as sweeping or mopping with a mild detergent. Prevent scratches by putting felt pads under furniture legs.
For example, sweep the floor regularly to get rid of dirt and debris. When mopping, use a pH-neutral cleaner to prevent damage.
Choosing the Right Epoxy for Your Wood Floor
Picking the correct epoxy is key to the success of your project. This part will discuss the different types of epoxy available. Understanding these options, along with factors such as your budget, intended use, and desired look, will help make the right choice. Making the right decision means that your floor lasts longer and looks great. The right choice is very important for a successful outcome.
Types of Epoxy Coatings
Different types of epoxy coatings are available for wood floors. Each kind has its own set of characteristics and is suitable for different purposes. Knowing the differences helps you choose what will meet your needs. Consider your project’s goals, conditions, and style choices.
- Water-Based Epoxy: Water-based epoxy has low VOCs (Volatile Organic Compounds) and is easy to clean. It’s good for indoor applications because it is low-odor and safe. It may not be as durable as other types. This makes it a good option if you want something safe to use, especially in areas with poor ventilation.
- Solvent-Based Epoxy: Solvent-based epoxy coatings are very durable and are good at resisting scratches and chemicals. However, they may release high levels of VOCs and have a strong odor. Ensure good ventilation when using these. This type is a great choice for high-traffic areas, like garages and workshops.
- 100% Solids Epoxy: 100% solids epoxy has no solvents. This means it is very durable and environmentally friendly. It often needs professional installation because it is thick. It offers great protection and is a good option for people who want high performance and are willing to pay for professional help.
- Self-Leveling Epoxy: Self-leveling epoxy is a good choice for people who want a smooth, seamless finish. It fills small cracks and evens out surfaces. This type is a good choice for floors that are not perfectly even.
Factors to Consider Before Purchasing
Before buying epoxy for your wood floor, think about several factors. These factors will influence the epoxy type you should choose. By taking time to consider these points, you are more likely to pick the right epoxy. Your decisions on these factors will affect the project’s success. Careful planning will help you get good results.
- Durability Needs: Think about the amount of foot traffic and the type of activity your floor will get. For high-traffic areas, select a very durable epoxy that withstands scratches and wear. For less used areas, a less heavy-duty option might be enough.
For example, a garage needs a stronger epoxy than a guest bedroom.
- Budget: Epoxy costs vary. Think about how much you want to spend on supplies and professional installation. Different types of epoxy have different price points. Factor in all the associated costs, including preparation materials, tools, and any professional labor.
Compare different epoxy products and get quotes from pros.
- Aesthetic Preferences: Consider the look you want to achieve. Epoxy comes in a wide variety of colors and finishes, so pick one that suits your style. Think about whether you want a glossy, matte, or textured finish.
If you want a modern look, choose a metallic epoxy with a glossy finish. For a more rustic look, you might want a matte finish.
- DIY vs. Professional Installation: Decide if you will apply the epoxy yourself or hire a professional. DIY can save money but requires skills. Professional installers have experience and the right tools.
Consider your skill level, the project’s complexity, and the availability of your time. If you’re not skilled, then the professional way might be the best.
Popular Epoxy Brands and Products
Several brands and products are considered by experts. Knowing these popular choices can help you make an informed decision. These products are popular for different reasons. Researching these products helps you pick one that best suits your project’s needs.
- Rust-Oleum EpoxyShield: Rust-Oleum EpoxyShield is a popular brand. It provides a tough and protective coating. It is known for its durability and ease of use, making it ideal for many users.
Rust-Oleum EpoxyShield is frequently used by DIYers.
- ProMarine Supplies Crystal Clear Epoxy Resin: ProMarine Supplies is great for creating clear, glossy finishes. It is known for its clarity and is perfect for decorative projects. This is a very good choice if you are looking for a clear look.
This product is widely used to create countertops and artistic floors.
- Stone Coat Countertops Epoxy: Stone Coat Countertops is famous for its color options. It is very popular for people who want custom and decorative designs. This brand is often picked for its high aesthetic value.
Stone Coat Countertops offers many colors and metallic options.
- TotalBoat TableTop Epoxy: TotalBoat TableTop Epoxy is excellent for creating a smooth, durable surface. It’s often used for making tabletops and bar tops. This brand is a great choice if you need a waterproof, robust finish.
It is chosen because it is easy to apply and resists yellowing.
Frequently Asked Questions
Question: Is epoxy flooring suitable for all types of wood floors?
Answer: No, epoxy is not always the best choice for every wood floor. The wood must be in good condition. You need to make sure the wood is dry and sealed. Floors with high movement, or moisture issues, might not be suitable for epoxy. It’s crucial to inspect your floor and prepare it properly before applying epoxy.
Question: How long does an epoxy floor last?
Answer: Epoxy floors are tough and can last for many years. With proper maintenance, they can last 10 to 20 years or even longer. How long it lasts depends on the quality of the epoxy, the installation, the amount of use it gets, and how well you take care of it.
Question: Can I apply epoxy flooring myself, or should I hire a professional?
Answer: You can apply epoxy yourself, but it’s important to be realistic about your skills. DIY is possible, especially if you have experience and are good with details. Professional installation is suggested for best results and for complex designs or if you want to be sure of the final outcome.
Question: What are the best cleaning products for epoxy floors?
Answer: The best cleaning products are gentle, non-abrasive cleaners with a neutral pH. Avoid harsh chemicals, bleach, or ammonia. Regular sweeping or vacuuming keeps the floor clean, and damp mopping will do. Using the proper cleaning products will keep the surface protected.
Question: What safety precautions should I take when working with epoxy?
Answer: Always wear protective gear, such as gloves, eye protection, and a respirator, when working with epoxy. Work in a well-ventilated area to prevent breathing fumes. If epoxy gets on your skin, wash it right away with soap and water. Always read and follow the manufacturer’s safety instructions.
Final Thoughts
Choosing to use epoxy on your wood floors can be a fantastic way to update them. It offers advantages, such as strong protection, great looks, and ease of care. But, you also need to know about the challenges, like careful preparation and some restrictions. For many people, the choice boils down to a balance of what you want and what you’re willing to do. If you are handy and take your time, DIY projects are a good option. However, sometimes calling in the pros is the best way to get the outcomes you’re looking for. Taking the time to decide if Can You Epoxy a Wood Floor? Pros and Cons fits your plan is what it all comes down to. With the right information, you can make an informed decision and start on the path to beautiful, durable floors that you will enjoy for years. This is your chance to change how your floor looks and feels. Enjoy the process!