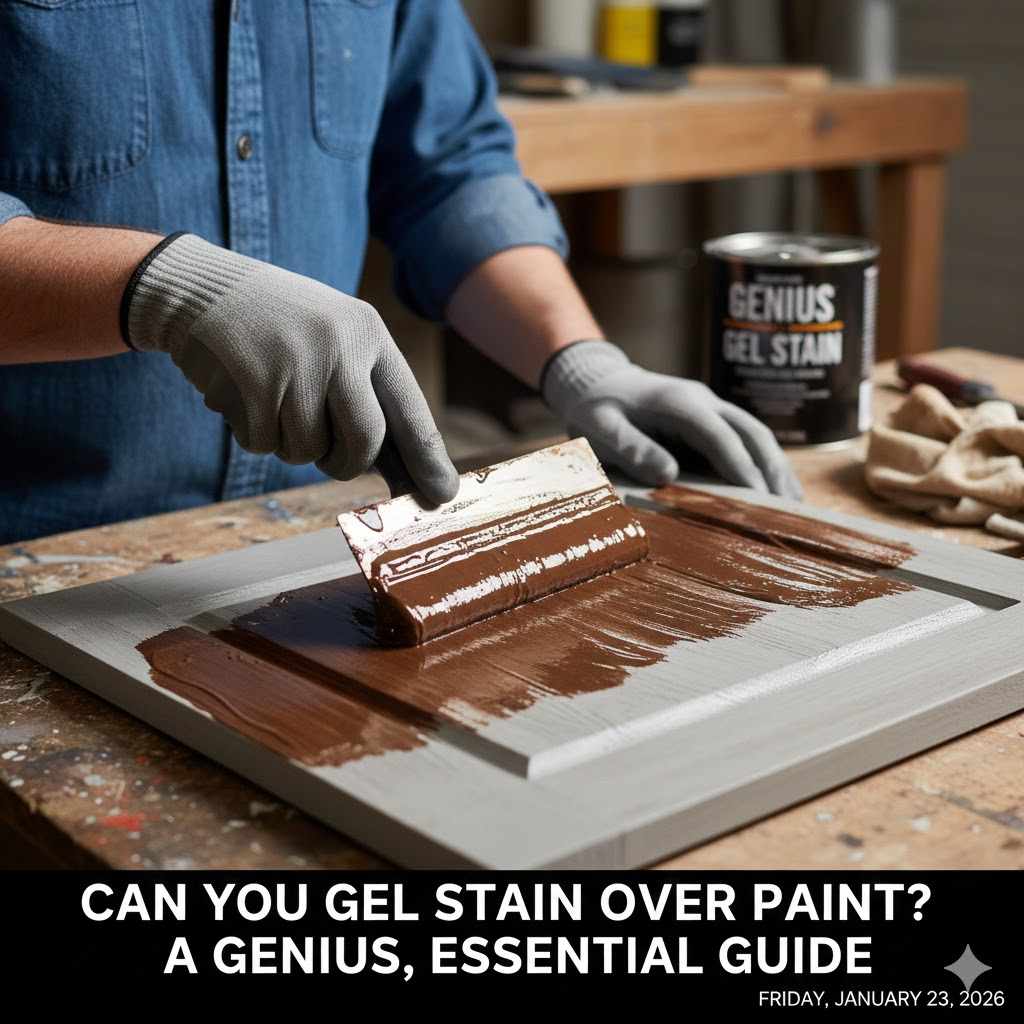
Can You Gel Stain Over Paint? A Genius, Essential Guide
Yes, you absolutely can use gel stain over paint. It’s a fantastic way to give a painted piece of furniture or cabinetry a rich, wood-like finish without the messy process of completely stripping the old paint. The key is proper preparation—thoroughly cleaning and lightly scuff-sanding the surface to ensure the gel stain adheres properly.
Have you ever looked at a painted dresser, table, or set of cabinets and wished it had the warm, classic look of real wood? Maybe you love the piece, but the solid paint color feels a bit flat. The thought of stripping all that paint down to the bare wood can be daunting, messy, and time-consuming. It’s enough to make anyone give up before they start.
But what if I told you there’s a shortcut? A brilliant technique that lets you get that beautiful, wood-grain look right on top of the existing paint? It’s possible, and it’s easier than you think.
Hello, I’m Md Meraj. In my workshop, I’m always looking for smart, practical solutions that give amazing results without the headache. Today, I’m going to show you one of my favorite finishing tricks: using gel stain over paint. We’ll walk through every step together, from prep work to the final protective coat. Let’s turn that painted piece into something spectacular!
What is Gel Stain and Why is it Different?
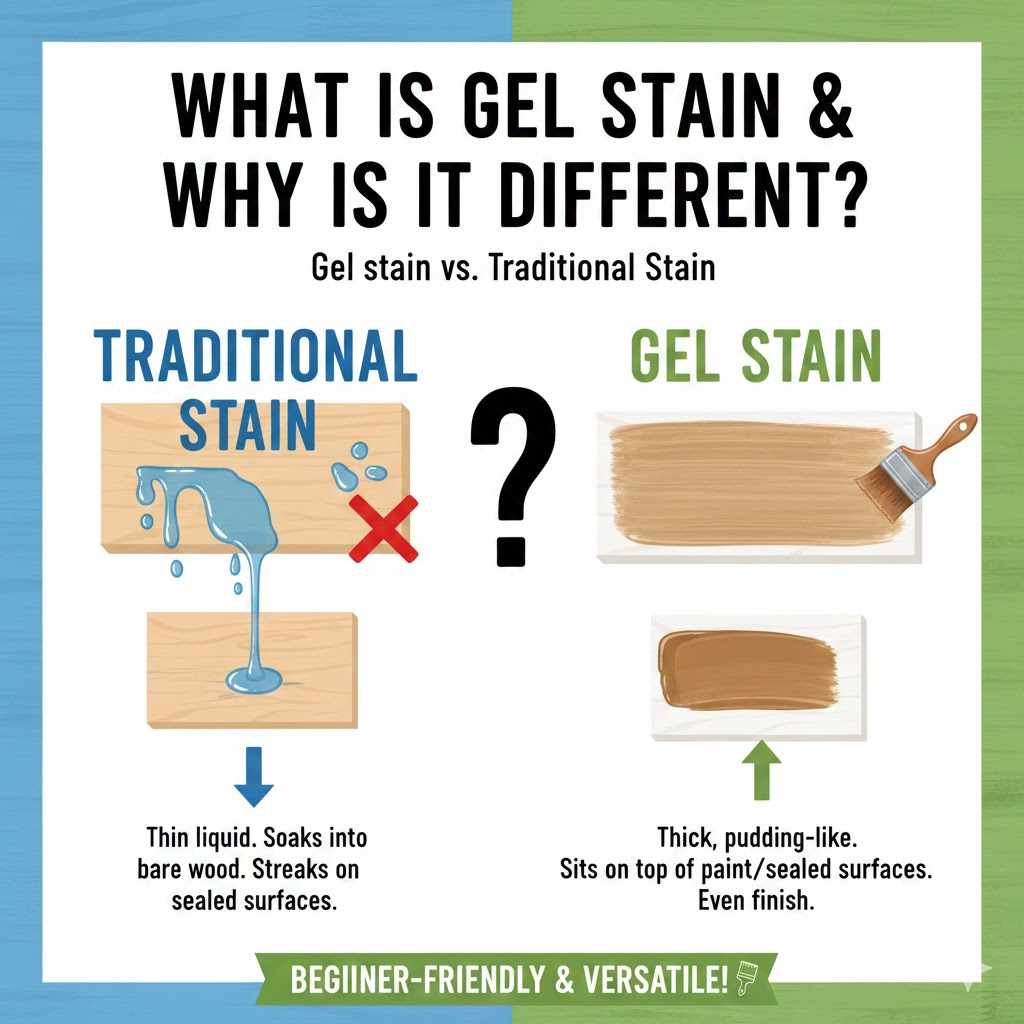
Before we grab our tools, it’s important to understand what makes gel stain so special for a project like this. Unlike traditional liquid wood stains that are thin and watery, gel stain has a thick, pudding-like consistency. This is a game-changer.
Think of it this way:
- Traditional Stain Soaks In: Thin, liquid stains are designed to penetrate bare wood pores to color the wood from the inside out. If you put them on a non-porous surface like paint, they will just bead up and wipe away, making a streaky mess.
- Gel Stain Sits on Top: Because of its thickness, gel stain doesn’t need to soak in. It sits on the surface of your project, acting almost like a transparent layer of color. This is precisely why it works so well over paint and other sealed surfaces—it creates a new finish right on top.
This unique quality makes gel stain incredibly versatile and beginner-friendly. It’s less likely to drip or run, giving you more control over the application and a more even finish. For creating a faux wood look over paint, there’s simply no better product.
The Big Question: Can You Really Put Gel Stain on a Painted Surface?
Let’s clear this up once and for all: yes, you can. It’s not just possible; it’s a popular and effective technique used by DIYers and professionals to transform furniture, doors, and cabinets.
The magic lies in one simple principle: adhesion. The gel stain isn’t trying to become one with the wood underneath the paint. Instead, it just needs something to hold onto. By properly preparing the painted surface—making it clean and slightly rough—you create the perfect canvas for the gel stain to grab hold of and stick to permanently.
When you apply gel stain over paint, you’re essentially creating a translucent, colored layer that mimics the depth and richness of a real wood finish. With a little technique, you can even add a faux wood grain to make the effect even more convincing. It’s the perfect solution for anyone who wants the beauty of wood without the labor-intensive process of stripping.
When to Use Gel Stain Over Paint (And When to Avoid It)
This technique is brilliant, but it’s not the right fit for every single project. Knowing when to use it will save you time and ensure you get the results you’re dreaming of. Here’s a quick guide to help you decide.
| Use Gel Stain Over Paint For: | Avoid Gel Stain Over Paint For: |
|---|---|
| Kitchen Cabinets & Bathroom Vanities: Perfect for a quick, dramatic makeover without a full remodel. | Heavily Damaged or Chipping Paint: Gel stain can’t fix a bad foundation. You must repair and sand peeling paint first. |
| Old Furniture (Dressers, Tables, Desks): Breathe new life into a dated, painted piece by giving it a classic wood look. | High-Traffic Horizontal Surfaces (without a strong topcoat): A tabletop or stair tread will need several coats of a durable polyurethane topcoat to withstand wear. |
| Interior Doors & Trim: A great way to add warmth and character to your home’s architectural details. | True Heirloom Restoration: If you’re restoring a valuable antique to its original state, you should consider professional stripping. |
| Garage Doors: You can achieve a stunning, high-end carriage house look on a standard metal or composite garage door. | Latex or “Gummy” Paint: If the paint is soft and peels easily, it won’t provide a stable base. It’s better to strip this kind of paint. |
Your Essential Toolkit: Supplies You’ll Need
Getting your tools and materials ready before you start is the key to a smooth and successful project. You don’t need a fancy workshop—just a few key items. Here’s everything you’ll need to have on hand:
- Cleaning Supplies: A good degreasing cleaner (like TSP substitute or a mix of dish soap and water), a bucket, and clean rags or a sponge.
- Safety Gear: Chemical-resistant gloves, safety glasses, and a respirator mask (especially if working indoors or with oil-based products).
- Sandpaper: Medium-grit (around 150-220 grit) sandpaper or a sanding sponge for scuffing the surface.
- Tack Cloth or Microfiber Cloth: For wiping away all the sanding dust.
- Painter’s Tape: To protect any areas you don’t want to stain, like hardware bases or glass.
- Gel Stain: Choose your desired color. Popular brands like General Finishes and Minwax make excellent products.
- Applicators: High-quality foam brushes or, my personal favorite, lint-free rags (an old t-shirt cut into squares works perfectly).
- Faux Graining Tool (Optional): If you want to create a realistic wood grain effect, this simple rubber tool is a must-have.
- Protective Topcoat: A clear, durable finish like polyurethane or polycrylic to protect your work. Choose the appropriate sheen (matte, satin, semi-gloss, or gloss).
- Stir Sticks: For mixing your stain and topcoat.
- Drop Cloths: To protect your floor and surrounding area.
Step-by-Step Guide: How to Apply Gel Stain Over Paint Perfectly
Alright, you’ve got your supplies, and your project piece is ready. Let’s get to the fun part! Follow these steps carefully, and you’ll achieve a finish that looks professional and beautiful. Remember, patience is your best tool in the workshop.
Step 1: Clean Your Surface Thoroughly
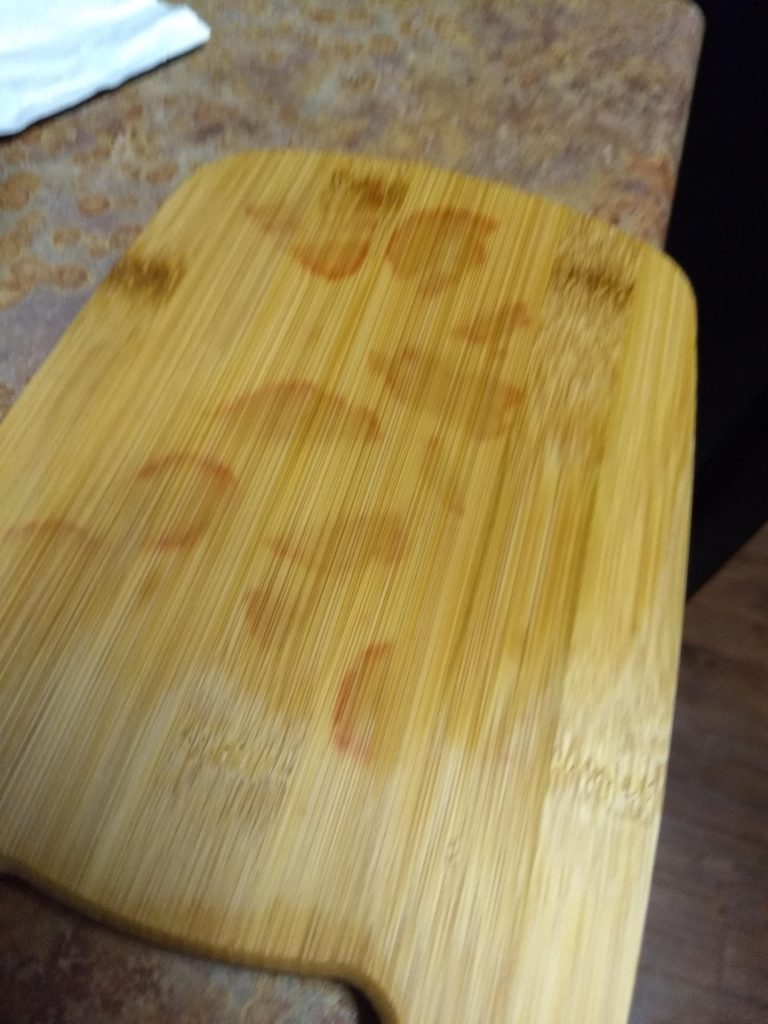
You cannot skip this step! Any dirt, grease, or grime on your painted surface will prevent the gel stain from adhering properly. Using your degreasing cleaner and a sponge, wash the entire piece from top to bottom. Pay extra attention to high-touch areas like cabinet handles or drawer fronts, as these are often the grimiest. Once clean, rinse the surface with a rag dampened with plain water and let it dry completely. A clean slate is essential for a lasting finish.
Step 2: Scuff Sand for Grip
The goal here isn’t to remove the paint, but to give it a “tooth” for the gel stain to grip onto. Take your 150- or 220-grit sandpaper and lightly sand the entire surface. You’re just looking to take the shine off the existing paint. Move in the direction you want your future “wood grain” to run. The surface should feel slightly rough and look dull and matte when you’re done. Once finished, wipe away every speck of sanding dust with a tack cloth or a damp microfiber cloth. Dust is the enemy of a smooth finish!
Step 3: Prime if Necessary (Optional but Recommended)
While not always required, applying a primer can be a smart move in certain situations. If you are applying a light-colored gel stain over a very dark paint (like staining light oak over black paint), a neutral-colored primer (like a light tan or gray) will help you achieve the true stain color with fewer coats. Primer also provides an extra layer of adhesion, which is never a bad thing. If you choose to prime, apply a thin, even coat and let it dry completely according to the manufacturer’s instructions before proceeding.
Step 4: Apply Your First Coat of Gel Stain
It’s time to add some color! Put on your gloves. Open your can of gel stain and stir it gently but thoroughly. Don’t shake it—that creates bubbles. Dip your foam brush or lint-free rag into the stain and apply a thin, even coat to a small section of your project. Work in long, straight strokes in the direction of your intended wood grain.
Once you’ve covered a section, take a clean part of your rag and gently wipe away the excess stain. How much pressure you use will determine how dark the finish is. Light pressure leaves more color behind; heavy pressure removes more. The goal for this first coat is to establish a base color, not to achieve the final look. Let it dry completely—this can take anywhere from 6 to 24 hours depending on the brand, temperature, and humidity.
Step 5: Create a Faux Wood Grain (Optional)
If you want to take your project to the next level, now is the time to create a faux wood grain. Apply a second, slightly thicker coat of gel stain. While the stain is still wet, take your wood graining tool, press it onto the surface at one end, and slowly rock and drag it across the wet stain. This motion will create a surprisingly realistic wood grain pattern. If you mess up, no worries! Simply wipe the section with a rag dampened with mineral spirits, reapply the stain, and try again. This step takes a bit of practice, but the result is well worth the effort.
Step 6: Apply Additional Coats for Depth
Whether you added a faux grain or not, you’ll likely want to apply another coat to deepen the color and add richness. Simply repeat the process from Step 4: apply a thin coat of gel stain and gently wipe off the excess. You can add as many coats as you need to achieve your desired darkness, but make sure you let each coat dry completely before adding the next one. This layering process is what creates the beautiful depth that makes the finish look so authentic.
Step 7: Seal with a Protective Topcoat
Your beautiful new finish needs protection to last. Once your final coat of gel stain has fully cured (wait at least 48-72 hours to be safe), it’s time to apply a topcoat. A clear polyurethane or polycrylic is the perfect choice. Using a high-quality brush, apply a thin, even coat of your chosen sealer. Work in long, smooth strokes. Let it dry, then lightly sand with 220-grit sandpaper, wipe away the dust, and apply a second coat. For high-use items like tabletops or kitchen cabinets, I recommend at least three coats for maximum durability.
Pro Tips for a Flawless Finish
After years of working with finishes, I’ve picked up a few tricks that make a big difference. Keep these in mind as you work:
- Test in a Hidden Spot: Before you commit to the whole piece, test your process on a hidden area, like the back of a cabinet door or the underside of a table. This lets you perfect your application technique and ensure you love the color.
- Thin Coats are Key: It’s always better to apply multiple thin coats than one thick, gloppy one. Thin coats dry faster, look more professional, and give you more control over the final color.
- Don’t Overwork It: Apply the stain and wipe it off. Try not to go back and fuss with it too much as it starts to dry, as this can cause smudges and streaks.
- Lighting is Everything: Work in a well-lit area. Good lighting helps you see any inconsistencies in your application and ensure you’re getting even coverage.
- Pay Attention to Dry Times: Rushing the process is the fastest way to ruin your finish. Read the can and respect the recommended drying and curing times for both the gel stain and the topcoat.
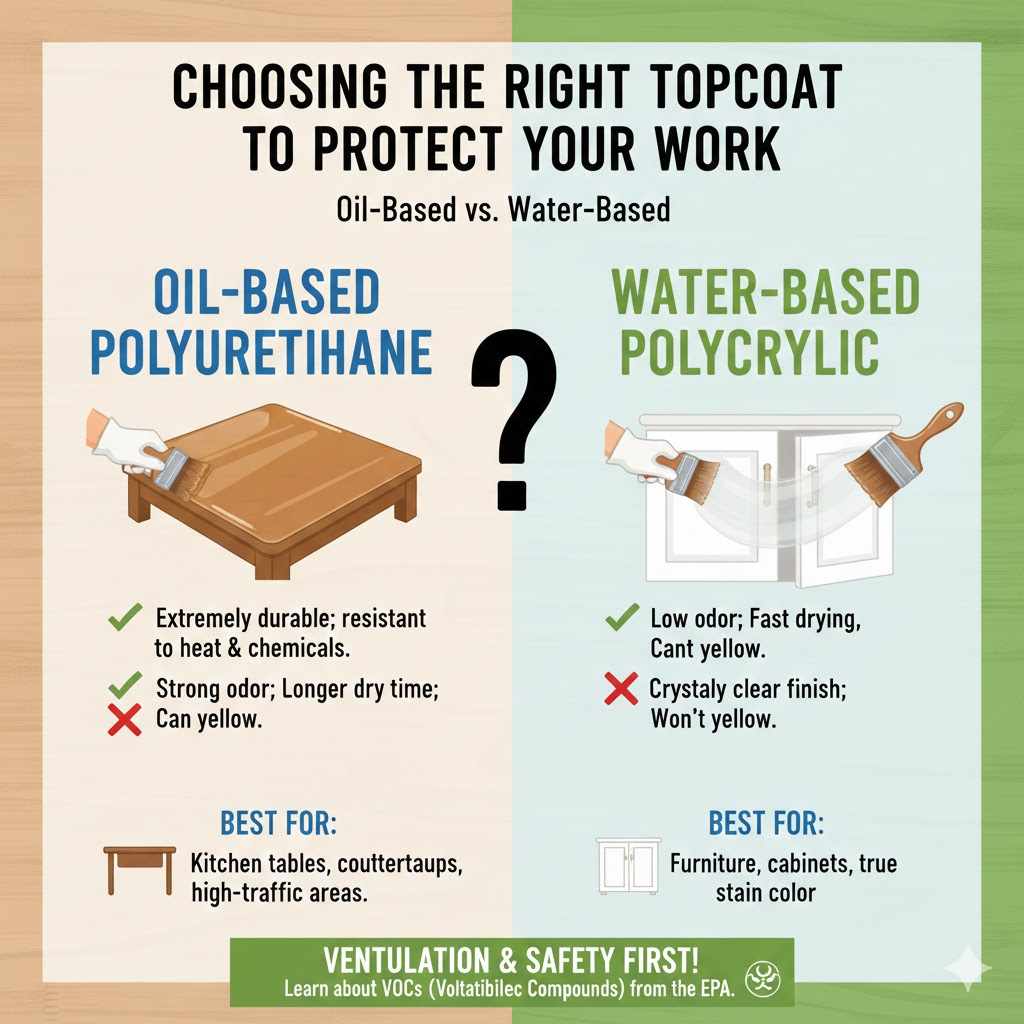
Choosing the Right Topcoat to Protect Your Work
The final step, the topcoat, is what shields your hard work from scratches, spills, and daily wear and tear. Choosing the right one is important. Your main choice will be between an oil-based and a water-based product.
| Topcoat Type | Pros | Cons | Best For |
|---|---|---|---|
| Oil-Based Polyurethane | Extremely durable; resistant to heat and chemicals; adds a slight amber warmth. | Strong odor (requires good ventilation); longer dry time; can yellow over time. | Kitchen tables, countertops, high-traffic areas. |
| Water-Based Polycrylic | Low odor; fast drying; crystal clear finish that won’t yellow. | Slightly less durable than oil-based; can look milky when wet but dries clear. | Furniture, cabinets, and projects where you want to maintain the true stain color. |
When working with any finishing product, be mindful of ventilation and safety. The U.S. Environmental Protection Agency (EPA) provides valuable information on volatile organic compounds (VOCs) commonly found in paints and finishes, so it’s wise to choose low-VOC options when possible and always work in a well-ventilated space.
Frequently Asked Questions
Do I have to sand before applying gel stain over paint?
Yes, but it’s just a light “scuff” sanding. You are not trying to remove the paint. The goal is simply to dull the existing finish and create a rough texture for the gel stain to adhere to. Using 150- to 220-grit sandpaper is perfect for this step.
What kind of paint can you gel stain over?
Gel stain works best over durable, fully cured paints like oil-based or acrylic enamel. It can also be applied over latex paint, as long as the paint is in good condition (not peeling or chipping) and has been properly scuff-sanded. The key is that the underlying paint provides a stable surface.
How long does gel stain take to dry over paint?
Drying time can vary based on the brand, thickness of application, temperature, and humidity. Generally, a thin coat of gel stain will be dry to the touch in 6-8 hours, but you should wait at least 24 hours before applying another coat. Always check the instructions on the can for specific recommendations.
Can I use a dark gel stain over light paint?
Absolutely! This is one of the most common and effective uses of this technique. Applying a dark gel stain like Java or Walnut over a white or cream-colored paint can create a stunning, high-contrast wood look. You may need two or three coats to achieve full, rich coverage.
What is the best applicator for gel stain?
Many people find that a lint-free rag (like a piece of an old cotton t-shirt) offers the most control for wiping the stain on and off. Foam brushes also work very well for applying the stain, especially in corners or detailed areas. Avoid bristle brushes, as they can leave streaks.
Will gel stain over paint look like real wood?
It can look surprisingly realistic! While it won’t have the true depth of a natural wood grain, the layered, translucent color of gel stain does an excellent job of mimicking a stained finish. For an even more convincing effect, use a faux graining tool to add a wood pattern.
How do I fix mistakes when applying gel stain?
Gel stain is quite forgiving. If you make a mistake while the stain is still wet (like applying too much or creating a streak), you can simply wipe the area with a rag dampened with mineral spirits to remove the wet stain and start over. If it has already dried, you can lightly sand the problem area and reapply a thin coat to blend it in.
Your Project Awaits!
There you have it—everything you need to know to confidently tackle your own gel stain over paint project. It’s a technique that opens up a world of possibilities, allowing you to update and transform furniture and fixtures on a budget. You don’t have to live with a boring, painted finish when a rich, wood-like look is just a few simple steps away.
Remember to take your time, prepare your surface well, and have fun with the process. The beauty of woodworking and DIY is in the creative journey and the pride you feel when you stand back and say, “I did that.” So go ahead, grab that old dresser or those dated cabinets, and give them a stunning new life. I know you can do it!