How to Vent a Wood Burner: The Safe, Code-Compliant Method
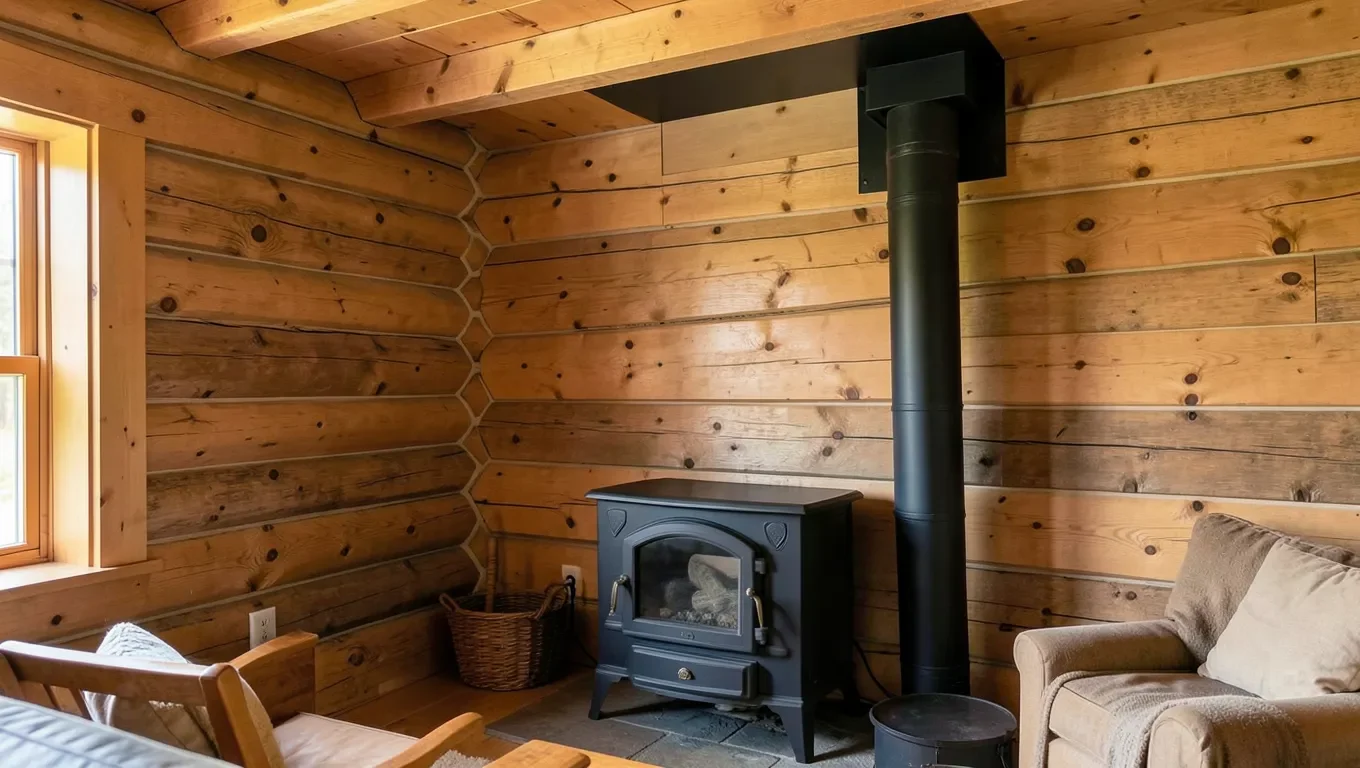
To vent a wood burner safely, you must create a continuous, sealed pathway for smoke and gases from the stove to the outdoors. This involves using the correct type of insulated chimney pipe sized to match your stove’s flue collar, maintaining proper clearances from combustible materials, and ensuring the chimney extends high enough above the roofline to create a strong draft. Get any one of these wrong and you risk carbon monoxide poisoning, a chimney fire, or both.
Venting a wood burner is not a job to eyeball. The pipe carrying combustion gases out of your home has to handle constant high heat, and every joint, clearance, and height measurement exists because someone learned the hard way what happens when it’s skipped. This guide walks through both common venting methods – lining an existing masonry chimney, or running a new Class A chimney through a wall or ceiling – with the specific clearances, sizing rules, and code-driven height requirements you need to get it right the first time.
Why Proper Venting Is a Big Deal
Best For Wood Stove Safety
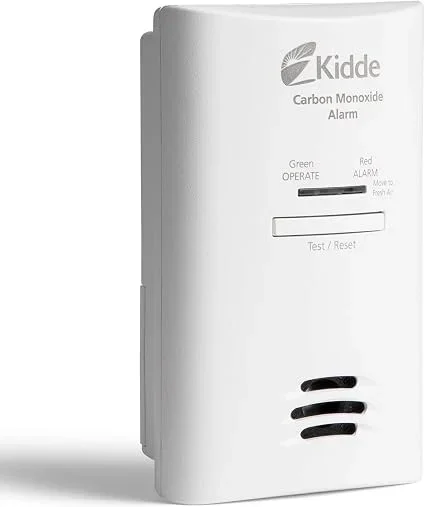 |
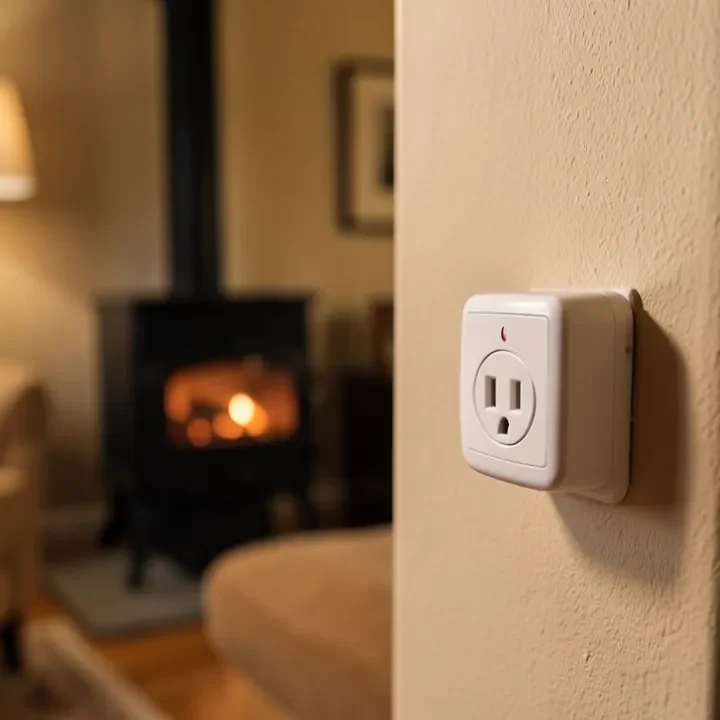
Kidde Plug-In Carbon Monoxide Detector – $29.04 Even a correctly vented wood burner is a combustion appliance – a CO detector is the backup layer that catches a failure (a cracked liner, a blocked cap, a bad seal) before it becomes dangerous.
|
Before picking up any tools, it helps to understand why this is so critical. Venting is the lungs of your wood stove – it has to carry every bit of combustion byproduct outside so the air inside your home stays safe to breathe. Getting this right isn’t just about making the stove work; it’s a safety system for your family.
Here are the three main reasons venting is taken so seriously:
- Preventing Carbon Monoxide Poisoning: Burning wood produces gases, including carbon monoxide (CO) – a gas you cannot see or smell. A properly sealed vent carries all of it safely outside. A leaking joint or a blocked chimney can let it back into your home, and CO poisoning is a real cause of death every year, not a theoretical risk.
- Avoiding House Fires: The pipe carrying smoke out gets extremely hot. If it’s too close to wood framing, drywall, or insulation, it can ignite a fire inside your walls or attic. Proper venting means using insulated pipe and holding the specific clearances – measured in inches, not guesswork – required for that pipe type.
- Stopping Creosote Buildup: Creosote is a tarlike substance that builds up inside the chimney pipe as smoke cools. Enough of it can ignite, causing a chimney fire that can spread into the structure of the house. A correctly sized, correctly vented system stays hot enough to keep smoke moving quickly, which reduces how fast creosote accumulates.
This is a safety system from top to bottom, not just a pipe hookup – and it’s worth treating it that way at every step below.
Understanding the Parts of Your Venting System
Before you start, it helps to know the names of the key components. It makes following instructions and matching parts much easier.
Here’s a breakdown of the main components you’ll be working with:
| Component | What It Does |
|---|---|
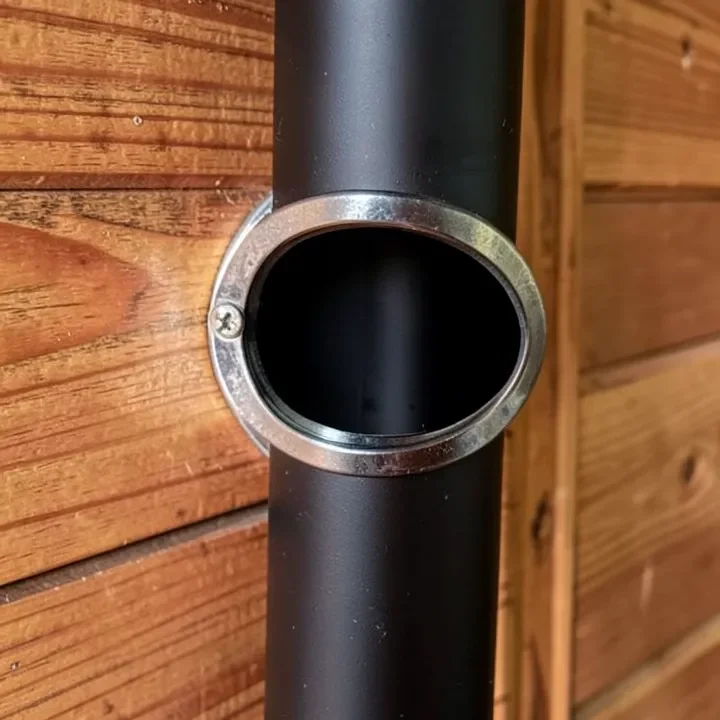
| Stovepipe (or Connector Pipe) | This is the pipe that connects directly to your wood stove and runs from the stove to the wall or ceiling. It’s usually a single-wall or double-wall black pipe. It gets very hot and is only for use inside the room where the stove is. |
| Chimney System (Class A Chimney) | This is the most important part. It’s a special insulated, double- or triple-walled stainless steel pipe designed to handle high temperatures safely. It’s the only type of pipe that can pass through walls, ceilings, and attics. |
| Thimble or Wall Pass-Through | A thimble is a protective metal or ceramic sleeve that goes into the wall. The stovepipe connects to the chimney system at this point, creating a safe transition through the wall. |
| Ceiling Support Box | If you are venting straight up through the ceiling, this is a special insulated box that supports the weight of the chimney and keeps it safely spaced away from the wood joists in your ceiling. |
| Chimney Cap | This sits on the very top of your chimney outside. It keeps rain, snow, animals, and debris out of the pipe and often has a screen to stop sparks from landing on your roof. |
One sizing rule trips up more DIYers than anything else in this list: your stovepipe diameter is set by your stove’s flue collar, not by preference or what’s on the shelf at the hardware store. Match the inside diameter of your connector pipe exactly to the outlet on the stove – most modern wood stoves use a 6-inch or 8-inch collar. Codes based on NFPA 211 do not allow downsizing the connector below the appliance’s own outlet unless the manufacturer’s installation manual specifically permits it. A pipe that’s too small for the stove weakens draft and speeds up creosote buildup – both work directly against the safety goals above.
Two Paths to Proper Venting: Choosing Your Method
There are two primary ways to vent a wood burner. The best choice for you depends on your home’s layout, specifically whether you have an existing masonry chimney you can use.
Method 1: Using an Existing Masonry Chimney
If your home already has a solid, well-built brick or stone chimney (perhaps from an old fireplace), you might be in luck. This is often the most straightforward and affordable method. However, you can’t just stick a pipe into the old opening. For safety and performance, you almost always need to install a stainless steel chimney liner inside the old masonry flue.
Method 2: Installing a New Chimney System (Through a Wall or Ceiling)
If you don’t have an existing chimney, no problem – you’ll be installing a modern, pre-fabricated metal chimney system, also called a “Class A” chimney. You can run this type of chimney straight up through the ceiling and roof, or out through an exterior wall and then up along the side of the house.
Here’s how they compare:
| Factor | Method 1: Existing Chimney | Method 2: New Installation |
|---|---|---|
| Cost | Generally lower, since the main structure already exists. The main cost is the liner kit. | Higher, since you’re buying every component: pipe, support boxes, flashing, and more. |
| Difficulty | Easier for a DIYer, assuming the chimney is in good condition. The main task is feeding the liner down. | More complex. Involves cutting holes in your wall or ceiling/roof and requires careful work with clearances. |
| Best For | Homes with an existing, structurally sound fireplace or masonry chimney. | Any home without a usable chimney, or if you want the stove in a specific location away from an old chimney. |
For the rest of this guide, we’ll cover the steps for both methods. Whichever you choose, the goal is the same: a safe, sealed path for the smoke to escape.
Tools and Materials You’ll Need
Having everything ready before you start makes the job go much smoother. Your specific materials list will depend on which method you choose, but here’s a general list of tools and supplies you’ll likely need.
- Safety Gear: Gloves, safety glasses, dust mask, and a sturdy ladder.
- Measuring & Marking: Tape measure, level, pencil, plumb bob (for finding center).
- Cutting Tools: Reciprocating saw or jigsaw (for cutting through walls/roofs), drill with bits.
- Fastening Tools: Screwdriver, caulk gun.
- Chimney System Components:
Stovepipe (to go from the stove to the wall/ceiling).
Class A chimney pipe sections (for going through walls, attics, and outside).
Elbows (if you need to make turns).
Ceiling support box or wall thimble.
Attic insulation shield.
Roof flashing and storm collar (for sealing the hole in the roof).
Chimney cap.
- For Existing Chimneys: Stainless steel chimney liner kit.
- Sealants: High-temperature silicone sealant and furnace cement.
Important: Buy your venting components from the same manufacturer. Different brands are not designed to fit together, and mixing them can create a serious safety hazard.
Step-by-Step Guide: Venting Through an Existing Chimney
This method can be a great option if you have a sound chimney. The key is making sure it’s done correctly by installing a new liner. Here’s how it’s done.
Step 1: Inspect and Clean the Chimney
Your first job is to play detective. The existing chimney must be structurally sound, with no major cracks or crumbling mortar. Get on a ladder and look down it with a powerful flashlight. More importantly, hire a certified chimney sweep to perform a Level 2 inspection. According to the Chimney Safety Institute of America (CSIA), this is essential when you’re changing the use of a chimney, like adding a new stove. They will also give it a thorough cleaning to remove old soot and flammable creosote.
Step 2: Measure for Your Chimney Liner
Measure the distance from the top of the chimney (the crown) all the way down to where the pipe will exit the thimble and connect to your stove. Add a couple of extra feet to be safe – you can always trim it later. You also need to measure the diameter of your stove’s flue collar (the outlet on the stove). Your liner should match this diameter.
Step 3: Install the Stainless Steel Liner
This is usually a two-person job. One person will be on the roof, and the other will be at the bottom near the stove.
- Attach a rope to the nose cone on the end of your flexible liner.
- Carefully, the person on the roof will begin feeding the liner down the chimney flue.
- The person at the bottom will help guide it through the damper area and out of the thimble opening.
- Once the liner is all the way down, you can remove the nose cone.
Step 4: Connect the Liner and Stovepipe
At the bottom, connect the stovepipe from your wood burner to the liner using a special connector piece that came with your liner kit. All connections should be sealed with furnace cement and secured with screws as specified by the manufacturer.
Step 5: Secure and Seal the Top
Back on the roof, trim any excess liner so it sticks out a few inches above the chimney crown. Install the top plate from your liner kit over the opening, sealing it to the chimney crown with high-temperature silicone caulk. This prevents water from getting between your new liner and the old chimney walls. Finally, install your chimney cap on top of the liner. Let all sealants cure completely before lighting your first fire.
Step-by-Step Guide: Venting Through a Wall or Ceiling
This is a bigger job, but totally achievable with careful planning and precise measurements. Before you cut any holes, always check your local building codes and the stove manufacturer’s instructions for clearance requirements.
Step 1: Plan Your Route
Decide where your stove will sit. Your venting path should be as short and straight as possible. A straight vertical run up through the ceiling is the most efficient. If you go through a wall, you’ll use an elbow to turn the pipe upwards once it’s outside. Use a plumb bob to transfer the center point of your stove’s flue outlet up to the ceiling so you know exactly where to cut.
Crucial Safety Check: Make sure your chosen path doesn’t run into electrical wires, plumbing pipes, or structural supports in the wall or ceiling.
Step 2: Cut the Opening and Install the Support Box/Thimble
Once you’ve marked your location, it’s time to cut. For a ceiling exit, you’ll cut a square hole in the ceiling drywall and between the joists to fit your ceiling support box. For a wall exit, you’ll cut a hole for the wall thimble. The instructions with your components will tell you the exact size of the hole to cut. Install the support box or thimble and secure it firmly to the house framing.
Step 3: Install the Stovepipe
Assemble the stovepipe sections from the wood stove up to the bottom of the ceiling support box (or to the wall thimble). The crimped (male) ends of the pipe should always point down towards the stove. This ensures that any liquid creosote runs back down into the stove to be burned off, rather than leaking out of the seams. For clearances by pipe type, slope, horizontal run limits and joint screws, see our wood stove pipe installation guide.
Step 4: Run the Class A Chimney Pipe
This is the insulated pipe for going through heated or unheated spaces. Start connecting sections of Class A pipe from the ceiling support box up through the attic and roof. Each section should twist-lock securely into the one below it. When passing through the attic, you must install an attic insulation shield. This is a metal barrier that keeps insulation from touching the hot chimney pipe.
Step 5: Cut the Roof Hole and Install Flashing
Once your pipe is through the attic, mark where it will exit the roof. Cut the hole. From the rooftop, slide the roof flashing down over the pipe. The bottom of the flashing should go under the shingles, and the top of it goes over the shingles. This is vital to prevent leaks. Secure the flashing to the roof deck with roofing nails and seal them with roofing cement. Slide the storm collar down the pipe until it sits tightly on top of the flashing cone, and seal the top edge with high-temperature silicone.
Step 6: Follow the Height Rules
Your chimney must be high enough to create a good draft and prevent downdrafts. The rule of thumb, often referred to as the “3-2-10 Rule,” is a standard rooted in the NFPA 211 Standard. It states the chimney must:
- Be at least 3 feet taller than the highest point where it passes through the roof.
- Be at least 2 feet higher than any part of the building that is within 10 feet of it horizontally.
Some stove manufacturers require even more total height above the appliance to guarantee draft performance and honor the warranty, so check your manual in addition to the 3-2-10 minimum. Attach any required roof braces to stabilize the chimney pipe if it extends more than 4-5 feet above the roofline.
Step 7: Install the Chimney Cap
This is the final piece of the puzzle. Secure the chimney cap to the top of the last pipe section. This keeps the weather and critters out and helps prevent stray sparks.
Final Safety Checks and Your First Fire
The installation work is done, but don’t rush to light that first fire yet. Run through this final safety sweep first.
- Double-Check Clearances: Go back and measure the distance from your stove and stovepipe to any nearby walls, furniture, or curtains. Make sure you’ve met the clearances listed on your stove’s safety label.
- Check All Connections: Ensure every pipe joint is secure and sealed according to the manufacturer’s directions.
- Install Detectors – Placed Correctly: You must have working smoke and carbon monoxide detectors in your home, including near sleeping areas. Don’t mount the CO detector directly above or right next to the stove itself – the heat and normal startup fumes from curing paint can trigger false alarms there. A nearby wall a few feet away, or the doorway into the room, works better.
- Cure the Stove Paint: For your first couple of fires, burn small, hot fires. This helps cure the special high-temperature paint on the stove and pipes. It will smell a bit and may produce some smoke – this is normal. Open some windows for ventilation during this process.
- Get It Inspected If You Have Any Doubt: If any part of this installation was outside your comfort zone, have a certified chimney sweep or local building inspector check it before regular use. Most areas also require a permit and inspection for a new wood stove installation – that’s not a formality, it’s a second set of trained eyes on a system that shares your living space with an open flame.
Once you’ve worked through that list, you’re ready to enjoy the warmth of your new wood burner, knowing the system behind it was built the safe and correct way.
Frequently Asked Questions (FAQ)
1. Can I vent a wood burner horizontally out a wall?
You can start by venting horizontally through a wall, but the chimney must turn 90 degrees and go vertically up once it’s outside. A venting system needs vertical height to create the “stack effect” or draft, which pulls smoke up and out. You cannot simply run a pipe straight out the wall like a dryer vent.
2. What’s the difference between single-wall and double-wall stovepipe?
Single-wall stovepipe is a simple, single layer of steel. It gets very hot and requires a larger clearance (usually 18 inches) from combustible materials. Double-wall stovepipe has an air gap between two layers of steel, which keeps the outer wall cooler. This allows you to install it with reduced clearances (often as little as 6 inches).
3. How often should I clean my chimney?
You should inspect your chimney system at least once a year and clean it whenever there is 1/8 inch or more of creosote buildup. For people who use their wood stove regularly as a primary heat source, this may mean cleaning it more than once per season.
4. Do I need a permit to install a wood burner?
In most areas, yes. Installing a wood stove and chimney system is considered a major modification that requires a building permit and an inspection from your local building or fire department. This is for your safety and is often required by insurance companies.
5. What is creosote and why is it so dangerous?
Creosote is a flammable, tarlike byproduct of burning wood, especially if the wood is damp or the fire is smoldering at a low temperature. It builds up inside your chimney pipe. If it gets thick enough and hot enough, it can ignite, causing a very dangerous chimney fire that can spread to the rest of your house.
6. Can I install the venting myself?
Yes, a homeowner who is comfortable with DIY projects can often install their own wood stove venting system. However, it requires careful reading of all manufacturer instructions and strict adherence to local building codes and safety clearances. If you have any doubt, hiring a certified professional is the safest choice.
7. How high does my chimney need to be?
The chimney must extend at least 3 feet above the point where it exits the roof. It also needs to be at least 2 feet higher than anything within a 10-foot horizontal radius. This “3-2-10 rule” ensures a good draft and prevents smoke from being blown back down into the house.
Conclusion: A Job Well Done
Installing the venting for your wood burner is one of the most important DIY projects you can take on. It’s more than a home improvement project – it’s a safety system for your family. By taking your time, using the right materials matched to your stove’s actual flue size, following the clearance and height rules, and backing it up with a working CO detector, you’ve built something that will bring safe, reliable warmth to your home for years to come.
When in doubt on any step, a local certified chimney sweep or your building department can answer questions specific to your home – it’s a cheap safeguard against an expensive, dangerous mistake.
Sponsored / affiliate links. As an Amazon Associate I earn from qualifying purchases. I may earn additional commission from eligible campaigns.