Can You Poly Over Paint? What Every Woodworker Should Know
You can apply polyurethane over paint, but success depends on using the right type of paint and poly, and preparing the surface correctly. Not all painted surfaces are suitable for a poly topcoat.
What Is Polyurethane and Why Use It?
Polyurethane is a type of plastic coating. It’s super tough and durable. People use it to protect surfaces from wear and tear.
Think of your kitchen table or wooden floors. Polyurethane is often the reason they stay looking good for years.
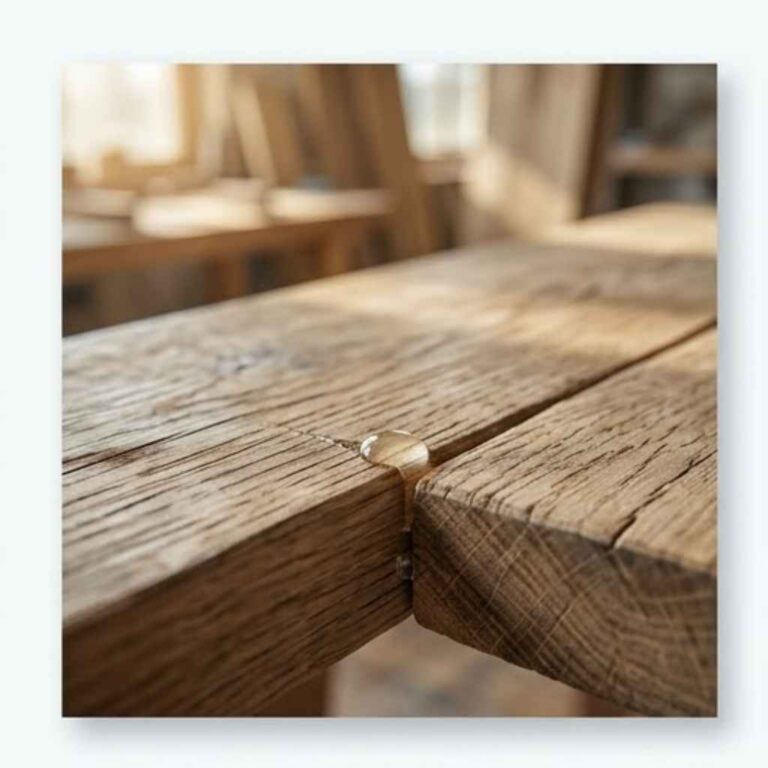
It creates a clear, hard shell. This shell acts like a shield. It protects against scratches, water, and spills.
It can also give a nice sheen. You can get a matte look, a satin sheen, or a super high gloss. The type of polyurethane you choose matters a lot for the final look and feel of your project.
There are two main kinds. Oil-based poly is very tough. It can yellow a bit over time.
Water-based poly dries clear and is easier to clean up. It’s usually less durable than oil-based but works well for many things. Both can protect painted surfaces if applied correctly.
The Big Question: Can You Poly Over Paint?
Yes, you often can put polyurethane over painted surfaces. But it’s not always a simple “yes.” Some paints just don’t work well under a topcoat. Others need special prep.
The type of paint you used is the biggest clue.
The goal is to create a surface that the poly can stick to. Paint is usually smooth. Polyurethane needs something to grip.
If the paint is too slick, the poly might peel or flake off later. It’s like trying to glue two pieces of glass together without any roughing up. They just slide apart.
Some paints are designed to be durable on their own. Others are more delicate. You need to know which you have.
This will tell you if poly is a good idea and how to do it right.
My Own Sticky Situation: A Lesson Learned
I remember a project years ago. I painted an old wooden chair a bright, cheerful yellow. It looked great!
I wanted to make sure it lasted. So, I grabbed the can of polyurethane. I didn’t think much about it.
I just slathered on two thick coats. Then I waited for it to dry.
The next morning, I checked on it. It was… sticky. And not just a little bit sticky.
It was tacky to the touch. A whole week later, it was still tacky. I was so frustrated.
The chair was unusable. I had to scrape off all the poly. It was a mess.
I learned that day that not all paint and poly pairings are automatic wins. Preparation is key!
Understanding Paint Types and Their Compatibility with Poly
This is where we get into the nitty-gritty. Not all paints are created equal. And when you add poly, some combinations are just doomed to fail.
Knowing your paint helps you know what to expect.
Latex and Water-Based Paints
These are super common for DIY projects. Think of the paint you use for walls or trim. Latex paints are generally flexible.
They dry to a finish that can sometimes be a bit soft.
The good news is that latex paint usually accepts polyurethane well. Especially if it’s a paint that has dried completely. These paints aren’t usually too slick.
They offer a decent surface for the poly to grab onto. You might need to do a light sanding first, though. This gives the poly even more to stick to.
If you use water-based poly with water-based paint, you’re often in a good spot. They are similar in chemistry. This helps them bond well.
Oil-Based Paints (Alkyd Paints)
Oil-based paints are tougher. They dry to a harder finish than latex. This can be good.
It means the paint itself is already quite durable.
Polyurethane often sticks well to oil-based paints. But there’s a catch. Oil-based paints can take a very long time to cure fully.
Even when they feel dry to the touch, they might still be a bit soft deep down. If you put poly on too soon, it can react with the oil. This can cause issues like stickiness or cloudiness.
You’ll want to make sure the oil paint is fully cured. This can take weeks. A light sanding is also a good idea here.
Sanding helps create a better bond.
Enamel Paints
Enamel paints are known for their hardness and durability. They often have a high gloss finish. This can make them tricky to apply poly over.
Some enamels, especially spray enamels, can be very slick. They might resist adhesion from polyurethane. If you’re using an enamel, you absolutely need to sand it first.
You’re aiming to break that super smooth surface.
You might also find that some enamels already have a built-in finish. Adding poly might not add much benefit. It could even dull the existing sheen.
Always test first if you can.
Chalk Paint and Mineral Paints
These paints have a very different texture. They are designed to be matte and have a chalky feel. Because of this, they almost always need a topcoat for protection.
Polyurethane is a popular choice.
However, chalk and mineral paints are porous. They can absorb the poly. This can sometimes change the color or appearance of the paint.
It might make it look darker or more “wet.”
To prevent this, many people use a wax finish over chalk paint. But if you prefer poly, you’ll want to seal the paint first with a shellac-based primer or a water-based poly specifically designed for these paints. This seals the pores.
Then you can apply your topcoat of poly. Light sanding is still a good idea.
Milk Paint
Milk paint is another type that is naturally porous. It’s often used for a distressed or antique look. Like chalk paint, it needs protection.
Milk paint can be tricky. It can chip easily on its own. Applying poly can sometimes lift the milk paint if the paint hasn’t bonded well to the surface underneath.
A bonding agent is often used with milk paint. If you used one, your surface is likely ready for poly after light sanding.
If you didn’t use a bonding agent, you might need to seal the milk paint with a primer first. Then you can apply your poly. Testing is really important here.
Specialty Paints (Metallic, High-Gloss, All-in-One)
These can be unpredictable. High-gloss paints are often very slick. Metallic paints can sometimes have a finish that doesn’t take well to other coatings.
All-in-one paints claim to do everything, but adding poly might interfere with their intended finish.
For these, thorough cleaning and diligent sanding are non-negotiable. Always test the poly on an inconspicuous spot. See how it adheres and if it changes the look in an undesirable way.
Quick Paint Type Check
Latex/Water-Based: Usually good. May need light sanding.
Oil-Based: Needs to be fully cured. Light sanding helps.
Enamel: Can be slick. Sanding is a must. Test adhesion.
Chalk/Mineral: Porous. May need sealing first or use specific poly.
Milk Paint: Porous. Might need bonding agent or primer.
Specialty: Always test. Sanding is critical.
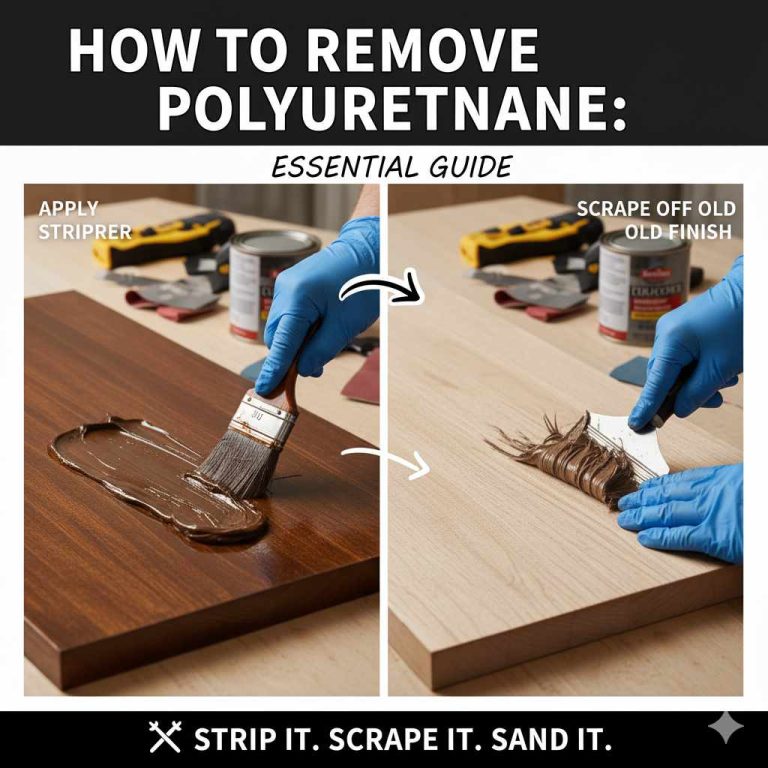
Surface Preparation: The Unsung Hero
No matter what kind of paint you used, preparation is where success or failure is decided. Skipping these steps is the most common reason for poly problems over paint.
Cleaning is Crucial
Dust, grease, oils, and grime are the enemies of good adhesion. You need a clean surface for the poly to stick to. Even if the paint looks clean, there might be a thin film on it.
Use a mild detergent and water. Or a degreaser. Gently wipe down the entire painted surface.
Make sure to rinse it well. You don’t want soap residue left behind. Then, let it dry completely.
This might take a few hours depending on humidity.
If you’re working with a surface that might have old wax or polish on it, you might need a solvent-based cleaner. Mineral spirits can work for some things. Just be sure to use them in a well-ventilated area.
And test them on a small spot first to make sure they don’t harm the paint.
Sanding for a Better Grip
This is the step most DIYers skip. But it’s vital. Polyurethane needs a slightly roughened surface to adhere to properly.
Think of it like preparing a wall for paint. You don’t just paint over glossy, smooth surfaces without a primer. Poly is similar.
You don’t need to sand down to the bare wood! That would defeat the purpose of painting. You just need to dull the sheen.
This creates tiny scratches for the poly to grab. Use fine-grit sandpaper. Something in the 220-grit range is usually perfect.
Lightly sand the entire painted surface. You want to remove any glossy spots. The surface should feel slightly smoother, not perfectly smooth and slick.
Move in the direction of the wood grain if you can see it. After sanding, you must clean off ALL the dust.
Dust Removal: Be Thorough!
Sanding creates dust. Lots of it. If you don’t get rid of all that dust, it will get trapped in your polyurethane.
This will make your finish look rough, bumpy, and unprofessional. It can also weaken the bond.
Use a tack cloth. This is a special cloth designed to pick up fine dust particles. Wipe down the entire surface gently.
You might need to go over it a couple of times. A vacuum with a brush attachment can get the bulk of the dust first. Then use the tack cloth for the fine stuff.
Work in a clean area. Close windows and doors. Avoid dusty activities nearby.
The cleaner your workspace, the cleaner your finish will be.
Choosing the Right Polyurethane
Not all polyurethanes are the same. The type you choose can affect how well it adheres to paint and the final look.
Water-Based vs. Oil-Based Poly
Water-Based Poly: Dries clear. Doesn’t yellow over time. Good for lighter paint colors.
Dries faster. Easier cleanup with soap and water. Generally less harsh.
It’s a great choice for most painted projects, especially if you used latex paint.
Oil-Based Poly: Dries to a warmer, amber tone. This can be nice for darker colors or a vintage look. It’s very durable and offers excellent protection.
However, it yellows over time, so it’s not ideal for white or very light colors. It also has stronger fumes and requires mineral spirits for cleanup. It can sometimes react with certain paints if not fully cured.
For painted surfaces, water-based poly is often the safer bet. It’s less likely to cause adhesion problems or react poorly with latex or acrylic paints. If you want the toughest finish and are using a darker paint, oil-based can work, but be extra careful with surface prep and curing times.
Sheen Matters
Polyurethane comes in different sheens: matte, satin, semi-gloss, and high-gloss. This is mostly about the final look you want.
A matte finish is dull. Satin has a low sheen. Semi-gloss is a bit shinier.
High-gloss is very reflective. The sheen doesn’t typically affect adhesion to the paint itself. However, very high-gloss finishes can sometimes show imperfections more.
They can also be more slippery if that’s a concern.
Specialty Formulations
There are polyurethanes specifically designed for certain uses. Some are labeled as “furniture finishes” or “cabinet and door” finishes. These are usually formulated for maximum durability.
There are also water-based polyurethanes that are specifically designed to go over chalk paint or mineral paint. These are worth looking into if you’re using those types of finishes. They often have better adhesion properties for those porous surfaces.
Polyurethane Quick Guide
- Water-Based: Clear, no yellowing, fast dry, easy clean. Best for light paints.
- Oil-Based: Amber tone, very tough, slower dry, fumes, mineral spirits clean. Best for dark colors.
- Sheen: Matte, Satin, Semi-Gloss, Gloss. Affects look, not adhesion.
- Specialty: Look for furniture or chalk paint formulas.
Application Techniques for a Smooth Finish
Even with the right paint and prep, how you apply the poly makes a big difference. You want a smooth, even coat. No drips, no brush marks, and no bubbles.
Tools of the Trade
You have a few options for application:
- High-Quality Synthetic Bristle Brush: This is common for water-based poly. Use a brush specifically made for water-based finishes.
- Natural Bristle Brush: Better suited for oil-based poly.
- Foam Brush: Can work for small projects or touch-ups. They often leave fewer brush marks than natural bristles.
- Roller: For large, flat surfaces like tabletops, a small foam roller can be very effective. Use a high-density foam roller.
- Spray Application: This gives the smoothest finish but requires a spray gun and good ventilation. It’s often best for professional results.
Whatever tool you choose, make sure it’s clean. Dust or debris on your brush or roller will end up in your finish.
Thin Coats Are Key
This is another common mistake. People think applying one thick coat will save time. It usually leads to problems.
Thick coats dry unevenly. They can cause drips, sagging, and prevent proper curing. This leads to that sticky mess I experienced.
Always apply multiple thin coats. It’s much better to do three thin coats than one thick one. Each thin coat builds up to a strong, smooth finish.
It also allows for better adhesion between coats.
Brushing Technique
Load your brush with just enough poly to get good coverage, but not so much that it drips. Apply in long, even strokes. Work in one direction.
If you’re brushing on a flat surface like a tabletop, start at one edge and work your way across. Overlap your strokes slightly.
Avoid over-brushing. Go back and forth too much, and you’ll introduce air bubbles. Try to lay the poly down gently and let it do its work.
Brush marks can be minimized by using a high-quality brush and working with the grain.
If you notice a drip starting, gently tip it off with your brush before it dries. It’s easier to fix small issues as you go.
Between Coats
After each coat of poly has dried thoroughly, you should lightly sand it again. Yes, again! This is called “scuff sanding.” It’s not about removing the poly.
It’s about smoothing out any tiny imperfections. It also creates a fresh surface for the next coat to adhere to.
Use very fine-grit sandpaper, like 320-grit or even 400-grit. Sand lightly. Then, once again, clean off ALL the dust with a tack cloth.
This step ensures that each layer bonds well with the one before it. It leads to a much smoother, more durable final finish.
Application Tips
- Use the right tool: Quality brush, roller, or sprayer.
- Thin coats: More is better than thick.
- Work in one direction: Follow the grain.
- Avoid over-brushing: Don’t stir up too much air.
- Scuff sand between coats: Use fine grit and clean thoroughly.
When Paint and Poly Don’t Mix Well
Sometimes, despite your best efforts, a painted surface just isn’t a good candidate for polyurethane. It’s important to know when to stop or change your plan.
Very Soft or Delicate Paints
Some paints are designed to be very soft and matte. Think of certain craft paints or some ultra-flat finishes. These might not withstand the sanding process at all.
They can also be too delicate to hold up under a protective layer.
If the paint feels powdery or rubs off easily even before you sand, poly might not be a good choice. You might need to consider a different topcoat, like a clear spray sealer, or a specialized wax designed for that type of paint.
Paints with Unknown or Questionable Additives
Have you used a paint that has glitter in it? Or a texture additive? Or maybe a specialty paint where you’re unsure of the binder?
These can be tricky. The additives might react with the polyurethane. Or they might create an uneven surface that the poly can’t adhere to.
Always test these paints thoroughly. If you can’t get a good bond in a test spot, it’s best to avoid poly. You might need to find a sealant that is compatible with those specific additives.
When the Paint is Already a Finish
Some paints, especially certain high-gloss enamels or clear coats, are already designed to be a durable finish. Adding another layer of polyurethane might not add any protection. It could also dull the existing finish or create an unwanted sheen.
Ask yourself: does this paint need protection? If it’s already tough and looks the way you want it, maybe leave it as is. Polyurethane is for adding durability or changing the sheen, not always for every painted surface.
Understanding Curing vs. Drying
This is a vital concept, especially with oil-based paints. Paint DRIES when it’s no longer wet to the touch. Paint CURES when it reaches its maximum hardness and durability.
This can take weeks, sometimes even a month or more, for oil-based paints.
Applying polyurethane before the paint has fully cured is a recipe for disaster. The solvents in the poly can react with the still-soft oils in the paint. This can cause the paint to soften, become gummy, or lift.
The poly might not adhere properly. You’ll end up with peeling or a sticky surface.
For oil-based paints, patience is key. Wait at least 7-14 days, and sometimes longer, before applying poly. If you’re unsure, it’s always better to wait longer.
For water-based paints, curing is usually much faster, often just a few days. But always ensure the paint is fully dry and hard before sanding or applying poly.
When to Pause and Re-evaluate
- Paint is too soft: Doesn’t hold up to light sanding.
- Unknown additives: Glitter, texture, etc.
- Paint is already a durable finish: Poly might be unnecessary.
- Paint is not fully cured: Especially important for oil-based.
Real-World Scenarios: Putting it All Together
Let’s look at how these principles apply in different home settings. Understanding these situations can help you make the right choices for your own projects.
Scenario 1: A Repainted Kitchen Table
Imagine you’ve painted your kitchen table a nice satin blue using a good quality latex paint. You want it to withstand daily use, spills, and kids. Here’s the plan:
- Wait for the paint to cure: Even latex needs a few days to harden up.
- Clean the surface: Use a mild soap and water. Rinse and dry thoroughly.
- Lightly sand: Use 220-grit sandpaper to dull any sheen.
- Remove all dust: Use a tack cloth.
- Apply thin coats of water-based polyurethane: Three to four coats should be enough for a table.
- Scuff sand between coats: Use 320-grit paper and clean thoroughly after each coat.
This approach will give you a durable finish that protects the paint and looks great for years.
Scenario 2: A Decorative Wooden Sign
You’ve painted a charming sign for your porch using acrylic craft paints. It’s mostly for looks, but you want it to survive a bit of weather. Acrylics are water-based.
- Ensure paint is fully dry: Acrylics dry fast.
- Clean gently: A slightly damp cloth might be enough.
- Lightly sand: Acrylic can be a bit slick. 220-grit is good.
- Dust removal is key: Use a tack cloth.
- Apply a water-based poly: Two or three thin coats of a satin finish should suffice.
For outdoor items, you might want to look for a polyurethane specifically rated for outdoor use, which contains UV inhibitors. But always test how it looks with your acrylic paint first.
Scenario 3: Chalk Painted Dresser Makeover
You’ve given an old dresser a beautiful makeover with chalk paint. It has that soft, matte finish you love. Now you need to protect it without making it look too shiny or changing the color dramatically.
- Clean the chalk paint: Chalk paint can be dusty. Use a dry cloth or a lightly damp one very carefully.
- Scuff sanding might be too harsh: For chalk paint, sanding can sometimes be too aggressive. Instead, focus on cleaning. If you do sand, use an extremely fine grit (400+) very lightly.
- Seal the chalk paint: This is where a good primer comes in handy. A clear shellac-based primer or a specific water-based poly for chalk paint acts as a barrier.
- Apply poly: Once the sealer is dry, apply thin coats of water-based poly. A matte or satin sheen is usually best to maintain the chalky look.
Alternatively, many people prefer furniture wax for chalk paint. It offers protection and a lovely soft sheen.
Scenario 4: A Vintage Toy Chest with Oil Paint
You found an antique toy chest. You’ve repainted it with a rich, dark oil-based enamel. It looks stunning.
You want it to be safe for kids and durable.
- Patience is paramount: Wait for the oil paint to fully cure. This could be 2-4 weeks or more. Test by pressing your fingernail into an inconspicuous spot. It should feel rock hard.
- Clean the surface: Use a mild cleaner or mineral spirits to remove any dust or oils.
- Sanding is essential: Oil paints, even cured ones, can be very smooth. Use 220-grit sandpaper to create a good grip for the poly.
- Remove all dust: This is critical with oil-based finishes.
- Apply oil-based polyurethane: Multiple thin coats will offer the best protection.
- Scuff sand between coats: Use 320-grit and clean very well.
This slow and steady approach is key to a successful, long-lasting finish on a piece like this.
Real-World Prep Steps
- Kitchen Table (Latex): Wait to cure, clean, sand, dust, thin poly coats, scuff sand.
- Craft Sign (Acrylic): Dry, clean, light sand, dust, thin poly coats.
- Chalk Paint: Clean, consider sealing, careful sanding if needed, specific poly.
- Toy Chest (Oil): LONG cure wait, clean, thorough sanding, dust, oil poly, scuff sand.
What This Means For You: When is it Normal?
So, what’s the takeaway from all this? When should you feel good about applying poly over paint, and when should you pause?
It’s Normal and Recommended When:
- You’ve used a standard latex or acrylic paint on furniture or decorative items.
- You want to add durability to a painted surface that will see use (tables, chairs, cabinets).
- The paint is fully dry and feels hard to the touch.
- You’ve followed the prep steps: clean, sand lightly, and remove dust.
- You’re using a compatible type of polyurethane (water-based for latex, or oil-based if you’re sure the paint is cured and compatible).
- You plan to apply multiple thin coats with scuff sanding in between.
When to Be Cautious or Reconsider:
- The paint feels soft, powdery, or rubs off easily.
- It’s a specialty paint with unknown additives (glitter, texture).
- The paint is a very high-gloss enamel that might resist adhesion even after sanding.
- The paint is not fully cured, especially oil-based paints.
- You’re dealing with chalk paint or milk paint and haven’t sealed it.
- You don’t have a clean workspace or the tools for proper application.
The key is to think of it as a system. The paint is layer one. The preparation is the crucial bridge.
And the polyurethane is layer three. Each needs to be compatible and done right.
Quick Tips and Simple Checks
Here are some easy checks and tips to help you succeed:
- Test Spot: Always, always test your polyurethane on a small, inconspicuous area first. Let it dry for 24 hours. Check for adhesion, stickiness, color change, and cracking.
- Ventilation: Work in a well-ventilated area, especially with oil-based products.
- Temperature: Apply poly in moderate temperatures. Extreme heat or cold can affect drying and curing. Most poly manufacturers recommend between 65-75°F (18-24°C).
- Humidity: High humidity can slow drying times and lead to issues like cloudiness, especially with water-based poly.
- Don’t Rush Curing: This is the biggest culprit for sticky finishes. Be patient!
- Read the Labels: Always read the instructions on both your paint can and your polyurethane can.
Frequent Questions About Polyurethane Over Paint
Can I put polyurethane over spray paint?
Yes, but it depends on the spray paint. Most spray paints for general use (like for crafts or furniture) can take a coat of polyurethane. However, they can be very slick. You’ll need to clean the surface thoroughly and sand it very well with fine-grit sandpaper. Then, remove all the dust. Test a small area first to ensure good adhesion.
Will polyurethane make my painted surface shiny?
It depends on the sheen of the polyurethane you choose. Polyurethane comes in matte, satin, semi-gloss, and high-gloss finishes. If you want to maintain a matte look, choose a matte polyurethane. If you want more shine, choose satin or semi-gloss. High-gloss will give a very reflective surface.
My painted surface is still sticky after applying poly. What happened?
This is usually due to one of a few things: 1) The paint was not fully cured before applying poly (especially oil-based paints). 2) The surface wasn’t properly prepared (not cleaned or sanded enough). 3) The polyurethane applied was too thick, causing it to not cure properly. 4) The paint and poly are incompatible.
How many coats of polyurethane should I put over paint?
For most furniture and decorative items, 2-3 thin coats are usually sufficient. For high-wear surfaces like tabletops or chair seats, you might want to apply 3-4 thin coats. Always allow each coat to dry completely and scuff sand between coats.
Can I use poly over a painted wall?
Generally, no. Paint on walls is usually a flat or eggshell finish designed for interior walls. It’s not meant to be a durable surface that requires a protective topcoat like furniture. Applying poly could make the wall look uneven, create a different sheen, and potentially peel off over time. Wall paint is designed to be breathable, and poly isn’t.
What’s the difference between drying and curing for paint?
Drying is when the paint is no longer wet to the touch. Curing is when the paint reaches its full hardness and durability. This happens over time, even after the paint feels dry. Oil-based paints can take weeks or even a month to fully cure, while water-based paints cure much faster, often within a few days. Applying a topcoat before paint has cured can cause adhesion problems.
Conclusion
So, can you poly over paint? The answer is a strong “yes, but carefully.” With the right preparation and understanding of your paint type, you can absolutely add a protective and beautiful layer of polyurethane to your painted projects. Remember to clean, sand lightly, dust thoroughly, and apply thin, even coats.
Patience and testing are your best friends here. Happy painting and protecting!