Can You Use Chalk Paint Over Polyurethane? Let’S Find Out
Ever stared at a piece of furniture with a shiny polyurethane finish and wondered if you could just slap some chalk paint right on top? It’s a common DIY question. You see those gorgeous, matte finishes chalk paint creates and think, “Wouldn’t it be easier to skip the sanding?”
That desire for a simpler painting process is totally understandable. Who wouldn’t want to save time and effort? But the truth is, when it comes to Paint Over Polyurethane? The Surprising Truth Revealed!” href=”https://woodworkingadvisor.com/can-you-paint-over-polyurethane/” target=”_blank” rel=”noopener” data-wpil-monitor-id=”20932″>painting over polyurethane, it’s not always a straightforward “yes” or “no.” There are important steps to consider.
This guide will walk you through everything you need to know. We’ll cover what happens when you try it, why it sometimes works and sometimes doesn’t, and most importantly, how to get that beautiful chalk paint finish without any of the usual headaches. You’ll learn the best ways to prep your surface.
You’ll also find out when it’s better to take a different approach.
Chalk paint can often be used over polyurethane, but success depends on proper surface preparation. Cleaning, light scuff sanding, and sometimes a bonding primer are key. This prevents peeling and ensures a durable finish.
Understanding Paint Adhesion: The Science Behind It
Paint sticks to surfaces because of adhesion. Think of it like tiny little hands grabbing onto the surface. Different paints have different kinds of “hands.” Polyurethane creates a very smooth, often slick, barrier.
This barrier is great for protecting wood. But it can make it hard for new paint to get a good grip.
Chalk paint is known for its ability to stick to many surfaces. It has a powdery, matte finish. This texture helps it adhere well.
However, even chalk paint needs a surface it can grab onto. A perfectly smooth, sealed surface like polyurethane can be too slippery for the chalk paint’s “hands” to hold onto properly.
When paint doesn’t have a good grip, it can peel. It might chip away easily. This is especially true if the piece gets a lot of use.
The goal is to create a surface that the chalk paint can grab. This means making the polyurethane less slick. It means creating tiny little nooks for the paint to hold onto.
This is why prep work is so crucial. It’s not about making the surface perfect. It’s about making it ready for the next layer of paint.
Even though chalk paint is forgiving, it’s not magic. It needs a little help to do its best work, especially over a sealed surface.
My Own Polyurethane Painting Mishap
I remember this one project vividly. I had found this beautiful old dresser at a flea market. It had this thick, glossy polyurethane finish that was still in pretty good shape.
I was excited to give it a modern, chalky makeover. I’d read a few blog posts that said chalk paint sticks to everything. So, I thought I could just clean it and go.
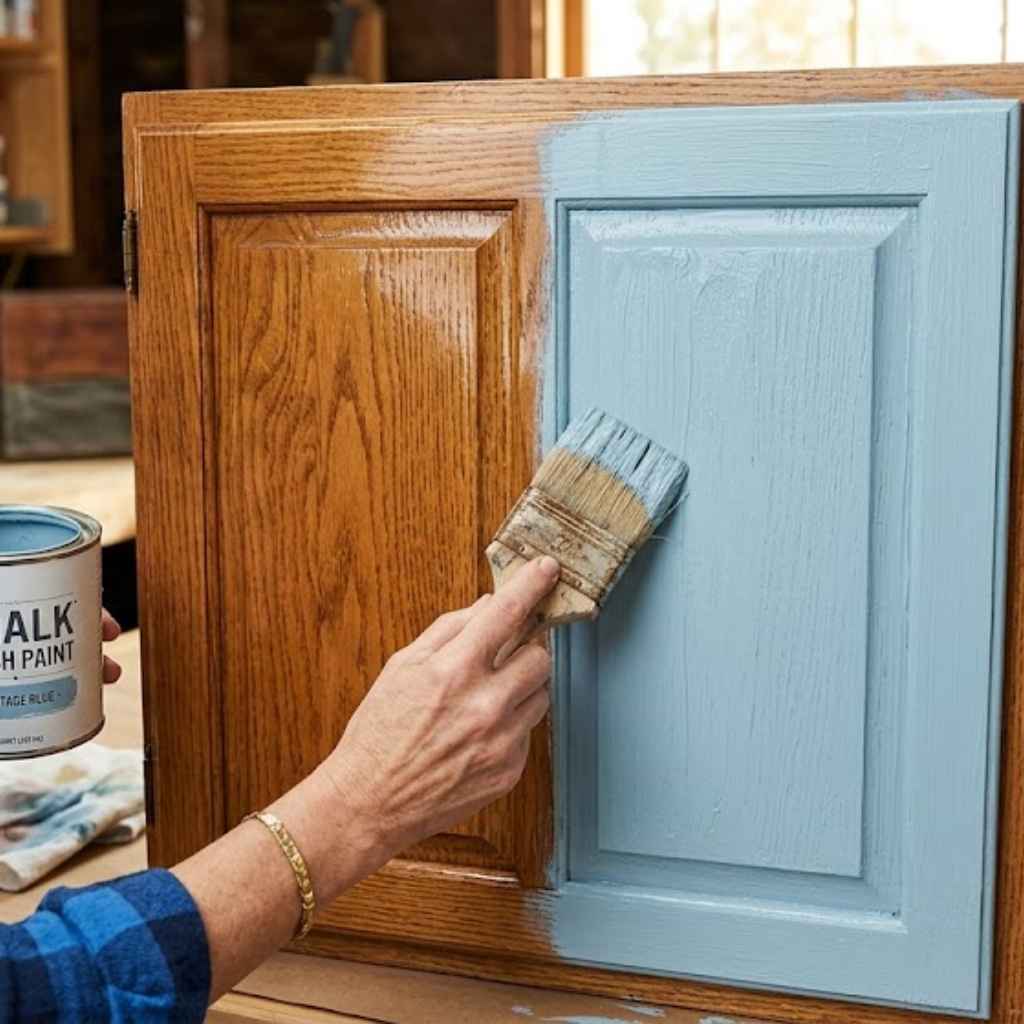
I wiped it down with some soap and water. Then, I applied two coats of a lovely dusty blue chalk paint. It looked great in my garage!
I felt so accomplished. But then, a few weeks later, my sister asked if she could have it for her daughter’s room. I delivered it, and within a month, she was calling me.
Little chips were appearing near the drawer pulls. Then, a whole section on the side started to peel like a bad sunburn.
It was so frustrating! I had followed what I thought was good advice. I had used a paint that’s supposed to stick.
But the polyurethane surface was just too smooth. The paint never really bonded. It just sat on top.
That experience taught me a hard lesson. You can’t always skip the prep. Especially when you’re painting over a slick, sealed finish like polyurethane.
It made me realize that while chalk paint is amazing, it has its limits. And understanding those limits is key to avoiding your own painting disasters. It’s better to spend a little extra time prepping than to redo the whole project later.
That’s what I learned the hard way. Now, I’m much more careful.
The Best Way to Prep: Creating a Graspable Surface
So, what’s the secret to making chalk paint stick to polyurethane? It all comes down to preparation. You need to create a surface that the paint can actually grab.
This means you can’t just paint over that shiny polyurethane as-is. You have to do a few things first. These steps make a big difference.
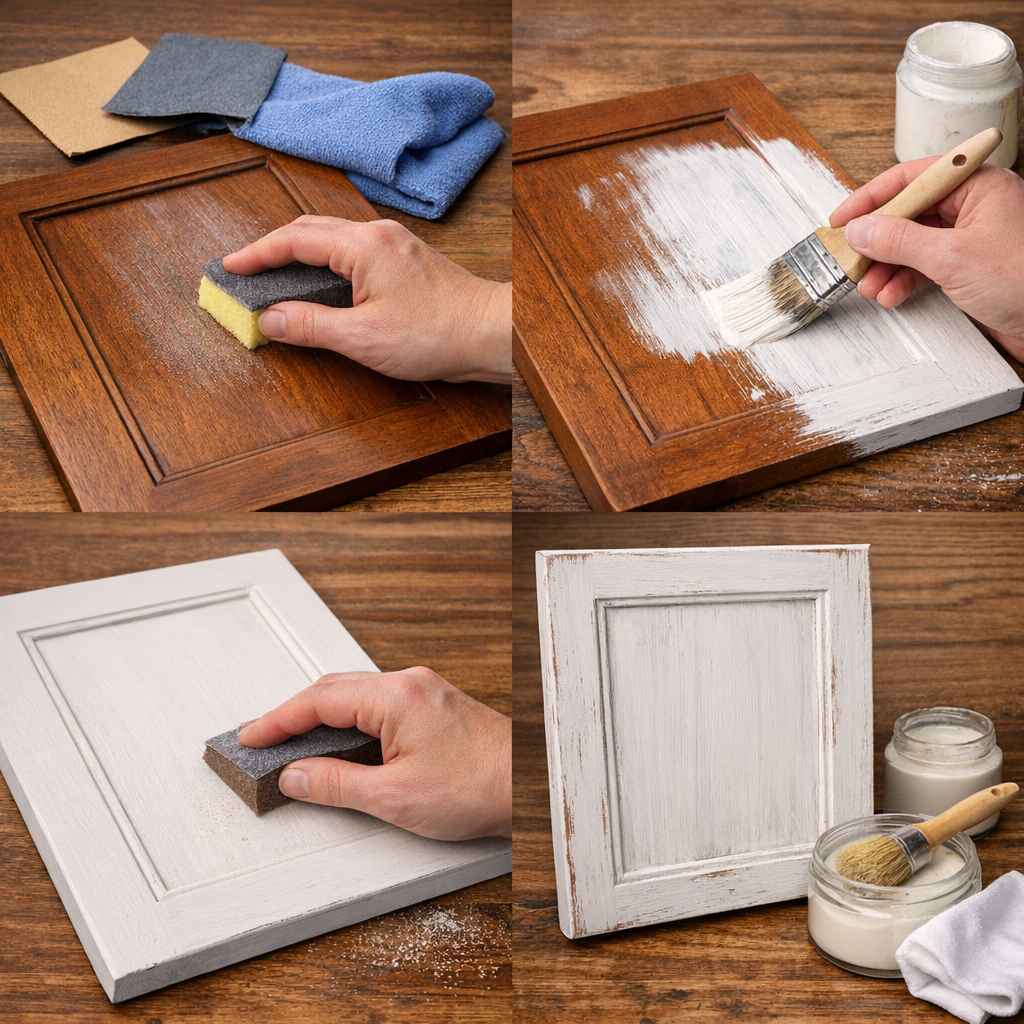
First, you need to clean the surface really well. Dirt, grease, and oils will prevent any paint from sticking. Use a good degreaser or a TSP (trisodium phosphate) substitute.
Clean it thoroughly. Rinse it off completely. Let it dry fully.
This is step one. It’s super important.
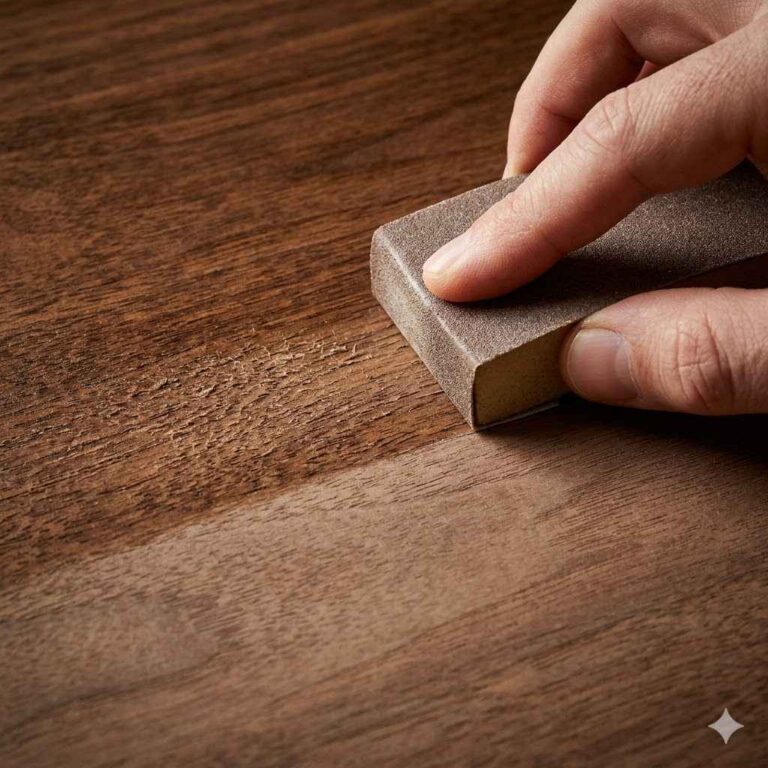
Next, you need to scuff up that finish. You don’t need to strip off all the polyurethane. That would defeat the purpose of trying to make it easier.
Instead, you want to lightly sand it. Use a fine-grit sandpaper. Think 220-grit or even finer.
You’re not trying to scratch deep lines. You’re just trying to break the gloss. You want to create a dull surface.
As you sand, you’ll see the shine disappear. The surface will look a bit hazy. This is good!
This dullness is what the chalk paint needs. It creates tiny little scratches. These are like little anchors for the paint.
After sanding, clean off all the dust. A damp cloth works well. Make sure no dust is left behind.
Some people like to use a liquid deglosser instead of sanding. This can also work. It chemically breaks down the shine.
You still need to clean the surface after using it. Always follow the product’s instructions. This step is vital for ensuring your paint adheres properly.
Surface Prep Checklist
Clean Thoroughly: Use a degreaser. Rinse well. Dry completely.
Scuff the Surface: Lightly sand with fine-grit sandpaper (220+). Aim to dull the shine.
Remove Dust: Wipe down with a damp cloth. Ensure no dust remains.
Optional: Bonding Primer: For extra security, consider a thin coat of bonding primer.
The Role of a Bonding Primer
Sometimes, even after cleaning and scuff sanding, you might still worry about adhesion. This is where a good quality bonding primer comes in. Think of a primer as a middleman.
It’s designed to stick to tricky surfaces. Then, it provides a good surface for your topcoat of paint to stick to.
Not all primers are the same. You need a “bonding primer.” These are made for tough jobs. They are created to stick to surfaces that regular primers might struggle with.
This includes slick finishes like polyurethane, laminate, or metal. They have special ingredients that help them grip.
Applying a bonding primer is an extra step. But for pieces that get a lot of wear and tear, it’s often worth it. It adds an extra layer of security.
It ensures your chalk paint job lasts much longer. It can save you from future peeling or chipping. You only need a thin coat.
Let it dry completely according to the product’s directions.
Make sure you choose a primer that dries clear or can be painted over easily. Some primers are tinted. You want one that won’t show through your chalk paint.
This is especially important if you’re using a light color. A good bonding primer creates a solid foundation. It’s like building a strong base for a house.
Many people skip this step, especially with chalk paint. They trust chalk paint’s inherent adhesion. But when the surface is as smooth as polyurethane, a primer can be a lifesaver.
It provides peace of mind. It’s a small effort for a big reward in durability. I always recommend it for high-use items.
When a Bonding Primer Might Be Overkill
Now, I know what you might be thinking. “Do I always need a primer?” And the answer is: not necessarily. There are times when you might get away with just cleaning and scuff sanding.
It really depends on a few factors. These factors influence how well your paint will stick.
One big factor is the type of polyurethane. Is it a very old, worn polyurethane? Or is it a brand new, super-hard, high-gloss finish?
Older finishes might be more porous. They might have tiny cracks that help paint grip. Newer, tougher finishes are often much slicker.
They need more help.
Another factor is how much wear and tear the piece will get. Is it a decorative tray that will sit on a shelf? Or is it a dining table that will see daily meals and spills?
For items that won’t be touched much, you might not need the extra primer. For high-traffic items, it’s a much better idea.
Think about the climate, too. If you live in a very humid area, paint adhesion can sometimes be trickier. Moisture can affect how paint cures.
In these cases, extra prep steps are your friend. In drier climates, you might have a bit more leeway.
Ultimately, it’s a judgment call based on the piece and your expectations. If you want the absolute longest-lasting finish, a bonding primer is a smart choice. If you’re painting something for a craft project that doesn’t need to be super durable, you might be able to skip it.
Always consider the end goal for your furniture piece.
Quick Scan: Primer vs. No Primer
| Scenario | Recommendation | Why? |
| High-traffic item (table, dresser, chair) | Use Bonding Primer | Ensures maximum durability and prevents chipping. |
| Low-traffic decorative item (shelf, picture frame) | Consider Skipping | Adhesion is less critical. Prep is still essential. |
| Old, worn polyurethane finish | May Skip Primer | Surface might be more porous, allowing better grip. |
| New, high-gloss polyurethane finish | Use Bonding Primer | Slick surface needs extra help for paint to adhere. |
The Myth of “Chalk Paint Sticks to Anything”
The phrase “chalk paint sticks to anything” is a popular one. It’s often used by brands and DIYers alike. And in many situations, it’s true!
Chalk paint is very forgiving. It’s designed to adhere to surfaces that other paints might struggle with. This includes wood, metal, laminate, and even fabric.
However, this saying can sometimes lead people to skip crucial preparation steps. Especially when dealing with challenging surfaces like glossy polyurethane. The idea that you can just paint over anything without prep is a myth.
It’s an oversimplification. While it sticks better than many paints, it doesn’t mean it will stick forever to absolutely everything without help.
Think of it like this: If you’re trying to stick a piece of paper to a smooth, wet bar of soap, it won’t hold for long. Even though paper can stick to things. The surface is just too slick.
Polyurethane can be like that wet bar of soap for paint. Chalk paint has better “stickiness” than regular paint, but it still needs a surface that offers some resistance.
This myth can cause a lot of frustration. People end up with paint that peels or chips. They blame the paint or themselves.
But often, the issue isn’t the paint. It’s the lack of proper surface prep. Understanding that chalk paint is highly adhesive, not universally adhesive, is key.
It means it requires a surface it can bond with. And a slick polyurethane finish needs a little help to become that surface.
So, while chalk paint is a fantastic choice for many projects, always approach slick surfaces with a healthy dose of preparation. It’s better to be safe than sorry. The myth is a helpful starting point, but reality requires a bit more work for lasting results.
Applying the Chalk Paint: The Actual Painting Process
Once your surface is prepped, the actual painting can begin! This is the fun part. Grab your chalk paint.
Make sure you’ve stirred it well. Chalk paint can sometimes separate. You want an even consistency.
Start with thin coats. Don’t try to get perfect coverage in one go. Thin coats dry faster.
They are less likely to drip or get too thick. This is especially true over a primed surface. You want to build up the color gradually.
Use a good quality brush. A synthetic brush works well for chalk paint. You can also use a roller for larger, flat areas.
If you’re using a brush, apply the paint in smooth strokes. Try to go in the same direction. This helps minimize brush marks.
Allow each coat to dry thoroughly. Drying times can vary. It depends on humidity and temperature.
Most chalk paints will feel dry to the touch in about an hour. But it takes longer for the paint to fully cure. Curing is when the paint hardens completely.
You might need two or three coats. This depends on the paint color. It also depends on the color of the piece underneath.
If you used a bonding primer, you might need fewer coats of paint. The primer provides a nice, even base.
Don’t rush the process. Patience is your best friend when painting. Rushing can lead to mistakes.
It can lead to a finish that isn’t as durable. Enjoy the transformation. Watch the piece come to life with its new, soft, chalky finish.
It’s a rewarding feeling.
The Importance of Sealing Chalk Paint
Chalk paint is known for its matte, velvety finish. But that finish can be quite delicate. It’s easily damaged by water, scuffs, and general wear.
This is why sealing your chalk painted piece is almost always a necessary step. Especially when you’ve taken the time to prep over polyurethane.
You have a couple of main options for sealing chalk paint. The most popular is furniture wax. Furniture wax is applied in thin coats.
You buff it to a soft sheen. It protects the paint and gives it a lovely depth. You can use clear wax.
Or you can use tinted waxes for different effects.
The other common option is a water-based polycrylic or polyurethane. You need to be careful here. You want a water-based sealer.
Oil-based ones can sometimes yellow chalk paint. Especially light colors. A water-based polycrylic offers excellent durability.
It’s a great choice for high-traffic surfaces like tabletops.
When applying wax, use a good quality wax brush. Work it into the paint in a circular motion. Then, buff it off with a clean, lint-free cloth.
You usually need two coats of wax for good protection. Let the first coat dry a bit before applying the second. Then, buff again until you get the desired sheen.
If you choose a polycrylic, apply it in thin, even coats. Again, use a good quality brush or a foam roller. Allow each coat to dry completely.
You might need two or three coats. This will give you a very durable, protective layer. It’s much more resistant to scratches and water than wax alone.
Choosing the right sealer depends on the piece. For a dresser, wax might be fine. For a kitchen table, a polycrylic is a safer bet.
Both will help protect your beautiful chalk paint finish. They ensure it lasts for years to come. Never skip this step!
It’s the final defense.
Sealing Options Explained
Furniture Wax:
- Pros: Easy to apply, beautiful soft sheen, enhances depth.
- Cons: Less durable against water and scratches than polycrylic. Needs reapplication over time.
- Best for: Decorative items, pieces with less wear.
Water-Based Polycrylic:
- Pros: Very durable, scratch and water-resistant.
- Cons: Can sometimes alter the chalky feel slightly, requires careful application to avoid streaks.
- Best for: High-traffic items like tabletops, chairs, heavily used furniture.
When It’s Best Not to Paint Over Polyurethane
While we’ve focused on how to successfully paint over polyurethane with chalk paint, there are times when it’s just not the best idea. Sometimes, the easiest path is to remove the old finish entirely. This is especially true if the polyurethane is in bad shape.
If the polyurethane is peeling, flaking, or heavily damaged, it’s a sign of poor adhesion to the underlying wood. Painting over a failing finish is like building on a crumbling foundation. No matter how well you prep, the old finish will continue to fail.
This will eventually take your new paint job with it.
In these cases, the most effective solution is to strip the old polyurethane. You can use a chemical stripper. Or you can sand it down to bare wood.
Once you have a clean, bare wood surface, you can then apply your primer and chalk paint. This will give you the most durable and professional-looking result.
Another reason to avoid painting over polyurethane is if the finish is extremely thick and brittle. Some older finishes can be like glass. They might crack or chip under the stress of new paint layers, even with proper prep.
Stripping them back is a safer bet.
Also, consider the value of the original finish. If the piece has an antique or valuable original finish, it’s usually best to preserve it. Painting over it, even with the best prep, can decrease its value.
In such cases, restoration or cleaning the original finish is the preferred method. Always consider the material and its history.
Finally, if you’re aiming for a very specific, high-gloss finish, chalk paint over polyurethane might not be the best route. Chalk paint’s strength is its matte, velvety texture. If you want a super glossy look, you might be better off using different types of paint and primers designed for that finish.
Frequently Asked Questions
Can I use regular chalk paint directly over a polyurethane finish without any prep?
No, it’s highly discouraged. While chalk paint is known for its adhesion, a slick polyurethane surface needs preparation. Skipping prep like cleaning and scuff sanding can lead to peeling and chipping paint.
How long does it take for chalk paint to cure over polyurethane?
Chalk paint feels dry to the touch in about an hour. However, full curing can take 7-21 days. During this time, the paint hardens completely and becomes more durable.
Be gentle with the piece during the curing period.
What happens if I don’t sand polyurethane before using chalk paint?
If you don’t sand or degloss the polyurethane, the chalk paint may not adhere properly. This can result in the paint peeling, chipping, or scratching off easily. The surface needs to be dulled to give the paint a surface to grip.
Can I use a different type of primer besides a bonding primer?
While some general primers might work in certain situations, a bonding primer is specifically designed to adhere to slick surfaces like polyurethane. For the most reliable results, a bonding primer is the recommended choice when painting over a sealed finish.
How many coats of chalk paint do I need over polyurethane?
This varies based on the paint color, the underlying color, and the primer used. Typically, two to three thin coats are needed. Ensure each coat is dry before applying the next for the best coverage and finish.
Is it okay to use a clear polycrylic over chalk paint on furniture?
Yes, a water-based clear polycrylic is an excellent choice for sealing chalk paint, especially on high-traffic furniture. It provides a durable, protective layer that is more resistant to wear and tear than wax alone.
Final Thoughts on Painting Over Polyurethane
So, can you use chalk paint over polyurethane? The answer is a resounding, but qualified, yes. It’s not as simple as just painting over it.
Proper preparation is the key to a successful, long-lasting finish. Cleaning, scuff sanding, and maybe even a bonding primer are your best friends.
Don’t let the myth of “sticks to anything” fool you completely. While chalk paint is incredibly versatile, it still needs a surface it can hold onto. By taking the time to prep correctly, you’re ensuring your beautiful chalk paint project doesn’t end up like my dresser – a peeling disappointment.
Embrace the prep work! It’s the most important part. It leads to a finish you’ll be proud of.
And remember to seal your work for that extra layer of protection. Happy painting!