Can You Refinish Engineered Wood Floors Successfully?
Thinking about updating your floors? You might be asking, Can You Refinish Engineered Wood? It’s a common question! This type of flooring is popular, but it’s different from solid hardwood. Sometimes, you can give it a new look, and sometimes, you can’t. Don’t worry; it’s not as hard as it might seem. We’ll break down everything you need to know, step-by-step. Let’s see if we can refresh those floors!
What Is Engineered Wood and How Does It Work?
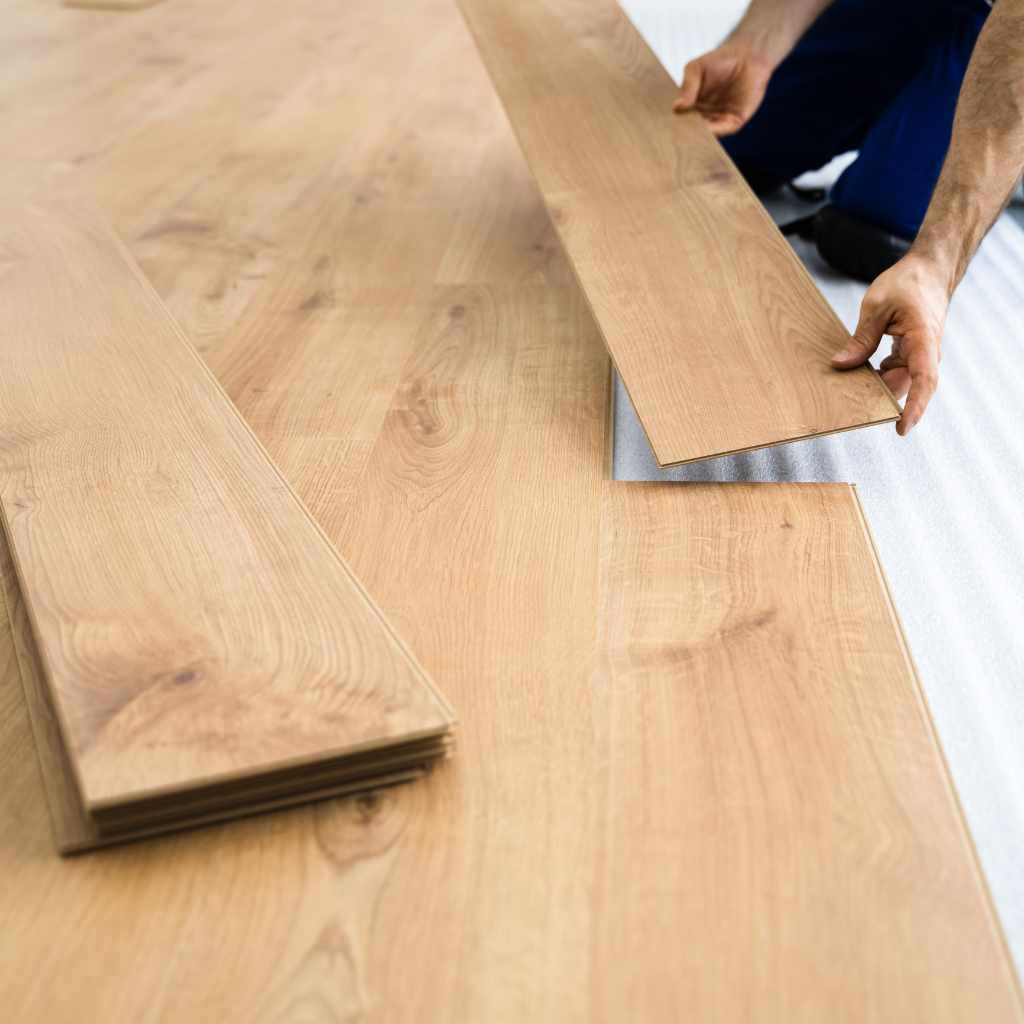
Engineered wood flooring is a clever invention. It’s made from layers of wood, with a top layer of real hardwood. The core layers are usually made from plywood or high-density fiberboard (HDF). This construction makes it more stable and less likely to warp than solid wood, especially in rooms with changes in humidity. It also allows for wider planks.
Engineered wood flooring is created with a top layer (the wear layer or veneer) that can vary in thickness. This top layer is the real wood part you see and walk on. The thickness of this wear layer is key to whether or not refinishing is possible. Thicker wear layers can handle sanding and refinishing, but thinner ones can’t.
The Structure of Engineered Wood
Knowing how engineered wood is put together helps to decide if you can refinish it. It is created in several layers, each playing a special role.
- Wear Layer: This is the top layer and the part you see. It’s made of real hardwood and determines how the floor looks and feels. Its thickness determines how much sanding it can handle.
- Core Layers: These layers are under the wear layer. They’re usually made of plywood or HDF. They add stability and keep the floor from warping or buckling. They’re often cross-layered for extra strength.
- Backing Layer: The bottom layer often provides extra support and may act as a moisture barrier.
The wear layer is the most important factor when you consider the option of refinishing. It needs to be thick enough to withstand sanding without damaging the underlying layers. The core provides stability. The stability of engineered wood makes it a good option in basements or other areas prone to moisture.
Wear Layer Thickness and Its Importance
The wear layer is the key to whether or not you can refinish your engineered wood. The wear layer is a layer of hardwood that you see and walk on. It’s like the protective surface for your floor. If this layer is thick enough, you might be able to sand it down and refinish it, just like solid hardwood. A thicker wear layer means you have more room for sanding.
- Thin Wear Layer: A thin wear layer is not ideal for refinishing. If you sand it, you might sand through the hardwood layer and damage the underlying core.
- Thick Wear Layer: A thicker wear layer gives you more options. You can sand and refinish it to refresh the look of your floors.
- Determining Thickness: Check your floor’s specs. If you do not have the information, you can try contacting the manufacturer of your flooring.
The thickness of the wear layer is usually measured in millimeters (mm). A good rule of thumb is that if the wear layer is at least 2mm thick, you might be able to refinish it once or twice. Layers thicker than 3mm are generally safe for refinishing, and those thicker than 4mm can often be refinished multiple times. Knowing this information will give you a better understanding of the floor you have.
Can You Refinish Engineered Wood Floors? Assessing Your Floors
So, can you refinish your engineered wood floors? The answer isn’t always a simple yes or no. You need to investigate your floor. The most important thing to consider is the wear layer. Also, think about the current condition and how you want the finished floor to look.
Before you get to work, you should examine the floors carefully to determine if they are able to be refinished. Assess the wear layer thickness, the flooring’s condition, and its finish type. Gather the proper tools and supplies and follow the steps. Taking the time to do this before starting will make the process easier.
Checking the Wear Layer
The most important part of assessing whether or not you can refinish your floors is the thickness of the wear layer. As noted, this is the top layer, made of actual hardwood. If you are not sure of the wear layer thickness, there are a few ways to find this information.
- Check the Flooring Specs: The easiest way is to look up your flooring’s specs. You can find this information on the product packaging, the manufacturer’s website, or any paperwork you received when you bought the floors.
- Contact the Manufacturer: If you cannot find the specifications, reach out to the manufacturer. They can tell you about your specific flooring type.
- Measure (If Possible): If you have a scrap piece or a removed plank, you might be able to measure the wear layer yourself. Be cautious when doing this and take your time.
If the wear layer is thin, it is not ideal to refinish. If the wear layer is thick, you might be able to refinish it once or even several times. This is the main factor in whether or not you can refinish the floor.
Evaluating Floor Condition and Finish
Besides the wear layer thickness, the condition and finish type of your floors are also very important. Understanding these elements can help you decide if refinishing is a good idea. They also influence the steps you will take.
- Inspect for Damage: Look for any significant damage to your floors. Deep scratches, dents, or gouges might be too much for refinishing. These damages can be very difficult or impossible to fix with sanding.
- Identify the Finish Type: Identify what type of finish is on your floors. Knowing the finish helps you determine the best way to prepare your floor for refinishing.
- Assess Overall Wear: Evaluate how worn your floors are. If they are only slightly worn, refinishing might be successful. If there is a large amount of wear, you might want to look at a new floor or a professional refinishing.
The amount of damage and the type of finish will both determine the process that you will use to refinish your floor. A well-maintained floor will be easier to restore than a floor that has a lot of damage.
The Refinishing Process: Step-by-Step Guide
If you’ve determined that your engineered wood floor is a good candidate for refinishing, the next step is the actual process. This part can be done by a professional, but if you have some skill, you can do it yourself. It can take time, but the outcome will be worth it. Here is a guide on how to refinish your floor. These steps will guide you through the process, but remember to take your time and follow safety precautions.
Follow these steps to successfully refinish your engineered wood floors. Before you start, gather your materials and be sure you have proper safety gear, like gloves and a dust mask. Also, ensure the area is well-ventilated, and follow the manufacturer’s guidelines for all the products you use.
Preparing Your Floors for Refinishing
Preparing the floor is very important for a successful result. It can take some time, but it’s important not to rush. This step will make the sanding, staining, and finishing go much smoother. Before starting, remove all furniture, rugs, and anything else from the room. Also, clean the floor thoroughly.
- Clean the Floor: Sweep, vacuum, and mop the floor. Make sure to remove any dirt, dust, and debris. This will help the sanding process.
- Inspect for Nails: Look for any loose nails. If there are any, sink them slightly below the surface. This will protect your sander from damage.
- Tape and Protect: Tape off any areas that you don’t want to refinish. Also, cover any doorways or vents to minimize dust spread.
A well-prepared floor ensures the sander works more effectively and that the final finish looks even. The better the preparation, the better the final outcome.
Sanding and Sanding Techniques
The sanding phase is essential for removing the old finish and any imperfections. Proper sanding will create a smooth surface for the stain and finish. Here is how to sand your floor.
- Start with Coarse Grit: Begin with a coarse-grit sandpaper (around 60-80 grit). Use a drum sander or an orbital sander. This will remove the old finish and any imperfections. Make sure to move the sander slowly and evenly.
- Intermediate Sanding: Next, move to a medium-grit sandpaper (around 100-120 grit). This will help smooth the floor further, preparing it for the final finish.
- Fine Sanding: Finally, use a fine-grit sandpaper (around 150-180 grit). This will create a smooth surface ready for the stain or finish. Be careful not to sand through the wear layer.
- Direction of Sanding: Always sand in the direction of the wood grain. This helps to minimize scratches and gives a better look.
Take your time with each sanding pass, and overlap each pass slightly. This helps to make sure you get an even result. This step is about removing the old finish, and it is also about leveling the floor.
Staining and Finishing
After sanding, it’s time to add a stain and apply a finish. Staining is optional, but it gives a different look to your floors. The finish protects the wood from damage.
- Staining (Optional): If you want to change the color of your floors, apply a wood stain. Follow the manufacturer’s instructions for the stain. Make sure to apply it evenly and remove any excess.
- First Coat of Finish: Apply the first coat of finish. Use a brush, roller, or applicator recommended by the manufacturer. Apply the finish evenly, and avoid drips and pools.
- Light Sanding Between Coats: After the first coat dries, lightly sand the floor with fine-grit sandpaper (220 grit or higher). This will create a smooth surface for the next coat.
- Apply Additional Coats: Apply at least one or two more coats of finish, following the manufacturer’s instructions. Allow each coat to dry completely before sanding and applying the next coat.
Make sure each coat dries completely before moving on to the next. Allow the floor to cure for several days before putting furniture back in the room. A good finish will give the floor a beautiful and durable look.
Maintaining Refinished Engineered Wood Floors
After you refinish your engineered wood floors, it is very important to maintain them properly. Maintaining the floors will keep them looking good for a long time. Regular care will help protect the finish and prevent damage. This will allow you to enjoy your refreshed floors for years.
Keeping your floors in great shape doesn’t involve a lot of effort. Here are some simple steps to follow. Following these tips will help extend the life of your floors and keep them looking their best.
Regular Cleaning and Care
Regular cleaning is key for keeping your floors in great condition. The cleaning method and frequency will depend on how much traffic your floors see.
- Sweep or Vacuum Regularly: Sweep or vacuum your floors frequently. This will help remove dirt, dust, and debris. Make sure to use a soft brush head to prevent scratching.
- Clean Spills Immediately: Clean up any spills right away. Liquid can damage the finish or cause the wood to warp.
- Use the Right Cleaners: Use cleaners specifically designed for wood floors. Avoid harsh chemicals, abrasive cleaners, or anything that could damage the finish.
Regular cleaning is not just about keeping your floors looking good. It also prevents dirt and debris from scratching or wearing down the finish. Clean floors are beautiful floors.
Protecting Your Floors from Damage
Protecting your floors is an important step. This will protect your investment and maintain the refinished look. Here are some tips to protect your floors.
- Use Door Mats: Place door mats at the entrances. This can help prevent dirt and grit from getting on the floor.
- Use Furniture Pads: Place felt pads under furniture legs. This will prevent scratches.
- Avoid High Heels: High heels can cause dents and damage the floor.
- Control Humidity and Temperature: Maintain a stable environment in your home. Too much or too little humidity can damage the wood.
By taking these steps, you can prevent damage and maintain the beauty of your floors. Prevention is key to extending the life of your refinished floors.

Frequently Asked Questions
Question: Can I refinish engineered wood myself?
Answer: Yes, you can. However, it depends on your skill level and the wear layer thickness. Make sure to evaluate the floor and read the instructions.
Question: What tools do I need to refinish engineered wood floors?
Answer: You will need a sander, sandpaper (different grits), a vacuum, cleaning supplies, stain (optional), finish, brushes or rollers, and safety gear like a dust mask and gloves.
Question: How many times can I refinish engineered wood?
Answer: It depends on the wear layer thickness. Some can be refinished once or twice. Those with thicker wear layers can handle multiple refinishings.
Question: What type of finish should I use?
Answer: Polyurethane finishes are common and durable. Water-based finishes offer low odor and quick drying times. Read the product’s guidelines and choose the finish that suits your needs.
Question: How long does it take to refinish engineered wood floors?
Answer: The time depends on the size of the room and the number of coats of finish. Plan for several days to allow the sanding, staining, and drying of each coat.
Final Thoughts
So, Can You Refinish Engineered Wood? The short answer is, sometimes, you can! It all depends on the wear layer. If it is thick enough, you are in luck. Refinishing can bring new life to your floors. Assess your floors to make sure they are a good match for refinishing. If so, follow the steps. Remember to prepare the floor. Then, sand, stain (if desired), and finish. Finally, don’t forget to take care of your newly refreshed floors. Proper maintenance keeps your floors looking their best for years. With a little work, you can enjoy beautiful, renewed floors!