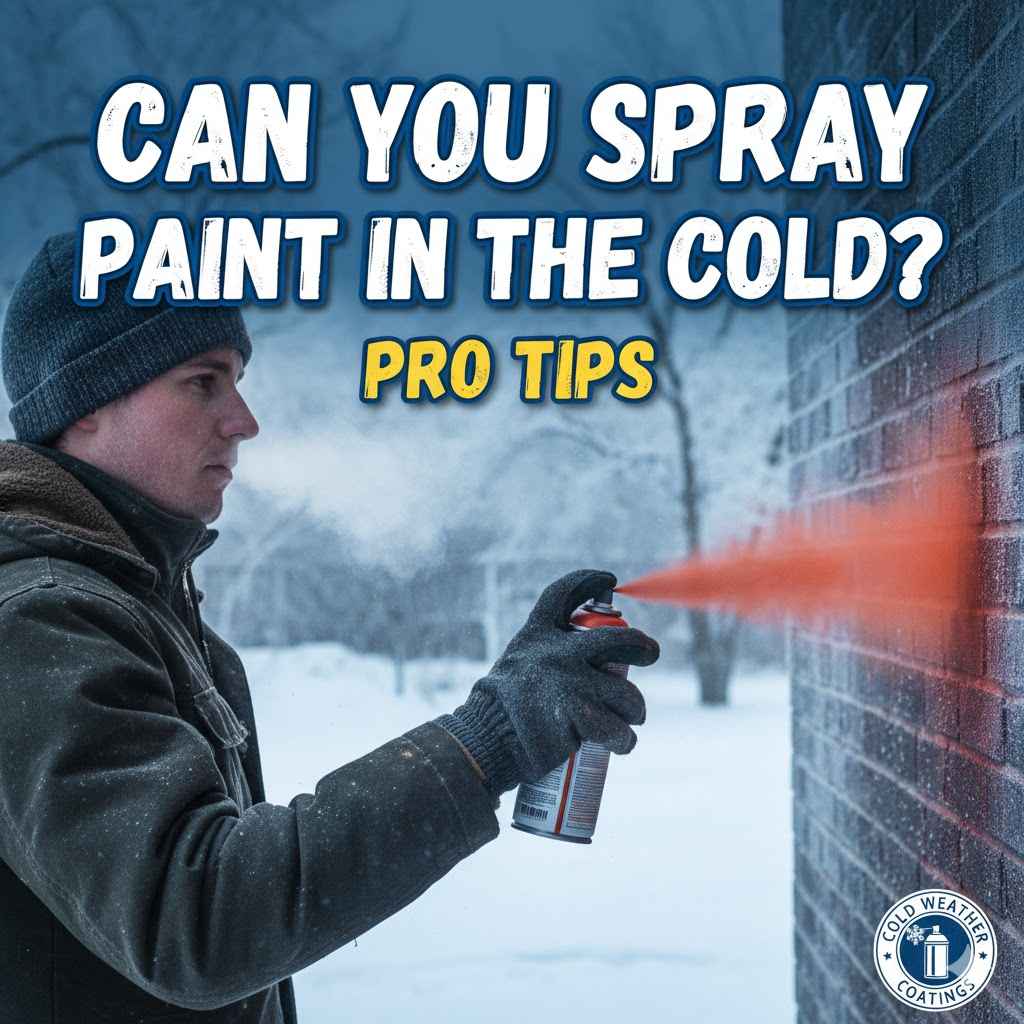
Can You Spray Paint in the Cold? Pro Tips
Many people wonder, “Can you spray paint in the cold?” It’s a common question for DIYers and artists. Cold weather can make spray paint behave strangely, leading to less-than-perfect results. Beginners often find this challenging because they don’t know how the cold affects the paint and their project.
Don’t worry! This guide breaks down everything you need to know with easy steps. We’ll show you how to get great spray paint jobs even when it’s chilly outside.
Spray Painting In Cold Weather Is It Possible
The idea of spray painting when the temperature drops can seem tricky. Many assume cold weather makes spray painting impossible or at least very difficult. This section explains the core challenges and confirms that, yes, you can spray paint in the cold with the right approach.
We will cover why temperature matters so much for aerosol paints and set the stage for understanding the solutions.
How Cold Affects Spray Paint
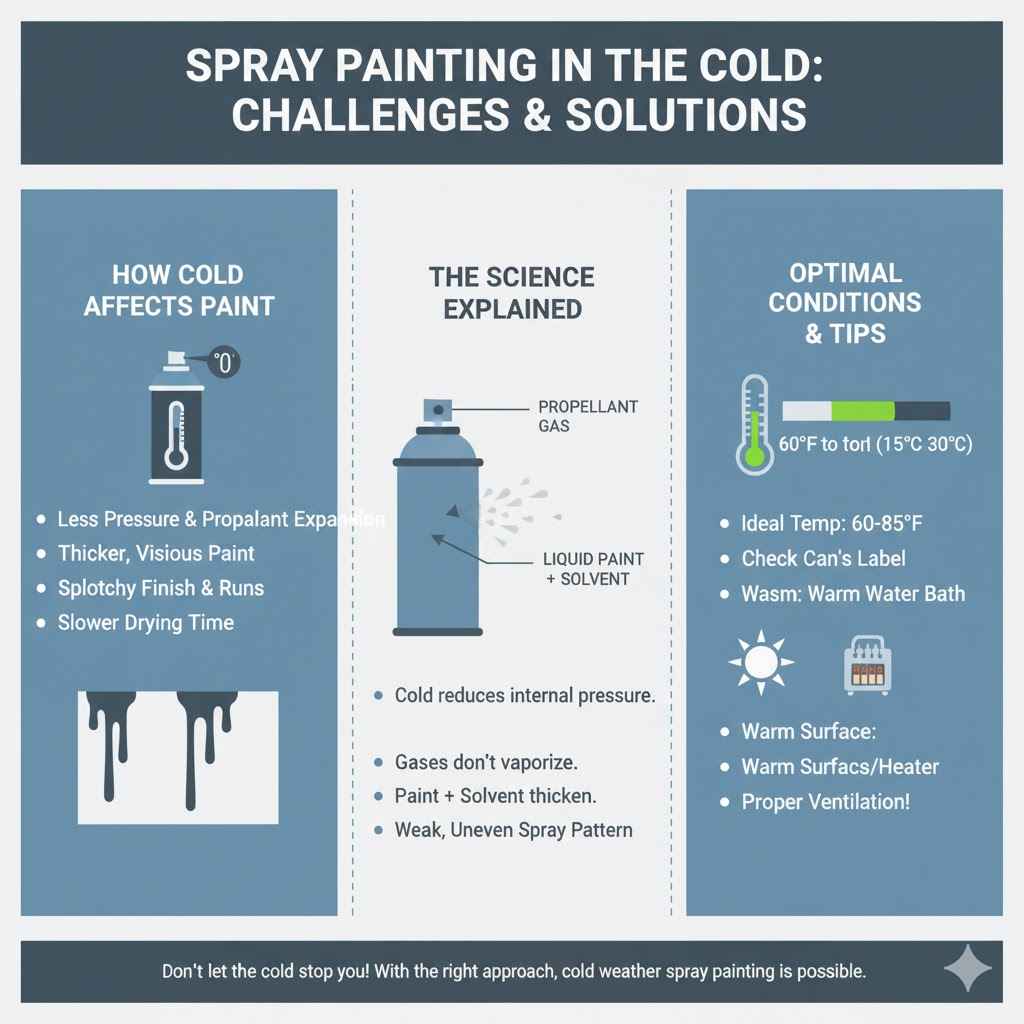
Temperature plays a huge role in how spray paint works. When it’s cold, the propellant inside the can doesn’t expand as much. This means less pressure.
Less pressure means the paint comes out slower and in thicker drips. It also makes the paint less likely to atomize properly, creating a splotchy finish. The paint itself becomes thicker and harder to spread evenly.
This can lead to runs and an uneven texture that’s hard to fix.
Think of it like trying to squeeze ketchup from a bottle on a very cold day. It just doesn’t flow as easily. The same principle applies to spray paint.
The chemicals in the paint need a certain temperature to mix well and spray smoothly.
The Science Behind The Spray Can
A spray can is a sealed container holding paint, a solvent, and a propellant. The propellant is a gas that, when released, pushes the paint out of the can and turns it into a fine mist. Most propellants are liquified gases.
At lower temperatures, these gases don’t vaporize as readily. This reduces the internal pressure of the can. Lower pressure means a weaker spray.
The paint and solvent also become more viscous, or thicker, which makes them harder to spray evenly.
This is why you often shake spray paint cans vigorously. Shaking helps mix the paint and propellant. But if it’s too cold, even vigorous shaking might not overcome the thick paint and low pressure.
The goal is to achieve a fine, even spray pattern. Cold temperatures directly interfere with this process.
Understanding Optimal Spray Painting Temperatures
Most spray paints are designed to work best in a specific temperature range. This is usually between 60°F and 85°F (15°C and 30°C). When temperatures fall below this range, you start to run into problems.
The paint may not adhere well to the surface. It can also take much longer to dry. This longer drying time increases the risk of dust or debris sticking to the wet paint.
For best results, always check the can’s label for recommended temperature guidelines. Some paints are formulated for use in cooler conditions, but they are less common. Even with these, there are limits.
Extreme cold, well below freezing, will likely prevent any spray paint from working correctly.
The surface you are painting also matters. If the surface itself is very cold, the paint will cool down rapidly as it hits it. This further hinders proper atomization and drying.
Warming the surface can be just as important as warming the can.
Pro Tips For Spray Painting In The Cold
Now that we understand why the cold is a challenge, let’s look at how to overcome it. These are practical steps you can take to achieve a good finish even when the thermometer is low. We’ll cover everything from preparing your space to managing the paint itself.
Preparing Your Workspace
Your painting environment is key, especially in cold weather. You need to create a space that is warmer than the outside air. This will help the paint and your project stay at a workable temperature.
Find an indoor space if possible.
This is the most effective solution. A garage, shed, or even a spare room can work. Make sure the space is well-ventilated.
Open windows or use fans to move air. This helps dissipate fumes. It also prevents moisture buildup, which can be a problem in cold, damp environments.
Use temporary shelters for outdoor projects.
If you must work outside, try to build a temporary enclosure. This could be a pop-up tent, a tarp shelter, or even a large cardboard box. The goal is to block wind and trap some heat.
You can use a small, safe portable heater inside this shelter to raise the temperature. Be very careful with heaters and flammable spray paint fumes. Always follow safety instructions for any heating device.
Warm the painting area before you start.
Turn on the heat in your garage or shed at least an hour before you plan to paint. This allows the air and surfaces to reach a more optimal temperature. The longer you can warm the space, the better.
This prevents the paint from cooling down too quickly upon application. It also helps your materials, like masking tape and drop cloths, become more pliable.
Warming The Spray Cans
This is one of the most crucial steps. Cold cans lead to poor spray performance. Warming them up increases the pressure and makes the paint flow better.
Use warm water, not boiling water.
Fill a bucket or sink with warm water. Make sure it’s warm to the touch but not hot enough to scald you. Submerge the spray cans in the warm water for about 10-15 minutes.
This gently heats the propellant and the paint inside. Do not use boiling water, as this can cause the can to explode. The pressure increase from boiling water is dangerous.
Ensure the water level is below the nozzle. You don’t want water getting into the spray mechanism. This method is safe and effective for bringing the can to an optimal temperature.
Test the can’s spray pattern in a safe area before painting your project. It should produce a finer mist than it did when cold.
Avoid direct heat sources like fires or radiators.
Never place spray cans directly on a radiator, near a fi
You can also use a portable heater in your workspace, but keep the cans a safe distance away. The goal is to raise the can’s temperature gradually and evenly. Never try to force heat onto the can.
Patience here will lead to better results and safety.
Surface Preparation And Priming
Cold weather can affect how paint sticks to a surface. Proper preparation is more important than ever.
Clean the surface thoroughly.
Dirt, grease, and oils will prevent paint from adhering properly, especially in cold. Use a degreaser or cleaner appropriate for your surface. Rinse and dry it completely.
A clean surface ensures the paint has a good foundation to stick to. Cold temperatures can make these contaminants harder to remove, so be thorough.
Even seemingly clean surfaces can have invisible oils or residues. Using a lint-free cloth dampened with rubbing alcohol after cleaning can help remove any last traces. This step is vital for paint adhesion, no matter the weather, but even more so when painting in less-than-ideal temperatures.
Use a cold-weather primer.
Some primers are formulated to work in cooler temperatures. Look for primers that specifically state they can be applied in lower temperatures. These primers can improve adhesion and provide a better base for your topcoat.
Applying a primer also adds an extra layer of protection. It can help seal the surface and ensure a more uniform finish.
A good primer will help the topcoat adhere better and prevent issues like peeling or chipping later on. Ensure the primer also dries properly in the cold. Follow the manufacturer’s instructions for drying times, which might be longer in the cold.
Warm the surface if possible.
If you are painting an object, try to bring it into a warm space for a while before painting. This helps warm up the material itself. A cold object will rapidly cool down the paint as it hits it.
This makes atomization and drying much harder. Even 30 minutes in a warm room can make a big difference.
This is especially important for metal or hard plastic objects. They tend to hold onto cold temperatures longer than lighter materials. Allowing the object to reach room temperature helps the paint flow and dry more evenly across the entire surface.
It reduces the chance of cold spots causing application issues.
Application Techniques For Cold Weather
How you apply the paint needs adjustment when it’s cold.
Apply thinner coats more frequently.
Instead of trying to get full coverage in one go, apply several light coats. This allows each layer to dry a bit before the next is applied. Thin coats are less likely to sag or run.
They also dry faster because there’s less material to cure. You might need to apply more coats overall to achieve the desired coverage.
Shake the can often between these light coats. This keeps the pressure up and the paint mixed. Listen to the ball inside the can.
If you can no longer hear it rattling, shake it some more. This ensures the propellant and paint stay well-combined for a consistent spray.
Increase distance between the can and the surface.
Holding the can slightly further away from the surface can help the paint atomize better. The paint has more time to become a fine mist before it hits the object. This also helps prevent drips and runs.
Aim for about 8-12 inches (20-30 cm) away. Experiment to find the sweet spot for your specific paint and can.
A slightly longer spray path allows the tiny paint particles to spread out and dry more before they land. This creates a smoother, more even finish. It requires a bit more sweeping motion with your arm, so keep your wrist loose.
The goal is to overlap your spray passes slightly for uniform coverage.
Consider spray paint additives.
There are additives you can sometimes mix into spray paint to improve its flow and drying in cold weather. These are less common for typical aerosol cans. For larger projects using automotive or industrial paints, specific cold-weather reducers or retarders might be available.
These help the paint stay liquid longer, allowing it to flow out better and preventing premature drying. Always check the product label for compatibility and instructions.
For standard spray cans, these additives are usually not an option. However, some specialty spray paints are formulated with these properties built-in. Always read the can’s instructions carefully.
If you’re working with a high-end paint system, consult the manufacturer for specific cold-weather recommendations or additives.
Drying And Curing Time Adjustments
Cold weather significantly extends the time it takes for spray paint to dry and cure.
Be patient with drying times.
What might dry in an hour in warm weather could take several hours or even overnight in the cold. Don’t touch the surface until you are absolutely sure it’s dry to the touch. Even then, it may not be fully cured.
Curing is the process where the paint hardens completely. This can take days or weeks depending on the paint type and temperature.
A good test is to gently press a fingertip onto an inconspicuous area of the painted surface. If it leaves an indent or feels tacky, it’s not dry enough. Give it more time in a warm environment if possible.
Rushing this step can ruin your finish.
Allow for longer curing periods.
Curing is when the paint reaches its maximum hardness and durability. This is a chemical process that slows down in cold temperatures. Your painted item might seem dry to the touch quickly, but it will remain susceptible to damage for much longer.
Avoid putting stress on the painted surface, like stacking items or using the object, until it has had ample time to cure fully.
If possible, move your project to a warmer, dry location to cure. This significantly speeds up the process. Even in a warm location, expect longer cure times than recommended on the can.
Always err on the side of caution and allow extra time before putting your painted item to use.
Monitor for moisture and condensation.
Cold surfaces can attract moisture from the air, causing condensation. This condensation can form on your painted surface, especially if you paint in a humid environment. This will interfere with drying and can cause paint to bubble or peel.
Ensure your painting area is as dry as possible.
If you notice condensation forming, stop painting immediately and allow the surface to dry completely. A dehumidifier can be helpful in enclosed spaces. In outdoor shelters, good ventilation helps prevent moisture buildup.
Always wipe down surfaces to remove any existing dew or moisture before you begin painting.
Troubleshooting Common Cold Weather Spray Painting Issues
Even with the best preparation, you might run into a few snags. Here’s how to fix them.
Paint Runs And Sags
This happens when the paint is applied too thickly or doesn’t dry fast enough. In the cold, the paint stays wet longer, making it prone to running down vertical surfaces. If you see a run while the paint is still wet, try to gently feather it out with a brush.
Use a brush that has been dipped in the paint’s solvent (check the can for recommended solvent) and then wiped almost dry. Work the edges of the run to blend it in.
If the paint has already started to dry, you’ll need to let it dry completely. Then, carefully sand down the run until it’s smooth. Wipe away the dust and reapply a light coat of paint over the area.
Ensure you are using thinner coats and a slightly further spray distance to prevent this in the future.
Uneven Finish And Texture
This is often caused by poor atomization. The paint isn’t breaking down into a fine mist. This results in a gritty or spotty appearance.
Make sure your cans are properly warmed. Also, try increasing the distance between the can and the surface. You might also need to shake the can more frequently during application to maintain consistent pressure.
For minor texture issues, you can often sand the surface once it’s dry and apply another thin, even coat. For more severe texture problems, you might need to sand down the entire area and start over. Proper warming and technique are key to avoiding this.
Poor Adhesion Or Peeling
This is a serious problem that can occur if the surface wasn’t properly cleaned or if the paint didn’t bond correctly due to cold. If you notice peeling soon after painting, gently try to lift the peeling edge. If it comes off easily, you’ll likely need to remove all the loose paint.
Sand the surface smooth, clean it again thoroughly, and reapply primer and paint.
To prevent this, always ensure surfaces are clean and dry. Use a good quality primer designed for adhesion. Warm your cans and your project.
Follow recommended drying times strictly before exposing the painted item to any stress or moisture.
Spray Painting In The Cold Case Study
A hobbyist named Sarah wanted to paint her garden furniture for the spring season. It was early March, and temperatures were still quite low, often hovering around 40°F (4°C) during the day. She had a set of metal chairs that were starting to rust.
Sarah decided to try painting them outdoors.
Initially, she just grabbed the cans and started spraying. The paint came out in thick globs, and she immediately got runs. The finish looked terrible.
Frustrated, she looked up tips for painting in the cold. She learned about warming the cans. Sarah then placed her spray cans in a bucket of warm water for 15 minutes.
She also decided to move the chairs into her unheated but enclosed garage for a few hours before painting. This helped take the chill off the metal. After warming the cans and the chairs, she applied several very thin coats of paint, holding the can a little further away than usual.
She also made sure to shake the can frequently.
The results were much better. The paint sprayed out in a fine mist, and she avoided the drips she had before. She knew the drying would take longer, so she left the chairs in the garage for two full days before moving them outside.
The chairs turned out beautifully, with a smooth and even finish that held up well.
Sarah learned that taking a few extra steps to warm her materials and workspace made all the difference. She realized that spray painting in the cold is definitely possible with the right techniques and patience. Her project went from a disaster to a success story.

Frequently Asked Questions
Question: Can I spray paint in freezing temperatures
Answer: It is not recommended to spray paint in freezing temperatures. Most paints will not adhere properly, and the propellant in the can will not function effectively, leading to poor coverage and a rough finish. It is best to wait for temperatures to be above freezing.
Question: How long should I warm spray paint cans
Answer: You should warm spray paint cans in warm water for about 10 to 15 minutes. The water should be warm to the touch but not boiling. This helps increase the pressure inside the can and makes the paint flow better.
Question: What is the minimum temperature for spray painting
Answer: The minimum temperature for spray painting varies by product, but generally, most paints perform best between 60°F and 85°F (15°C to 30°C). Some products may tolerate lower temperatures, but usually not below 50°F (10°C).
Question: Does cold weather make spray paint dry slower
Answer: Yes, cold weather significantly slows down the drying and curing process for spray paint. The paint needs time to evaporate its solvents and harden, and this chemical reaction happens much slower in cooler temperatures.
Question: Can I use a hair dryer to warm spray paint cans
Answer: Using a hair dryer is generally not recommended for warming spray paint cans. The heat can be uneven and may overheat the can, increasing the risk of explosion. Warm water is a much safer and more effective method.
Final Thoughts
So, can you spray paint in the cold? Yes, you absolutely can with the right approach. By warming your spray cans, preparing your workspace, and adjusting your application technique, you can achieve excellent results.
Be patient with drying times, and your project will look great. Happy painting!