How to Build a Popsicle Stick Catapult That Actually Launches Far
The strongest popsicle stick catapult design isn’t a single stick taped to a spoon – it’s a stack of 5 to 6 sticks bound tightly at both ends to form a rigid fulcrum, with a separate two-stick lever arm banded across the top. That stacked fulcrum is what most quick tutorials skip, and it’s the difference between a catapult that flings a marshmallow 8 to 10 feet and one that just flops over.
What You Need
This build uses ordinary craft-store supplies, and you can make one catapult or several at once with the same materials:
- 7 to 8 jumbo popsicle/craft sticks per catapult (6 for the fulcrum stack, 2 for the lever arm)
- 4 to 6 rubber bands per catapult (small, size #33 or similar work well)
- 1 plastic spoon or a small bottle cap for the launcher
- A lightweight projectile – a mini marshmallow, pom-pom, or foam cube (skip anything hard or heavy)
- Hot glue (optional, for a more permanent build)
Jumbo craft sticks (about 6 inches long) hold up better than the thin flat kind, since the stacked fulcrum needs sticks that won’t bow under rubber-band tension. If the sticks you have are an odd length or splintered on the ends, our guide on how to cut popsicle sticks cleanly covers trimming them without cracking the wood, and our popsicle stick dimensions guide breaks down which sizes work best for which projects.
Complete Catapult Building Kit
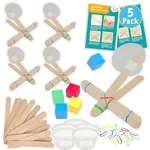 |
Catapult Kit for Kids, 5-Pack – $17.95 Pre-measures the same craft sticks, rubber bands, and launch cups the stacked-fulcrum build below uses, so you can make all five catapults without a separate supply run.
|
The Fulcrum-Stack Design (Why It Beats the “One Stick and a Spoon” Version)
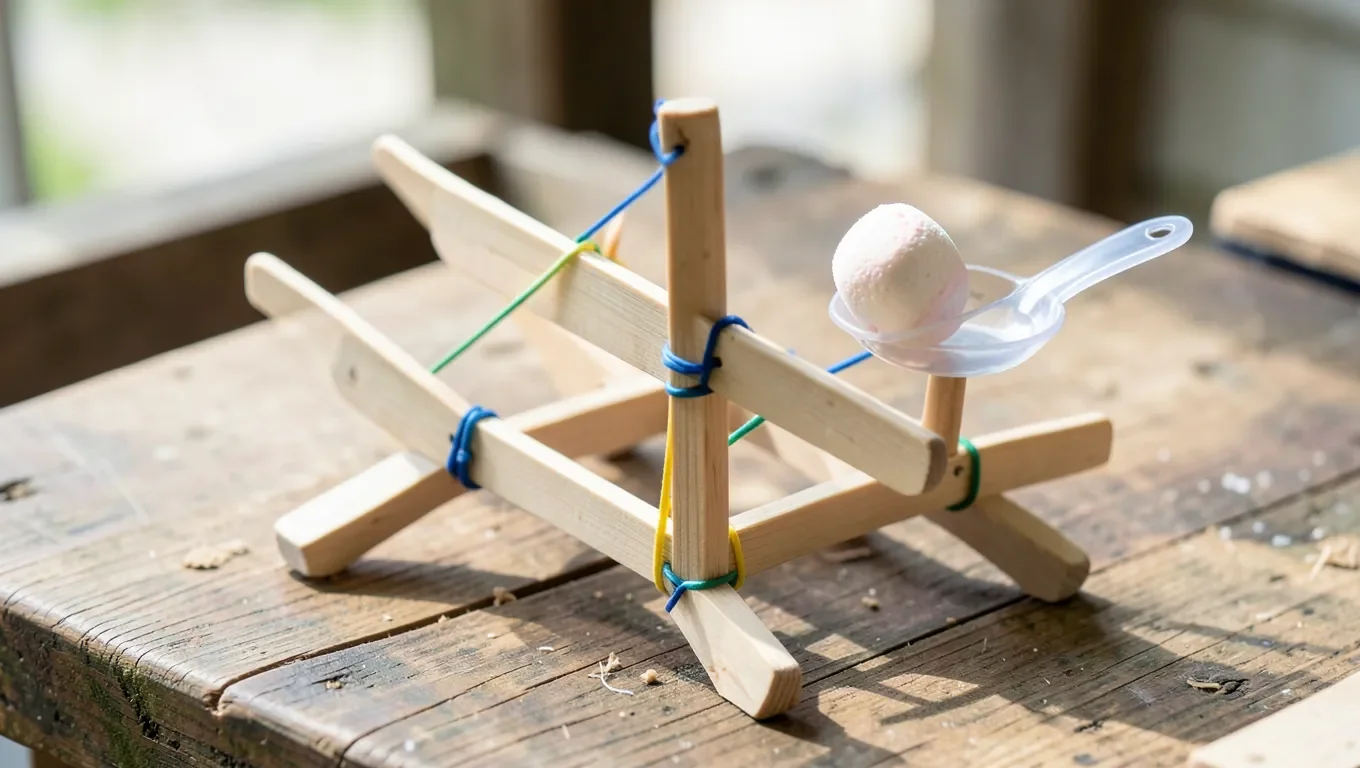
Search for a popsicle stick catapult and most results show a single stick with a spoon glued to the end, pivoting on a second stick underneath. It works for a second or two, but a single stick flexes and twists under load, so the arm wobbles sideways instead of snapping straight up. The fix used by actual STEM kits and engineering-fair guides is a stacked fulcrum: several sticks banded together into a rigid block, with the lever arm riding across the top of that block instead of a single thin pivot point. The stack resists twisting, which means more of the rubber band’s stored energy goes into launching the projectile instead of wobbling the frame.
Step-by-Step Assembly
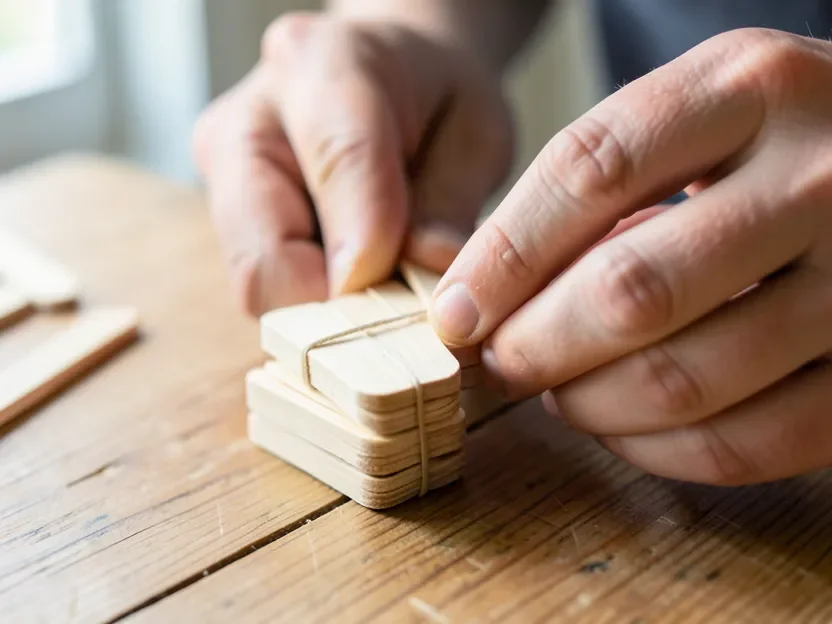
- Build the fulcrum stack. Stack 5 to 6 popsicle sticks evenly on top of each other and wrap a rubber band tightly around each end of the stack, about 1/2 inch from each tip. You now have a rigid block, not a bundle of loose sticks.
- Build the lever arm. Take 2 more sticks and band them together tightly at one end only. Gently pull the free ends apart to spread them into a “V” shape – the banded end stays closed, the open end fans out.
- Combine the two pieces. Slide the fulcrum stack between the two sticks of the V, positioned near the banded end, so the stack sits perpendicular to the arm (like a plus sign or letter T). Wrap one more rubber band around the intersection, crossing it in a figure-eight so the fulcrum can’t slide side to side.
- Attach the launcher. Secure the plastic spoon (or bottle cap) to the open end of the V – the top stick of the lever arm – with a rubber band, hot glue, or both for a sturdier hold. This is where the projectile sits before launch.
- Test with a light projectile first. Load a mini marshmallow or pom-pom, press the spoon down toward the base, and release. Adjust from there – don’t skip straight to a heavier object, since the fulcrum stack needs a test launch or two to settle into place.
Adjusting for More Distance and Power
Once the basic build launches reliably, three adjustments change how far and how high it throws:
- Move the fulcrum stack. Sliding the stack closer to the launcher end (shortening the lever arm’s throwing side) increases launch speed but reduces how far you can pull the arm back. Sliding it closer to the banded end does the opposite – more pull-back distance, slower release.
- Add a second rubber band for tension. Running an extra band from the base to the underside of the lever arm adds spring force, but stop at two or three – past that, the sticks themselves start to bend or snap instead of storing more energy.
- Match the projectile to the build. A mini marshmallow or pom-pom flies consistently. Anything heavier than a foam die tends to just slide off the spoon at release instead of launching, since the arm doesn’t have the leverage of a full-size catapult.
The Physics Your Kids Are Actually Learning
This build is a genuine class-1 lever – the fulcrum sits between the effort (your hand pulling the arm down) and the load (the projectile in the spoon), the same arrangement as a seesaw or a pair of scissors. Two concepts show up clearly enough for a kid to see and feel:
- Elastic potential energy: stretching the rubber band stores energy, and releasing the arm converts that stored energy into the kinetic energy that sends the projectile flying – more stretch (within reason) means more stored energy and a longer launch.
- Lever position and force: moving the fulcrum changes the ratio between how far you pull the arm and how fast the far end whips forward, which is exactly why fulcrum placement is the single biggest adjustment for distance.
For a hands-on experiment, have kids measure launch distance at three different fulcrum positions and graph the results – it turns “we built a toy” into an actual data-collection exercise.
Safety Tips
- Only launch soft, lightweight projectiles – marshmallows, pom-poms, or foam cubes. Never load anything hard, sharp, or heavy.
- Keep the catapult pointed away from faces when loading and releasing, and don’t aim it at another person.
- Stretched rubber bands can snap back and sting fingers – younger kids should have an adult handle the final band on the fulcrum stack, since that one holds the most tension.
- Two or three rubber bands for tension is plenty; adding more than that raises the odds of the sticks splitting under load rather than actually improving distance.
Building a second catapult with a design twist – a longer arm, an extra fulcrum stick, or a different launcher – pairs naturally with a physics-and-engineering unit. If your kids enjoyed the lever-and-tension mechanics here, the popsicle stick arch bridge is a good next build, since it swaps tension and leverage for compression and load-bearing – a different structural concept using the same box of craft sticks.
Frequently Asked Questions
What materials do I need to build a popsicle stick catapult?
You need 7 to 8 jumbo craft sticks, 4 to 6 small rubber bands, and a plastic spoon or bottle cap as the launcher, plus a soft, lightweight projectile like a mini marshmallow or pom-pom. Hot glue is optional for a sturdier, longer-lasting build.
How do you build a popsicle stick catapult that actually launches far?
Band 5 to 6 sticks together at both ends to form a rigid fulcrum stack, then band 2 more sticks together at one end and spread them into a V for the lever arm. Slide the fulcrum stack through the V near its banded end, secure the intersection with another rubber band, and attach the spoon to the open end of the arm.
What safety precautions should I take when using a popsicle stick catapult?
Only launch soft, lightweight objects, keep the catapult aimed away from faces, and have an adult handle the final rubber band on the fulcrum stack since that connection holds the most tension. Limit tension bands to two or three – more than that raises the risk of the wood splitting.
Can a popsicle stick catapult be used for a school STEM project?
Yes – it’s a genuine class-1 lever that demonstrates elastic potential energy and how fulcrum position changes launch force, both standard middle-school physics concepts. Measuring launch distance at different fulcrum positions turns the build into a real data-collection experiment rather than just a craft.
Conclusion
The step most tutorials skip – a stacked, rubber-banded fulcrum instead of a single pivot stick – is what turns a wobbly craft into a catapult that launches consistently. Build the fulcrum first, band the lever arm across it, and adjust the stack’s position to dial in distance once the basic build is working.
Sponsored / affiliate links. As an Amazon Associate I earn from qualifying purchases. I may earn additional commission from eligible campaigns.