
How to Make a Concave Depression in Wood: Expert Tips
To create a concave depression in wood, use a gouge or chisel to carve out the desired shape. Sand the area to smooth the surface and refine the curve.
Creating a concave depression in wood can enhance the aesthetic appeal of your project. This technique is useful for various applications, including furniture design and woodworking crafts. Whether you’re making a decorative bowl or adding a unique touch to a tabletop, mastering this skill can elevate your craftsmanship.
The right tools and techniques are essential for achieving a clean, precise curve. With careful planning and practice, anyone can learn to create beautiful concave shapes in wood. This guide will walk you through the steps needed to achieve professional results, ensuring your wood projects stand out.
Introduction To Woodworking Techniques
The art of shaping wood requires practice and the right tools. A concave depression can add beauty to your projects. Start with a sharp chisel to carve the wood. A router also works well for this task. Use a spokeshave for finer adjustments. Sandpaper helps smooth the edges.
Gather these tools for the best results:
| Tool | Purpose |
|---|---|
| Chisel | Carving the initial shape |
| Router | Creating smooth curves |
| Spokeshave | Fine-tuning the shape |
| Sandpaper | Smoothing surfaces |
Choosing The Right Wood
Choosing the right wood is important for creating a concave depression. Hardwood and softwood are two common types. Hardwood comes from trees like oak and maple. It is usually stronger and more durable. Softwood, such as pine and cedar, is lighter and easier to work with.
Grain patterns also affect the final look. Hardwoods have varied patterns and textures. This can enhance the beauty of the wood. Softwoods often have straight grains and a more uniform appearance. Understanding these characteristics helps in making the best choice.
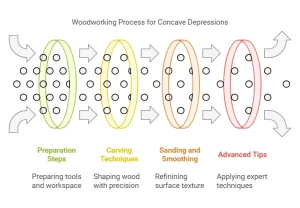
Preparation Steps
Start by measuring the area where you want the concave depression. Use a ruler or measuring tape for accuracy. Mark the center point clearly with a pencil. This step is crucial for evenness.
Next, outline the desired shape. Use a compass or a round object to trace a perfect curve. Make sure your markings are visible and precise.
Always wear safety goggles and a dust mask. Protect your eyes and lungs while working with wood. Keep your workspace clean and organized to avoid accidents.
Use a sturdy surface to work on. Clamps can secure the wood, preventing it from moving. This ensures a smooth and safe operation.
Carving Techniques For Concave Depressions
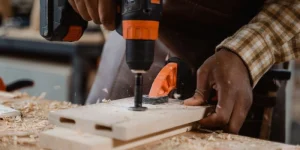
To create a concave depression in wood, gouges are essential tools. They help shape the wood easily. Choose a gouge with a curve that fits your design. Start by marking the area you want to carve.
Next, use your chisel techniques. Hold the chisel at a slight angle. Make smooth, controlled cuts to avoid splintering. Work slowly to achieve the desired depth.
Using a router can speed up the process. Set the depth for the router bit carefully. Move the router in a controlled manner, ensuring even pressure. This method is great for larger projects.
Sanding And Smoothing
Choosing the right sandpaper is key for a smooth concave depression. Use coarse sandpaper for initial shaping. This helps remove large amounts of material quickly. For finer details, switch to medium or fine sandpaper. This ensures a smooth finish.
Manual sanding gives you more control. It allows for precision in shaping. Power sanding is faster but requires careful handling. Always start with a lower speed to prevent damage. Use the right technique for the best results.
Advanced Tips
Creating smooth transitions in wood is essential for a great finish. Start with a sharp chisel to carve the edges. Use a sandpaper with fine grit to smooth out any rough areas. Sand in a circular motion for best results. Always check for evenness in the surface.
Dealing with tough grains can be tricky. Use a backing pad to apply even pressure while sanding. A wood conditioner helps in softening the grain. This makes it easier to shape the wood. Pay attention to the direction of the grain. Sanding against it may cause tear-out.
Finishing Your Work
After shaping the wood, applying sealants and finishes is essential. This step protects the wood and enhances its beauty.
Choose a suitable sealer based on your project. Popular options include polyurethane, lacquer, and oil-based finishes. Each offers different protection levels and aesthetics.
Before applying, ensure the wood surface is clean and smooth. Use sandpaper for best results. Apply the sealer with a brush or rag for even coverage.
Allow the sealer to dry completely. Then, lightly sand the surface again. This step prepares it for the final finish.
Finally, apply a topcoat for extra durability. This extra layer keeps your work looking great for years.
Maintenance And Care
Regular cleaning is key to keeping wood in good shape. Use a soft, damp cloth to remove dust. Avoid harsh chemicals that can damage the surface. Always dry the wood after cleaning. This helps prevent water damage and stains.
For minor damages, use wood filler to repair small dents. Sand the area gently after it dries. Match the wood color as closely as possible. This makes repairs less noticeable. For deeper scratches, consider using a wood stain or touch-up marker.
Frequently Asked Questions
How Do I Create A Concave Depression In Wood?
To create a concave depression in wood, use a combination of chisels and sandpaper. Start by marking the area with a pencil. Gradually remove wood with a chisel, focusing on the center. Finish by sanding the edges smoothly for a refined look.
Always wear safety gear when working with tools.
What Tools Are Needed For Concave Wood Carving?
Essential tools for concave wood carving include gouges, chisels, and sandpaper. A carving knife can help with detailed work. Additionally, clamps will secure your wood piece. Using a rotary tool can expedite the process, but it’s not mandatory. Choose tools based on your skill level and project needs.
Can I Use Power Tools For Concave Depressions?
Yes, power tools can efficiently create concave depressions in wood. A rotary tool with a carving bit works well for this purpose. However, ensure you maintain control to avoid over-carving. Always follow safety guidelines and wear protective gear. Hand tools can also provide precision for finer details.
What Wood Types Are Best For Concave Carving?
Softwoods like pine and cedar are ideal for concave carving. They are easier to work with and allow for better detail. Hardwoods like oak can also be used but require more effort. Consider the project’s purpose when choosing wood. Experimenting with different types can enhance your skills.
Conclusion
Creating a concave depression in wood is a rewarding project. With the right tools and techniques, anyone can achieve professional results. Remember to take your time and practice patience. This skill enhances your woodworking abilities and opens up new design possibilities.
Embrace the creativity that comes with woodworking!