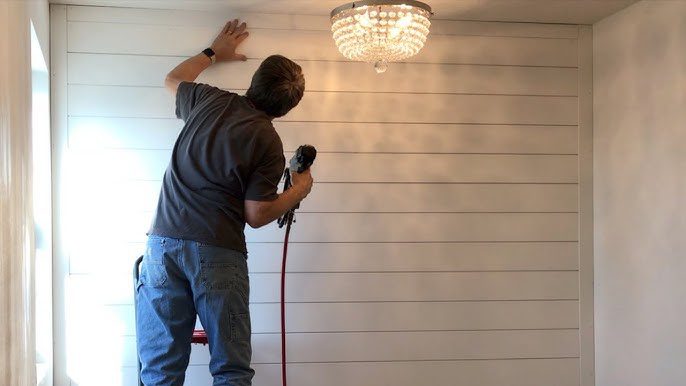
How to Install Prefinished Shiplap (No Painting Required)
Prefinished shiplap installs like standard shiplap — nail through the tongue at each stud, overlap the next board’s groove over it — but skips the painting step entirely since the finish is already cured at the factory. Nailing through the face instead of the tongue is the most common mistake, since it leaves visible nail holes on a finish you can’t easily touch up to match. This guide covers cutting, the first-board setup, working around outlets and corners, and the touch-up steps prefinished boards actually need.
Introduction To Prefinished Shiplap
Best Shiplap Install Tool
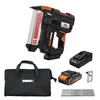
Worx Nitro 20V Cordless Brad Nailer
A brad nailer drives fasteners at a consistent angle through the tongue, which is harder to control by hand with a hammer on a prefinished surface.
- Best for: Clean, consistent nailing without denting the finish
- Why we picked it: Cordless means no compressor or hose to drag along the wall
- Main drawback: Battery sold separately if you don’t already own one
Compare more finishing supplies
 Option 1 Gorilla White Wood Filler
|
 Option 2 DAP Alex Painter’s Caulk
|
As an Amazon Associate we earn from qualifying purchases.
Prefinished shiplap comes ready to install. It has a smooth, even finish. This saves time and effort. The boards fit together with a simple overlap. This gives a tight, clean look. It is easy to work with. It can be used in many different spaces.
Prefinished shiplap is ready to use. No extra painting is needed. This saves time and money. It also reduces mess. The finish is durable. It resists scratches and stains. The boards are uniform. This makes installation easier. The look is consistent and professional.
Prefinished shiplap can be used in many places. It looks great on walls. It adds character to ceilings. It can be used for accent walls. It works well in living rooms. It is perfect for bedrooms. It can even be used in bathrooms. It is a versatile material.
Tools And Materials Needed
To install prefinished shiplap, gather essential tools like a tape measure, level, and saw. You’ll also need materials like nails, adhesive, and shiplap boards.
Essential Tools
To install prefinished shiplap, you need some essential tools. A tape measure helps you get accurate measurements. Level ensures your shiplap is straight. Nail gun or hammer and nails are key for attaching the shiplap. Saw is needed for cutting the shiplap to size. Stud finder locates the studs in your wall. Safety goggles protect your eyes during the process. Pencil for marking measurements.
Required Materials
Gather the materials before starting. Prefinished shiplap boards are the primary material. Nails or screws secure the boards. Adhesive can add extra hold. Sandpaper smooths out rough edges. Wood filler fills any gaps or holes. Paint or stain may be needed if you want to touch up or change the color. Caulk seals any joints or edges.
Preparing The Surface
Ensure the wall is clean and dry. Fill any holes or cracks with spackle. Sand the surface smooth for best results. For more wall-panel design inspiration, see our accent wall ideas with wood.
Cleaning And Measuring
First, clean the surface. Remove dust and dirt. Use a damp cloth. Make sure the wall is dry. Next, take your measurements carefully. Measure the height and width. Write down these numbers. This helps in cutting the shiplap.
Marking Stud Locations
Find the studs in the wall. Use a stud finder. Mark each stud with a pencil. Mark from top to bottom. This helps in nailing the shiplap securely.
Cutting Shiplap Boards
First, gather your tape measure and pencil. Measure the wall space where you need to install the shiplap. Write down the measurements. Next, lay the shiplap board on a flat surface. Use the tape measure to mark the length on the board. Make sure to mark both ends for a straight line. Draw a line with a pencil. Double-check the measurements to ensure accuracy.
Always wear safety goggles before using a saw. Place the shiplap board on a stable surface. Align the saw blade with the pencil line. Hold the board firmly. Cut along the line slowly. Ensure the cut is straight. Smooth the edges with sandpaper if needed. Your board is now ready for installation.
Installing The First Board
Start by finding the studs in the wall. Use a stud finder for this. Mark each stud with a pencil. This will help later. Place the first shiplap board at the bottom. Make sure it is level. Use a level tool to check. Adjust if needed. Proper alignment is crucial. It sets the stage for the rest.
Nails or screws can be used to secure the board. Use a nail gun or drill. Secure the board to the studs. This ensures a strong hold. Place nails or screws every 6 inches. Do not over-tighten screws. This may damage the board. Check the alignment again. Make sure it stays level.
Continuing The Installation
Each new board should overlap the one below it. This helps to keep the boards tight. Make sure each board is secured properly. Use a level to check each board.
Ensure your boards are always level. This is very important. Use a level tool for accuracy. Adjust as needed if the boards are not straight. This will give a clean look.
Dealing With Obstacles
Turn off the power before starting. Measure the outlet’s position on the wall. Mark the same spot on your shiplap plank. Use a jigsaw to cut the marked area. Test the fit by placing the plank over the outlet. Adjust the cut if needed. Secure the plank to the wall using nails. Replace the outlet cover after installing the plank.
Measure the corner’s angle using a protractor. Mark this angle on the shiplap plank. Cut along the marked line with a saw. Fit the plank into the corner. Check for any gaps or uneven edges. Trim the plank if necessary. Secure the plank with nails. Repeat the steps for the other side of the corner.
Finishing Touches
Installing prefinished shiplap adds elegance to any room. Measure the wall, cut the boards, and nail them in place. Fill gaps with caulk for a polished look.
Filling Nail Holes
Use wood filler to cover nail holes. Choose a color that matches the shiplap. Apply a small amount to each hole. Smooth it out with a putty knife. Let it dry. Once dry, sand it lightly. This helps it blend with the wood. Check if the holes are well-filled. If needed, repeat the steps. This ensures a smooth finish.
Touching Up Paint
After filling holes, paint touch-ups may be needed. Use the same paint used on the shiplap. Apply the paint with a small brush. Cover the filled holes and any scratches. Let the paint dry. Check for missed spots. Apply more paint if needed. This keeps the shiplap looking fresh and clean.
Maintenance Tips
Keep your shiplap clean with a soft cloth. Use a gentle cleaner and warm water. Wipe down the boards to remove dust. Avoid harsh chemicals. They can damage the finish. Dry the shiplap with a towel. Regular cleaning helps maintain its look.
Protect your shiplap from moisture. Check for leaks and fix them quickly. Keep furniture from scratching the surface. Use pads on furniture legs. Avoid hanging heavy items on the shiplap. Inspect it regularly for any signs of damage.

Frequently Asked Questions
What Tools Are Needed To Install Shiplap?
To install shiplap, you’ll need a measuring tape, level, saw, hammer or nail gun, and adhesive.
Can I Install Shiplap Over Drywall?
Yes, you can install shiplap over drywall. Ensure the wall is clean and level.
How Do I Cut Shiplap Boards?
Use a miter saw or circular saw to cut shiplap boards. Measure and cut carefully.
Should I Paint Prefinished Shiplap Before Or After Installation?
You generally don’t need to paint prefinished shiplap at all — it comes with the finish already cured at the factory. The only painting involved is touch-up: dab matching paint over filled nail holes and any cut edges after installation.
Conclusion
Installing prefinished shiplap can transform your space. Follow the steps carefully. Measure, cut, and align each board. Secure them properly for a flawless finish. Remember to plan your layout. This ensures a professional look. With patience and the right tools, you can achieve stunning results.
Your room will have a fresh, stylish look. Enjoy the beauty and warmth of your new shiplap walls. Happy decorating!
Sponsored / affiliate links. As an Amazon Associate I earn from qualifying purchases. I may earn additional commission from eligible campaigns.