Cutting Cove Moulding Compound Miter Saw: Master Techniques
Cutting cove moulding with a compound miter saw requires precise angles and cuts. This can be achieved by using a crown cut jig and carefully following the steps for each corner.
It is important to secure the work piece with clamps and never make free-hand cuts. By following proper safety measures and using the correct tools, cutting cove moulding with a compound miter saw can be a successful and efficient process.
Introduction To Cove Moulding
Cutting Cove Moulding with a Compound Miter Saw in Austin, Texas. Learn how to efficiently and accurately cut cove moulding using a compound miter saw in this step-by-step tutorial. Achieve professional-looking results with this handy tool.
Cove moulding is a type of decorative trim used to enhance the appearance of a room or furniture piece. It is typically installed along the edges of walls, ceilings, or cabinetry to add a touch of elegance and sophistication. Cove moulding is characterized by its concave shape, which creates a smooth transition between surfaces. It is often used in traditional or classic interior designs, but can also be incorporated into modern or contemporary spaces for a unique look. In this blog post, we will explore the importance of precision when working with cove moulding and the tools required to achieve accurate cuts.
Importance Of Precision
Achieving precise cuts is crucial when working with cove moulding. The intricate design of this type of trim requires precise angles and measurements to ensure a seamless fit and a professional-looking finish. Even the smallest deviation can result in unsightly gaps or misaligned joints, compromising the overall aesthetic appeal. Precision is key to achieving a seamless installation and showcasing the beauty of cove moulding.
Tools Required
To achieve accurate cuts when working with cove moulding, several essential tools are required. These tools help ensure precision and make the installation process smoother and more efficient. Here are the tools you’ll need:
- Miter Saw: A compound miter saw is the ideal tool for cutting cove moulding. Its ability to make precise angled cuts in both horizontal and vertical planes makes it essential for achieving accurate joints and seamless transitions.
- Measuring Tape: Accurate measurements are crucial when working with cove moulding. A reliable measuring tape allows you to measure the length and angles needed for precise cuts.
- Miter Gauge: A miter gauge is a handy tool that helps guide the cove moulding through the miter saw at the correct angle. It ensures consistency and accuracy in the cutting process.
- Pencil: A pencil is essential for marking the measurements and angles on the cove moulding, ensuring accuracy and preventing mistakes.
- Clamps: Clamps are useful for securing the cove moulding in place, preventing movement during the cutting process and ensuring clean, precise cuts.
- Safety Gear: Safety should always be a priority when working with power tools. Wear safety goggles, ear protection, and a dust mask to protect yourself from potential hazards.
With these tools at your disposal, you can confidently tackle the cutting process and achieve precise, professional-looking results when working with cove moulding. Remember to take your time, double-check your measurements, and always prioritize safety throughout the entire process.
Safety First
When using a compound miter saw to cut cove moulding, it’s crucial to prioritize safety. Proper protective equipment and adherence to miter saw safety tips are essential for a secure and efficient working environment.
Proper Protective Equipment
Before operating a compound miter saw for cutting cove moulding, ensure that you are equipped with the appropriate protective gear. This includes:
- Safety Glasses: Protect your eyes from flying debris.
- Hearing Protection: Reduce the risk of hearing damage from the saw’s noise.
- Dust Mask: Prevent inhalation of sawdust and airborne particles.
- Gloves: Ensure a firm grip and protect your hands from sharp edges.
Miter Saw Safety Tips
When using a compound miter saw to cut cove moulding, follow these safety tips to minimize the risk of accidents:
- Secure Workpiece: Always use clamps to secure the workpiece, avoiding free-hand cuts.
- Maintain Clear Workspace: Keep the work area clear of clutter and obstructions to ensure smooth operation.
- Read the Manual: Familiarize yourself with the manufacturer’s instructions and safety guidelines for the specific miter saw model.
- Unplug when Adjusting: Prior to making any adjustments or blade changes, disconnect the miter saw from the power source.
- Stay Focused: Avoid distractions and maintain full concentration on the cutting process to prevent accidents.
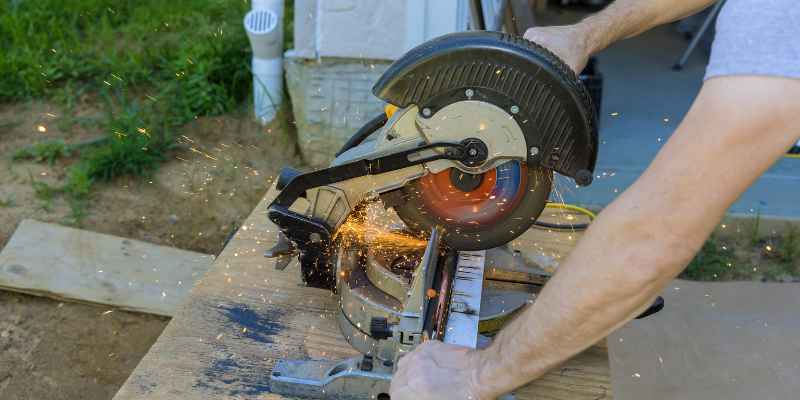
Miter Saw Basics
Learn the basics of cutting cove moulding with a compound miter saw. Discover how to achieve precise cuts and create beautiful crown molding for your projects.
Anatomy Of A Miter Saw
A miter saw consists of several key components that enable precise and accurate cutting of various angles and bevels. These components include the blade, base, fence, miter gauge, bevel adjustment, and dust collection system.
Setting Up The Saw
Before using a miter saw, it’s essential to properly set it up for the specific cutting tasks. This involves adjusting the miter and bevel angles, securing the workpiece, and ensuring proper alignment of the cutting blade.
When setting up the saw, it’s important to ensure that the work area is well-lit and free of any obstructions. Additionally, the workpiece should be firmly clamped to the saw’s base to prevent any movement during the cutting process.
Proper alignment of the cutting blade is crucial for accurate cuts, and it’s recommended to regularly check and adjust the blade alignment to maintain cutting precision.
Measuring And Planning
Before cutting cove molding with a compound miter saw, it is crucial to accurately measure and plan the project. This involves determining the cove molding dimensions and understanding compound angles to ensure precise cuts.
Determining Cove Moulding Dimensions
When determining cove molding dimensions, measure the wall lengths and ceiling angles to calculate the exact length and miter angle required for each piece. Use a measuring tape and an angle finder to obtain precise measurements for a seamless fit.
Understanding Compound Angles
Compound angles are essential for cutting cove molding as they involve both miter and bevel angles. Take into account the spring angle and the corner orientation to adjust the miter and bevel settings on the compound miter saw for accurate cuts.
Cutting Techniques
Cutting cove moulding compound miter saw is a precise technique used to achieve accurate cuts on crown molding. By positioning the crown molding flat against the back fence of the miter saw, you can create bevel cuts that fit perfectly together for a seamless finish.
Mastering this technique allows for professional-looking results in your woodworking projects.
Cutting Inside Corners
When cutting inside corners with a cove moulding compound miter saw, it’s essential to understand the correct angle and direction for the cut. To avoid mistakes, always cut the pieces upside down and backward. Before making the cut, measure the angle between the walls and divide it in half to get the correct angle for the miter saw. Be sure to use a stop block to achieve consistent cuts.
Cutting Outside Corners
Cutting outside corners with a cove moulding compound miter saw requires a different approach than inside corners. To ensure accurate cuts, it’s essential to measure the angle of the corner and divide it by two to get the correct miter angle. When cutting the moulding, keep the piece upside down and backward, and use a stop block to maintain consistency.
Safety Tips
It’s important to use caution when operating a cove moulding compound miter saw. Never make freehand cuts with a miter or chop saw, always use clamps to secure the workpiece. Be aware of the angle for cove moulding and use the appropriate settings. Additionally, check the saw settings using charts and pictorial aids to avoid making mistakes.
By following these cutting techniques, you can achieve accurate cuts with your cove moulding compound miter saw. Remember to always use caution and take safety measures to avoid accidents. With practice, you can master the art of cutting cove moulding and create beautiful finishes for your home.
Advanced Cutting Tips
Achieving precise cuts when cutting cove moulding with a compound miter saw requires careful attention to detail. To ensure accuracy, it’s important to properly set up the saw and use a crown cut jig or stop block.
Managing Complex Profiles
When cutting cove moulding with a compound miter saw, it’s important to remember that not all profiles are the same. Some profiles can be more complex than others, which can make it difficult to achieve a clean and accurate cut. To manage complex profiles, it’s essential to take the time to study the moulding and identify any areas that may require special attention. One tip is to use a scrap piece of moulding to test the cut before making the actual cut on the piece you need.
Dealing With Spring Angles
Spring angles can pose a challenge when cutting cove moulding with a compound miter saw. Spring angles refer to the angle between the wall and the crown moulding, which can vary depending on the type of moulding and the angle of the wall. To ensure accurate cuts when dealing with spring angles, it’s important to determine the angle of the spring and set the saw accordingly. Using a chart or a digital angle finder can help ensure that the saw is set correctly.
Using A Crown Cut Jig
Another advanced cutting tip for cutting cove moulding with a compound miter saw is to use a crown cut jig. A crown cut jig is a specialized tool that attaches to the saw and helps guide the moulding through the saw blade. This can help ensure accurate cuts, especially for moulding with complex profiles or spring angles.
In conclusion, cutting cove moulding with a compound miter saw can be challenging, but with these advanced cutting tips, you can achieve accurate and clean cuts every time. By managing complex profiles, dealing with spring angles, and using a crown cut jig, you can take your cove moulding cutting skills to the next level.
Finishing Touches
After cutting cove molding with a compound miter saw, it’s crucial to pay attention to the finishing touches to ensure a professional and polished result. This includes sanding and smoothing, as well as joining and fastening the pieces together seamlessly.
Sanding And Smoothing
Sanding and smoothing the cut edges of cove molding is essential to achieve a flawless finish. Use fine-grit sandpaper to gently sand the edges, ensuring any roughness or imperfections are smoothed out. This step is crucial for creating a seamless joint when fitting the pieces together, and it also prepares the surface for painting or staining.
Joining And Fastening
When it comes to joining and fastening cove molding, precision is key. Utilize wood glue to securely join the pieces together, ensuring a strong bond. Additionally, using finishing nails or a brad nailer can further reinforce the joints. Countersink the nails slightly below the surface and fill the holes with wood putty for a professional and seamless finish.
Common Pitfalls And Solutions
When working with cove moulding compound miter saw, there are common pitfalls that can arise, but with the right solutions, you can overcome these challenges to achieve precise and professional results.
Troubleshooting Poor Fits
If you encounter poor fits when cutting cove moulding with a compound miter saw, the issue may stem from inaccurate measurements or an improperly adjusted saw. To resolve this, start by ensuring that the saw is properly calibrated and that the measurements are accurate. Additionally, double-check the angles and bevel settings to guarantee a proper fit.
Adjusting For Wall Irregularities
Wall irregularities can cause difficulties when installing cove moulding. To address this, consider using a coping saw to adjust the cove moulding to fit the irregularities of the wall. By coping the joints, you can achieve a seamless and precise fit that accommodates any imperfections in the wall surface.
Project Examples
Cutting cove moulding with a compound miter saw is a precise process that requires careful attention to detail. By using a crown cut jig and following proper safety precautions, you can achieve clean and accurate cuts for your project. Check out resources like YouTube tutorials and articles from woodworking experts to learn more.
Crown Molding For Columns
When it comes to adding an elegant touch to columns, crown molding is a perfect choice. By using a compound miter saw, you can precisely cut and install crown molding to enhance the visual appeal of columns. The miter saw’s ability to make bevel and miter cuts at the same time ensures a seamless fit around the column’s top and bottom edges, creating a polished and professional look.
Creative Cove Moulding Applications
Unleash your creativity with cove molding by exploring unique applications beyond traditional use. From framing artwork to accentuating cabinet doors, cove molding offers versatility and aesthetic appeal. With a compound miter saw, you can achieve precise cuts for custom cove molding applications, allowing you to elevate the visual impact of various projects.
Frequently Asked Questions
Can You Miter Cove Molding?
Yes, you can miter cove molding. Using a compound miter saw, you can make precise angled cuts on the molding to create clean, seamless corners. Make sure to secure the workpiece with clamps for safety and accuracy.
What Type Of Cutting Should Not Be Done On The Compound Miter Saw?
On a compound miter saw, you should avoid making free-hand cuts. Always use clamps to secure the workpiece for safety.
What Is The Angle For Cove Molding?
The angle for cove molding can vary depending on the specific design and installation requirements. It is recommended to use a compound miter saw to make precise cuts for cove molding. Make sure to refer to cutting guides and tutorials to determine the appropriate angle for your specific project.
How To Cut Crown Molding On Compound Miter Saw?
To cut crown molding on a compound miter saw, set the molding against the fence and table, upside down. Adjust the miter and bevel angles according to the molding’s spring angle and wall angle. Make test cuts and adjust as needed for precise cuts.
Conclusion
Cutting cove moulding with a compound miter saw is a precise and efficient method for achieving clean and accurate results. By following the appropriate techniques and utilizing the proper tools, such as spring angles and bevel cuts, you can create beautiful crown molding for your projects.
Remember to prioritize safety by securing your workpiece and avoiding free-hand cuts. With the right approach and attention to detail, you can master the art of cutting cove moulding with a compound miter saw. Happy woodworking!