How I Mastered Cutting Molding with a Miter Saw
Crooked cuts and gaps at the corners are the most common complaint from anyone cutting molding with a miter saw for the first time. This guide walks through cutting molding with a miter saw like a pro, whether you’re a beginner, a DIY enthusiast, or an advanced woodworker. I’ll share easy steps, handy tips, and a few mistakes to avoid, all explained as if we’re chatting over a workbench.
What Is Cutting Molding with a Miter Saw?
Best 10-Inch Miter Saw for Cutting Molding
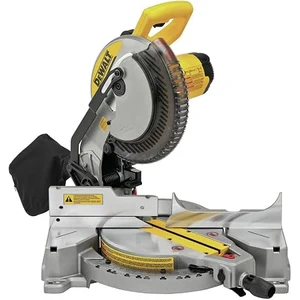 |
DEWALT DWS713 10-Inch Single-Bevel Compound Miter Saw – $279.00 This is the class of saw referenced throughout this guide — a 10-inch compound miter saw with enough capacity for both baseboard and crown molding.
|
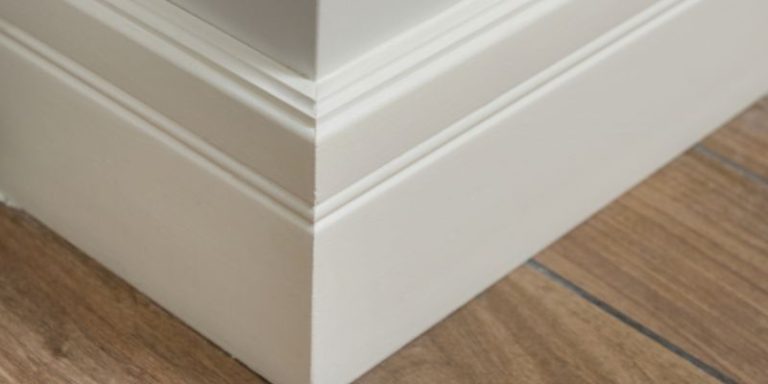
Cutting molding with a miter saw is using a special saw to make angled or straight cuts on trim pieces, like crown molding or baseboards, to fit corners or edges perfectly. Molding is the decorative wood or MDF that hides seams where walls meet ceilings or floors. A miter saw makes precise cuts, so your molding looks clean and professional. It is a game-changer for home projects because it is fast and accurate.
Perfect cuts make a room look polished, whether the project is crown molding in a dining room or baseboards in a bedroom, and getting a tight-fitting corner right is one of the more satisfying wins in DIY trim work.
Why Use a Miter Saw for Molding?
A miter saw is perfect for molding because it cuts at exact angles, like 45 degrees for corners. Unlike hand saws, it’s quick and less likely to mess up. Here’s why it earns a spot in most trim toolkits:
- Speed: Cuts take seconds.
- Precision: Angles are spot-on with the right setup.
- Versatility: Works for crown, baseboards, or even picture frames.
But there are drawbacks. Miter saws can be pricey (starting around $100), and they take practice — a miscalculated angle or an unsteady cut wastes wood fast.
Tools and Materials You’ll Need
Before you start, gather these basics; beginners can keep the list simple, while more experienced woodworkers may want a few extras.
- Miter Saw: A 10-inch compound miter saw handles most molding sizes well. Brand matters less than blade quality — a sharp, fine-tooth blade makes a bigger difference in cut quality than the saw badge.
- Molding: Wood or MDF crown molding or baseboards. Start with 3-4 inch wide pieces for practice.
- Safety Gear: Safety glasses and gloves — sawdust in the eyes is a real hazard on this tool.
- Measuring Tape: For accurate lengths.
- Pencil: To mark cuts.
- Clamps or Stops: To hold molding steady (optional but helpful).
Table 1: Miter Saw Comparison for Beginners
| Saw Type | Cost Range | Best For | Notes |
|---|---|---|---|
| Single Bevel | $100-$200 | Beginners | Simple, affordable |
| Compound | $200-$400 | Enthusiasts | More angles, versatile |
| Sliding Compound | $400-$600 | Advanced Users | Cuts wider molding easily |
Caption: Choose a miter saw based on your skill and project size. Beginners can start with a single bevel saw.
Step-by-Step Guide to Cutting Molding
Here is how to cut crown molding for a 90-degree corner, laid flat on the miter saw table — this method is easier and more repeatable than holding the molding at an angle against the fence.
- Set Up Your Saw: Adjust the miter angle to 31.6 degrees and the bevel to 33.9 degrees. Most saws mark these angles clearly.
- Measure and Mark: Measure the wall length where the molding goes. Mark the bottom edge of the molding (the part against the wall).
- Lay Molding Flat: Place the molding flat on the saw, with the top edge against the fence and the bottom on the table.
- Make the Cut: Cut slowly to avoid splintering. For inside corners, the bottom is longer; for outside corners, the top is longer.
- Reverse and Repeat: Flip the settings for the other piece of the corner and cut again.
- Test Fit: Hold pieces against the wall. Sand or trim if needed for a tight fit.
Visual Idea: A diagram showing molding flat on the saw with labeled angles (31.6° miter, 33.9° bevel) would help here.
Cutting Baseboards: A Simpler Project
Baseboards are easier than crown molding because they sit flat against the wall. Here’s a quick guide:
- Measure: Measure the wall length.
- Set Miter to 45 Degrees: For 90-degree corners, cut at 45 degrees.
- Cut and Fit: Place the baseboard flat, cut, and test the fit.
Baseboards are a good project to build confidence on since a full hallway run can realistically be cut and fitted in an afternoon, well before tackling crown molding.
Common Mistakes to Avoid
These are the most common mistakes to watch for:
- Wrong Angles: Double-check miter and bevel settings. A half-degree off ruins the fit.
- Measuring Errors: Measure the bottom edge of crown molding, not the top.
- Rushing: Slow cuts prevent splintering, especially with wood.
Table 2: Common Mistakes and Fixes
| Mistake | Fix |
|---|---|
| Crooked Cuts | Check saw alignment before cutting |
| Wrong Measurements | Measure twice, cut once |
| Splintered Edges | Use a sharp, fine-tooth blade |
Caption: Avoid these mistakes to save time and wood.
Safety Tips for Miter Saw Use
Safety matters a lot on a miter saw — flying sawdust and offcuts are the most common minor injuries. Here is what to do:
- Wear safety glasses and gloves.
- Keep hands 6 inches from the blade.
- Unplug the saw when adjusting or changing blades.
Visual Idea: A simple sketch of a miter saw with labeled safety zones (blade, hands) would be great.
Cost-Saving Ideas
Molding projects can add up in cost, but a few simple choices help keep the budget down:
- Buy MDF molding instead of wood—it’s cheaper and easier to cut.
- Practice on scrap pieces to avoid wasting good molding.
- Rent a miter saw for small projects instead of buying one.
Table 3: Cost Comparison
| Item | Cost Range | Notes |
|---|---|---|
| MDF Molding | $1-$2 per foot | Affordable, easy to cut |
| Wood Molding | $2-$5 per foot | Looks premium, harder to cut |
| Miter Saw Rental | $30-$50 per day | Great for one-time projects |
Caption: Save money with these budget-friendly options.
Personal Tips from My Experience
A few habits consistently produce better results:
- Practice first: test cuts on cheap scrap molding before touching the good material — a first attempt rarely lines up perfectly.
- Mark Clearly: Use a sharp pencil for precise marks. Smudged lines mess up cuts.
- Sand Edges: Lightly sand cut edges for a smoother fit.
For advanced users, coping cuts for inside corners are trickier to master but give a noticeably tighter joint than a mitered inside corner, especially on crown molding.
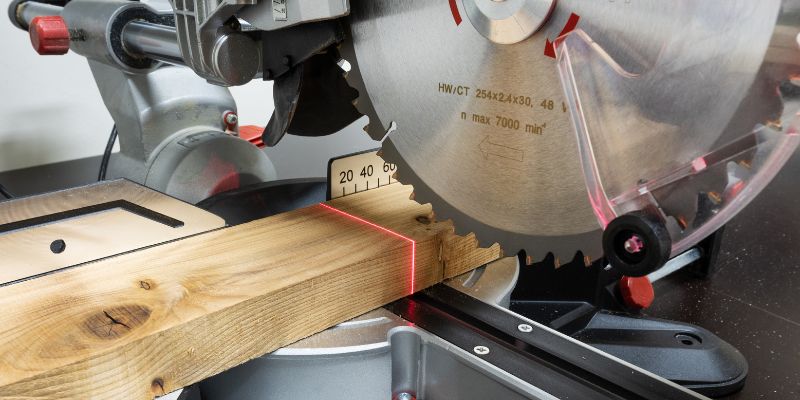
Alternatives to Miter Saws
No miter saw on hand? A miter box with a hand saw works for a small job of four or five cuts, though it is slower and less precise. For anything bigger, renting a miter saw for a day is usually cheaper than buying one for a single project.
Visual Idea: A side-by-side diagram comparing a miter saw and miter box setup would show the difference clearly.
Conclusion
Cutting molding with a miter saw is a fun way to level up your home projects. With the right tools, a few practice cuts, and my tips, you’ll be making perfect corners in no time. Start small with baseboards or try crown molding for a bold look. Grab some molding, fire up your saw, and give it a shot! Share your project ideas in the comments—I’d love to hear them!
Frequently Asked Questions
What’s the Best Miter Saw for Beginners?
A 10-inch single bevel miter saw is best for beginners. It’s affordable, easy to use, and cuts most molding sizes.
How Do I Cut Crown Molding Flat?
Lay the molding flat, set the miter to 31.6 degrees and bevel to 33.9 degrees, then cut. Reverse for the other piece.
Can I Cut Molding Without a Miter Saw?
Yes, use a miter box and hand saw. It’s slower but works for small projects with few cuts.
Why Are My Molding Cuts Gapping?
Gaps happen from wrong angles or poor measurements. Check your saw settings and measure the bottom edge carefully.
How Do I Avoid Splintering When Cutting?
Use a sharp, fine-tooth blade and cut slowly. Tape the molding’s edge for extra protection.
What’s the Difference Between Inside and Outside Corners?
Inside corners form an enclosed angle, like a room’s corner. Outside corners stick out, like a cabinet edge.
How Much Molding Should I Buy?
Buy 10-15% more than measured to account for mistakes or bad cuts. It saves trips to the store!
Sponsored / affiliate links. As an Amazon Associate I earn from qualifying purchases. I may earn additional commission from eligible campaigns.