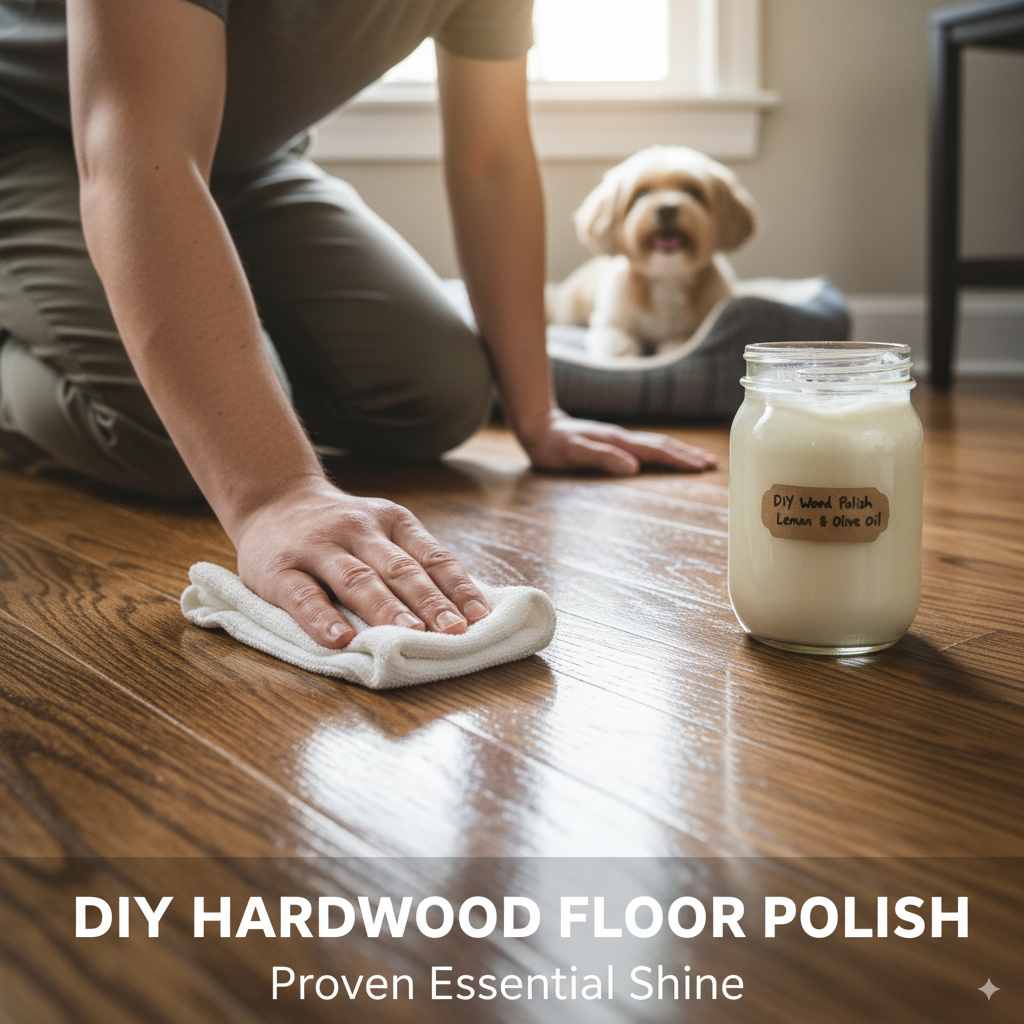
DIY Hardwood Floor Polish: Proven Essential Shine
DIY Hardwood Floor Polish: Get a Proven, Essential Shine at Home!
Tired of dull, scuffed hardwood floors? You can restore their beautiful shine with a simple, affordable DIY hardwood floor polish. This guide shows you how to bring back that essential brilliance using common household ingredients and easy steps. Get ready to make your floors look stunning again without calling in the pros!
Wood floors can lose their luster over time. Foot traffic, sunlight, and everyday accidents dull their natural gleam, making your home feel less inviting. You might think bringing back that beautiful shine requires expensive products or professional help, but that’s not always the case! Many homeowners feel frustrated when they see their beloved wood floors looking tired and worn. The good news is, with a few simple ingredients you likely already have, you can create a fantastic DIY hardwood floor polish that works wonders. This guide will walk you through everything you need, step by step, so you can confidently refresh your floors and enjoy their essential shine once more. Let’s get started and reveal the beauty hidden beneath the dullness!
The Magic of DIY: Why Make Your Own Hardwood Floor Polish?
Creating your own hardwood floor polish is a fantastic way to save money and avoid harsh chemicals often found in commercial products. It’s incredibly rewarding to see your floors transform using something you made yourself! Plus, you get to control exactly what goes onto your precious wood. Commercial polishes can sometimes leave a sticky residue or mask rather than truly revitalize the wood. A good DIY solution nourishes the wood, bringing out its natural beauty and offering a protective sheen.
You’ll be amazed at how simple ingredients can work together to clean, condition, and shine your hardwood floors. It’s a truly satisfying DIY project that breathes new life into your living space without a hefty price tag. Let’s dive into what makes these simple solutions so effective!
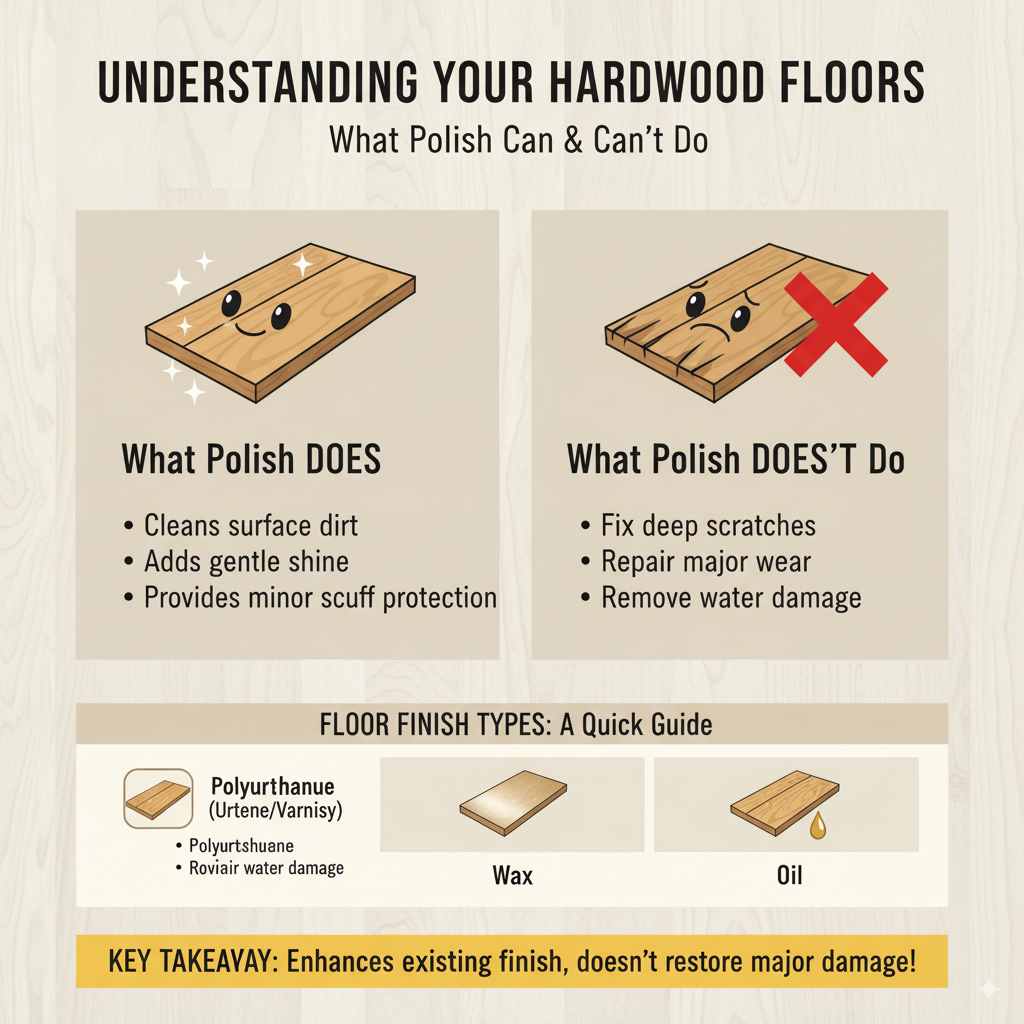
Understanding Your Hardwood Floors: What Polish Can and Can’t Do
Before we start polishing, it’s important to understand what hardwood floor polish does. It’s designed to clean surface dirt, add a layer of gentle shine, and provide a bit of protection against minor scuffs. Think of it like a moisturizer for your floors – it helps improve their appearance and feel.
However, DIY hardwood floor polish is not a miracle worker for deep scratches, significant wear, or water damage. Those issues often require professional refinishing or deeper repairs. Our goal here is to enhance the existing finish and bring back that essential gleam, not to perform major restoration. Knowing this helps set realistic expectations and ensures you’ll be delighted with the results!
Types of Hardwood Floor Finishes: A Quick Guide
Most modern hardwood floors have a protective coating, typically polyurethane. Older floors might have wax or oil finishes. The type of finish determines the best approach to polishing. Polyurethane finishes are generally very durable and respond well to gentle cleaning and polishing.
- Polyurethane (Urethane/Varnish): Most common. Forms a protective layer on top of the wood.
- Wax: Often used on older floors. Creates a softer sheen. Needs specific care.
- Oil: Penetrates the wood. Offers a more natural look and feel. Requires different maintenance.
For this guide, we’ll focus on the most common type: polyurethane finishes. If you’re unsure about your floor’s finish, it’s always best to test any cleaning or polishing solution in an inconspicuous area first. For more in-depth information on identifying wood finishes, you can consult resources like this comprehensive guide to wood finishes.
Gathering Your Supplies: What You’ll Need for Your DIY Polish
The beauty of most DIY hardwood floor polishes is that they use common household items. You probably have most of these in your pantry or cleaning closet already!
Essential Ingredients for Your DIY Polish
For a classic and effective DIY hardwood floor polish, you’ll typically need:
- Warm Water: The base for dilution.
- White Vinegar: A natural disinfectant and mild degreaser that helps cut through grime without being too harsh.
- Olive Oil (or other gentle oil like mineral oil): This is the key ingredient for shine! It nourishes the wood and restores a healthy luster. Use extra virgin olive oil for a good quality shine, but any olive oil will work.
- Optional: A few drops of essential oil (like lemon or lavender): For a pleasant scent. This doesn’t affect the cleaning power but can make the process more enjoyable.
Tools for the Job
Along with your ingredients, you’ll need a few basic cleaning tools:
- Two buckets
- A soft-bristle broom or dust mop
- A clean, soft microfiber cloth or sponge mop (avoid string mops that hold too much water)
- A spray bottle (for some vinegar-based cleaners)
- A measuring cup
It’s crucial to use soft materials to avoid scratching your floors. Microfiber is excellent because it traps dirt and buffs efficiently without streaks.
Recipe 1: The Classic Vinegar & Olive Oil Polish
This is a tried-and-true recipe that balances cleaning power with conditioning for an essential shine. It’s perfect for most polyurethane-finished hardwood floors.
Ingredients:
- 1 gallon warm water
- 1/4 cup white vinegar
- 1/2 cup olive oil
- Optional: 5-10 drops of essential oil (lemon, lavender, peppermint)
Instructions: Step-by-Step to Shine
- Prep the Floor: Start by thoroughly sweeping or dust-mopping your floor. You want to remove all loose dirt, dust, and debris. Any grit left behind can cause scratches during polishing.
- Mix the Solution: In one of your buckets, combine the warm water and white vinegar. Add your chosen essential oil if you’re using it. Mix gently.
- Add the Oil: In the second bucket, pour your olive oil. This might seem strange, but we’ll be using this and the vinegar solution separately in a specific way to avoid oily residue.
- Dampen Your Mop: Dip your microfiber cloth or sponge mop into the vinegar-water solution. Wring it out THOROUGHLY. The mop should feel barely damp, not wet. Too much liquid is the enemy of hardwood floors. Consult professional advice from organizations like the National Wood Flooring Association (NWFA) for proper wood floor care techniques; they emphasize minimizing moisture.
- Clean the Floor: Mop your floor in a systematic way, working in small sections. Go with the grain of the wood. The vinegar-water solution will clean away grime.
- Apply the Polish: This is where the magic happens! Lightly dampen a clean section of your microfiber cloth or a separate clean mop with olive oil. Again, wring it out so it is barely saturated.
- Buff to Shine: Go over the areas you just cleaned with the oil-dampened cloth/mop. Buff the floor gently in the direction of the wood grain. This step distributes the oil evenly and creates that beautiful, essential shine. You’re not flooding the floor with oil; you’re just applying a very thin, even layer.
- Repeat and Refine: Continue this process, section by section, until your entire floor is polished. You might need to rinse and re-dampen your cleaning mop or cloth as you go.
- Allow to Dry: Let the floor air dry completely. This usually takes about 30-60 minutes. Avoid walking on it during this time if possible, or walk very carefully in socks.
Tips for the Best Results:
- Always test in a small, hidden area first.
- Work in good lighting so you can see what you’re doing.
- Use a very light hand when applying the oil. Less is definitely more!
- Ensure your mop or cloth is well wrung out to prevent excess moisture.
- Clean spills immediately to prevent damage.
Recipe 2: Simple Vinegar & Water (For a Lighter Clean & Shine)
If you prefer to avoid oil, or if your floors tend to feel a bit too “oily” with the previous method, this simpler recipe is a great option. It provides a good clean and a subtle sheen without adding extra conditioning agents.
Ingredients:
- 1 gallon warm water
- 1/2 cup white vinegar
- Optional: A few drops of essential oil
Instructions:
- Sweep First: As always, start by thoroughly sweeping or dust-mopping your floors to remove all loose debris.
- Mix the Solution: Combine the warm water and white vinegar in your bucket. Add essential oils if desired.
- Dampen and Mop: Dip your microfiber cloth or sponge mop into the solution and wring it out until it’s just damp. Never leave your hardwood floors soaking wet.
- Clean and Buff: Mop the floor with the damp mop, following the grain of the wood. Work in sections. The vinegar will help lift dirt and grime. For a bit of shine, you can buff each section with a dry, clean microfiber cloth immediately after damp-mopping.
- Dry Time: Allow the floor to air dry.
When to Use This Recipe:
This recipe is ideal for regular maintenance cleaning when your floors don’t need deep conditioning. It’s excellent for removing light dirt and scuffs and provides a clean finish with a hint of natural shine.
Recipe 3: The Mineral Oil Shine Booster
For a truly brilliant, almost mirror-like shine, mineral oil can be a fantastic choice. It’s excellent for bringing out the deep luster in wood, especially those with polyurethane finishes.
Ingredients:
- 1 quart (4 cups) mineral oil
- Optional: 10-15 drops of essential oil (lemon or orange works well for a fresh scent)
Instructions:
- Prepare: Ensure your floors are meticulously clean and dry. Sweep or vacuum with a hard floor attachment.
- Apply Oil Sparingly: Pour a small amount of mineral oil directly onto a clean, soft microfiber cloth or a very fine-grade steel wool pad (0000 grade). You want the cloth/pad to be lightly saturated, not dripping.
- Buff with the Grain: Gently buff the floor with the oil-infused cloth/pad, always moving in the direction of the wood grain. Work in small, manageable sections.
- Wipe Away Excess: Immediately after buffing a section, use a separate clean, dry microfiber cloth to wipe away any excess oil. This is critical! You want a thin, even layer, not a puddle of oil.
- Continue Section by Section: Repeat the process until the entire floor is done.
- Cure Time: Allow the floor to sit undisturbed for at least an hour, or ideally overnight, to let the oil penetrate and cure.
Important Considerations:
Mineral oil can make surfaces slippery. Be very cautious after applying it until it has fully penetrated and buffed clean. It’s best suited for living areas where slip hazards are less critical. For kitchens or bathrooms, stick to the vinegar and water method or use the olive oil method very sparingly.
Table: Comparing DIY Polish Recipes
Here’s a quick look at how these popular DIY options stack up:
| Recipe | Primary Ingredients | Best For | Shine Level | Pros | Cons |
|---|---|---|---|---|---|
| Classic Vinegar & Olive Oil | White Vinegar, Olive Oil, Water | General cleaning and moderate shine on polyurethane floors. | Medium-High | Cleans and conditions, affordable, uses common ingredients. | Requires careful application to avoid residue; can be slightly slippery initially. |
| Simple Vinegar & Water | White Vinegar, Water | Regular cleaning, light scuffs, and a subtle, natural look. | Low-Medium | Very simple, budget-friendly, leaves no oily residue, good for frequent use. | Doesn’t add significant conditioning or deep shine. |
| Mineral Oil Shine Booster | Mineral Oil | Maximizing deep luster and shine on well-maintained polyurethane floors. | High-Very High | Creates a beautiful, deep, lustrous shine; good for bringing out wood’s richness. | Can be slippery, requires careful application and buffing; may attract dust if not fully buffed. Not suitable for all floor types or high-traffic areas where slip is a concern. |
Safety First: Protecting Your Floors and Yourself
Working with any cleaning solution requires a bit of caution. For your floors and your well-being, always keep these safety tips in mind:
- Moisture is the Enemy: Never saturate your hardwood floors with water or any cleaning solution. Excess moisture can cause warping, cupping, and damage to the wood and subfloor. Always wring your mop or cloth until it’s just damp.
- Test in an Inconspicuous Area: Before applying any DIY polish to your entire floor, test it on a hidden spot (like inside a closet or under a large rug). Wait 24 hours to check for any adverse reactions like discoloration or damage.
- Ventilation is Key: Even with natural ingredients, it’s a good idea to ensure good airflow in the room while you’re cleaning and drying. Open windows and doors if possible.
- Wear Appropriate Footwear: Avoid walking on freshly polished floors with bare feet or slippery socks, especially if you’ve used oil-based polishes, as they can be quite slick. Wear non-slip socks or slippers.
- Proper Storage: Store any leftover cleaning solutions in clearly labeled containers, out of reach of children and pets.
By following these safety guidelines, you can achieve a beautiful shine while keeping your home and floors in great condition.
Maintaining the Shine: Tips for Long-Term Beauty
Once your floors are looking their best, a little ongoing care will help maintain that essential shine:
- Regular Sweeping/Dusting: Dust and grit are the biggest culprits for dulling floors. Sweep or dust mop at least a few times a week, especially in high-traffic areas.
- Wipe Up Spills Immediately: Don’t let liquids sit on your hardwood. Wipe them up with a soft, absorbent cloth right away.
- Use Area Rugs and Mats: Place rugs in high-traffic zones (entryways, hallways, living areas) and doormats at all exterior entrances to trap dirt and moisture before it reaches your wood floors.
- Trim Pet Nails: Sharp pet nails can cause minor scratches that dull the finish over time.
- Use Furniture Pads: Place felt pads on the legs of all furniture (chairs, tables, couches). This prevents scratches and makes it easier to move items.
- Avoid Harsh Cleaners: Steer clear of abrasive cleaners, scouring pads, and steam mops, as they can damage the finish.
- Re-polish as Needed: Depending on foot traffic and wear, you might need to re-polish every 1-3 months. Pay attention to how your floors are looking and polish when they start to lose their luster.
Consistent, gentle maintenance will keep your DIY polished floors looking fantastic for years to come. It’s all about consistent habit and smart protection.

Frequently Asked Questions (FAQ)
Q1: Can I use my DIY hardwood floor polish on any type of wood floor?
A: These DIY recipes, particularly the vinegar and water or vinegar and olive oil ones, are generally safe for most sealed polyurethane-finished hardwood floors. Avoid using them on unsealed, waxed, or oiled floors, as they can strip the finish or cause damage. Always test in an inconspicuous area first if you’re unsure about your floor’s finish.
Q2: How often should I polish my hardwood floors with my DIY solution?
A: For best results and to maintain that essential shine, aim to polish your floors every 1 to 3 months, depending on traffic and how quickly they dull. You should also clean them with a damp mop (vinegar and water) more frequently, perhaps weekly or bi-weekly, as needed.
Q3: My floors look streaky after polishing. What did I do wrong?
A: Streaks are often caused by using too much polish (especially oil-based ones) or not buffing thoroughly. Ensure you’re using a very well-wrung-out mop or cloth and that you’re buffing with a dry cloth to remove any excess residue. Working in the direction of the wood grain also helps prevent streaks.