How to Seal Gaps in Wood Floors: Rope Caulk vs Wood Filler
Wood floor gaps under 1/8 inch are cosmetic and close up on their own by summer – only fill gaps that stay open year-round or trap dirt and drafts. Filling active seasonal gaps with a rigid filler causes buckling when the boards swell back up. This guide covers the DIY sawdust-and-glue trick for a perfect color match, when to use rope caulk instead, and exactly how wide a gap has to be before you need wood shims or a professional.
Why Do Wood Floors Get Gaps? Understanding the Basics
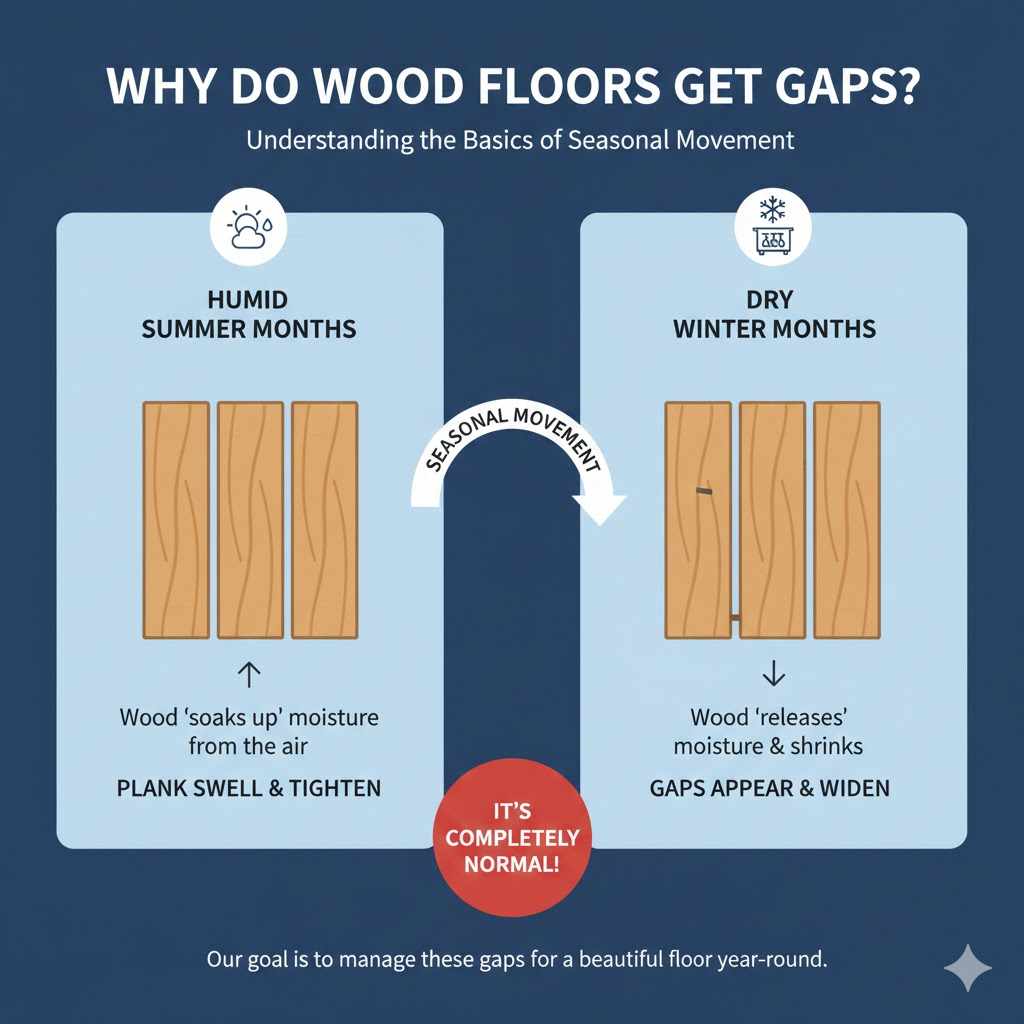
Wood floors expand and contract with changes in moisture and temperature – this is completely normal, not a defect.
The main culprit is humidity. During humid summer months, wood soaks up moisture from the air and swells. This can make the planks press tightly against each other. In the dry winter months, when your furnace is running, the air dries out. The wood releases its moisture and shrinks, causing those gaps to appear or widen.
This is often called “seasonal movement.” In most cases, these small, seasonal gaps are nothing to worry about. They are simply a sign that your wood floor is behaving as it should. Our goal today isn’t to stop this natural process, but to manage the gaps so your floor looks its best year-round. For a broader look at how different wood species and finishes handle moisture over time, see our full wood flooring guide.
Before You Start: Gathering Your Tools and Materials
Getting everything ready beforehand makes any project go smoother. You likely have many of these items around your home already. Here is a simple checklist of what you’ll need.
Essential Tools
- Shop Vacuum or Household Vacuum with a Crevice Tool: For cleaning out all the dust and debris from the gaps.
- Putty Knife or 5-in-1 Painter’s Tool: To clean out stubborn dirt and apply the filler.
- Orbital Sander or Sanding Block: To smooth out the filler once it’s dry.
- Fine-Grit Sandpaper: 120-grit or 180-grit works perfectly.
- A Small Container: For mixing your filler. A disposable cup or small bowl is fine.
- Stir Stick: A popsicle stick or scrap piece of wood works great.
- Safety Gear: A dust mask and safety glasses are a must, especially for sanding.
Key Materials
- Wood Glue: A good quality wood glue is essential. Choose one that dries clear or is stainable.
- Fine Sawdust: This is the secret ingredient! The best way to get a perfect color match is to use sawdust from the same type of wood as your floor. If you have a leftover plank, you can sand it to create dust. If not, you can often find a matching scrap piece at a hardware store.
- Clean Rags: For wiping up any excess glue or mess.
- Optional: Matching Wood Stain and Polyurethane: If your floor has a specific finish, you might need these to touch up the repaired spots.
- Ready-Made Wood Filler (optional shortcut): If you’d rather skip mixing your own sawdust paste, a stainable, sandable wood filler tub does the same job with less prep – see our pick below.
Choosing the Right Method: What’s Best for Your Floor?
There are a few ways to tackle floor gaps. The best method for you depends on the size of the gaps and your personal preference. Let’s compare the most common options.
| Method | Best For | Pros | Cons |
|---|---|---|---|
| Wood Filler/Putty | Small, stable gaps (less than 1/8 inch) |
|
|
| Rope Caulk | Wider, seasonal gaps |
|
|
| The Sawdust & Glue Trick | Small to medium gaps (up to 1/4 inch) |
|
|
For most homeowners looking for a seamless, durable, and affordable fix, the sawdust and glue method is the clear winner. It becomes part of the floor rather than just a filler, and you can’t beat the custom color match.
Best Wood Floor Gap Filler Pick
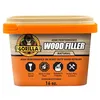 |
Gorilla All Purpose Wood Filler, 16 oz Tub Skips the sawdust-mixing step in Step 2 above – a stainable, sandable, water-resistant filler you press straight into cleaned gaps and sand flush the next day.
|
As an Amazon Associate we earn from qualifying purchases.
Step-by-Step Guide: Sealing Gaps Like a Pro
Ready to get started? We’ll take this one step at a time.
Step 1: Clean the Gaps Thoroughly
You can’t put a new filling in a dirty crack. Any dust, pet hair, or debris left in the gaps will prevent your filler from sticking properly. This is the most important step for a lasting repair.
- Scrape it Out: Take your putty knife or 5-in-1 tool and gently run it through each gap you plan to fill. This will dislodge any gunk that’s packed down inside. Be careful not to gouge the edges of your wood planks.
- Vacuum Everything: Use your vacuum with the crevice tool attachment. Go over each gap slowly, sucking up all the loose debris you just scraped out. Do it twice to be sure it’s completely clean.
Step 2: Prepare Your Filler
Wood filler is a paste-based repair compound that hardens, sands, and stains like real wood – unlike wood putty, which stays soft and is only meant for cosmetic touch-ups on finished surfaces. Use a filler (DIY sawdust paste or a ready-made tub) for any gap you actually want to become part of the floor.
- Create Your Sawdust: If you don’t already have sawdust, take a scrap piece of wood that matches your floor. Use your sander with a fine-grit sandpaper (120-grit is good) and sand the wood over a clean surface or piece of paper to collect the fine dust. You need more than you think, so gather a small pile.
- Mix it Up: In your small container, add a good amount of sawdust. Then, slowly pour in the wood glue. Start with a little glue and add more as needed. You want to create a thick paste, something with the consistency of peanut butter. If it’s too runny, it will shrink too much as it dries. If it’s too thick, it will be hard to press into the gaps.
- Work Quickly: Wood glue starts to set up fairly fast, so only mix a small batch at a time – enough to work with for about 10-15 minutes.
Step 3: Apply the Filler
With your paste ready, it’s time to fill those gaps. Take your time here to ensure a smooth application.
- Press it In: Scoop up a small amount of the filler with the tip of your putty knife. Press it firmly down into the gap. The goal is to make sure the filler goes all the way to the bottom of the gap, leaving no air pockets.
- Overfill Slightly: Leave a small mound of filler sitting just above the surface of the floor. The filler will shrink a tiny bit as it dries, and this ensures you’ll have enough material to sand down for a flush finish.
- Clean the Edges: Use the edge of your putty knife or a damp rag to clean up any excess filler that has squeezed onto the surface of the floor planks. It’s much easier to clean it up while it’s wet than to scrape it off later.
Step 4: Let It Dry and Sand It Smooth
Patience is key here. You must let the filler dry and harden completely before moving on to the final step.
- Drying Time: Let the filler cure for at least 24 hours. The exact time can vary based on the gap’s depth, the type of glue, and the humidity in your home. It should feel hard to the touch and not at all gummy.
- Sand It Flush: Once it’s fully dry, take your sanding block or orbital sander with 120- or 180-grit sandpaper. Gently sand the overfilled filler until it is perfectly level with the surrounding floorboards. Let the sandpaper do the work; you don’t need to press hard.
- Final Cleanup: Vacuum up all the sanding dust for a clean finish.
“Sanding a sawdust-and-glue repair before the full 24 hours is up is the single most common way to ruin the color match – the filler is still soft underneath a dry-feeling top layer, and the sander smears it instead of leveling it. Wait the full cure time even if it feels solid after a few hours.”
— Md Meraj, WoodworkingAdvisor.com
Step 5: Finishing Touches
The final step is to make your repair blend in visually.
- Stain If Needed: For many unfinished or naturally finished floors, the sawdust mix will blend in so well that you won’t need stain. However, if your floor is stained, you’ll want to apply a matching stain to the repaired areas. Use a small artist’s brush or a cotton swab for precise application. Always test the stain on a scrap piece of wood first to ensure the color is right.
- Apply a Top Coat: After the stain has dried, apply a thin layer of polyurethane or your floor’s top coat over the repair to seal it and match the sheen of the rest of the floor. Feather the edges so it blends seamlessly.
How to Handle Wider Gaps (More Than 1/4 Inch)
What if your gaps are wider than a quarter of an inch? For big gaps, a simple filler might not be the best solution, as it can crack over time. In these cases, it’s better to fill the void with real wood.
The best method here is to use wood shims or custom-cut “slivers” from a matching floorboard.
- Measure the Gap: Use a precise measuring tool to determine the width of the gap at several points.
- Cut a Sliver: Using a table saw or a hand plane, carefully cut a thin sliver of wood from a matching plank. The sliver should be slightly wider than the gap so you can get a snug fit. Taper it slightly so it’s easier to insert.
- Apply Glue: Apply a thin layer of wood glue to both sides of the wood sliver.
- Tap it In: Gently tap the sliver into the gap using a hammer and a small block of wood to protect the floor surface. Don’t force it. It should be a tight, friction fit.
- Let It Dry & Finish: Once the glue is dry, use a sharp chisel or a flush-cut saw to trim the sliver level with the floor. Sand it smooth and apply stain and finish to match.
Pro Tips for a Flawless Finish
- Test First: Always test your filler mixture and any stains on a hidden spot (like inside a closet) or a scrap piece of wood before applying it to a visible area.
- Work in Small Sections: Don’t try to fill all the gaps in your house in one go. Work on one small room or area at a time.
- Monitor Your Home’s Humidity: Since humidity is the main cause of gapping, managing it can prevent future problems. The U.S. Environmental Protection Agency recommends keeping indoor relative humidity below 60% and ideally between 30% and 50%. A simple hygrometer can help you track this, and using a humidifier in the winter can make a big difference.
- Patience is Everything: Rushing the drying or sanding steps is the most common mistake. Give each step the time it needs for the best, most durable results.
When to Call a Professional
The DIY method is fantastic for most common floor gaps. However, there are times when it’s wise to consult a professional flooring expert.
- Very Large or Widespread Gapping: If nearly every board has a large gap, it could point to an installation issue or a significant humidity problem.
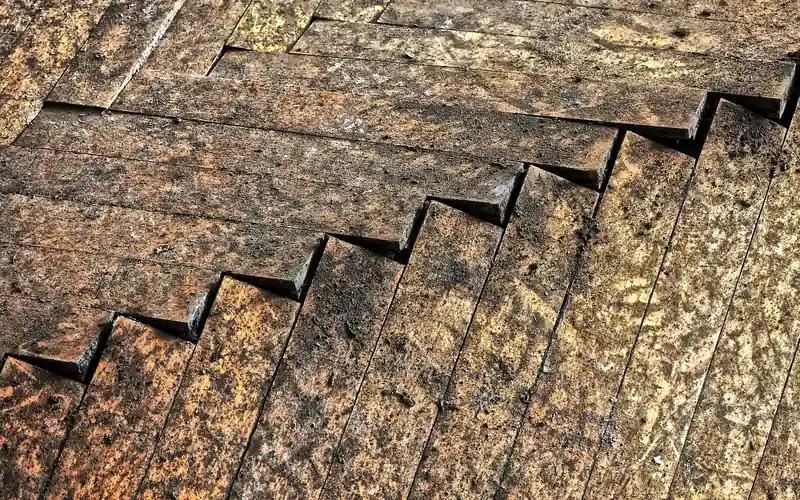
- Buckling or Cupping Floors: If your floorboards are bending or lifting up, this is often a sign of a serious moisture problem coming from below, like a leak. Filler will not solve this underlying issue.
- Floors That Feel Spongy: If the floor feels soft or bouncy when you walk on it, you could have a subfloor problem that needs professional inspection.
📊 Professional gap repair for a damaged hardwood floor typically runs $7–$15 per square foot, with full-project labor often totaling $250–$2,000 depending on the extent of the damage. — Source: HomeGuide, 2026
There’s no shame in asking for help. A professional can diagnose the root cause and save you a lot of time and money in the long run.
Frequently Asked Questions (FAQ)
Is it always necessary to fill gaps in hardwood floors?
Not always. Small, hairline gaps that appear in the winter and close up in the summer are a normal part of your floor’s seasonal movement. It’s often best to leave these alone. You should only fill gaps that are large enough to trap significant dirt, cause drafts, or bother you aesthetically.
Can I use caulk to fill gaps in my wood floor?
While some flexible caulks are designed for flooring, they often look different from the wood and can attract dirt. The sawdust and glue method generally provides a much more attractive and integrated repair. Rope caulk can be a good temporary solution for drafty floors.
What is the best time of year to fill floor gaps?
The best time is during a period of “average” humidity, which is typically in the spring or fall. If you fill gaps in the middle of winter when they are at their widest, the filler may get squeezed out when the wood expands in the summer. If you fill them in the summer when the wood is swollen, the filler may crack when the boards shrink in the winter.
How do I get sawdust that matches my floor?
The best source is a leftover plank from your floor installation. If you don’t have one, visit a local lumberyard or flooring store with a photo of your floor. They can often provide a small scrap piece of the same wood species (like oak, maple, or cherry) for you to sand.
Will the filled gaps crack again?
If done correctly with a strong wood glue and allowed to cure properly, the sawdust and glue filler is very strong and becomes part of the wood. However, if your home experiences extreme swings in humidity, new, tiny cracks might appear over time. Managing your home’s humidity is the best long-term solution.
How can I prevent wood floor gaps in the future?
The number one way is to control your home’s indoor humidity. Use a humidifier during dry winter months and a dehumidifier during humid summer months to keep the moisture levels stable. This will minimize the wood’s expansion and contraction.
Is wood putty the same as wood filler?
They are similar but not the same. Wood putty is typically oil-based, doesn’t harden completely, and is best for small touch-ups on finished surfaces. Wood filler is designed to harden, can be sanded and finished, and is much better for filling gaps and larger repairs before finishing.
How much does it cost to fix gaps in a wood floor?
The sawdust-and-glue or wood-filler DIY methods cost under $15 total for glue, sandpaper, and a stir stick if you already own a sander and vacuum. Hiring a professional for gap repair typically runs $7 to $15 per square foot, or $250 to $2,000 for a full room depending on the extent of the damage, according to HomeGuide’s 2026 cost data.
Your Beautiful, Gap-Free Floors Await!
There you have it – a simple, affordable, and effective way to seal the gaps in your wood floors. By using a little bit of sawdust and glue, you’re creating a custom repair that matches your floor rather than just patching a hole. Gather your tools, work one section at a time, and give the filler its full 24 hours to cure before you sand.
Sponsored / affiliate links. As an Amazon Associate I earn from qualifying purchases. I may earn additional commission from eligible campaigns.