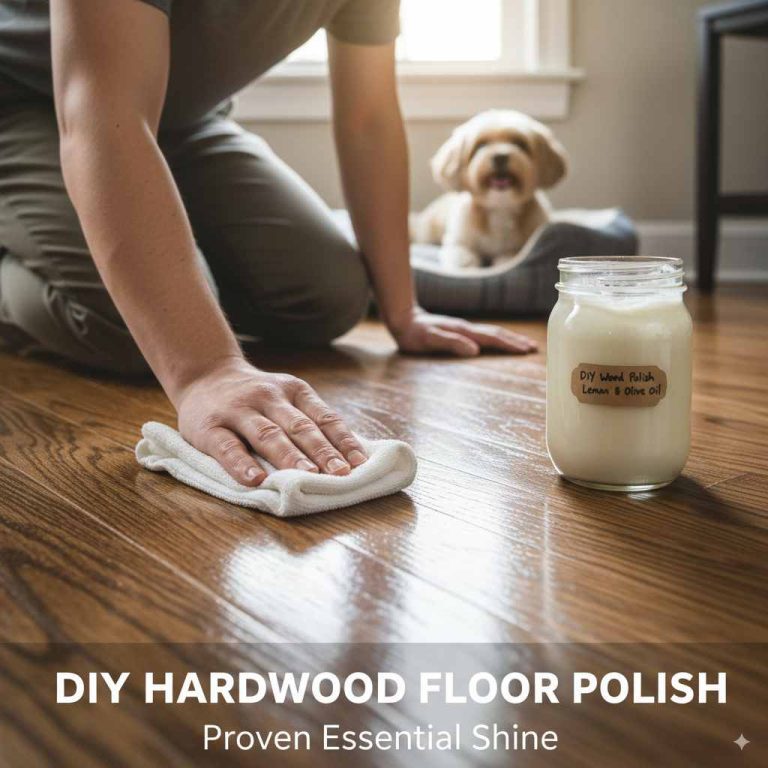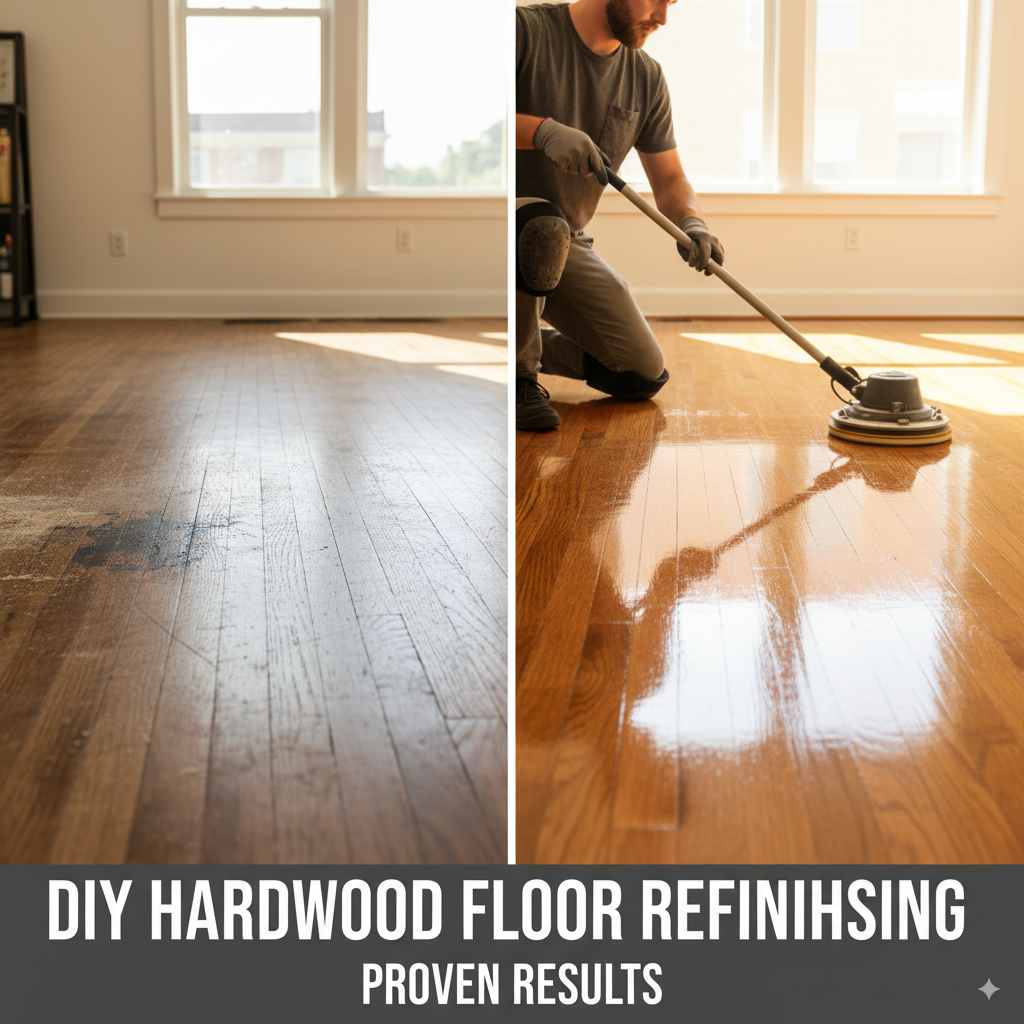
DIY Hardwood Floor Refinishing: Proven Results
Easily refinish your hardwood floors yourself! This guide offers clear steps, simple tools, and safety tips for a beautiful, like-new finish on a budget. Get proven, rewarding results with this beginner-friendly approach.
Ready to give your tired hardwood floors a new lease on life? Those scuffs, scratches, and faded patches can really bring down a room’s charm. But hiring professionals can often feel like a big expense. What if I told you that you can achieve stunning, professional-looking results right in your own home, with your own two hands? It’s absolutely possible! With a little guidance, the right tools, and some elbow grease, you can transform your worn floors into something you’ll be proud of. This guide will walk you through everything, from preparing your space to applying the final coat, making DIY hardwood floor refinishing surprisingly manageable and incredibly rewarding. Let’s get those floors shining again!
Why Refinish Your Hardwood Floors?
Old hardwood floors have a certain warmth and character, but over time, they inevitably show wear and tear. Daily foot traffic, moving furniture, pet claws, and sunlight can all take their toll, leaving floors scratched, dented, faded, and dull. Refinishing your hardwood floors is a fantastic way to:
- Restore their original beauty and luster.
- Hide and repair damage like scratches, gouges, and sun fading.
- Update the look of your home without a full replacement.
- Increase your home’s value.
- Create a durable, long-lasting finish that protects your investment.
It’s a process that breathes new life into your home, often at a fraction of the cost of installing new flooring.
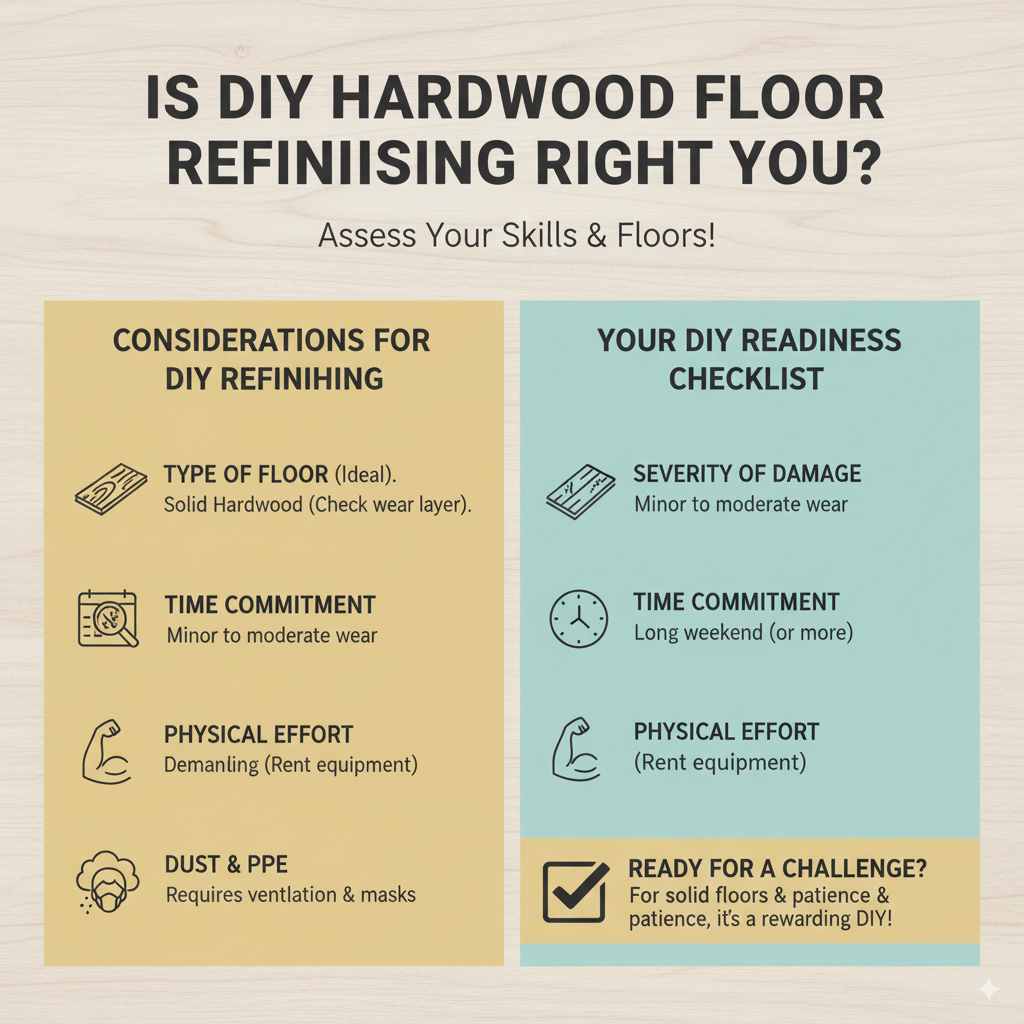
Is DIY Hardwood Floor Refinishing Right For You?
Before diving in, let’s consider if this project is a good fit for your skills and your floors.
Considerations for DIY Refinishing:
- Type of Floor: This guide is primarily for solid hardwood floors. Engineered hardwood can sometimes be refinished, but it depends on the thickness of the wear layer. Always check the manufacturer’s specifications.
- Severity of Damage: Minor to moderate scratches and wear are perfect for DIY refinishing. Deep gouges or severely damaged sections might require board replacement, which can be a more advanced DIY skill.
- Time Commitment: Refinishing floors takes time. Plan for at least a long weekend, possibly more, depending on the size of the area and drying times.
- Physical Effort: This project involves sanding, which can be physically demanding. Renting the right equipment and taking breaks is key.
- Dust: Even with dust containment systems, sanding creates dust. Proper ventilation and personal protective equipment (PPE) are essential.
If you’re ready for a rewarding challenge and your floors are in decent shape, then you’re ready to refinish them yourself!
Gathering Your Tools and Materials
Having the right tools makes all the difference in a DIY project. For refinishing hardwood floors, you’ll need a combination of rental equipment and supplies you can purchase.
Essential Rental Equipment:
- Drum Sander: This is the workhorse for removing the old finish and smoothing the wood. It’s usually rented by the day.
- Edge Sander (or Edger): This smaller, disc-shaped sander gets into corners and edges that the drum sander can’t reach.
- Random Orbital Sander (optional but recommended): A good addition for final smoothing and for smaller areas or if you have specific concerns about dust.
- Vacuum Cleaner (with HEPA filter): Crucial for dust cleanup.
Essential Supplies to Purchase:
- Sandpaper: In various grits (e.g., 36, 60, 100, 120, 150). You’ll need plenty for the drum sander and edger.
- Sanding Screens/Discs: For the random orbital sander, if used.
- Wood Filler/Putty: To fill small holes and gaps. Choose a color that matches your wood or can be stained.
- Tack Cloths: For removing fine dust particles before refinishing.
- Painter’s Tape: To protect baseboards and adjoining surfaces.
- Drop Cloths/Plastic Sheeting: To cover furniture and block off rooms.
- Stain (optional): If you plan to change the color of your floors.
- Polyurethane Finish: Water-based or oil-based topcoat. Water-based dries faster and has lower VOCs, while oil-based offers a harder finish but takes longer to dry and has stronger fumes.
- Applicators: High-quality synthetic brushes for edges, natural bristle brushes or lambswool applicators for stain, and high-quality foam rollers or lambswool applicators for the topcoat.
- Safety Gear: Safety glasses, dust masks (N95 or better), gloves, and knee pads.
Renting Equipment:
Most tool rental centers offer drum sanders and edge sanders. Be sure to ask for instructions on how to operate them safely. They are powerful machines and require a gentle but firm hand.
Step-by-Step Guide: DIY Hardwood Floor Refinishing
Let’s break down the process into manageable steps.
Step 1: Preparation is Key!
This stage is crucial for a smooth and successful refinishing job. Don’t skip any steps here!
- Clear the Room: Remove all furniture, rugs, and decorations. Every last item must be out of the room.
- Protect the Space: Use plastic sheeting and painter’s tape to seal off doorways and cover anything you can’t move, like built-in cabinets or appliances. This also helps contain the dust.
- Remove All Hardware: Take out switch plates, vent covers, and any other fixtures attached to the floor or baseboards.
- Inspect Your Floors: Check for loose nails or staples. Hammer them down so they are slightly below the wood surface. If you find any damaged boards that are beyond repair, consider replacing them before you start sanding.
- Clean Thoroughly: Vacuum the floor meticulously to remove all dirt, grit, and debris. Any debris left behind will turn into sandpaper under your sanding machine, causing scratches.
Step 2: Sanding – The Heart of Refinishing
Sanding removes the old finish and any imperfections. This is where the magic begins!
- Start with Coarse Grit: Begin with the rented drum sander and a coarse grit sandpaper (usually 36-grit). Work in long, overlapping passes, moving with the grain of the wood. Don’t stop the sander in one spot, or you’ll create divots. Many pros recommend a double-pass method: one pass with the grain, then a second pass at a 45-degree angle to the grain, and finish with a final pass with the grain. Overlap each pass by about 50% to avoid creating deep “swirl” marks.
- Use the Edger: Immediately after sanding an area with the drum sander, use the edge sander to sand the perimeter of the room and along baseboards. Again, work systematically and overlap your passes.
- Progress to Finer Grits: Once the entire floor is sanded with the coarse grit, you may need to re-roll the drum sander and edger with finer grits (e.g., 60-grit, then 100-grit). The progression depends on how deep the scratches from the previous grit were. The goal is to eliminate the scratch marks from the coarser grit. Always follow the same sanding pattern.
- Final Smoothing: For the smoothest finish, a final pass with a higher grit (120, 150, or even 220-grit) is recommended. Some people use a random orbital sander for this final, delicate smoothing phase across the entire floor, as it’s less likely to leave the deep scratches a drum sander can.
- Clean Up Between Grits: After each grit of sandpaper, vacuum the floor thoroughly. Then, use a shop vacuum with a brush attachment to get dust out of crevices. Then, use a tack cloth to pick up any remaining fine dust. This is critical for a clean finish.
Safety Note: Always wear a dust mask! Sanding hardwood can create very fine dust that is harmful to inhale. Ensure good ventilation by opening windows (if conditions allow for sealing off other rooms) or using fans to push air outside. Check out resources like the OSHA guide on wood dust for more information on hazards and controls.
Step 3: Filling Gaps and Imperfections
Now that your floors are smooth and bare, it’s time to fix any minor blemishes.
- Inspect Again: Look for any small holes, gaps between boards, or minor dents.
- Apply Wood Filler: Using a putty knife, apply wood filler to these imperfections. For gaps between boards, you might want to use a filler or “putty” that incorporates fine sawdust from your sanding process. This helps it match the wood color more closely.
- Smooth and Dry: Smooth the filler flush with the surrounding wood. Allow it to dry completely according to the manufacturer’s instructions.
- Gentle Re-sanding (if needed): Once dry, you may need to slightly sand over the filled areas with a very fine grit sandpaper (e.g., 180 or 220) to ensure they are perfectly flush with the floor. Clean up this dust thoroughly.
Step 4: Staining (Optional)
If you’re happy with the natural color of your wood, you can skip this step. If you want to change or deepen the color, this is the time.
- Test Your Stain: Apply your chosen stain to an inconspicuous area or a scrap piece of wood from your floor (if you have any). This ensures you like the color and how it looks on your wood species.
- Apply the Stain: Work in small sections. Using a good quality brush or applicator pad, apply the stain evenly, working with the grain of the wood.
- Wipe Off Excess: Allow the stain to penetrate for the time recommended on the can (usually 5-15 minutes). Then, using clean, lint-free cloths, wipe off the excess stain. Wipe with the grain. Don’t let the stain dry on the surface. For a darker color, you can apply a second coat after the first has dried but before applying the topcoat.
- Dry Time: Allow the stain to dry completely, which can take 24 hours or more. Proper drying is essential before applying the topcoat.
Step 5: Applying the Protective Finish (Polyurethane)
This is the final, crucial step to protect your beautiful new floor finish. You can choose between water-based or oil-based polyurethane.
-
- Choose Your Finish:
- Water-Based Polyurethane: Dries faster, has less odor, and is generally more durable over the long term for high-traffic areas. It can sometimes make wood look slightly lighter.
- Oil-Based Polyurethane: Tends to be more amber-colored, which can warm up the wood tone. It’s more forgiving to apply but takes longer to dry and has stronger fumes.
- Application:
- First Coat: Using a high-quality foam roller or lambswool applicator, apply a thin, even coat of polyurethane, working with the grain. Avoid over-applying, as this can lead to drips and uneven drying. For edges, use a good quality synthetic brush.
- Maintain a Wet Edge: Always work towards an area you haven’t finished yet to create a “wet edge.” This helps prevent lap marks.
- Drying Time: Allow the first coat to dry completely. Water-based usually dries in 2-4 hours, while oil-based can take 6-12 hours or longer.
- Light Sanding Between Coats: Once dry, very lightly sand the surface with a fine-grit sandpaper (150-220 grit) or a fine sanding screen. This creates a better surface for the next coat to adhere to. Vacuum thoroughly and use a tack cloth to remove all dust.
- Subsequent Coats: Apply a minimum of 2-3 coats, and up to 4 coats for areas with very heavy traffic. Repeat the light sanding and cleaning process between each coat.
- Final Curing: The floor will be dry to the touch within hours, but it takes about 7-30 days for polyurethane to fully cure and reach its maximum hardness. During this time, be extra gentle. Avoid dragging furniture, and use felt pads under any furniture legs.
- Choose Your Finish:
Important Note: Always follow the manufacturer’s instructions for the specific products you use, especially regarding drying times and application methods. For more detailed information on wood finishes, consider resources like the Woodworking Handbook’s Finishing Section.
Key Differences: Water-Based vs. Oil-Based Polyurethane
To help you choose the best finish for your project, here’s a quick comparison:
| Feature | Water-Based Polyurethane | Oil-Based Polyurethane |
|---|---|---|
| Drying Time | Fast (2-4 hours between coats) | Slow (6-12+ hours between coats) |
| Odor & VOCs | Low odor, lower VOCs | Strong odor, higher VOCs |
| Color | Clear to slightly milky (can make wood look lighter) | Amber/yellowish tint (warms up wood tone) |
| Durability (Hardness) | Highly durable, excellent scratch resistance | Very durable, slightly softer than water-based over time |
| Application | More prone to lap marks if not applied carefully | More forgiving, flows out better |
| Cleanup | Water | Mineral spirits or paint thinner |
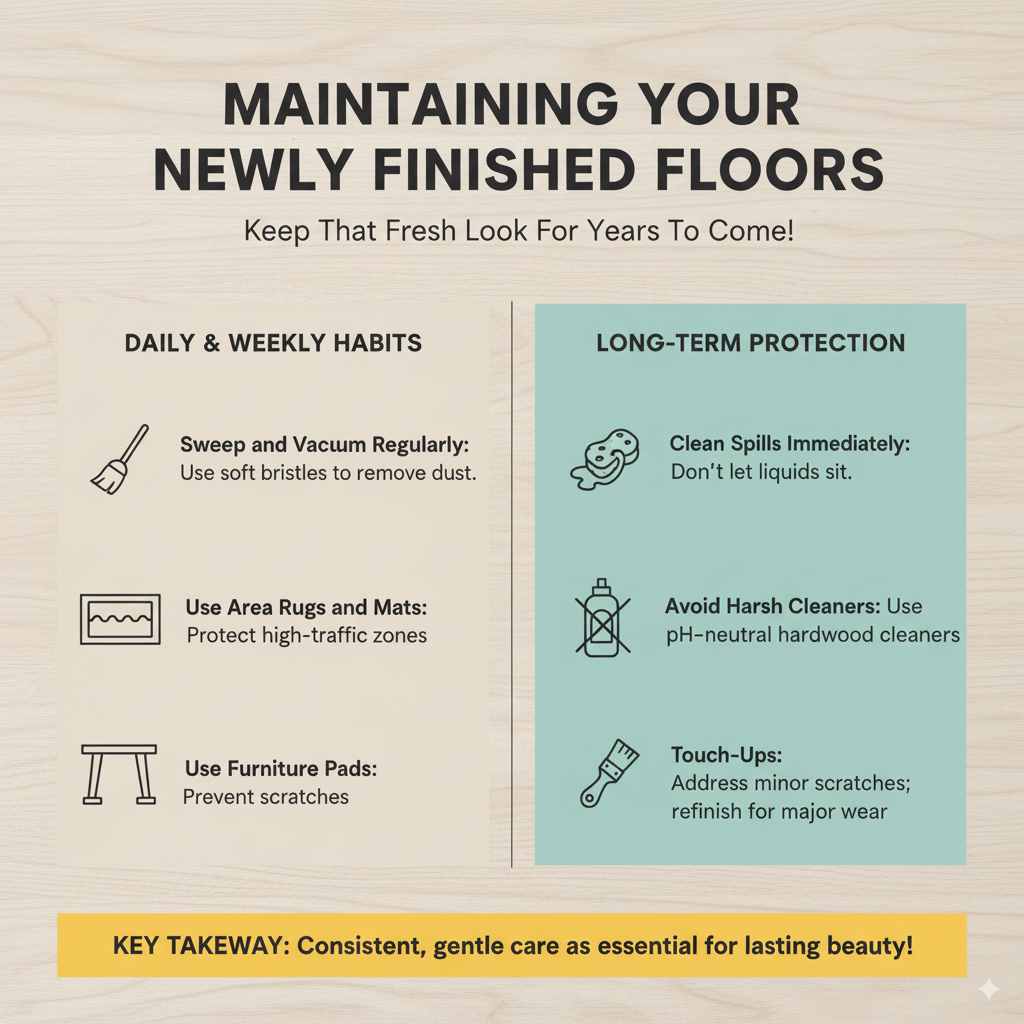
Maintaining Your Newly Finished Floors
Once your floors are fully cured, proper maintenance will keep them looking beautiful for years to come.
-
- Sweep and Vacuum Regularly: Use a soft-bristle broom or a vacuum cleaner with a floor-safe setting to remove dust and debris that can scratch the finish.
- Use Area Rugs and Mats: Place mats at entryways to trap dirt and grit before it reaches your hardwood. Use area rugs in high-traffic zones.
- Use Furniture Pads: Always place felt or rubber protector pads under the legs of furniture.
- Clean Spills Immediately: Wipe up any spills with a soft, damp cloth as soon as they happen.
- Avoid Harsh Cleaners: Never use ammonia-based cleaners, abrasive pads, or excessive water. Stick to pH-neutral floor cleaners specifically designed for hardwood.
- Touch-Ups: Minor scratches in the finish can sometimes be addressed with touch-up products, but for significant wear, another full refinish may be needed down the line.
Frequently Asked Questions (FAQ)
Q1: How long does it take to refinish hardwood floors?
The actual sanding and finishing process for one average-sized room (around 200 sq ft) typically takes 2-4 days. This includes prep, drying times between coats, and cleanup. Factor in additional time if you’re doing multiple rooms or need to replace damaged boards.
Q2: Is it cheaper to refinish floors yourself or hire a pro?
DIY refinishing is significantly cheaper than hiring professionals. You save on labor costs, which are often more than half the total price. Your main expenses will be for consumables (sandpaper, stain, finish) and about $100-$300 for equipment rental, depending on your location and rental duration.
Q3: Do I need to remove my baseboards?
You don’t necessarily need to remove them, but you must protect them. Use good quality painter’s tape to mask off the baseboards before you start sanding. You’ll also want to use an edge sander or hand sand the areas right against the baseboards.
Q4: How much dust does floor sanding create?
A lot! Even with modern machines that have dust collection, some dust is inevitable. This is why thorough prep to seal off rooms and wearing an N95 or better dust mask is vital. Renting a drum sander with a good dust bag attachment is highly recommended.