Double Picture Frame Deck Layout: Cost, Tools & Steps
A double picture frame deck layout adds two rows of mitered border boards around your deck’s edge, hiding rough board ends and adding structural definition — on composite or wood decking alike. Skip the 16-inch blocking spacing under those border boards and they will sag or crack within a season. This guide covers the framing steps, tool and material costs ($400–$800 extra), and the mitered-corner technique that trips up most first-time builders.
What Is a Double Picture Frame Deck Layout?
Best Hidden Deck Fastener Pick
FREEKIT 500-Pack Hidden Deck Fasteners – $57.99
Covers about 300 sq ft at the 16-inch blocking spacing this guide’s Add Blocking step uses, and the 30 included starter clips help square up your first and last border boards.
- Best for: A standard double picture frame border on a 12×12 to 16×16 deck
- Why we picked it: Pre-installed 316 stainless screws and starter clips built for the exact 16-inch joist spacing this guide recommends
- Main drawback: Coverage drops if you go with tighter 12-inch blocking
Compare more hidden deck fastener options
 Option 1 430-Pack Hidden Deck Fasteners – $36.99
|
 Option 2 ZONEGRACE 1000-Pack Fastener Kit – $139.99
|
 Option 3 ManCoda 900-Pack Hidden Fasteners – $233.60
|
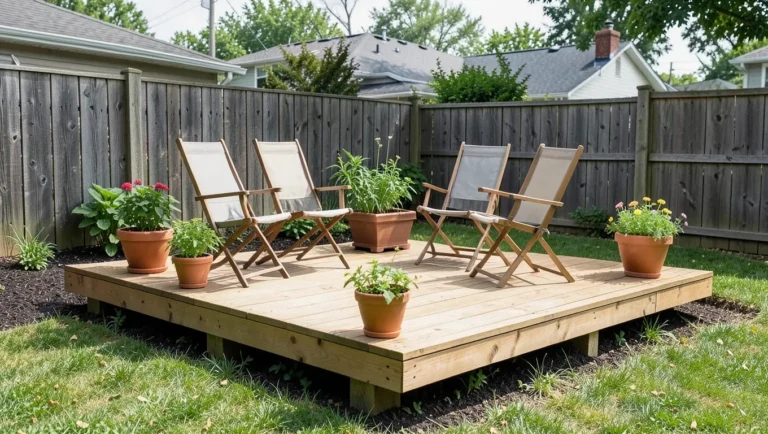
A double picture frame deck layout is when you add two rows of boards around your deck’s edge, like a picture frame. These boards, called border boards, hide the ends of the main deck boards and give a clean, fancy look. I love it because it makes any deck pop! It’s perfect for composite decking, as it covers the rough ends, but it works with wood, too. This design also adds strength and safety by defining the deck’s edges.
Why Choose a Double Picture Frame?
Why go for two border rows instead of one? A single frame can get hidden under railings, but a double frame stands out. It’s bold, adds visual depth, and protects your deck from wear. Plus, it’s a fun way to mix colors, like using dark border boards with lighter main boards.
Benefits and Drawbacks of a Double Picture Frame Deck
This layout isn’t just about looks—it’s practical, too. Here’s why it’s awesome, plus a few things to watch out for.
Benefits
- Looks Amazing: The double border makes your deck look professional and sleek.
- Hides Board Ends: Covers rough or grooved ends of composite decking.
- Adds Safety: Clear edges reduce trips and falls.
- Customizable: Use different colors or angles for a unique vibe.
Drawbacks
- More Materials: You’ll need extra boards and blocking, which adds cost.
- Tricky Miters: Cutting perfect 45-degree angles takes practice.
- Extra Time: Framing and cutting take longer than a basic deck.
Tools and Materials You’ll Need
Building a double picture frame deck is no sweat with the right stuff. Here’s what I use, with beginner-friendly picks.
| Tool/Material | Recommendation | Why It’s Great |
|---|---|---|
| Miter Saw | DeWalt 12” Miter Saw | Cuts clean 45-degree angles for miters. |
| Circular Saw | Makita 7-1/4” Circular Saw | Great for cutting boards to length. |
| Deck Screws | Trex Hideaway Clips | Hidden fasteners for a clean look. |
| Composite Boards | Trex or TimberTech | Durable, low-maintenance decking. |
| 2×8 Lumber | Pressure-Treated Pine | Strong for joists and blocking. |
Caption: My go-to tools and materials for a double picture frame deck. Prices vary, but expect $500-$1,000 for a small deck.
Visual Idea
A simple diagram showing joist placement for a double picture frame would help. Picture two parallel joists at the deck’s edge, with blocking every 16 inches. Another diagram could show mitered corner cuts for the border boards.
Step-by-Step Guide to Building a Double Picture Frame Deck
Ready to build? Follow these steps for a 12×12-foot deck. I learned this the hard way, so trust me—it works!
- Plan Your Layout
Measure your deck area and mark corners with stakes — our deck calculator can turn those measurements into a materials estimate before you buy lumber. Use the 6-8-10 method to ensure it’s square: measure 6 feet along one side, 8 feet along the other, and the diagonal should be 10 feet. Adjust until it’s perfect. - Set Up Posts and Beams
Dig holes for concrete footings and set 4×4 posts. Attach 2×8 beams using post anchors. Keep a slight slope (1/8 inch per foot) for water runoff. - Frame the Deck
Install 2×8 joists every 12 inches for composite decking (16 inches for wood). Add a second joist along the perimeter for the double frame. Fasten with joist hangers. - Add Blocking
Place 2×8 blocking every 16 inches between the outer joists to support the border boards. For corners, add solid 2×8 blocks, leaving 15 inches of clear space inside the corner. - Cut Border Boards
Use a miter saw to cut border boards at 45-degree angles for clean corners. Dry-fit them first to check the fit. My first try was a wonky mess—measure twice! - Install Border Boards
Fasten the outer border boards first using deck screws or hidden clips. Work from one corner to keep everything tight. - Lay Infill Boards
Install the main deck boards inside the frame, cutting them to fit. Use a chalk line to keep rows straight. For a cool look, try a 45-degree angle for infill boards. - Finish Up
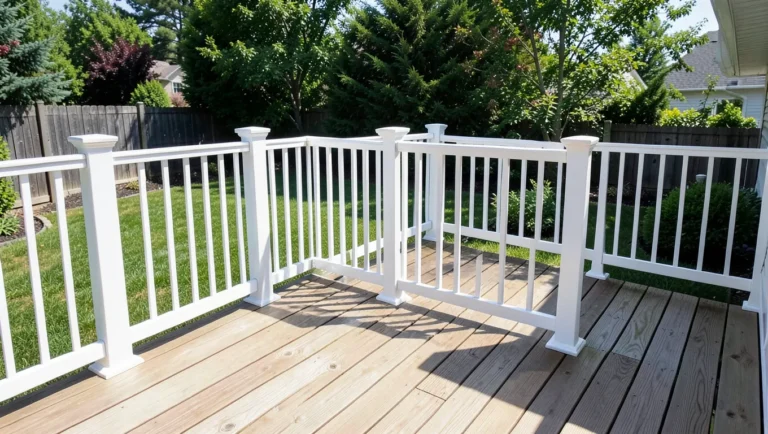
Add railings if needed, securing posts to blocking. Sand any rough edges and clean the deck.
Tip: Snap a chalk line every few rows to keep infill boards straight. It saved my deck from looking like a zigzag puzzle!
Visual Idea
A step-by-step diagram of the framing process would be awesome. Show the joist layout, blocking placement, and how border boards fit over the frame.
Comparing Single vs. Double Picture Frame Decks
Not sure if a double frame is right for you? Here’s a quick comparison.
| Feature | Single Picture Frame | Double Picture Frame |
|---|---|---|
| Look | Clean but subtle | Bold and professional |
| Cost | $200-$500 extra | $400-$800 extra |
| Time | 1-2 extra days | 2-3 extra days |
| Skill Level | Beginner-friendly | Needs precise cuts |
Caption: Single vs. double picture frame decks—choose based on your budget and style!
Tips from My Experience
After building dozens of decks, here are my top tips for a double picture frame deck layout:
- Dry-Fit First: Lay out border boards before fastening to avoid gaps.
- Use Quality Blades: A fine-tooth blade (80-100 teeth) makes clean miter cuts.
- Tape Joists: Add deck tape to joists for water protection. It’s a game-changer!
- Plan for Railings: Add extra blocking where posts will go. It’s easier now than later.
Common Mistakes to Avoid
- Skipping Blocking: Without it, your border boards will sag.
- Bad Miter Cuts: Practice on scrap wood to get those 45-degree angles right.
- Ignoring Slope: A flat deck traps water, causing rot.
Safety First
Decks are fun but can be dangerous to build. Wear safety glasses and gloves when cutting. Check local codes for footing depth and railing height. My buddy once skipped a permit, and it cost him big time—don’t make that mistake!
Visual Idea
A safety checklist graphic would be handy. List gear like gloves, glasses, and a dust mask, plus a reminder to check building codes.
Cost-Saving Ideas
Decks can get pricey — see our average cost of a wood deck breakdown for the full picture — but here’s how to save:
- Use pressure-treated wood instead of composite for a budget-friendly option.
- Buy tools secondhand from local hardware stores.
- Plan your cuts to minimize waste—measure twice, cut once!
Alternatives to a Double Picture Frame
Not sold on the double frame? Try these:
- Single Picture Frame: Simpler and cheaper but less bold.
- Curved Border: Use flexible composite boards for a unique look.
- Diagonal Infill: Lay main boards at a 45-degree angle for flair without a frame.
Frequently Asked Questions
What Is a Double Picture Frame Deck Layout?
A double picture frame deck layout uses two rows of border boards around the deck’s edge, hiding the ends of the main boards. It looks polished and protects the deck while adding a bold, professional style.
How Much Does a Double Picture Frame Deck Cost?
It adds $400-$800 to a basic deck, depending on size and materials. Composite boards cost more, but pressure-treated wood can save you money while still looking great.
Can Beginners Build a Double Picture Frame Deck?
Yes, with patience! The trickiest part is cutting precise 45-degree miters. Practice on scrap wood, follow my steps, and you’ll nail it, even if it’s your first deck.
What Tools Do I Need for This Layout?
You’ll need a miter saw, circular saw, drill, deck screws, and a tape measure. A chalk line helps keep boards straight. Rent tools to save cash if you’re starting out.
How Long Does It Take to Build?
A 12×12-foot deck takes 2-3 extra days compared to a basic deck. Framing and miter cuts add time, but the polished look is worth it!
Can I Use Any Decking Material?
Yes, composite or wood works. Composite like Trex hides ends better, but pressure-treated wood is cheaper. Choose square-edge boards for the border.
Do I Need a Permit for This Deck?
Check local codes. Most areas require permits for elevated decks. Ground-level decks may not need one, but always confirm to avoid fines.
Conclusion
A double picture frame deck layout is a fun, stylish way to upgrade your backyard. It hides board ends, looks pro, and adds safety. With simple tools, clear steps, and a bit of patience, you can build one yourself. My first deck was a flop, but this design turned me into a deck-building fan! Try it out, mix colors, or add your own spin. Share your deck pics or tips with friends—it’s a blast to show off! Ready to start? Grab your saw and make your backyard shine!
Sponsored / affiliate links. As an Amazon Associate I earn from qualifying purchases. I may earn additional commission from eligible campaigns.