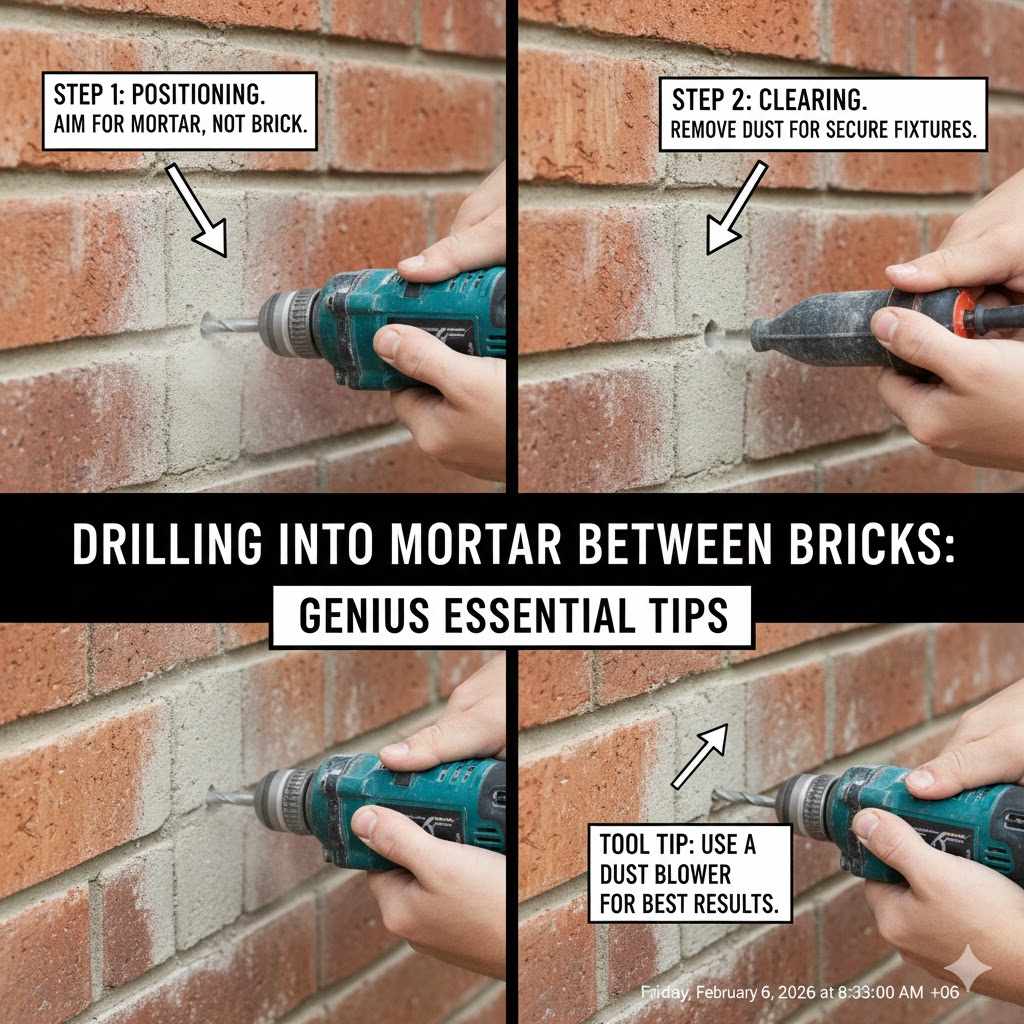
Drilling Into Mortar Between Bricks: Genius Essential Tips
Drilling into mortar between bricks is easier and safer than drilling into the brick itself. Use a masonry drill bit with a standard drill on a low-speed setting. Mark your spot, drill a pilot hole, and then widen it to the required size. This prevents cracking the brick and makes the hole easy to repair if needed.
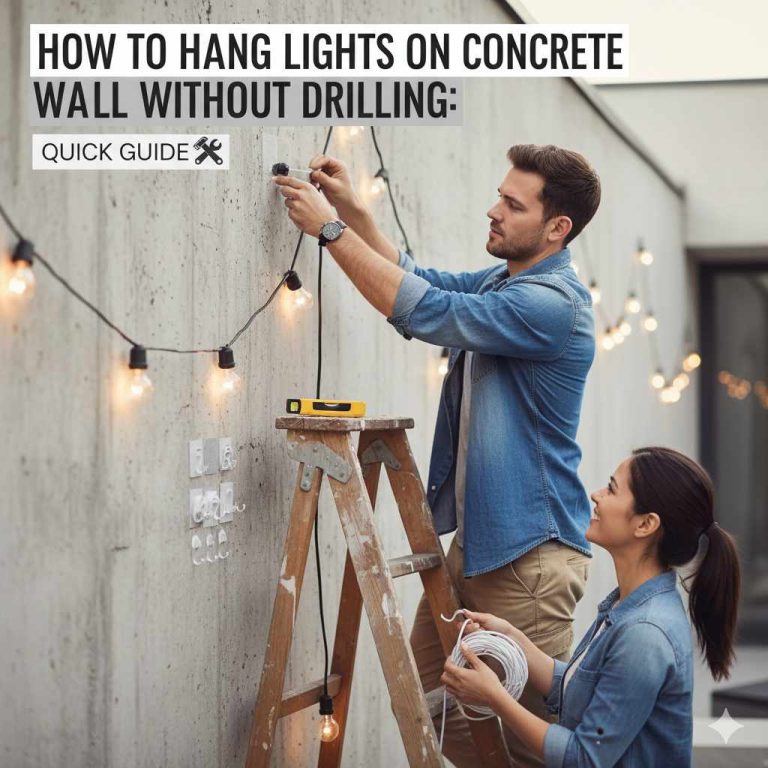
Hello there, fellow creator! Md Meraj here, your guide in the world of DIY. Have you ever stood in front of a brick wall, drill in hand, feeling a bit nervous? You need to hang a shelf, a picture, or maybe some string lights, but the thought of drilling into that solid brick is intimidating. I get it. Many folks think you have to tackle the brick itself, but there’s a much simpler way.
Drilling into the mortar—the sandy cement mix between the bricks—is often the perfect solution. It’s softer, more forgiving, and much easier to work with. In this guide, I’ll walk you through every step, from picking the right tools to drilling the perfect hole. We’ll make this task feel less like a challenge and more like a simple weekend win. Let’s get started and turn that brick wall into the perfect backdrop for your project.
Why Drill into Mortar and Not the Brick? The Smart Choice
You might think a hard brick offers a stronger hold, but that’s not always true or necessary. For most everyday projects like hanging decor, hose reels, or trellises, the mortar is more than strong enough. Plus, it offers some big advantages that save you time, effort, and potential headaches.
Choosing mortar is a strategic move. It preserves the integrity of your wall and makes the whole process faster and more forgiving. Bricks can be brittle, and a misplaced hole can lead to a permanent crack. Mortar, on the other hand, is designed to be the “sacrificial” part of the wall. If you make a mistake or decide to move the item later, patching a hole in mortar is incredibly simple. You just mix a little new mortar and fill it in. Patching a cracked brick? That’s a whole different level of repair work.
Let’s break down the key differences to see why mortar is your best friend for most light to medium-duty hanging jobs.
| Feature | Drilling into Mortar | Drilling into Brick |
|---|---|---|
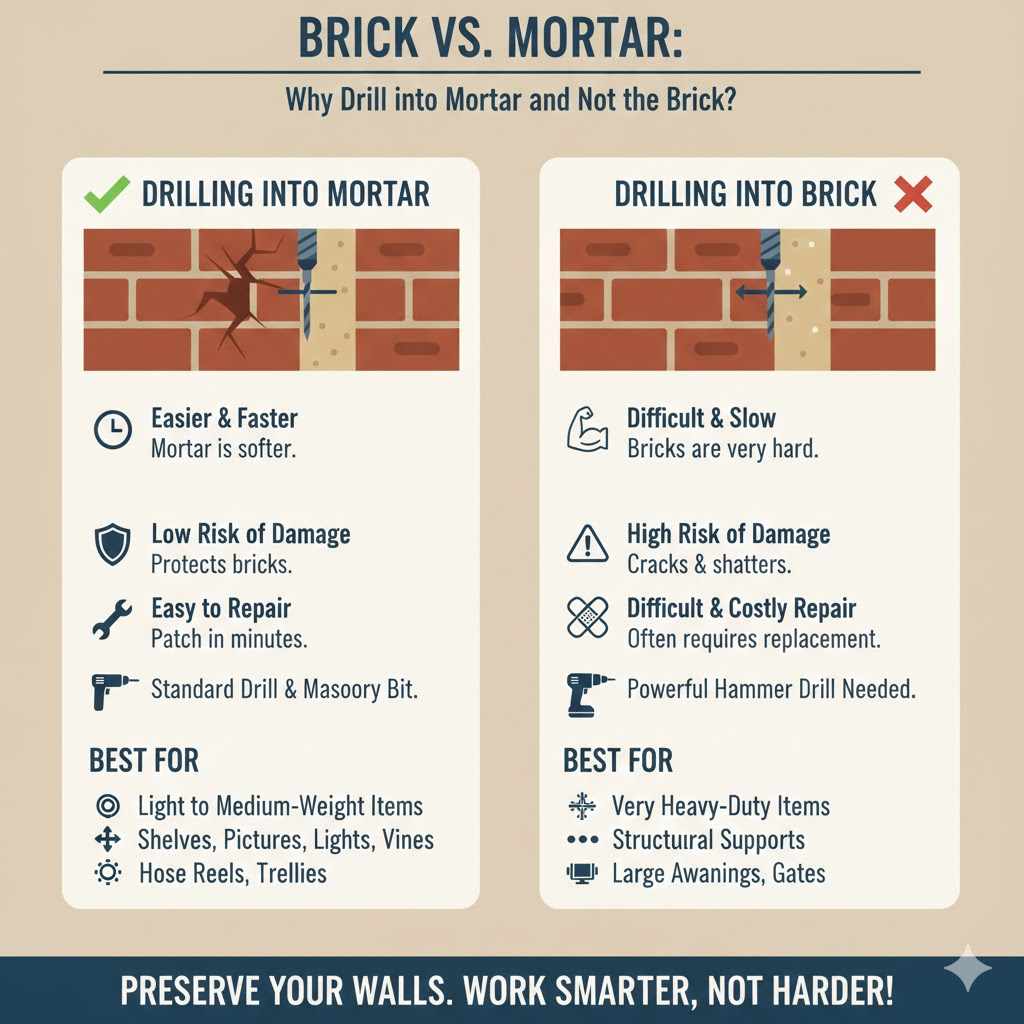
| Difficulty | Easier and faster. Mortar is much softer than brick. | Difficult and slow. Bricks are very hard and require more force. |
| Risk of Damage | Low. The risk of cracking the surrounding bricks is minimal. | High. Bricks, especially older ones, can easily crack or shatter. |
| Repairability | Very easy. A small hole can be patched with new mortar in minutes. | Difficult and costly. A cracked brick may need to be completely replaced. |
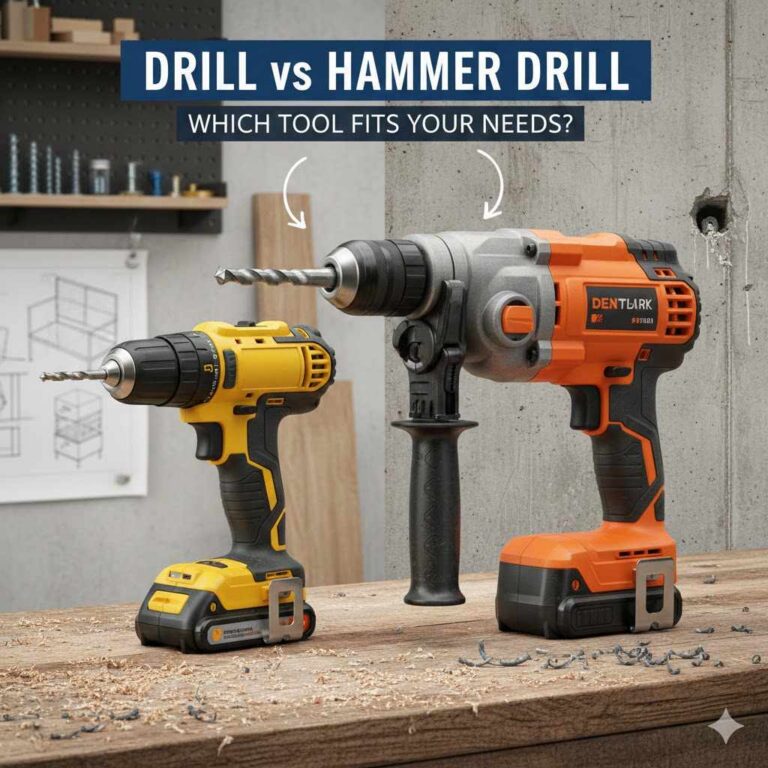
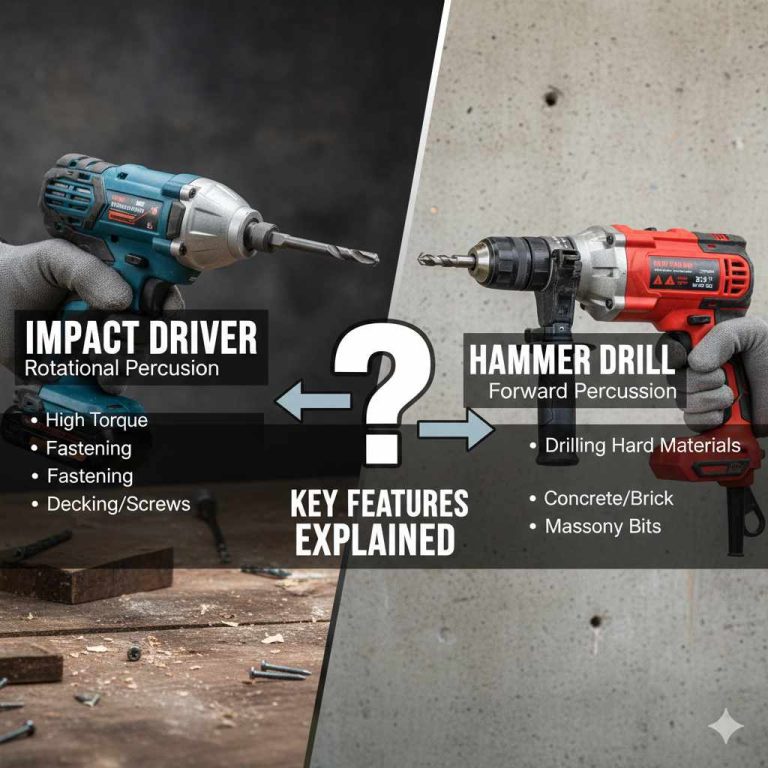
| Required Tools | A standard drill with a masonry bit is usually enough. | Often requires a powerful hammer drill to be effective. |
| Best For | Light to medium-weight items: shelves, pictures, lights, vines. | Very heavy-duty items: structural supports, large awnings, gates. |
For the vast majority of home projects, the strength of the mortar is more than sufficient. Unless you are mounting something extremely heavy that requires the structural strength of the brick itself, sticking to the mortar joints is the wisest path.
Your Essential Toolkit: Gathering Your Supplies
Having the right tools ready before you start makes any job smoother and safer. You don’t need a workshop full of expensive equipment for this task. Here is a simple checklist of everything you’ll need to drill into mortar like a pro.
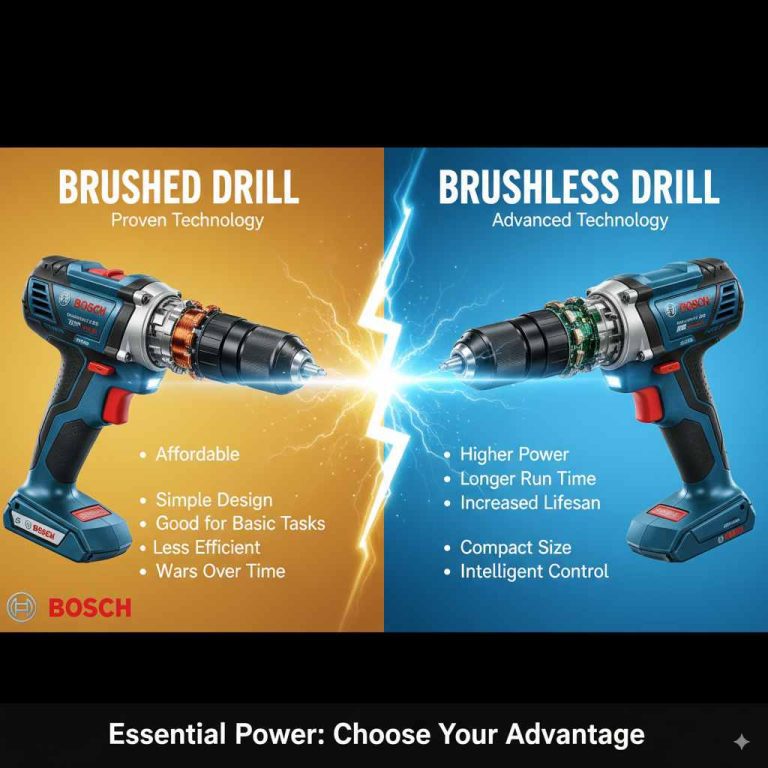
- Cordless Drill or Combi Drill: A standard drill will work just fine for mortar. If you have a combi drill with a hammer function, you can use it, but make sure it’s on the regular drill setting to start.
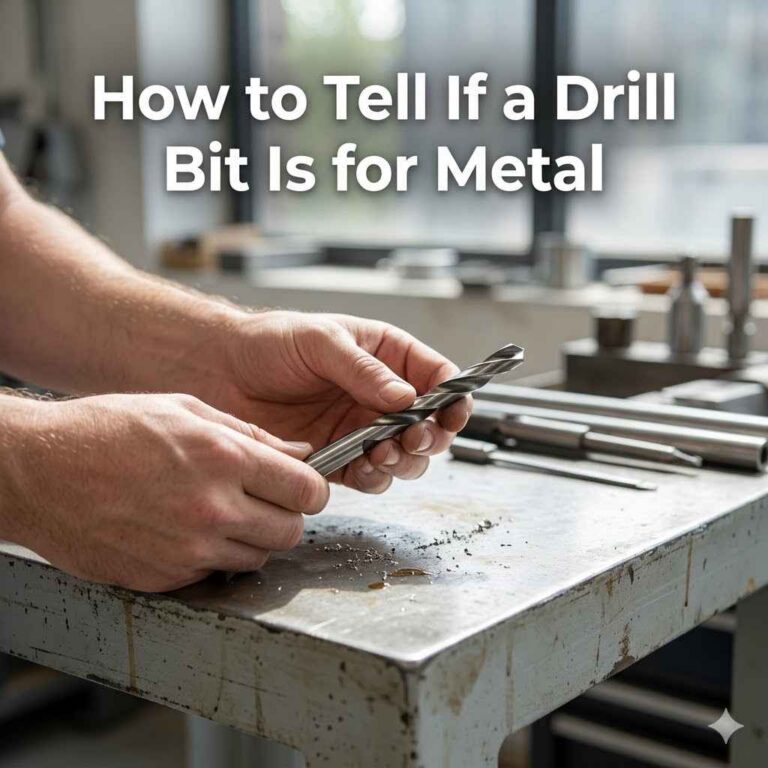
- Masonry Drill Bits: This is the most important part! Do not use wood or metal bits. Masonry bits have a special tungsten carbide tip designed to grind through cement and sand. Get a set with a few different sizes.
- Wall Plugs/Anchors: These plastic sleeves go into the hole and expand when you drive a screw into them, creating a secure grip. Make sure they match the size of your drill bit and screw.
- Screws: Choose screws that are the right length and diameter for your wall plugs and the item you’re hanging.
- Tape Measure: For accurate placement. You know the old saying: measure twice, drill once!
- Pencil or Marker: To mark your drilling spot clearly on the mortar.
- Spirit Level: To ensure whatever you’re hanging is perfectly straight.
- Safety Goggles: Non-negotiable! Drilling creates dust and small particles that can fly into your eyes.
- Dust Mask: Mortar dust contains silica, which is harmful to inhale. Always protect your lungs.
- Shop Vacuum or Dustpan & Brush: To clean up the dust afterward. A vacuum with a hose is great for sucking dust directly from the hole as you drill.
- A Hammer: To gently tap the wall plug into the drilled hole.
Gathering these items beforehand means you won’t have to stop midway through the project. It sets you up for a clean, efficient, and safe drilling experience.
Step-by-Step Guide: How to Drill into Mortar Perfectly
Ready to make that perfect hole? Just follow these simple steps. I’ll guide you through each one to ensure you get a great result without any stress.
Step 1: Mark Your Spot with Precision
First things first, decide exactly where you want to hang your item. Use your tape measure and spirit level to get the position just right. Place the item (or its mounting bracket) against the wall and use your pencil to mark the screw holes. Aim for the center of the mortar joint, both horizontally and vertically. Avoid getting too close to the edge of a brick, as this could cause the brick to chip.
Step 2: Choose the Right Drill Bit
Your drill bit size must match your wall plug. Look at the wall plug packaging—it will usually tell you what size drill bit to use (e.g., “Use 6mm drill bit”). Select a masonry drill bit of that exact size. If the bit is too small, the plug won’t fit. If it’s too big, the plug will be loose and won’t grip securely.
Step 3: Set Up Your Drill for Success
Insert the masonry bit into your drill and tighten the chuck securely. Set your drill to a low speed. High speeds can cause the bit to overheat or “walk” away from your mark. If you’re using a combi drill, make sure it’s set to the standard drilling mode (the icon looks like a drill bit), not the hammer mode (the icon looks like a hammer). Hammer mode can be too aggressive for mortar and might cause it to crumble.
Step 4: Drill a Pilot Hole (The Pro Secret)
Here’s a tip that makes a huge difference: start with a small pilot hole. If your final hole needs to be 8mm, start by drilling a 4mm hole first. This helps guide the larger bit and prevents it from wandering off your mark. Place the tip of the bit on your pencil mark. Apply gentle, steady pressure and start drilling slowly. Let the drill do the work—you don’t need to force it.
Step 5: Widen the Hole to Final Size
Once your pilot hole is drilled, switch to the correct-sized masonry bit. Place it in the pilot hole and drill again, maintaining gentle, steady pressure. Drill to the depth of your wall plug. A good trick is to measure the wall plug against the drill bit and wrap a piece of masking tape around the bit to mark the depth. Drill until the tape reaches the wall, and you’ll know you’ve gone deep enough.
Step 6: Clean and Plug the Hole
Pull the drill straight out. The hole will be filled with dust. Use your vacuum cleaner hose to suck out all the dust and debris. A clean hole ensures the wall plug gets the best possible grip. Now, take your plastic wall plug and push it into the hole. It should be a snug fit. If it’s a little tight, you can gently tap it in with a hammer until it’s flush with the wall surface.
And that’s it! You’ve successfully drilled a clean, secure hole in your mortar. Now you’re ready to screw in your fixture and admire your handiwork.
Choosing the Right Drill and Drill Bits
The success of your project heavily depends on using the right tool for the job. While you don’t need the most expensive gear, understanding the basics of drills and bits will make a world of difference.
Your Drill: Standard vs. Hammer
For drilling into mortar, a standard cordless drill is often all you need. Mortar is relatively soft, and a good drill on a low-speed setting can handle it with ease. A combi drill, which has both standard and hammer settings, is also a great option. However, it’s crucial to use it on the standard drilling setting first. The hammer action, which provides rapid, percussive blows, can be too powerful for soft mortar and cause it to break apart. If you hit a particularly hard patch of mortar, you might switch to hammer mode briefly, but always start without it.
The All-Important Drill Bit
You cannot drill into mortar with a standard wood or metal drill bit. It will quickly become dull and ineffective. You need a bit specifically designed for masonry. Here’s a look at the most common types.
| Drill Bit Type | Best Use Case | Beginner-Friendliness | Notes |
|---|---|---|---|
| Tungsten Carbide-Tipped Masonry Bit | General-purpose drilling in mortar, soft brick, and concrete block. | Excellent. This is the standard, affordable choice for DIYers. | Look for a bit with a sharp, arrow-shaped tip. Perfect for most home projects. |
| Multi-Material Drill Bit | Drilling through a variety of materials including mortar, wood, plastic, and soft metal. | Very Good. Great if you want one versatile bit for many tasks. | Not as specialized as a dedicated masonry bit but very convenient. |
| Diamond-Tipped Bit | Drilling into very hard materials like porcelain tile, granite, or hard brick. | Advanced. Usually requires water for cooling. | Overkill for mortar and much more expensive. Stick with standard masonry bits. |
For anyone starting out, a quality set of tungsten carbide-tipped masonry bits is the best investment. You can find them at any hardware store. For more detailed guidance on bit selection, resources like this guide from This Old House offer a fantastic overview for homeowners.
Safety First: My Non-Negotiable Rules
In our workshop, safety always comes first, and the same applies to any project around your home. Drilling into mortar might seem simple, but taking a few precautions is essential to keep you safe and your project running smoothly.
- Always Wear Safety Goggles: This is my number one rule. Mortar dust, grit, and tiny chips can fly out of the hole unexpectedly. Protecting your eyes is absolutely critical.
- Use a Dust Mask: Mortar dust contains crystalline silica, which can cause serious lung damage if inhaled over time. A simple dust mask will help protect your respiratory system.
- Check for Hidden Wires and Pipes: Before you drill into any wall, it’s crucial to know what’s behind it. Use a stud finder that can also detect electrical wires and pipes. Drilling into a live wire or a water pipe is a dangerous and costly mistake.
- Secure Your Footing: If you’re drilling up high, use a sturdy ladder or step stool. Make sure it’s placed on a flat, stable surface. Never overreach—it’s always better to get down and move the ladder.
- Keep Your Hands Clear: Keep your free hand away from the drilling area. Hold the drill firmly with both hands for better control.
- Let the Drill Bit Cool Down: If you’re drilling multiple holes, the drill bit can get very hot. Let it cool down between holes to prevent it from getting damaged or burning you.
Following these simple safety steps takes only a few extra minutes but can prevent serious injuries. The Occupational Safety and Health Administration (OSHA) provides excellent guidelines on power tool safety that are great for professionals and DIYers alike.
Common Mistakes to Avoid (and How to Fix Them)
Even with the best instructions, we all make mistakes. The key is knowing what to look out for and how to correct it. Here are some common slip-ups when drilling into mortar.
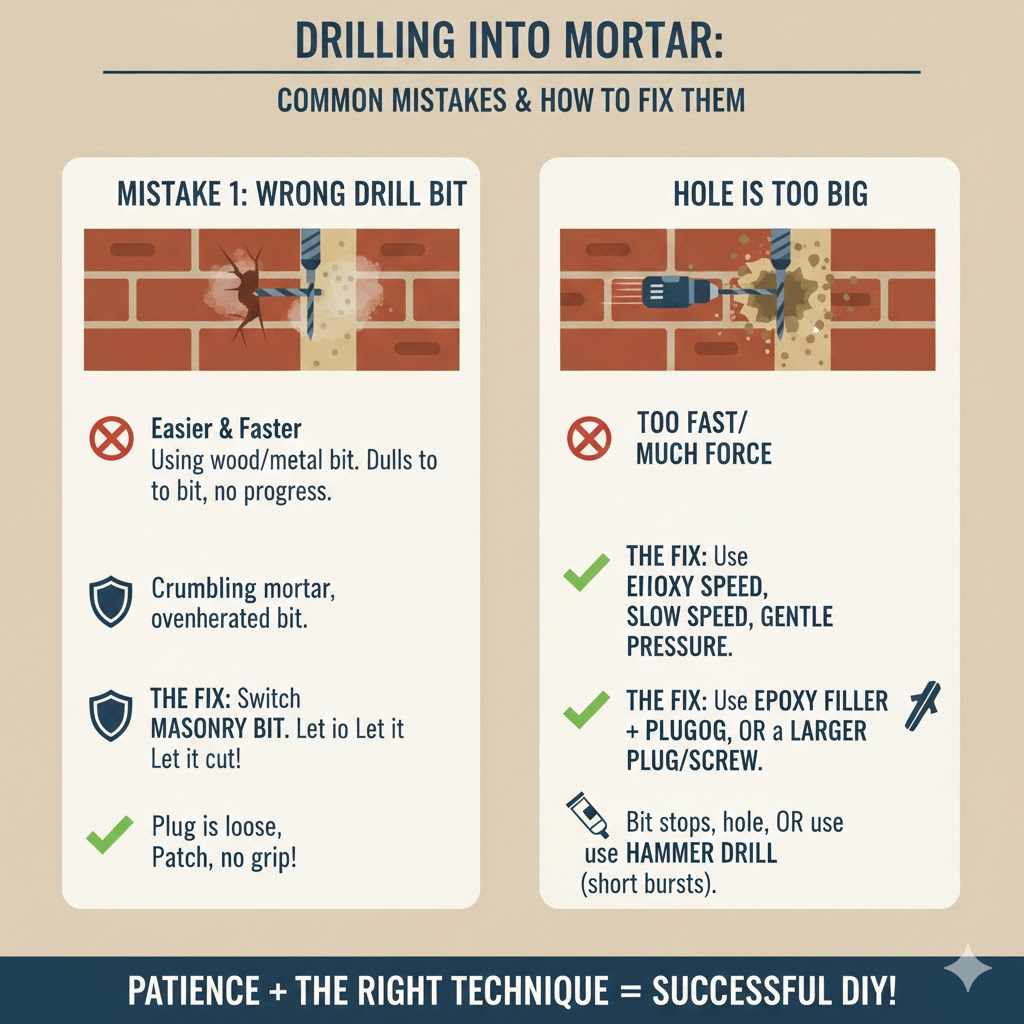
Mistake 1: Using the Wrong Drill Bit
Trying to use a wood or metal bit on mortar will get you nowhere fast. You’ll just dull the bit and make a mess of the mortar surface.
The Fix: Stop immediately and switch to a proper masonry drill bit. You’ll be amazed at the difference.
Mistake 2: Drilling Too Fast or With Too Much Force
Pushing too hard or setting the drill speed too high can cause the bit to overheat and can make the mortar crumble.
The Fix: Slow down. Use a low drill speed and apply gentle, steady pressure. Let the sharpness of the bit do the cutting.
Mistake 3: The Hole is Too Big
Sometimes the mortar is softer than expected, and the hole ends up wider than the wall plug.
The Fix: Don’t panic! You can fill the hole with a two-part epoxy filler or a quality construction adhesive, then insert the wall plug before it sets. Alternatively, you can step up to a larger wall plug and screw size.
Mistake 4: Hitting Something Hard
Occasionally, you might hit a very hard piece of aggregate (stone) in the mortar mix or even the edge of a brick.
The Fix: Stop drilling. If you can, try to move your hole slightly up or down. If that’s not possible, you may need to switch your drill to the hammer setting for a few short bursts to break through the obstruction. Use this as a last resort.Remember, every DIY project is a learning experience. Don’t get discouraged by a small setback. A little patience is all you need to get it right.
Frequently Asked Questions (FAQ)
1. Can I use a regular drill for drilling into mortar?
Absolutely! For most mortar, a standard cordless or corded drill is perfectly fine. Just make sure you are using a sharp masonry drill bit and a low-speed setting. You don’t usually need a powerful hammer drill unless the mortar is unusually hard.
2. What’s the difference between mortar and concrete?
Mortar is the bonding agent used to hold bricks or blocks together, typically made of sand, cement, and lime. It’s relatively soft. Concrete is much stronger and is used for structural foundations and slabs. It contains larger aggregates like gravel, making it much harder to drill through.
3. How much weight can mortar hold?
The holding strength depends on the quality of the mortar and the type of anchor used. Generally, a single, properly installed anchor in solid mortar can hold 20-50 pounds. For heavier items, use multiple anchor points to distribute the weight across several mortar joints.
4. What if the mortar crumbles when I drill?
If the mortar is old and crumbly, it might not provide a secure hold. In this case, you can inject a construction adhesive or epoxy filler into the hole before inserting your wall plug. This will create a solid base for your screw. Let it cure fully before hanging anything.
5. Can I drill into the brick instead?
You can, but it should be avoided unless necessary for very heavy loads. Bricks can crack easily, especially with a hammer drill. Drilling into mortar is the safer and more forgiving option for most home projects.
6. How do I know what size drill bit and wall plug to use?
The packaging for your wall plugs (anchors) will specify the correct drill bit size. The screw size should also be compatible with the wall plug. A good rule of thumb is the drill bit and the wall plug should have the same diameter.
7. Is it okay to drill into colored or repaired mortar joints?
Yes, it’s generally fine. Just be aware that if you ever need to patch the hole, matching the exact color of the mortar can be tricky. You can buy mortar repair kits in various shades to get a close match.
Wrapping It All Up
There you have it! Drilling into the mortar between your bricks is a simple, effective skill that opens up a world of possibilities for decorating and organizing your space. It’s all about choosing the right approach—working smarter, not harder. By aiming for the mortar, you save your bricks from potential damage and make the entire job quicker, easier, and much more forgiving.
Remember the key takeaways: use a sharp masonry bit, start with a slow drill speed, and always wear your safety gear. With these tips in your back pocket, you can confidently hang those shelves, mount that trellis, or string up those beautiful lights you’ve been dreaming about. Don’t let a brick wall intimidate you ever again. You’ve got the knowledge and the skill to do it right. Happy building!