Flood Solid Wood Stain for Cedar Guide Made Simple
Using Flood solid wood stain on cedar can sometimes feel tricky, especially if you’re new to staining wood. People often wonder about the best way to get a beautiful, lasting finish that really makes their cedar look amazing. This guide is here to help.
We’ll walk through everything step-by-step so you can feel confident. Get ready to learn how to achieve a great look for your cedar projects.
Choosing Flood Solid Wood Stain for Cedar
Selecting the right stain is the first important step for any project. Flood solid wood stain is a popular choice for cedar because it offers excellent protection and color. It’s designed to cover the wood grain completely, providing a uniform and opaque finish.
This is especially beneficial for cedar, which can sometimes have knots or color variations that you might want to hide or uniformly cover. This section will guide you through understanding what makes Flood solid stain a good fit for cedar and how to pick the perfect shade for your needs.
Understanding Solid Wood Stain Properties
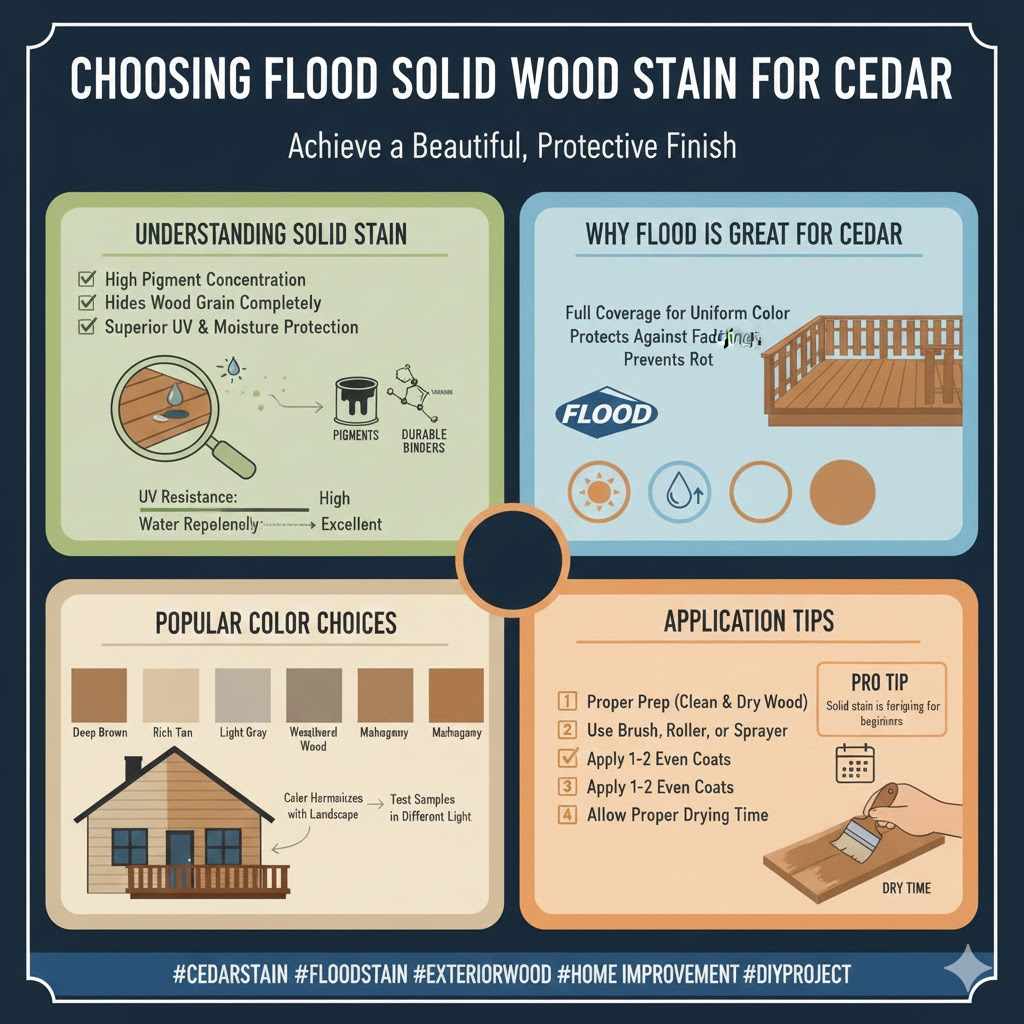
Solid wood stain is different from semi-transparent or semi-solid stains. It contains a higher pigment concentration, which is why it completely hides the natural wood grain. This opacity provides superior protection against UV rays and moisture, two major factors that can damage exterior wood.
For cedar, this means that even if your wood has some imperfections, a solid stain will give it a fresh, uniform look. It acts almost like a paint but retains the feel of wood. The pigments in solid stain are fine particles suspended in a liquid base.
When applied, these particles spread out evenly and dry to form a protective film on the wood’s surface.
This film acts as a barrier, preventing water from soaking into the wood and blocking harmful UV radiation from the sun. UV rays can break down the lignin in wood, causing it to gray and become brittle over time. Solid stain’s pigments absorb and reflect these UV rays, significantly extending the life of your cedar.
The type of binder used in the stain also matters. Flood often uses acrylic or alkyd-based binders. Acrylic binders offer excellent flexibility and adhesion, resisting cracking and peeling.
Alkyd binders penetrate the wood slightly more and provide good durability. The combination of high pigment load and durable binders makes solid stain a robust choice for outdoor cedar.
When choosing a solid stain, consider the finish you want. Some solid stains are matte, while others have a satin sheen. The sheen can affect how light reflects off the surface and how the color appears.
A matte finish offers a natural look, while a satin finish adds a subtle glow.
Why Flood Solid Stain is Great for Cedar
Cedar is a naturally beautiful wood, but it’s also porous and susceptible to weathering. Flood solid wood stain for cedar provides a protective shield that keeps the wood looking its best for longer. It’s a fantastic option for decks, fences, siding, and outdoor furniture made from cedar.
The reason it’s so popular for cedar is its ability to provide full coverage. Cedar often has natural color variations, knots, and grain patterns. If you want a uniform color and a clean look, solid stain is the way to go.
It’s like giving your cedar a fresh coat of paint, but with the protective benefits of a high-quality stain.
Flood stains are formulated with UV inhibitors that are crucial for protecting wood exposed to sunlight. Cedar, especially when used outdoors, needs this protection to prevent fading and graying. The solid pigments in the stain act like sunscreen for your wood.
They reflect the harsh sun’s rays, keeping the wood from drying out and becoming damaged.
Water repellency is another key benefit. Cedar can absorb moisture, leading to swelling, cracking, and even rot over time. Flood solid stain creates a barrier that repels water, keeping the cedar dry and stable.
This is vital for the longevity of any outdoor cedar structure or piece of furniture.
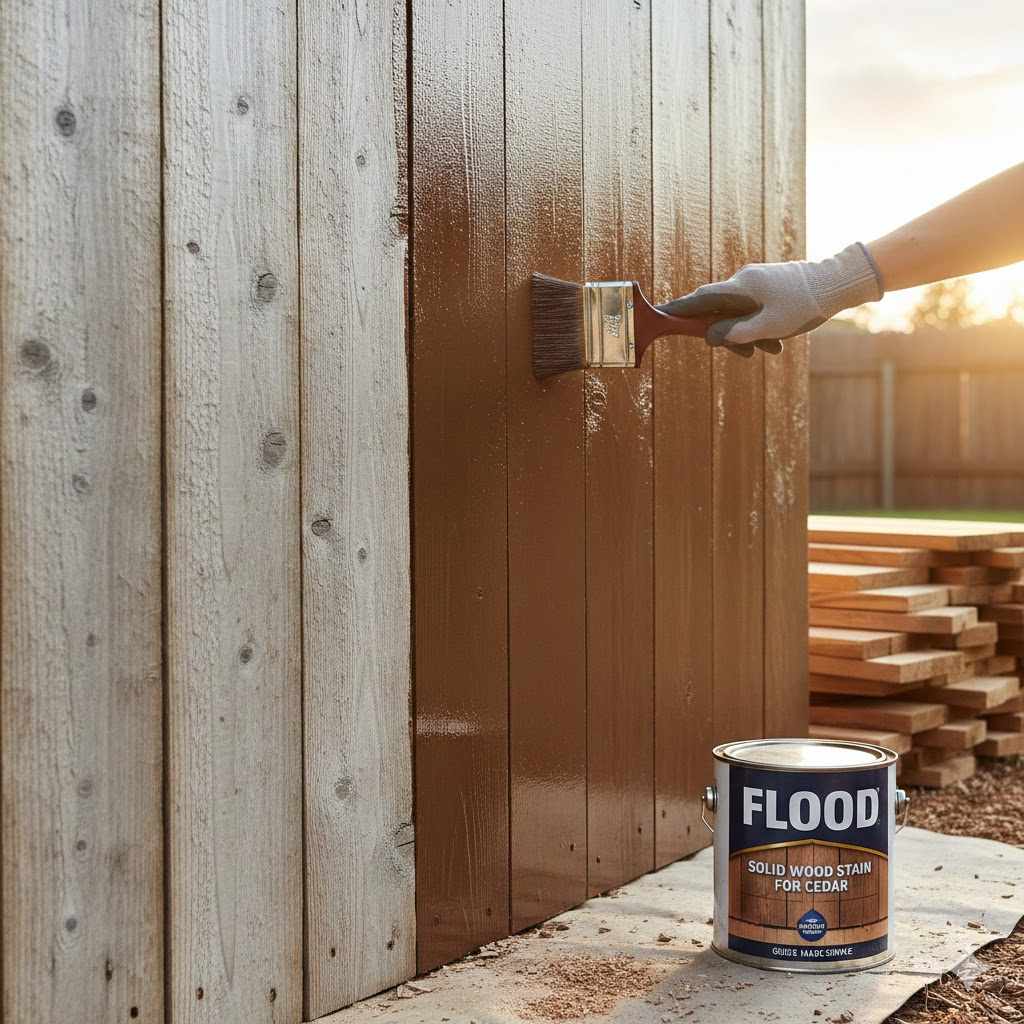
The ease of application is also a plus. While it requires proper prep, the staining process itself is straightforward. Most Flood solid stains can be applied with a brush, roller, or sprayer, making it adaptable to different project sizes and types.
For beginners, the forgiving nature of solid stain means minor mistakes are less noticeable than with transparent stains.
Popular Color Choices for Cedar
When you think about staining cedar, certain colors just seem to work perfectly. Natural wood tones like browns, tans, and even some reds complement cedar’s inherent warmth. Flood offers a wide palette, giving you plenty of options.
Think about the classic look of a cedar deck. Deep browns and rich tans create a sophisticated and timeless appearance. These colors mimic the look of darker hardwoods, giving your cedar a more substantial feel.
For a brighter, more modern look, consider lighter tans or even some of the grays. Gray stains can give cedar a weathered, driftwood appearance that is very popular for coastal or modern designs.
If your cedar is part of a larger landscape, you might want to pick a stain color that harmonizes with your house paint, roofing, or surrounding plants. For example, if you have a red-brick house, a deep brown stain can create a lovely contrast. If your home has white trim, a lighter tan or gray can make the cedar pop beautifully.
Don’t forget to consider the lighting conditions where the cedar will be. A color that looks great in a shaded area might appear too dark or too light in direct sunlight. It’s often a good idea to get sample cans and test them on a small, inconspicuous area of your cedar project.
This allows you to see how the color looks at different times of the day.
Flood also offers stains with different undertones. Some browns might have red undertones, while others lean more towards yellow or orange. Understanding these subtle differences can help you achieve the exact look you’re going for.
Always check the can for the color name and any descriptions of its undertones.
Preparing Your Cedar for Stain Application
Proper preparation is the cornerstone of a successful staining project. If you skip this step, even the best stain won’t last or look its best. This part of the guide focuses on getting your cedar surface ready for the Flood solid wood stain.
We’ll cover cleaning, stripping old finishes, and sanding to ensure the stain adheres well and provides a smooth, durable finish.
Cleaning Cedar Surfaces
Before you can stain your cedar, it needs to be clean. Over time, cedar can accumulate dirt, mildew, mold, and algae, especially if it’s outdoors. These contaminants can prevent the stain from adhering properly.
For basic cleaning, a good scrub brush and a mild detergent mixed with water usually do the trick. You can also use specialized deck cleaners or mildew removers. These products are formulated to break down tough grime and kill mold and mildew spores.
Always follow the product instructions carefully, as some cleaners can be quite strong and may require rinsing thoroughly.
For stubborn mildew or algae, a solution of one part bleach to three parts water can be effective. However, bleach can be harsh on wood fibers. It’s essential to rinse thoroughly after using bleach to remove any residue.
Many people prefer to use oxygen bleach products, which are less damaging to wood and safer for the environment.
When cleaning cedar, always work with the grain of the wood. This helps prevent damaging the wood fibers and creating an uneven appearance. Rinse all cleaning solutions off completely.
Any leftover residue can interfere with the stain’s adhesion or cause blotchy results. Let the cedar dry completely before moving to the next step. This can take 24 to 48 hours, depending on the weather.
If your cedar has been previously stained or sealed, you might need a more aggressive cleaning method. Sometimes, a pressure washer can be used, but it must be done with caution. Too much pressure can easily gouge the wood.
A lower setting and a fan tip are recommended, and it’s best to practice on scrap wood first.
Stripping Old Finishes
If your cedar already has an old stain or sealant on it, you’ll likely need to remove it. Stain doesn’t adhere well to previous coatings, leading to peeling and a poor finish. Stripping old finishes ensures a clean slate for your new Flood solid wood stain.
There are several ways to strip old finishes. Chemical strippers are common. These products come in liquid or gel form and are applied to the wood, allowed to dwell, and then scraped or brushed away along with the old finish.
Always choose a stripper that is safe for cedar and follow the manufacturer’s instructions precisely. Wear protective gear, including gloves and eye protection.
After applying the stripper, you’ll usually need to neutralize it. This step is critical to stop the chemical reaction and prevent the stripper from damaging the wood or interfering with the new stain. A product like TSP substitute (trisodium phosphate) or a specialized wood brightener can often be used for neutralization.
Another method is sanding. For light finishes, sanding might be enough to remove the old coating. However, for thicker or more stubborn finishes, chemical stripping followed by light sanding is often more effective.
Sanding also helps to open up the wood pores, making it more receptive to the new stain.
If you’re using a pressure washer, it can also help remove some older, failing finishes, especially if combined with a cleaning solution. However, be very careful not to damage the wood. A stripper will generally give you a more consistent and thorough removal of the old coating.
Sanding for Optimal Adhesion
Sanding is a vital step in preparing cedar for any stain, especially a solid stain. It creates a smooth surface and opens up the wood pores, allowing the stain to penetrate evenly and adhere better. This leads to a more professional and durable finish.
Start with a medium-grit sandpaper, typically around 80-grit or 100-grit. The goal is not to remove a lot of wood, but to scuff up the surface. If you’re sanding after stripping, you might need to use a finer grit, like 120-grit, to remove any remaining stripper residue or minor imperfections.
Always sand in the direction of the wood grain.
After the initial sanding, use a finer grit sandpaper, such as 150-grit or even 220-grit, to smooth the surface. This finer grit will remove any scratches left by the coarser sandpaper. A smooth surface is essential for solid stain because it will be visible.
Any rough spots or deep scratches can become more pronounced once stained.
After sanding, it’s crucial to remove all dust. Use a vacuum cleaner with a brush attachment, followed by a tack cloth. Tack cloths are sticky cloths designed to pick up fine dust particles.
Failing to remove all the dust will result in a rough finish and can affect the stain’s appearance.
For large areas like decks, using a random orbital sander or a belt sander can save a lot of time and effort. For smaller, intricate pieces, you might use a sanding block or even just sandpaper by hand. Whichever tool you use, ensure you achieve a uniform smoothness across the entire surface.
Statistics show that proper surface preparation, including sanding, can extend the life of wood finishes by up to 50%. A well-prepared surface ensures the stain binds properly to the wood fibers, creating a strong, protective layer that resists weathering and wear.
Applying Flood Solid Wood Stain to Cedar
With your cedar perfectly prepped, it’s time for the main event: applying the Flood solid wood stain. This section will guide you through the application process, offering tips for achieving a smooth, even coat and ensuring the best possible results for your cedar. We’ll cover techniques, tools, and crucial details to make the process manageable and successful.
Tools and Techniques for Application
Choosing the right tools and application method can make a big difference in how your Flood solid wood stain looks on cedar. For solid stain, the goal is to create a uniform film of color and protection.
A good quality synthetic brush is excellent for getting into tight areas, corners, and for detailed work. For larger surfaces like decks or siding, a stain pad applicator or a roller with a long handle can speed up the process. Some people prefer to use a sprayer, but this requires careful masking to avoid overspray and often needs back-brushing to ensure even coverage.
When applying, work in small sections. This is particularly important if you’re working on a hot or windy day, as the stain can dry quickly, leading to lap marks. Apply the stain evenly, working with the wood grain.
Don’t overwork the stain or try to spread it too thin. A solid stain needs a good, consistent layer to provide full coverage and protection.
For surfaces like decks, stain one or two boards at a time, from end to end, to avoid noticeable seams where one section meets another. This helps create a seamless look. If you’re applying a second coat, wait for the first coat to be completely dry according to the manufacturer’s instructions, usually several hours.
Flood solid stains are typically designed for a one-coat application if the surface is properly prepared and the stain is applied at the correct thickness. However, if you notice any thin spots or inconsistencies, a second coat can be applied. Always stir the stain thoroughly before and during application, as the pigments can settle at the bottom of the can.
Achieving an Even, Solid Coat
The key to a beautiful finish with Flood solid wood stain for cedar is achieving an even, solid coat. This means no streaks, no bare spots, and a uniform color across the entire surface.
Start by thoroughly stirring the stain. If you’re using multiple cans of the same color, it’s a good idea to mix them all together in a larger container. This ensures that any slight color variations between batches are eliminated.
Apply the stain with consistent pressure and in smooth, overlapping strokes. If you’re using a brush, load it with enough stain but avoid overloading it. Apply the stain in the direction of the wood grain.
For areas where the grain is complex, like around knots, take your time and work carefully.
If you notice any areas where the stain looks thinner or less opaque, go back and apply a bit more. The goal is to build up a uniform layer of pigment. Don’t try to “fix” an area that’s already drying by brushing over it repeatedly.
This can create a patchy look. Instead, work into the wet edge of the stain.
On horizontal surfaces like decks, apply the stain in long, continuous strokes along the length of the boards. Try to maintain a wet edge so that when you start a new section, you can easily blend it into the previous one. This is where working in sections of one or two boards at a time becomes very helpful.
If you are using a sprayer, ensure you maintain a consistent distance from the surface and overlap your spray passes by at least 50%. Immediately after spraying, use a brush or roller to back-brush the stain. This pushes the stain into the wood and evens out the coverage, preventing drips and runs.
A common mistake is trying to apply the stain too thinly, thinking it will dry faster or require less product. However, solid stain needs to be applied at a sufficient thickness to provide its full protective and aesthetic benefits. If you can see too much of the wood grain through the stain, it’s likely too thin.
Second Coats and Drying Times
Flood solid wood stains are often formulated to provide excellent coverage in a single coat, especially on well-prepared surfaces. However, depending on the wood’s porosity and the desired opacity, a second coat might be beneficial or even necessary.
Always refer to the product’s label for specific drying and recoating times. Generally, you’ll need to wait at least 4-6 hours, and sometimes up to 24 hours, before applying a second coat. Environmental factors like humidity and temperature can significantly affect drying times.
Cooler temperatures and higher humidity will slow down the drying process.
If you decide to apply a second coat, ensure the first coat is completely dry to the touch. Applying a second coat too soon can lead to peeling, bubbling, or an uneven finish because the underlying coat hasn’t fully cured.
The second coat is typically applied in the same manner as the first, focusing on achieving a uniform appearance. Sometimes, the second coat is applied slightly thinner than the first to avoid a “painted” look, depending on the desired aesthetic. However, for maximum protection, a full second coat is often recommended.
After the final coat, allow the stain to cure fully before exposing it to heavy use or harsh weather. Curing is a process that takes longer than drying. While the stain might feel dry to the touch within hours, it can take several days or even weeks for the stain to reach its maximum hardness and durability.
Flood’s product data sheets will provide specific curing times. For example, a deck might need to be kept dry and free of foot traffic for 48-72 hours after the final coat.
In some cases, if you notice any imperfections after the first coat dries, like missed spots or uneven coverage, you might be able to lightly sand those areas and then touch them up. However, if the entire surface needs correction, it might be best to wait for it to fully cure and then consider applying another full coat, or even stripping and starting over if the issues are severe.
Statistics suggest that proper drying and curing are critical for the longevity of exterior wood stains. Products that are properly cured can resist wear and tear up to 30% longer than those that are put into service too early. This underscores the importance of patience during the application and drying phases.
Maintaining Your Stained Cedar
Keeping your cedar looking great after applying Flood solid wood stain involves a bit of ongoing care. This final section covers how to maintain your newly stained cedar to ensure it remains beautiful and protected for years to come. We’ll look at cleaning, inspection, and when and how to reapply the stain.
Regular Cleaning and Inspections
Just like any outdoor surface, your stained cedar will benefit from regular cleaning. This helps prevent the buildup of dirt, mildew, and other environmental debris that can dull the finish or lead to more serious issues.
Typically, a gentle wash with mild soap and water once or twice a year is sufficient. Use a soft brush or a cloth to clean the surface, working with the grain. Rinse thoroughly with clean water and let the cedar dry completely.
Avoid using harsh chemicals or abrasive scrubbers, as these can damage the stain’s protective layer.
Regular inspections are also important. Look for any signs of wear, such as peeling, flaking, or faded areas. Check for mildew or mold growth, especially in shaded or damp areas.
Pay attention to areas that receive heavy foot traffic, such as decks, as these might show wear sooner.
If you notice any loose dirt or debris trapped in the grain or between boards, gently sweep or brush it away. Keeping the surface clean is the first line of defense against premature wear and tear. For areas prone to mold and mildew, you might want to use a specialized deck cleaner that can inhibit growth.
Another aspect to inspect is the condition of the surrounding environment. Are there overhanging trees that might drip sap or leaves? Are there sprinkler systems that might constantly wet the surface?
Addressing these environmental factors can help reduce the maintenance required for your stained cedar.
When to Reapply Flood Solid Stain
Flood solid wood stain is designed for durability, but no finish lasts forever, especially outdoors. The lifespan of the stain depends on several factors, including the climate, exposure to sunlight and moisture, and the quality of the initial application.
Generally, you can expect a high-quality solid stain like Flood to last anywhere from 3 to 7 years. However, in harsh environments with intense sun or frequent rain, you might need to reapply sooner. The first sign that it’s time to reapply is usually a noticeable fading of the color or a dulling of the finish.
You might also start to see areas where the stain is beginning to chalk or wear away.
Before reapplying, assess the condition of the existing stain. If the old stain is still well-adhered but simply faded, you might be able to clean the surface thoroughly and apply a new coat directly over the old one. This is one of the advantages of solid stain – it often provides a good surface for recoating.
However, if the old stain is peeling or flaking, you’ll need to remove it first. This usually involves sanding or chemical stripping to get back to clean wood. Once you have a clean, sound surface, you can then reapply the Flood solid wood stain as you did the first time, following the preparation and application steps outlined earlier in this guide.
It’s important to use the same type of stain or a compatible product for recoating. If you’re unsure, it’s always best to strip the old finish and start fresh to ensure optimal adhesion and a uniform appearance. When reapplying, make sure to mix the new stain thoroughly, and if using multiple cans, mix them together to ensure color consistency.
Many users find that reapplying the same color and brand of stain makes the process much simpler, as it minimizes the risk of color mismatch or adhesion issues. The goal of reapplication is to restore the protective barrier and refresh the aesthetic of your cedar.
A study by the Forest Products Laboratory indicated that exterior wood finishes, when properly maintained, can significantly increase the service life of wood structures. For instance, regular recoating of a deck can add 10-15 years to its expected lifespan compared to neglecting maintenance.

Frequently Asked Questions
Question: How do I prepare my cedar for Flood solid wood stain if it has mildew on it?
Answer: If your cedar has mildew, clean it thoroughly with a solution of mild detergent and water, or use a specialized deck cleaner designed to kill mildew. For stubborn spots, a diluted bleach solution (1 part bleach to 3 parts water) can be used, but always rinse completely and allow the wood to dry fully before staining. Oxygen bleach products are a gentler alternative.
Question: Can I apply Flood solid wood stain over a previously painted cedar surface?
Answer: It is generally not recommended to apply solid stain directly over a painted surface without proper preparation. Paint creates a film that is different from stain. You would likely need to remove the paint through sanding or stripping to ensure the stain adheres properly and provides the desired finish and protection.
Question: How many coats of Flood solid wood stain should I apply to cedar?
Answer: Flood solid wood stain is often designed for one-coat coverage. However, if the wood is very porous or you desire maximum opacity and protection, a second coat may be beneficial. Always follow the manufacturer’s instructions on the product label for the best results.
Question: Will Flood solid wood stain hide the natural grain of my cedar?
Answer: Yes, Flood solid wood stain is designed to completely hide the natural wood grain, knots, and texture due to its high pigment content. If you want to see the wood grain, a semi-transparent or semi-solid stain would be a better choice.
Question: How long does Flood solid wood stain take to dry before I can use my cedar deck?
Answer: Drying times vary, but Flood solid wood stain is usually dry to the touch within a few hours. However, it’s crucial to allow it to cure fully before heavy use. Check the product label; typically, you should wait at least 24-72 hours for a deck before walking on it, and longer before placing furniture.
Conclusion
Applying Flood solid wood stain to your cedar projects is a rewarding process. By following these steps for preparation, application, and maintenance, you can achieve a beautiful, long-lasting finish. This guide has shown you how to choose the right stain, get your cedar ready, and apply it for the best results.
Your cedar will look great and be well-protected for years to come.