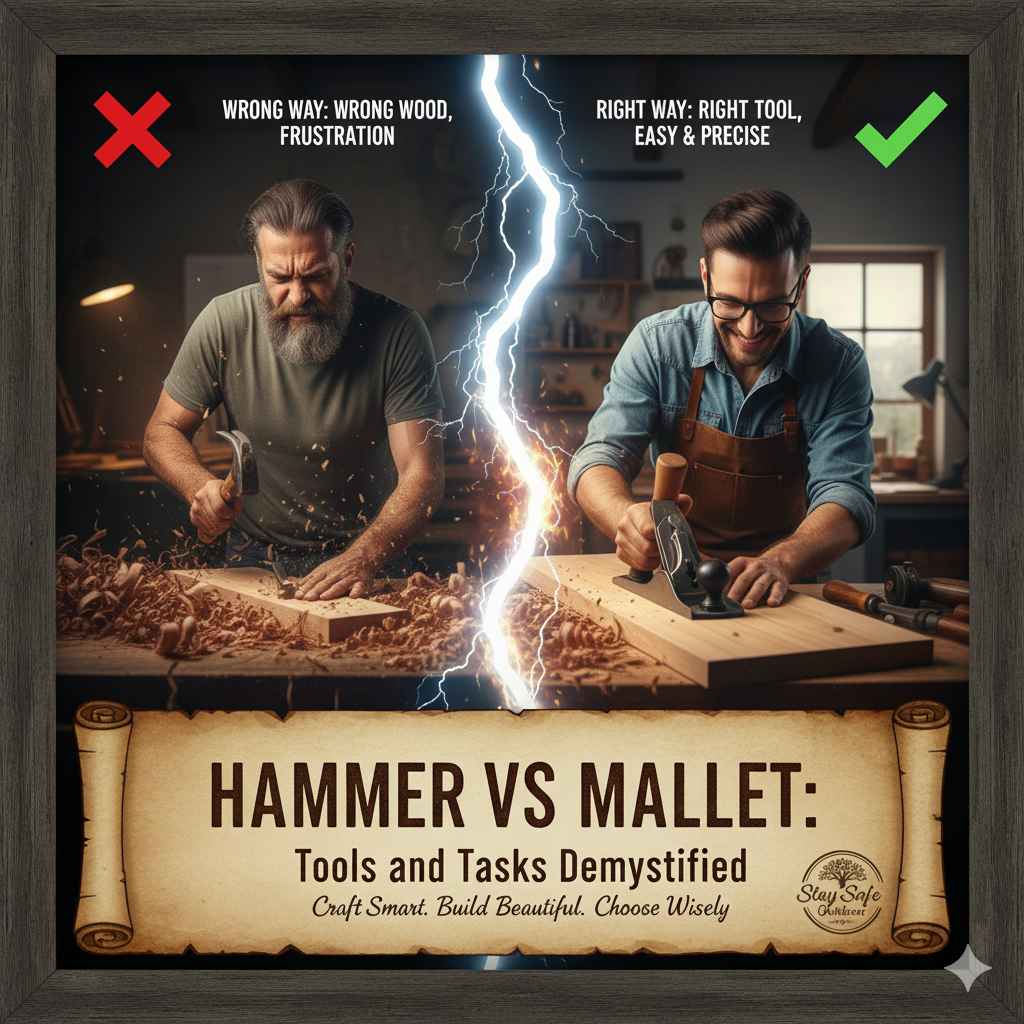
Hammer vs Mallet: Tools and Tasks Demystified
Figuring out the difference between a Hammer vs Mallet: Key Differences Explained can seem tricky when you’re just starting. Both tools look similar and are used for hitting things, but they have distinct purposes. Many beginners get confused about which to use for which job. Don’t worry, it’s simpler than you think! We’ll explore the main differences, explaining when to grab a hammer and when a mallet is the better choice, step-by-step. Let’s start with a peek at the basics.
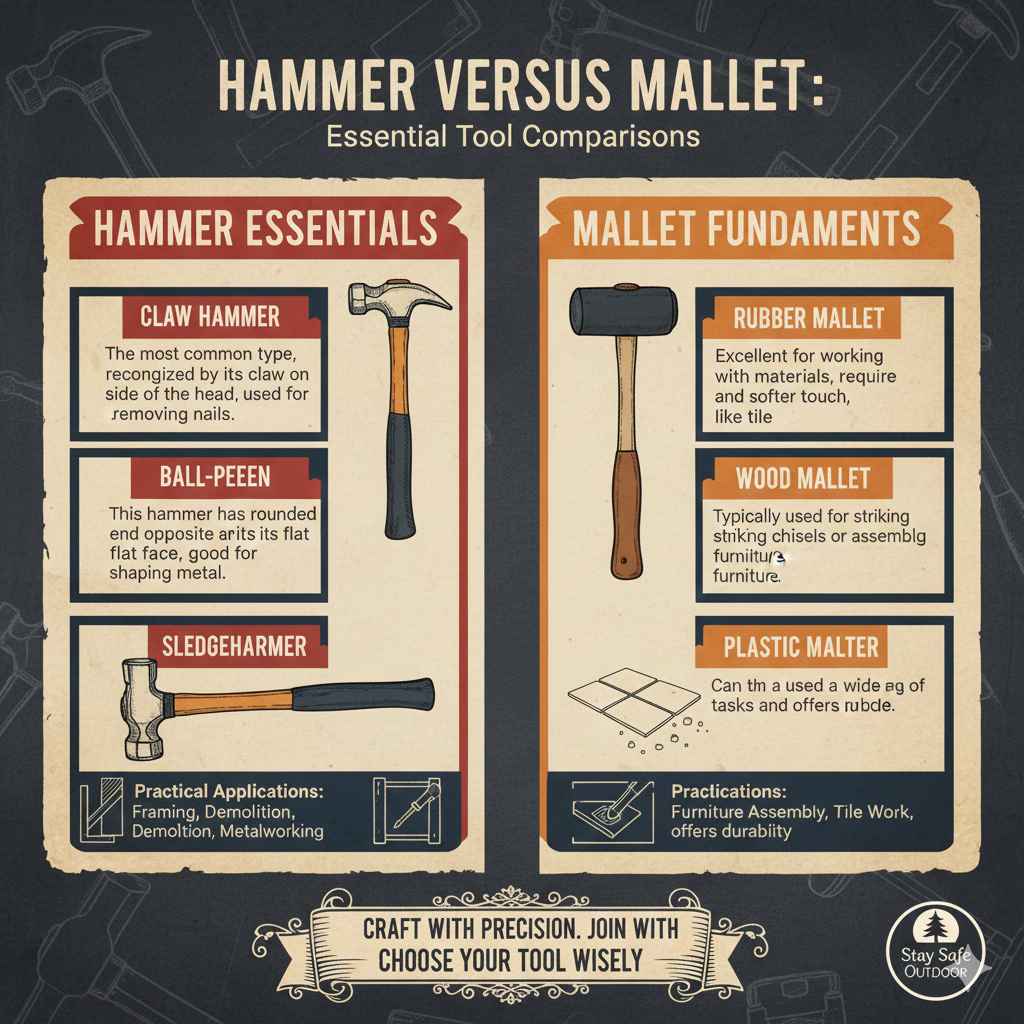
Hammer Versus Mallet: Essential Tool Comparisons
The core concept behind Hammer vs Mallet: Key Differences Explained is the type of work you intend to accomplish. A hammer is generally used for tasks requiring more force and precision, often involving driving nails or shaping metal. A mallet, on the other hand, is suitable for tasks that require less force and prevent damage to the work piece. It’s useful for assembly or tasks where you want to avoid leaving marks.
Hammer Essentials and Its Practical Applications
The hammer is a classic tool, typically featuring a metal head and a wooden or composite handle. The head is made of hardened steel, allowing it to withstand high impact forces. This design makes a hammer ideal for jobs like driving nails into wood, breaking up materials, and shaping metal objects. The weight of the head contributes to the force applied when swung, making it efficient for tougher tasks. Many different types of hammers exist; each has a specific design to fit its work.
Claw Hammer: This is the most common type, recognized by its claw on one side of the head, used for removing nails.
The claw hammer is a staple in most toolboxes because of its versatility. It’s great for framing, demolition work, and general household repairs. The claw end is particularly useful for prying boards and removing nails, while the flat striking face is for driving nails into the material. Because of its balance of weight and form, it’s very easy to manage, even for people who aren’t used to it.
Ball-Peen Hammer: This hammer has a rounded end opposite its flat face, good for shaping metal.
The ball-peen hammer is the right tool for metalworking. The rounded end is used to shape or curve metal, while the flat face is used for general hammering. The ball-peen hammer is a must-have for people working with metal and offers versatility that is useful for anyone from DIYers to professional metalworkers. It’s often used to set rivets, curve metal, and smooth out surfaces, making it great for detailed work.
Sledgehammer: A large, heavy hammer used for demolition and breaking materials.
The sledgehammer is designed for heavy-duty tasks where brute force is required. Its large head and long handle are built to deliver powerful blows, ideal for demolition jobs like breaking up concrete or demolishing walls. The sledgehammer’s size and weight are its strength, allowing it to break down tough materials efficiently. The sledgehammer is an essential tool for contractors and construction workers.
One common use case is when constructing a wooden frame. Using a claw hammer, you can quickly drive nails to secure the wooden pieces. Another instance is in metalworking, where a ball-peen hammer can shape a piece of sheet metal. These examples show how the choice of hammer influences the outcome and efficiency of the task.
Mallet Fundamentals and Uses in Various Fields
A mallet is a tool with a head, often made of rubber, wood, or plastic, attached to a handle. Its main function is to apply force without causing damage to the surface of the object being struck. This design is crucial for tasks like assembling furniture, shaping metal or working with tile. The softer head of a mallet absorbs the impact, spreading the force over a larger area, and reducing the likelihood of dents, scratches, or other forms of damage.
Rubber Mallet: Excellent for working with materials that require a softer touch, like tile.
Rubber mallets are designed to prevent damage when working with softer materials. They have a softer head, usually made of vulcanized rubber, which absorbs the shock, making them ideal for tasks like laying tiles, adjusting trim, or gently tapping materials into place. The rubber head distributes the force evenly, reducing the chance of cracks, chips, or other surface damages.
Wood Mallet: Typically used for striking chisels or assembling furniture.
Wood mallets are often crafted from hardwoods like maple or beech and are perfect for tasks requiring controlled force. They are the ideal match for striking chisels, driving them without damaging the handle, and assembling furniture, ensuring joints fit tightly without causing harm to the pieces. The wooden head provides a balance of impact and safety, making them versatile.
Plastic Mallet: Can be used for a wide range of tasks and offers durability.
Plastic mallets can handle various tasks and are known for their durability and resistance to wear and tear. Their heads are usually made of strong, impact-resistant plastic or composite materials, allowing them to apply force to a wide range of materials. They are a good choice for everything, from assembling furniture and working with tile to general carpentry tasks. The plastic head combines strength and precision.
Consider the task of assembling flat-pack furniture. Using a mallet helps fit the pieces together without damaging the finish. Similarly, when setting tiles, a rubber mallet can gently tap them into place without cracking the tile. These examples highlight the mallet’s role in preserving the integrity of the work piece.
Diving into the Nuances of Hammer vs Mallet
Deciding between a hammer and a mallet is important. The right tool ensures a successful outcome. The core factor to remember is the level of impact needed and the potential for causing surface damage. Knowing these differences can dramatically improve your work and prevent costly mistakes. Both tools serve similar purposes, but the design and the materials used make all the difference.
Force Application: How Tools Differ in Their Strikes
The way a hammer applies force depends on its weight, head shape, and handle length. The head of a hammer is designed to concentrate the force onto a small area, making it ideal for driving nails, breaking materials, and shaping metal. A longer handle will generate more force through leverage, while the head’s weight affects the impact’s power. Different hammer types are engineered for different levels of force.
Impact Area: Hammers have a concentrated impact area, making them perfect for tasks that need high-pressure force.
The impact area of a hammer is small and concentrated, allowing it to drive nails, break materials, and shape metal. This concentrated impact is efficient for tasks needing to deliver high pressure to a particular area. The design focuses the applied force, making it suitable for getting things done precisely and efficiently.
Force Amplification: Handle length and head weight determine the power of the strike.
A hammer’s ability to apply force is connected to the length of its handle and the weight of the head. A longer handle will help you generate more force by adding leverage, while a heavier head will deliver a more powerful blow. Balancing the weight of the head with the length of the handle is important for providing power and control.
Impact Control: The type of hammer greatly affects your control.
Hammers are designed with different weights and handle lengths to give you control over how hard you strike. For example, a light hammer is ideal for detailed work that doesn’t need much force, while a heavier hammer is best for demolition work. The shape of the hammerhead also matters; a flat head is for general use, and a ball-peen head is used for shaping metal.
For example, if you’re trying to remove a stubborn nail, a claw hammer’s concentrated force can efficiently apply enough power to remove it without damaging the surrounding wood. Another example is when shaping a metal sheet with a ball-peen hammer; the focused impact is ideal for making accurate bends.
Surface Impact: Protecting Materials with the Right Tool
The design of a mallet prioritizes surface protection. The head, made of softer materials like rubber, wood, or plastic, spreads the impact force, preventing damage. This method is important when working with materials that are easily scratched or damaged. The key to the mallet’s effectiveness is its ability to deliver the right amount of force while minimizing surface disruption.
Soft Head: Absorbs impact, reducing the chance of dents or scratches.
The soft head of a mallet, which might be made of rubber, wood, or plastic, is essential for absorbing impact, reducing the chance of dents or scratches. This design spreads the force over a large area, protecting the surface. The softer head is gentle on the materials, making the mallet ideal for tasks needing a precise application of force without damage.
Force Distribution: Distributes impact over a wider area.
Mallets are designed to spread the force over a larger area when striking. This distribution prevents any concentrated pressure and reduces the chance of harm. This method helps to ensure that the work piece remains safe during assembly or adjustments.
Material Protection: Great for working with delicate or easily-marked materials.
Mallets are ideal for working with delicate materials that are easily marked or scratched. Using a mallet helps protect the surface, ensuring that the work is finished properly. They are essential for tasks like assembling furniture, setting tiles, or aligning delicate parts, where the look of the item is as important as the function.
When assembling a piece of furniture, a mallet ensures that the pieces fit tightly without scratching the surface. Similarly, when setting tiles, a rubber mallet avoids cracking the tile. These situations show that a mallet can deliver force while preserving the item.
Situational Guide to Selecting a Hammer or Mallet
Choosing between a hammer and a mallet depends heavily on the task at hand. The decision hinges on several factors, including the type of material, the type of work needed, and the importance of surface protection. Knowing the strengths of each tool will improve your job.
Material Type: Matching the Tool to the Material
The material you are working with is very important. Hammers are typically used with harder materials like wood, metal, and concrete. The impact and focused force of a hammer are effective for driving nails, breaking materials, or shaping metal. Mallets, on the other hand, are ideal for softer materials, such as wood, plastics, tile, and assembled furniture. The softer head of a mallet prevents damage during assembly or fine-tuning.
Hard Materials: Hammers are preferred for wood, metal, and concrete.
For hard materials like wood, metal, or concrete, hammers are the preferred tools. The sturdy metal head provides the necessary force to drive nails, break up materials, or shape metal. The hammer’s design focuses the impact, making it ideal for tasks that require high impact on sturdy materials.
Soft Materials: Mallets are perfect for softer materials such as wood, plastics, and assembled furniture.
Mallets are perfect for soft materials such as wood, plastics, tile, or assembled furniture. The mallet’s softer head spreads the force, preventing damage. This design is perfect for tasks needing gentler impacts to avoid dents or scratches.
Material Sensitivity: Consider potential surface damage.
The type of material also affects the chance of harm. Always consider how sensitive the material is to impact. If the material can be easily scratched or damaged, use a mallet to protect it. For materials that can withstand more force, a hammer will do. Understanding the material properties is key.
For example, using a hammer to drive nails into hardwood will work efficiently, while attempting to do the same with a mallet will be ineffective. On the other hand, using a mallet to tap together furniture pieces will protect the finish, and using a hammer would cause dents.
Job Type: When to Use Each Tool
The nature of the job will also affect your tool choice. Hammers are great for tasks that require force, precision, and the ability to shape materials. Mallets are best for assembling, aligning, and finishing tasks where you want to minimize the chance of damaging the work. Understanding these distinctions will affect your performance.
Force-Intensive Tasks: Hammers excel when force and precision are required.
Hammers are best for tasks requiring force and precision. This includes driving nails, breaking up materials, and shaping metal. The concentrated impact of a hammer ensures that the required pressure is applied efficiently. Tasks requiring precision, such as metal shaping, benefit from a hammer’s focused force.
Assembly and Finishing: Mallets are the right choice for assembly and finishing tasks.
Mallets are ideal for assembly, aligning, and finishing tasks where material preservation is important. They prevent damage to surfaces by absorbing the impact. They are ideal for tasks like fitting furniture together, setting tiles, and fine-tuning parts. The mallet ensures that everything fits together smoothly without damage.
Control and Accuracy: Assess the need for precision and damage prevention.
Think about how much control and accuracy the task demands, as well as the need to protect the material. If precision is crucial and surface protection is a priority, choose a mallet. When dealing with nails or breaking down materials, a hammer is usually the better option. The right choice affects the overall quality and safety of your work.
Scenario 1: Installing hardwood flooring requires driving nails. A hammer is the perfect tool for the job.
When installing hardwood flooring, you need a tool to drive nails securely into the subfloor and the floorboards. A hammer is the right choice for applying force efficiently. The impact of the hammer ensures the nails are fully set, holding the flooring firmly in place. This makes a secure and sturdy installation.
Scenario 2: Assembling flat-pack furniture involves fitting parts together. A mallet is the way to go here.
When assembling flat-pack furniture, you want to fit parts together without harm. A mallet is best for tapping pieces gently into place. The softer head of the mallet prevents scratches or dents. This ensures that the furniture goes together smoothly, without damaging the finish.
Safety Considerations: Making the Right Choice to Protect Yourself
Safety should always be the priority. Knowing the right tool to use for a particular task will also minimize the risk of injury. Using a hammer in the wrong situation might lead to slips or missed strikes. Choosing the correct tool will help ensure a safer and more efficient working environment.
Proper Tool Use: Knowing the right tool for the job reduces injury risks.
Using the correct tool can greatly improve your safety. Using the right tool for each job helps to minimize the chance of injuries. This reduces the risk of accidents caused by using the wrong tools or in the wrong way. Practice proper techniques for the safest work.
Protective Gear: Safety glasses and gloves are always helpful.
Always use safety glasses to protect your eyes from debris and gloves to improve your grip. These protective tools are important for any job, regardless of whether you’re using a hammer or a mallet. The right gear helps protect you from harm and lets you work with confidence.
Workplace Conditions: Be mindful of your surroundings for a safe operation.
Always clear your work space to avoid hazards. Make sure the area is well lit and free from tripping hazards. Ensure that you have a stable work surface. A clean and safe workplace is essential for preventing accidents and ensuring smooth operations.
Frequently Asked Questions
Question: What’s the main difference between a hammer and a mallet?
Answer: The primary difference is the head material and purpose. Hammers have hard metal heads for driving nails or breaking materials. Mallets have softer heads (rubber, wood, or plastic) for tasks where you don’t want to damage the surface.
Question: When should I use a hammer?
Answer: Use a hammer when you need to apply significant force, such as driving nails, breaking materials, or shaping metal. It’s designed to deliver powerful impacts.
Question: When should I use a mallet?
Answer: Use a mallet when you want to apply force without causing damage to the surface of the object. This is ideal for assembling furniture, setting tiles, or adjusting parts.
Question: Can I use a hammer to assemble furniture?
Answer: While you could use a hammer, it’s not ideal. The hammer’s hard head could easily damage the furniture. A mallet is designed for assembly to avoid scratches or dents.
Question: Which tool is better for beginners?
Answer: Both tools are useful, but start by learning about the tasks you will perform. You’ll soon see what you need. Understanding their uses is more important than choosing one over the other. The best tool depends on the job.
Final Thoughts
Understanding the difference between a Hammer vs Mallet: Key Differences Explained means understanding their core functions. A hammer is the force tool; a mallet is the gentle touch. From driving nails to assembling furniture, the right choice ensures efficiency and protects the materials you’re working with. Remember the force and the type of material when deciding, and you’ll choose the best tool.
Don’t be afraid to experiment and practice. Each tool has its own feel and method. Consider starting with simple projects to get a feel for both tools. With practice, you’ll start to instinctively know which tool is right for any project. Learning this will give you the confidence to tackle a variety of tasks, from small repairs to more complex projects.