DIY Wood Projects for Beginners: Easy and Fun Ideas to Try
Woodworking can be a fun and rewarding hobby. It’s perfect for creating useful items and personal gifts.
If a gift is the goal, see our DIY wood gift ideas for Mom for five specific beginner-friendly projects, from a jewelry box to a plant stand.
For beginners, starting with simple projects is key. Embarking on DIY wood projects can be both exciting and intimidating. As a beginner, you might wonder where to start and what you can create. Don’t worry! Simple wood projects are a great way to learn the basics and gain confidence.
You don’t need a lot of tools or experience to get started. With a few essential tools and some basic materials, you can create beautiful and functional pieces. Let’s explore some beginner-friendly wood projects that will help you build your skills and enjoy the process.
Introduction To Diy Wood Projects
Best Starter Tool Kit
 |
Hi-Spec Beginner Tool Kit with Metal Box for DIY StartersHi-Spec | Our pick | $39.99
Price as of 20 Oct 2026
|
View |
Beyond the obvious payoff — a shelf or birdhouse you actually built — woodworking is one of the few hobbies where the learning curve is genuinely gentle. A pine board costs a few dollars, a mistake usually just means cutting a new piece rather than starting over on an expensive material, and the skills stack: the same square, measure-and-mark habits you use on a picture frame carry straight over to a bookshelf, then a coffee table. It’s also one of the rare hobbies with a real resale angle if you want it — handmade cutting boards, small furniture, and custom shelving all move steadily on sites like Etsy, so the tools you buy for a first birdhouse aren’t a dead-end purchase.
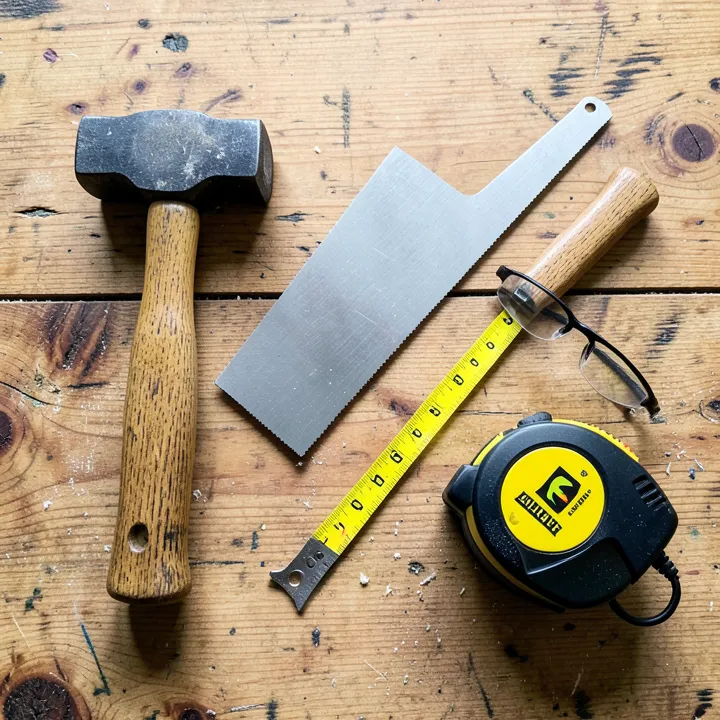
Here’s the realistic starter tool list, and what each one is actually for: a hand saw or a basic circular saw for cutting boards to length; a hammer and a set of screws or nails for assembly; a Phillips screwdriver or a cordless drill with a driver bit (a drill does double duty since it also bores pilot holes, which prevents the wood from splitting when you drive a screw near an edge); a tape measure and a combination square for accurate, square cuts; sandpaper in at least two grits (100-120 for shaping, 220 for a finish-ready surface); and a couple of bar clamps to hold pieces steady while glue sets. Safety goggles and a dust mask round out the list — not because early projects are dangerous, but because good habits formed on a birdhouse are what keep you safe once you’re running a power saw regularly.
- Saw: cuts boards to length; a basic hand saw is enough for the projects below.
- Hammer: drives nails for simple butt-joint assemblies.
- Drill/driver: bores pilot holes and drives screws — the single most-used tool on this list.
- Measuring tape and combination square: keeps cuts accurate and corners square.
- Sandpaper (120 and 220 grit): shapes edges, then finishes the surface.
- Bar or spring clamps: holds glued pieces still while they cure.
- Safety goggles and dust mask: non-negotiable once sanding or cutting kicks up dust.
Buy these once, in decent quality, and they’ll outlast a dozen projects — a cheap $10 hand saw that binds and wanders in the cut will frustrate a beginner far more than spending $25 on one that tracks straight.
Choosing The Right Wood
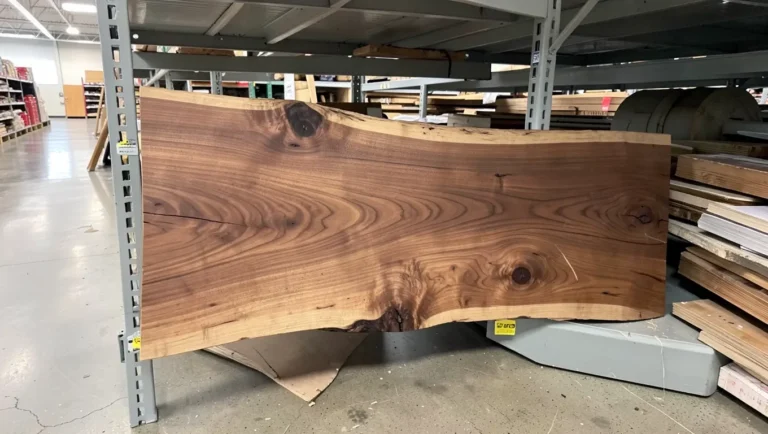
Softwoods like pine and cedar come from coniferous trees, cost less (pine runs roughly $2-$4 per board foot at most lumber yards), and cut and sand far more easily than hardwoods, which is exactly why they dominate beginner project lists — a hand saw or a basic circular saw will get through pine cleanly, while the same tools work harder against dense hardwood. Hardwoods like oak and maple come from broadleaf trees, cost two to four times as much, and hold up better to daily wear, which is why they’re the better call once you’re building something load-bearing like a coffee table rather than a decorative shelf.
When you’re picking through boards at the lumber yard, sight down the length of each one to check it’s actually straight — a board with a visible bow or twist will fight you at every cutting and joining step. Skip boards with large knots near where a cut or a screw needs to go, since a knot is a dense, brittle spot that can split unpredictably under a saw blade or a driven screw. A board that’s already reasonably smooth saves you a sanding grit or two, which matters more than it sounds like on a first project where sanding is often the slowest part.
Safety Tips
Safety goggles matter every time a blade or sander is running, not just for the obviously dangerous steps — a stray wood chip from sanding travels just as fast as one from a saw cut. Ear protection is worth adding once you’re using a power drill or saw for more than a few minutes at a stretch, since sustained exposure to tool noise in the 90-100 decibel range is enough to cause gradual hearing damage even though no single cut feels loud. A dust mask matters most during sanding, when fine particles stay airborne far longer than the visible sawdust suggests.
Beyond gear, the habits that actually prevent injuries are mundane: keep your workspace clear of offcuts and cords you could trip over, unplug a power tool before changing a blade or bit rather than trusting the safety switch, and always cut with the workpiece clamped or braced rather than held loosely in your other hand. “Measure twice, cut once” isn’t just about wasting less wood — a rushed, unmarked cut is also the kind that’s more likely to wander off-line and put your guiding hand closer to the blade than you meant it to be.
Simple Woodworking Techniques
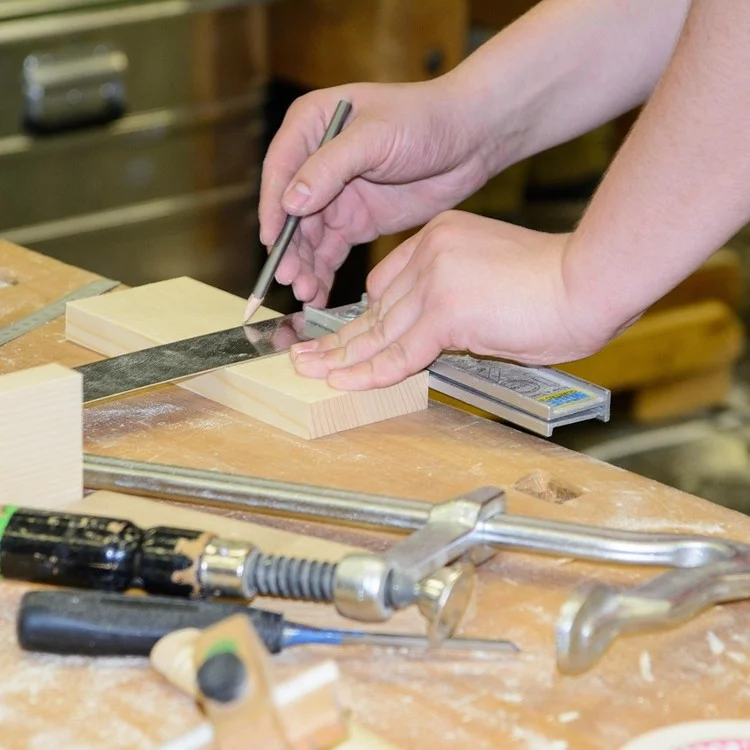
Mark your cut line with a combination square and a sharp pencil rather than eyeballing it — a square gives you a true 90-degree reference line, which matters because an out-of-square cut on one board compounds into a visibly crooked joint once you’re assembling four or five pieces together. For straight cuts with a hand saw, start the cut with the blade angled slightly upward and let the first few strokes establish a shallow kerf (groove) before bringing the saw level; trying to cut straight in from the very first stroke is the most common reason a hand saw wanders off the line.
Sand through the grits in order — 100 or 120 to remove saw marks and shape edges, then 220 for the smooth, finish-ready surface — and always sand parallel to the wood grain, since cross-grain scratches stay visible even after a stain or clear coat goes on. Wipe the piece down with a slightly damp cloth or a tack cloth after sanding; leftover dust in the grain will show up as a slightly gritty, uneven finish once paint or stain goes over it. When it comes to finishing, stain penetrates and colors the wood while paint sits on top and hides the grain entirely — pick based on whether you want the wood’s natural look to show through, and always test either one on an offcut of the same wood before committing to the actual project.
Basic Wood Projects
Beginner woodworkers can create simple and fun DIY wood projects that put the tools and techniques above into practice on something small enough to finish in an afternoon.
Birdhouse
A basic birdhouse needs six pieces cut from a single 1×6 pine board: four walls, a floor, and a sloped roof panel. Drill the entrance hole (1.25 inches works for wrens and chickadees, 1.5 inches for larger birds like bluebirds) before assembly, since it’s much easier to drill cleanly into a flat panel than into an already-assembled box. Glue and nail the walls to the floor first, checking the corners are square as you go, then attach the roof last so you can angle it slightly for water runoff. Leave the wood unfinished or use exterior-grade paint only on the outside — interior paint fumes can be harmful to nesting birds, and unpainted, untreated wood is actually the safest choice for the inside of the box.
Picture Frame
Cut two long rails and two short rails from a 1×2 board, mitering the ends at 45 degrees so the four corners meet cleanly — this is a good first project for practicing angled cuts, since a picture frame’s small size makes any error obvious and easy to correct on a fresh offcut. Glue the mitered corners together, clamp with a picture-frame clamp or painter’s tape pulled tight across each joint, and let it cure fully before adding a rabbet (a shallow groove cut into the back) to hold the glass and photo, or simply glue a backing board on if you’re skipping glass entirely.
Intermediate Wood Projects
A basic bookshelf built from pine 1×10 boards is a natural next step once you’re comfortable with square cuts and screws — the joinery is still simple butt joints, but the scale means squareness actually matters, since a shelf that’s even slightly out of square will visibly rack over time under the weight of books. Use a level when attaching each shelf to the side panels, not just a tape measure, and drive screws through pilot holes to avoid splitting the thinner shelf edges. Two coats of polyurethane over a stain, sanded lightly with 320-grit between coats, gives a bookshelf enough durability to handle daily use without looking overly glossy.
A coffee table introduces load-bearing joinery in a way a bookshelf doesn’t — the legs need to be genuinely square to the top and to each other, or the table will wobble no matter how well everything else is built. Solid oak is a common choice here specifically because its hardness resists the dents and scuffs a coffee table takes over years of actual use. Attach the legs with both wood glue and screws (glue alone isn’t enough for a joint that takes lateral stress every time someone bumps the table), and add a lower shelf between the legs for both extra storage and structural rigidity — it ties the four legs together and meaningfully reduces wobble.
Decorative Wood Projects
Geometric wall art is a good use for scrap wood left over from other projects — cut small offcuts into triangles, hexagons, or simple strips, arrange them in a pattern against a backing board, and glue them down before framing the whole thing or hanging it directly. Painting each piece a different shade of the same color family (several blues, several warm neutrals) tends to look more intentional than random bright colors, since it reads as a designed palette rather than leftover paint samples.
A planter box is essentially the same build as the wooden box covered elsewhere on this site, with two changes: use cedar or another naturally rot-resistant wood since it’ll hold damp soil, and drill several 1/4-inch drainage holes in the bottom before you ever add soil, since standing water is what actually kills most potted plants and rots the box itself over a season or two. Line the interior with landscape fabric if you want to slow down moisture contact with the wood and extend how many seasons the box lasts.
Tips For Success
The mistakes that trip up most beginners are predictable: over-sanding rounds over edges that were supposed to stay crisp, rushing a glue-up before checking squareness means the mistake is locked in once the glue sets, and skipping a pilot hole on a small piece near an edge is the single most common way to split a board you’ve already cut and sanded. None of these are skill problems — they’re pacing problems, and slowing down at exactly those three moments (sanding, glue-up, and screwing near an edge) fixes most beginner frustration before it starts.
A little organization goes further than it sounds: laying out and labeling cut pieces before assembly prevents the “which board was which” confusion that wastes real time on multi-piece projects like a bookshelf. Always make your first cut of a new technique — a miter, a rabbet, a specific joint — on a scrap offcut rather than the actual project piece, since a practice cut costs nothing and a ruined project piece means a trip back to the lumber yard.
Resources And Inspiration
YouTube channels built specifically around beginner woodworking walk through full builds in real time, which matters more than a written plan alone because you can actually see how much pressure to use on a hand saw or how a joint should look once it’s properly seated — something that’s hard to convey in photos or text. Watching a full video once before starting a project, rather than pausing and rewatching step by step during the build, tends to work better since you go in with the whole sequence in mind instead of constantly stopping to check what’s next.
Woodworking forums and Reddit communities like r/beginnerwoodworking are useful less for finding new project ideas and more for troubleshooting — posting a photo of a joint that isn’t sitting right, or a board that split unexpectedly, usually gets a specific, practical answer faster than searching alone would. Sharing a finished first project, even an imperfect one, is also one of the more reliable ways to stay motivated for the next one, since the feedback from other woodworkers tends to focus on what to try next rather than what went wrong.
Frequently Asked Questions
What Is The Best Wood For Beginner Projects?
Pine is the best wood for beginner projects. It’s affordable, easy to work with, and widely available. Pine sands smoothly and accepts paint or stain well, making it versatile for various projects.
What Are Some Easy Things To Make With Wood?
Simple wood projects include making shelves, picture frames, birdhouses, coat racks, and small planters. These are great for beginners.
What Wood Crafts Sell Well?
Popular wood crafts that sell well include custom furniture, wooden toys, cutting boards, birdhouses, picture frames, and home decor items.
What Is The Cheapest Wood For Diy Projects?
Pine is the cheapest wood for DIY projects. It’s easy to work with, widely available, and cost-effective.
Conclusion
Starting DIY wood projects can be fun and rewarding. You learn new skills. You create useful items for your home. These projects help you gain confidence. They also make great gifts. Remember to start small and be patient. Safety should always come first.
Gradually, you can take on bigger challenges. Enjoy every step of your woodworking journey. Happy crafting!
Sponsored / affiliate links. As an Amazon Associate I earn from qualifying purchases. I may earn additional commission from eligible campaigns.