How Do You Get Glue Off Metal: The Best, Proven Method
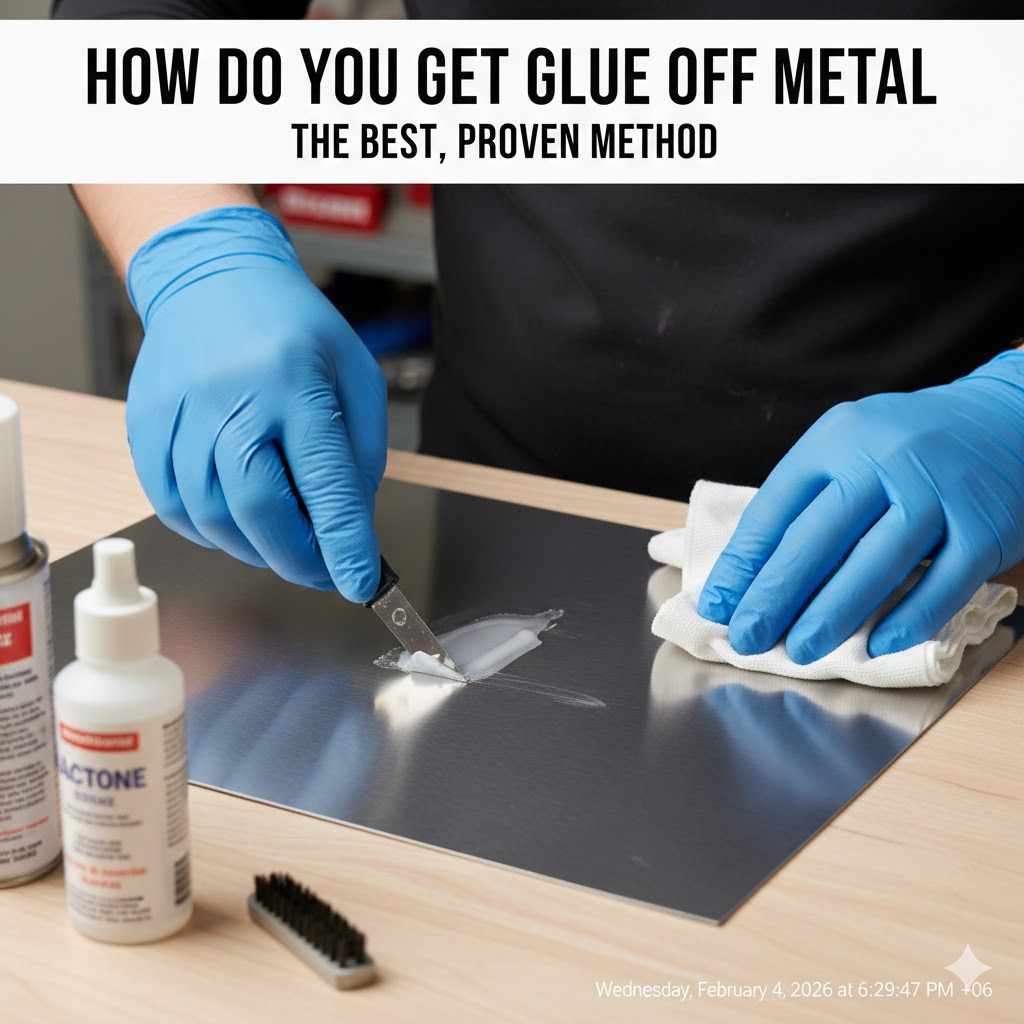
To get glue off metal, start by gently heating the adhesive with a hairdryer for 30-60 seconds. Then, carefully lift the softened glue with a plastic scraper or an old credit card. For stubborn residue, dab a microfiber cloth in isopropyl alcohol or acetone, let it sit for a few minutes, and wipe clean.
Hello there, fellow maker! It’s Md Meraj, your friend in the workshop. We’ve all been there. A project is going perfectly, and then—oops. A drip of super glue lands on a shiny metal hinge, or you peel a sticker off a new tool, leaving a stubborn, tacky mess. It’s frustrating, right? That sticky residue can ruin the look of a beautiful piece. Don’t you worry, though. Getting glue off metal is a problem with a simple solution.
You don’t need harsh chemicals or a lot of elbow grease. Most of the time, all you need are a few things you already have at home. In this guide, I’ll walk you through the best, safest methods to clean up that sticky mess. We’ll cover everything from gentle techniques for sticker gunk to stronger solutions for tough glues. Let’s get that metal looking clean and new again!
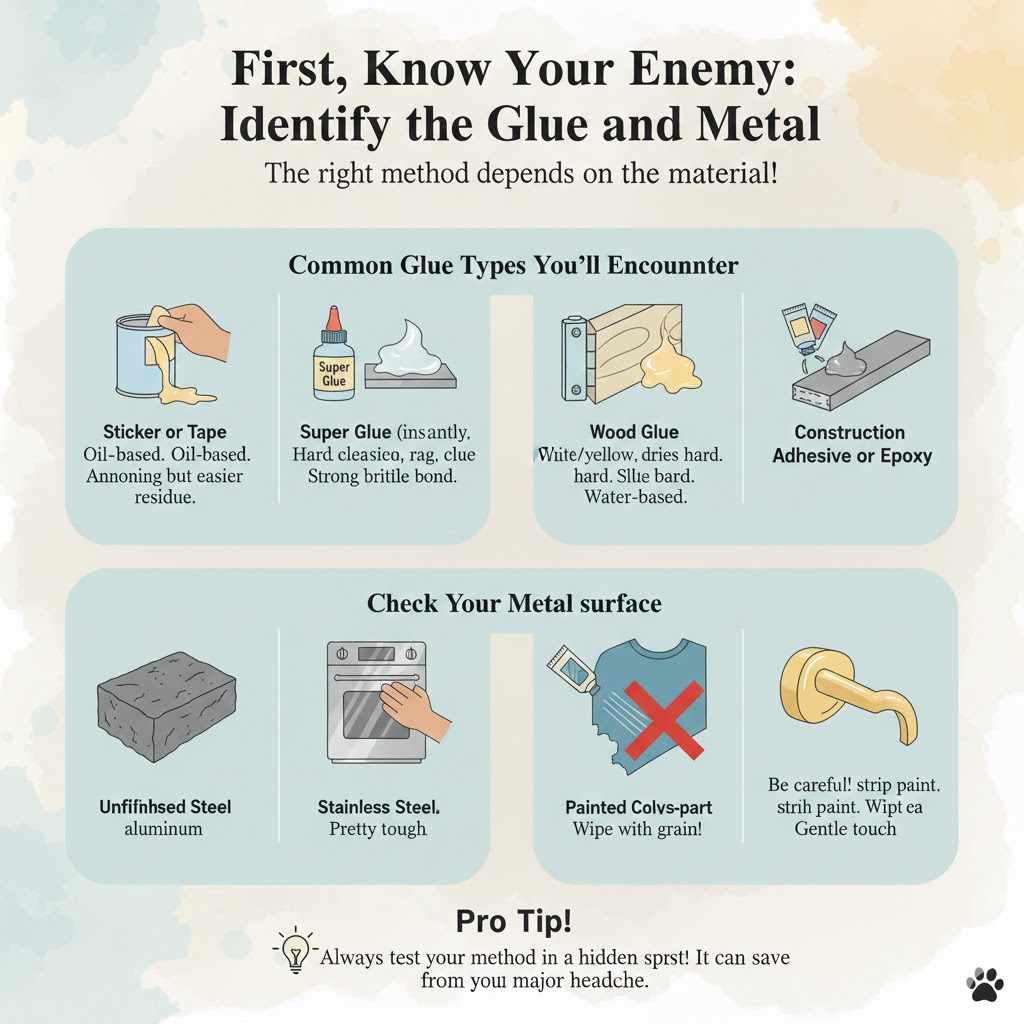
First, Know Your Enemy: Identify the Glue and Metal
Before we jump into scraping and wiping, let’s take a quick pause. The best way to get glue off metal depends entirely on two things: what kind of glue it is and what kind of metal you’re working with. Getting this right from the start saves you time and protects your project from accidental damage. It’s like choosing the right screwdriver for the right screw—it just makes the job easier.
Common Glue Types You’ll Encounter
Different glues have different chemistries, which means they respond to different removal methods. Here are the usual suspects:
- Sticker or Tape Residue: This is the tacky, gummy film left behind by labels, price tags, and tape. It’s usually oil-based, making it annoying but relatively easy to remove.
- Super Glue (Cyanoacrylate): This stuff bonds instantly and dries into a hard, clear plastic. It creates a very strong, brittle bond that can seem impossible to break.
- Wood Glue (PVA): If you’re a woodworker, you know this one well. When it drips on metal hardware like hinges or handles, it dries hard but is water-based, which is good news for us.
- Construction Adhesive or Epoxy: These are the heavy hitters. They create powerful, permanent bonds and can be very tough to remove once fully cured. They often require more muscle or specialized removers.
Check Your Metal Surface
Not all metals are created equal. Some can handle strong solvents, while others will scratch or discolor easily. Think about the surface you’re cleaning:
- Unfinished Metal: Raw steel, aluminum, or iron are pretty tough. You have more options here.
- Stainless Steel: Common in kitchens and appliances. It’s durable but can be scratched by abrasive materials. Always wipe with the grain!
- Painted or Coated Metal: Be extra careful here. Strong solvents like acetone can strip paint right off. Heat can also cause the paint to bubble or discolor.
- Soft Metals: Brass, copper, and chrome are softer and can be easily scratched. A gentle touch is key.
When in doubt, always test your cleaning method on a small, hidden spot first. This simple step can save you from a major headache later on.
The Best Place to Start: The Heat and Scrape Method
For most everyday glue problems, like sticker residue or even small dabs of dried craft glue, I always recommend starting with the gentlest method possible. Why? Because it’s safe for almost any metal surface and often all you need. The goal here is to soften the glue, not melt your project. This method is my go-to first attempt every single time.
Tools and Materials You’ll Need
You probably have all of this around your home or workshop already. No need for anything fancy!
- A hairdryer or a heat gun (on its lowest setting)
- A plastic scraper, plastic putty knife, or an old credit card
- Soft microfiber cloths
- Warm, soapy water (a little dish soap in a bowl of water)
Step-by-Step Instructions
Follow these simple steps, and be patient. Sometimes you need to repeat the process a couple of times for very stubborn spots.
- Clean the Area: First, wipe the surface with a damp cloth to remove any dust or dirt. This prevents you from grinding grit into the metal as you work.
- Apply Gentle Heat: Turn your hairdryer to a low or medium setting. Hold it about 3 to 6 inches away from the glue spot. Move it back and forth continuously to distribute the heat evenly. Do this for about 30 to 60 seconds. The goal is to make the metal warm to the touch, not hot. The adhesive should become soft and gummy.
- Scrape Gently: While the glue is still warm and soft, take your plastic scraper or credit card. Hold it at a low angle (almost flat against the surface) and start pushing gently at the edge of the glue. You should see it start to lift or peel away. Work from the outside edges toward the center.
- Wipe Away the Residue: Once you’ve lifted the bulk of the glue, there will likely be a sticky film left behind. Dip a microfiber cloth in your warm, soapy water, wring it out, and wipe the area firmly in a circular motion.
- Rinse and Dry: Use a clean, damp cloth to wipe away any soap. Then, dry the area completely with another clean cloth to prevent water spots, especially on stainless steel.
- Repeat if Needed: If some glue remains, don’t get discouraged! Just repeat the process. A little more heat and gentle scraping should take care of it.
Tackling Stubborn Glue: Solvents to the Rescue
So, the heat method didn’t quite cut it? Don’t worry, that just means you’re dealing with a tougher adhesive, like super glue or a chemical-based epoxy. It’s time to bring in some liquid muscle: solvents. A solvent is simply a liquid that can dissolve another substance. But before we start opening bottles, let’s talk safety.
Safety First, Always!
Working with chemical solvents, even common household ones, requires respect. They can release fumes and irritate your skin. For your safety and peace of mind, please follow these rules:
- Work in a Well-Ventilated Area: Open a window or a garage door. Better yet, work outside if you can. Good airflow helps disperse fumes so you don’t breathe them in.
- Wear Protective Gear: Put on a pair of chemical-resistant gloves (nitrile is a great choice) and safety glasses. You don’t want this stuff splashing on your skin or in your eyes.
- Read the Label: If you’re using a commercial product, read the manufacturer’s safety instructions and warnings. They are there for a reason. You can find detailed safety information on handling chemicals from resources like the Occupational Safety and Health Administration (OSHA).
- Keep Away from Flames: Many solvents are flammable. Make sure you’re not working near any open flames, pilot lights, or sources of sparks.
Choosing the Right Solvent for the Job
The key is to start with the mildest solvent that will get the job done. Think of it like a ladder—you start on the bottom rung and only climb higher if you need to.
| Solvent Type | Best For Removing | Things to Watch Out For |
|---|---|---|
| Isopropyl Alcohol (Rubbing Alcohol) | Sticker residue, some types of marker ink, light adhesive films. | Very safe on most metals. It evaporates quickly. Might require a little more scrubbing. |
| Acetone (or Nail Polish Remover) | Super glue (cyanoacrylate) and many permanent adhesives. | Can damage or strip paint and some plastic coatings. Always test on a hidden spot first! |
| Oil-Based Products (WD-40, Goo Gone, Vegetable Oil) | Sticky, gummy residue from tape, stickers, and price tags. | Very safe for surfaces but can leave an oily film that needs to be cleaned off with soap and water afterward. |
| Specialized Glue Removers | Construction adhesives, epoxy, and other heavy-duty glues. | These are powerful and effective but you must follow the product’s instructions carefully. |
How to Use a Solvent Safely
The process is similar no matter which solvent you choose.
- Spot Test: I can’t say this enough! Find an inconspicuous area on your metal piece and apply a tiny amount of the solvent with a cotton swab. Let it sit for a minute, then wipe it off. Check for any discoloration, paint damage, or changes to the finish. If it looks good, you’re ready to proceed.
- Apply the Solvent: Dampen a folded paper towel or a cotton ball with your chosen solvent. Don’t pour it directly on the surface, as it can run and affect a larger area than you intend.
- Let It Soak: Press the dampened cloth or cotton ball directly onto the glue spot. You want the solvent to sit on the glue and work its magic. Let it soak for 2 to 10 minutes. The time depends on the glue’s stubbornness and the solvent’s strength. The goal is to let the solvent penetrate and break down the adhesive.
- Wipe and Scrape: After letting it soak, try wiping the glue away with a clean cloth. It should be much softer now. If it’s still stuck, use your plastic scraper to gently lift the softened goo. You might need to apply a little more solvent as you work.
- Clean Up Thoroughly: Once the glue is gone, you need to remove any leftover solvent. Wipe the entire area down with a cloth dipped in warm, soapy water. Then rinse with a clean, damp cloth and dry it completely. This is especially important for oil-based products.
Specific Strategies for Different Glues
Knowing the enemy helps you choose the right weapon. Here’s a quick-reference guide for how to get glue off metal based on what you’re up against. This is where we put our knowledge into practice.
How to Get Super Glue Off Metal
Super glue feels permanent, but its kryptonite is acetone. Acetone breaks the chemical bonds of the cyanoacrylate, causing it to release its grip.
- What You’ll Need: Acetone (100% pure is best, but nail polish remover with acetone works), cotton balls or swabs, plastic scraper, safety gear.
- The Process:
- Do a spot test! Acetone is strong and can harm painted finishes.
- Soak a cotton ball in acetone and press it firmly against the hardened super glue.
- Hold it there for 2-3 minutes. You may need to re-soak the cotton ball as acetone evaporates quickly.
- You should see the edges of the glue start to turn white and soften.
- Use a plastic scraper to gently pry or flake off the softened glue.
- Repeat the process until all the glue is gone.
- Clean the area with soapy water to remove any acetone residue.
How to Get Sticker Residue Off Metal
That annoying sticky film is best tackled with oil. The oil breaks down the gummy adhesive, allowing it to be wiped away easily.
- What You’ll Need: An oil (vegetable oil, mineral oil, WD-40, or Goo Gone), a paper towel, a plastic scraper, soapy water.
- The Process:
- Peel off as much of the sticker as you can with your fingernail.
- Apply a generous amount of your chosen oil directly onto the residue. Let it soak for 10-15 minutes. Don’t rush this part—let the oil do the work.
- The residue should now be very soft. Use a plastic scraper to scrape up the goo. It should come off in clumps.
- Wipe away the remaining oily gunk with a paper towel.
- Finish by washing the area thoroughly with warm, soapy water to remove the oil. Dry completely.
How to Get Epoxy or Construction Adhesive Off Metal
This is the toughest challenge. If the adhesive is still wet, you can often clean it up with the solvent recommended by the manufacturer (check the packaging). If it’s fully cured, you have a bigger job ahead of you.
- What You’ll Need: A commercial glue remover designed for epoxy or construction adhesive, a heat gun, a sturdy scraper (start with plastic, but you may need a metal one used with extreme care), safety gear.
- The Process:
- Start with heat. Use a heat gun on a low setting to warm and soften the adhesive. This can take several minutes. Be very careful not to overheat the metal, especially if it’s painted.
- While the adhesive is soft, carefully scrape away as much as you can.
- For what’s left, apply a specialized adhesive remover according to the product directions. These products are powerful chemicals, so follow all safety precautions.
- Let the chemical remover sit for the recommended time, then scrape away the softened adhesive.
- This may take multiple applications. Patience is your best tool here.
- Once done, neutralize and clean the area as directed by the remover’s instructions, usually with soap and water or mineral spirits.
The Finishing Touch: How to Clean Up After
Great job, you got the glue off! But we’re not quite done. Leaving behind solvent residue or dirt can dull the metal’s finish. A proper final cleaning ensures your project looks spotless and professional. It’s like sweeping the floor after a big project—it’s the step that truly finishes the job.
Final Cleaning and Neutralizing
No matter which method you used, the final step should always be a good wash. Solvents and oils can leave behind a film that attracts dust and dirt.
- Use Simple Soap and Water: Mix a few drops of mild dish soap into a bowl of warm water.
- Wipe it Down: Dip a soft microfiber cloth into the soapy water, wring it out, and wipe down the entire area you worked on. This removes any lingering chemicals or oily residue.
- Rinse Clearly: Use a second, clean cloth dampened with just plain water to “rinse” the area. This ensures no soap film is left behind.
- Dry Thoroughly: Immediately dry the metal with a clean, dry microfiber cloth. This prevents water spots and protects against rust on susceptible metals like raw steel. For stainless steel, be sure to dry following the direction of the metal’s grain for a streak-free shine.
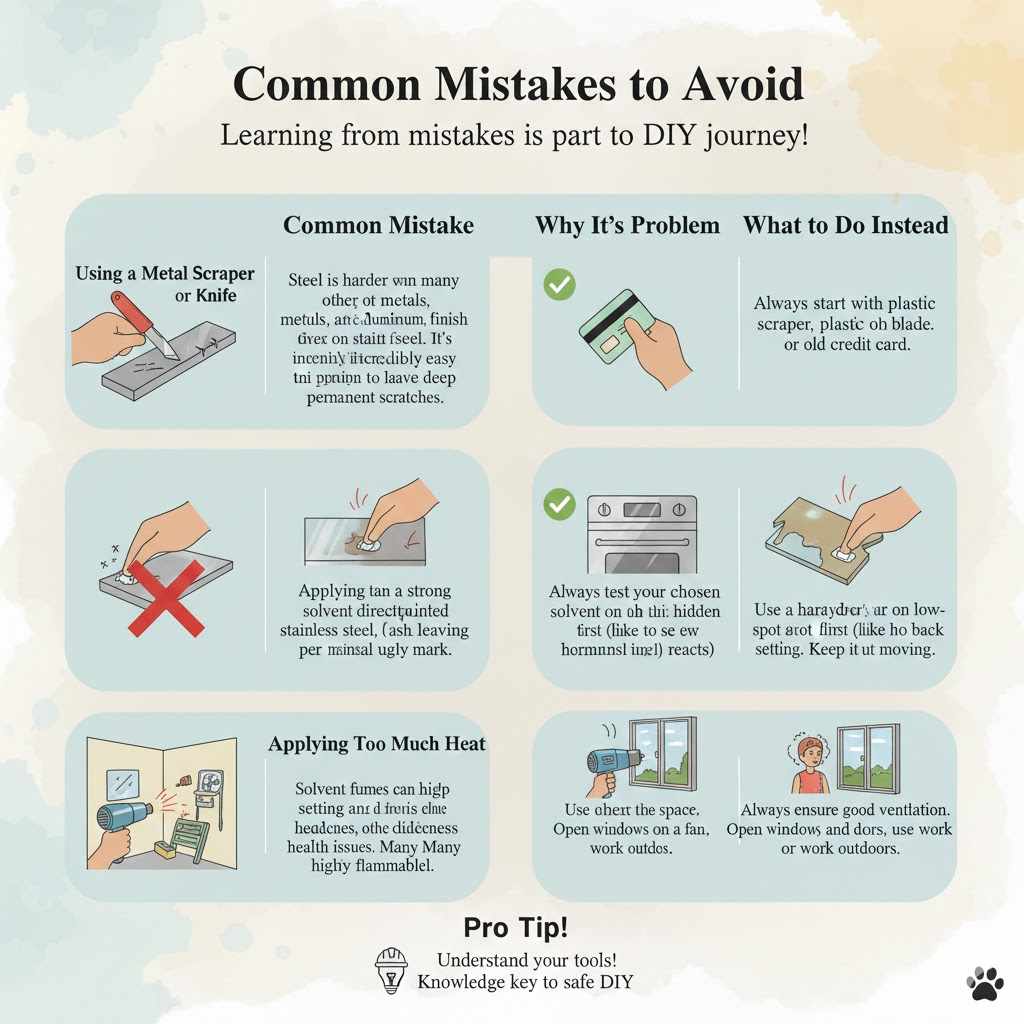
Common Mistakes to Avoid
Learning from mistakes is part of any DIY journey, but it’s even better to avoid them in the first place! Here are a few common slip-ups people make when trying to get glue off metal.
| Common Mistake | Why It’s a Problem | What to Do Instead |
|---|---|---|
| Using a Metal Scraper or Knife | Steel is harder than many other metals, including aluminum, brass, and even the finish on stainless steel. It’s incredibly easy to leave deep, permanent scratches. | Always start with a plastic scraper, plastic razor blade, or an old credit card. They are strong enough to lift glue but too soft to scratch most metals. |
| Skipping the Spot Test | Applying a strong solvent like acetone directly to a painted or coated surface can instantly strip the finish, leaving a permanent ugly mark. | Always test your chosen solvent on a hidden spot first (like the back or underside) to see how the material reacts. Wait a few minutes before proceeding. |
| Applying Too Much Heat | A heat gun on a high setting can warp thin metal, discolor stainless steel (giving it a bluish-brown tint), and cause paint to bubble and peel. | Use a hairdryer on low-medium or a heat gun on its lowest setting. Keep it moving and never focus the heat on one spot for too long. |
| Working in a Closed Room | Solvent fumes can build up in a space without airflow, leading to dizziness, headaches, and other health issues. Many are also highly flammable. | Always ensure good ventilation. Open windows and doors, use a fan to circulate air, or work outdoors if possible. Keep flammable solvents away from ignition sources. You can find more about tool safety at resources like the Canadian Centre for Occupational Health and Safety. |
Frequently Asked Questions
How do I get super glue off metal without acetone?
If you don’t have acetone, you can try soaking the glue spot in isopropyl alcohol (rubbing alcohol) for a longer period (15-20 minutes). For a more natural approach, a paste made from baking soda and vegetable oil can sometimes work with persistent, gentle scrubbing.
Can vinegar remove glue from metal?
Yes, white vinegar can work on some water-based glues (like PVA wood glue) and can help soften mild sticker residue. Soak a cloth in vinegar and let it sit on the spot for 15-20 minutes before wiping. However, it’s not very effective against stronger glues like super glue or epoxy.
Is it safe to use a heat gun on all types of metal?
Generally, yes, but with caution. Use the lowest heat setting and keep the gun moving to avoid concentrating heat in one spot. Be extra careful with thin metals, as they can warp, and painted metals, as the paint can bubble. Never use a heat gun near flammable materials.
Will Goo Gone damage metal surfaces?
Goo Gone is an oil-based remover that is safe for use on most hard, non-porous surfaces, including most metals like steel, aluminum, and chrome. It is not recommended for use on unfinished brass or copper as it could cause discoloration over time. Always wash the oily residue off with soap and water after use.
How do you get old, hardened glue off metal?
For old, hardened glue, a combination approach is often best. Start by gently heating the glue with a hairdryer to make it less brittle. Then, apply an appropriate solvent (like acetone for super glue or a commercial remover for epoxy) and let it soak. After soaking, gently scrape the softened glue away. This may take a few rounds of soaking and scraping.
What’s the best way to remove Gorilla Glue from metal?
Cured Gorilla Glue (a polyurethane adhesive) is extremely tough. Mechanical removal is your best bet. Use a sharp chisel or scraper held at a low angle to carefully chip away the hardened glue. Be very careful not to gouge the metal. If the glue is still tacky, you can wipe it up with mineral spirits or acetone.
Conclusion: A Clean Finish is Always Within Reach
There you have it. That stubborn spot of glue that seemed like a permanent fixture on your beautiful metal surface is no match for a little bit of patience and the right technique. The key takeaway is always to start with the gentlest method first—a bit of heat and some gentle persuasion—before moving on to stronger solutions if you need them.
Remember to identify your glue and metal, prioritize safety by wearing gloves and ensuring good ventilation, and always, always do a spot test. By following these steps, you’re not just cleaning a sticky mess; you’re practicing good craftsmanship. You’re treating your materials with respect and ensuring your projects look their absolute best, from start to finish.
So next time you find a stray drop of glue, don’t panic. Take a deep breath, grab your hairdryer and plastic scraper, and know that you have the skills to handle it. Happy making!