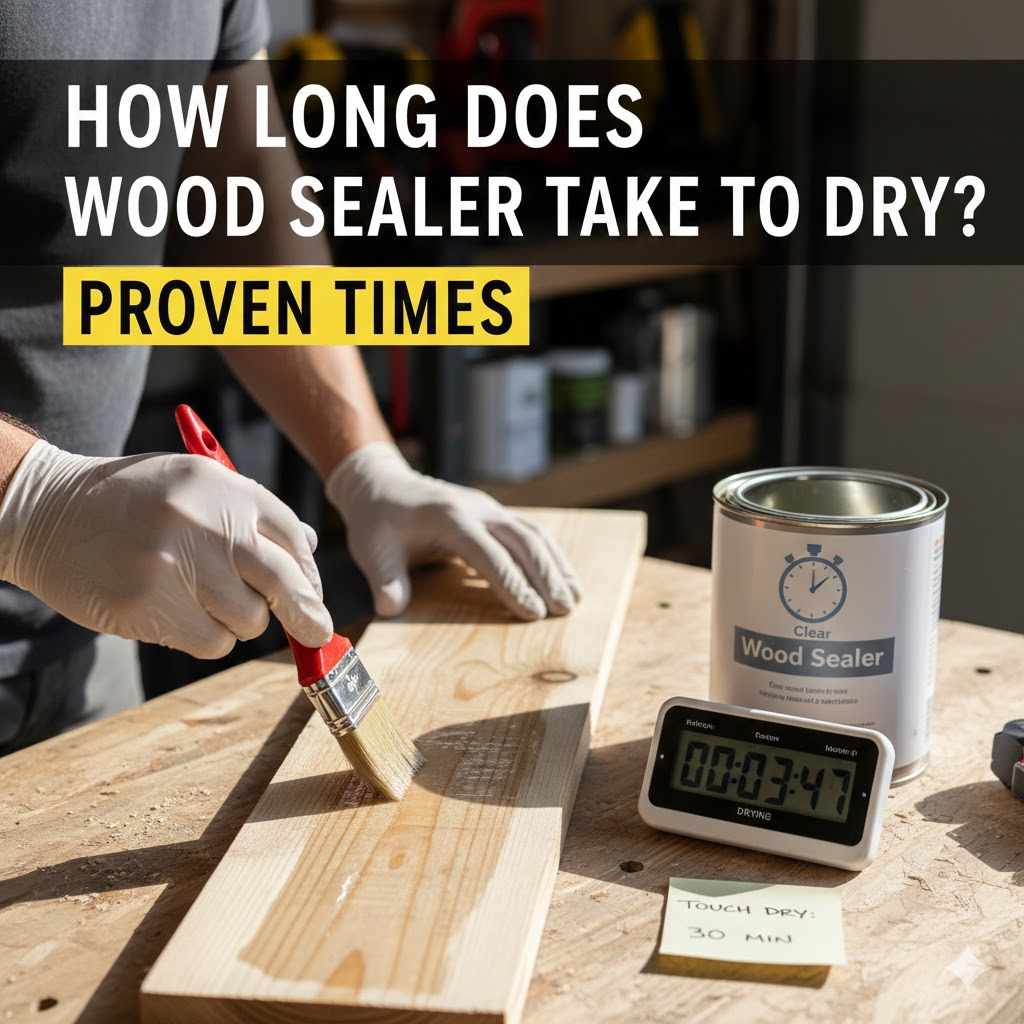
How Long Does Wood Sealer Take To Dry? Proven Times
Quick Summary: How long does wood sealer take to dry? Typically, most wood sealers dry to the touch in 30 minutes to 2 hours, but achieving a full cure, ready for recoating or heavy use, often takes 24 to 72 hours. Drying time heavily depends on the sealer type (water-based vs. oil-based), humidity, temperature, and wood porosity. Always check the manufacturer’s specific guidelines!
Getting that perfect finish on your woodworking project is exciting, but waiting for the sealer to dry can feel like forever. If you jump the gun, you risk streaks, bubbles, or a sticky mess. I know that feeling—you just want to apply the next coat and admire your work! Don’t worry; figuring out drying times isn’t rocket science.
It’s just about knowing what kind of sealer you have and what the weather is doing. We are going to break down the proven drying times for all the popular wood sealers. You’ll learn exactly when you can safely move on to the next step, saving you time and ensuring a beautiful, long-lasting finish. Let’s explore the secrets to timing your drying process like a pro mentor!
Understanding the Drying Process: More Than Just Time
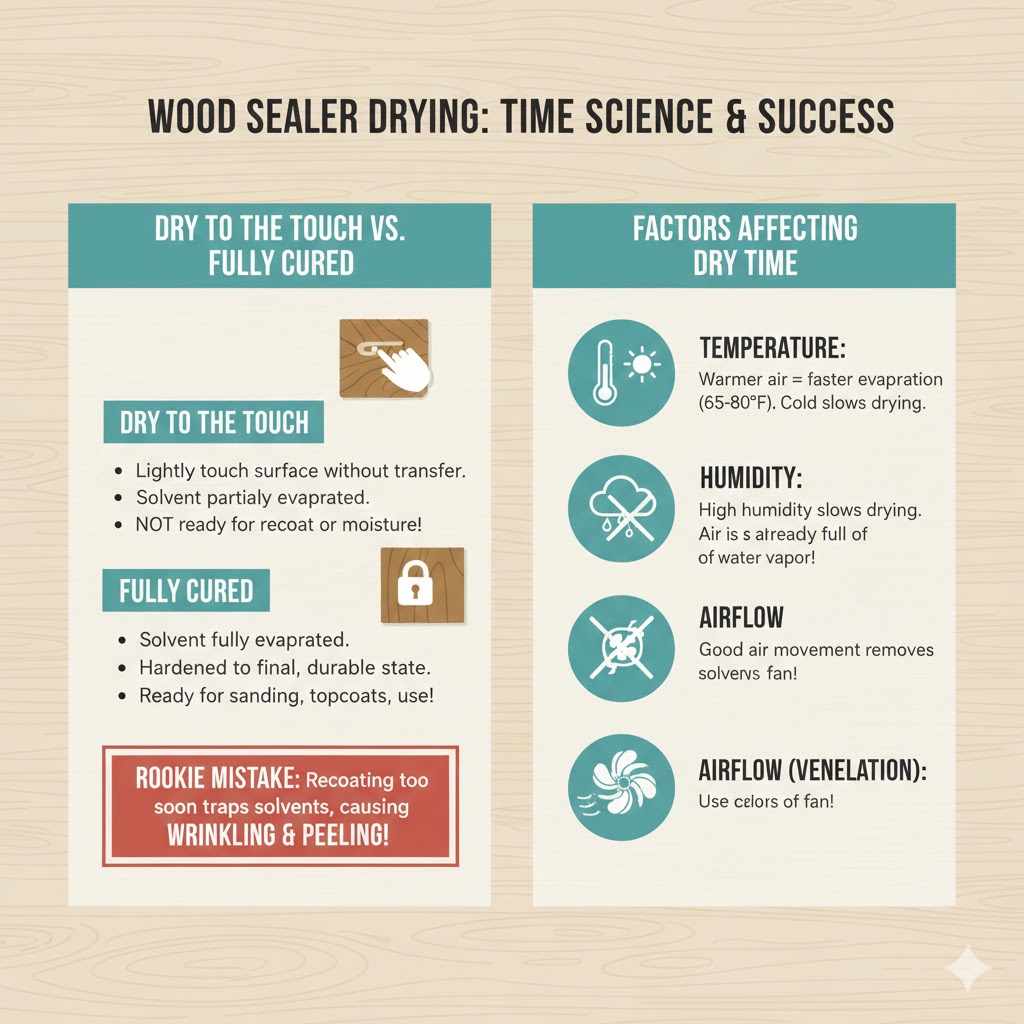
When we talk about wood sealer drying, it’s helpful to separate the process into two stages: “dry to the touch” and “fully cured.” Knowing the difference is the key to successful finishing.
Dry to the Touch vs. Fully Cured
“Dry to the touch” means you can lightly run your finger over the surface without getting sealer on your skin. This is great news, but it doesn’t mean it’s ready for the next step.
“Fully cured” means the solvent (water or oil) has completely evaporated, and the sealer has hardened to its final, durable state. This is when you can sand it lightly, apply topcoats, or expose it to moisture without damage.
Ignoring the full cure time is one of the biggest rookie mistakes. If you recoat too soon, you might trap solvents, causing the finish to wrinkle or fail to adhere properly.
The Big Three Factors Affecting Dry Time
Before looking at specific product times, you need to understand the environment where your wood sits. These three factors have the biggest impact on how long you wait:
- Temperature: Warmer air helps solvents evaporate faster. Ideal drying temperatures are usually between 65°F and 80°F (18°C to 27°C). Cold conditions dramatically slow down drying.
- Humidity: This is the number one culprit for slow drying, especially for water-based products. High humidity means there is already a lot of water vapor in the air, so the sealer’s water takes much longer to escape.
- Airflow (Ventilation): Good air movement pulls away the evaporated solvents (like a slow, steady breeze). If you are sealing indoors, running a fan can significantly speed up the process.
Drying Times Based on Sealer Type: A Comparative Guide
Not all sealers are created equal! The base chemistry—whether it’s water, oil, or shellac—determines how fast it evaporates. As a DIY enthusiast, knowing your product is crucial.
1. Water-Based Sealers (Acrylic/Latex)
Water-based sealers are popular because they clean up easily with soap and water and have very low odor. They are fantastic for beginners.
These are the fastest drying sealers available. They shine in warm, dry environments.
- Dry to the Touch: Usually 30 minutes to 1 hour.
- Recoat Time: 1 to 4 hours is generally safe, depending on humidity. Always aim for 2 hours minimum in good conditions.
- Fully Cured: Often 24 to 48 hours before exposure to heavy use or moisture.
Pro Tip from Md Meraj: If you are working on a piece where moisture is a concern (like a bathroom vanity), use a high-quality water-based sealer, but give it the full 48 hours to cure before heavy use. Low humidity is your best friend here.
2. Oil-Based Sealers (Alkyd/Penetrating Oils)
Oil-based sealers often provide deeper penetration and a rich, traditional look. They take longer to dry because the oils must oxidize (harden by reacting with air) rather than just evaporating.
These need good ventilation because they release more volatile organic compounds (VOCs) as they dry. Always wear a respirator if you’re sensitive to fumes.
- Dry to the Touch: 2 to 6 hours.
- Recoat Time: 6 to 24 hours. Waiting a full 24 hours between coats is often recommended for oil-based products to ensure a hard surface, preventing “pull-through.”
- Fully Cured: This can take a surprisingly long time—often 5 to 7 days for full hardness.
3. Penetrating Oil Finishes (Tung Oil, Danish Oil, Linseed Oil)
These aren’t technically “sealer” coats in the traditional film-forming sense, but they seal the wood pores deeply. They rely purely on oxidation.
These cure the slowest, but they offer a natural, in-the-wood look that many woodworkers adore.
- Dry to the Touch: 6 to 12 hours (sometimes longer).
- Recoat Time: 12 to 24 hours. Applying another coat before the previous one is adequately oxidized can lead to a gummy, sticky surface that won’t ever fully dry.
- Fully Cured: Can take up to 30 days to reach maximum hardness and water resistance.
Visualizing Sealer Drying Times
To help you plan your project schedule, here is a table summarizing the typical timeframes. Remember, these are averages; always defer to the specific can instructions.
| Sealer Type | Dry to Touch (Approx.) | Recoat Time (Minimum) | Full Cure (Approx.) |
|---|---|---|---|
| Water-Based (Acrylic/Latex) | 30 min – 1 hr | 1 – 2 hours | 24 – 48 hours |
| Oil-Based (Alkyd) | 2 – 6 hours | 6 – 24 hours | 5 – 7 days |
| Penetrating Oils (Tung/Danish) | 6 – 12 hours | 12 – 24 hours | Up to 30 days |
The Secret Weapon: How to Speed Up Wood Sealer Drying Time
Waiting patiently is important, but sometimes you have a tight deadline, maybe that outdoor deck project needs to be done before the big weekend BBQ! Luckily, you can take active steps to speed things up without ruining the finish. Remember, we are aiming to maximize evaporation and oxidation.
Actionable Tips for Faster Drying
- Control the Environment (The Workshop Goal): The absolute best thing you can do is aim for ideal conditions. If possible, work when the ambient temperature is between 70°F and 75°F and relative humidity is below 50%. The U.S. Forest Service notes that wood finishes rely heavily on favorable climate conditions for optimal film formation.
- Increase Airflow Dramatically: Use multiple fans! Don’t just point one fan across the surface. Place one fan blowing across the surface and another positioned to pull the air away from the piece (exhausting it out of the room or shop). This constant exchange prevents trapped solvent vapors from slowing down the process.
- Thin Coats are Key: A thin coat of sealer dries exponentially faster than a thick coat. Think of it like making a pancake—a thin layer cooks through quickly, but a thick blob takes ages. If the can allows for thinning (especially water-based), applying two very thin coats with short flash times between them is often better than one thick coat.
- Utilize Dehumidifiers for Water-Based Sealers: If you are battling high humidity (common in spring and fall), running a small dehumidifier in your workspace pulls the moisture out of the air, giving the sealer’s water a much easier time evaporating.
- Avoid Direct Heat (Be Careful!): While warmth helps, never point a direct heat source (like a heat gun or direct space heater) onto a wet finish. This causes bubbling, scorching, and rapid curing on the surface while trapping the liquid underneath—a disaster! Gentle ambient warmth is the goal.
When is it Safe to Sand Between Coats?
Sanding is an essential step for a glass-smooth finish, but sanding too early will just peel up the soft sealer beneath the sandpaper, creating deep scratches and clumps of gummy finish.
Sanding Readiness Check
You must wait until the sealer is fully hardened, not just dry to the touch. For most water-based sealers, this means waiting 2–4 hours. For oil-based sealers, you should comfortably wait 12–24 hours.
When sanding:
- Always use light pressure.
- Start with a higher grit (e.g., 220 grit) for the first light scuff sanding. If the sealer feels soft or clogs the sandpaper immediately, STOP. It needs more time.
- Clean off all dust thoroughly with a tack cloth or a lightly damp cloth (ensure the cloth is only slightly damp, not soaking wet).
Specific Sealer Examples and Proven Times
To give you confidence in your schedule, let’s look at some common product categories. This should help you plan your weekend projects effectively.
Polyurethane Sealers (Water-Based vs. Oil-Based)
Polyurethane is a common sealer/topcoat hybrid. The drying times align closely with the base types we discussed:
| Product Category | Dry Time to Touch | Time Before Light Sanding/Recoating |
|---|---|---|
| Water-Based Polyurethane | 30–60 minutes | 2–4 hours |
| Oil-Based Polyurethane | 4–8 hours | 12–24 hours |
Outdoor Deck and Fence Sealers
Outdoor sealers are formulated differently to handle UV exposure and moisture cycling. They often contain mildewcides and sometimes need time to absorb deeply into the lumber.
Oil-Based Deck Stains/Sealers: These need a long time to fully penetrate, often requiring 24 hours before applying a second coat or heavy rainfall. If they stay tacky for too long, the oils can attract dirt.
Water-Based Deck Sealers: These usually offer faster results, often recoatable in 4–6 hours. However, check local building codes or material standards from bodies like the Environmental Protection Agency (EPA) regarding wood treatments, especially for pressure-treated wood, to ensure you are using an appropriate sealer.
Diagnosing Common Drying Problems (And Fixing Them)
If your sealer seems like it’s taking forever, don’t panic. Here are the most common scenarios beginners face and how to troubleshoot them safely.
Problem 1: The Sealer is Still Sticky After Hours
If the surface feels tacky or oily after the manufacturer’s recommended dry time, you are likely experiencing one of these issues:
- Too Cold or Too Humid: The air cannot effectively pull the solvent or water out of the finish.
- Coating Applied Too Thickly: The surface skin dries first, trapping the liquid beneath it.
- Improper Mixing (Oil-Based): If using an oil-based product, the hardening agents (oxidizers) might not be fully mixed, preventing proper curing.
The Fix: Increase airflow and slightly raise the temperature of the room if possible (aim for that 70°F sweet spot). Do NOT apply a second coat! Wait patiently. If it’s extremely gummy after 48 hours, you might need to gently wipe off the top sticky layer with a rag slightly dampened with the appropriate solvent (mineral spirits for oil, water for latex) before allowing it to dry again in better conditions.
Problem 2: “Hazing” or “Cloudiness” on the Finish
This usually happens with water-based sealers in high humidity. The sealer tries to dry, but as the water evaporates, it cools the surface, causing airborne moisture to condense onto the finish, resulting in a milky white or hazy film.
The Fix: Stop applying new coats immediately. Improve ventilation aggressively to move humid air away from the project. If the haze is mild, subsequent clear coats often cover it up as they cure properly. If the haze is severe, you may need to lightly sand the area once completely dry and reapply a thin coat.
Problem 3: Sealer “Crawling” or “Peeling” During Recoat
If you sand lightly and the second coat immediately starts pulling away from the wood or clumping up, the first coat wasn’t cured enough—you sanded off the skin and started recoating liquid finish onto liquid finish.
The Fix: This usually requires allowing the piece to sit longer. For the next coat, apply much thinner material, or, in stubborn cases, wipe the entire surface down with a rag lightly dampened with the appropriate solvent to “reactivate” and smooth out the tacky layer before recoating thinly.
Building Your Finish Schedule Like a Pro
A confident woodworker plans their day around curing times. Here is a simple, sample schedule for finishing a set of beginner-friendly wooden picture frames using a standard water-based sealer (assuming moderate temperature and humidity).
Sample Project Timeline (Water-Based Sealer)
Goal: Complete all sealing and one finish topcoat in under 30 hours.
- 8:00 AM (Day 1): Prep wood, apply thin Coat 1 of Sealer. Ensure good airflow.
- 9:00 AM (Day 1): Sealer should be dry to the touch. Check lightly.
- 10:00 AM (Day 1): Apply thin Coat 2 of Sealer.
- 12:00 PM (Day 1): Sealer is dry. Perform a light scuff sand (220 grit). Wipe clean.
- 1:00 PM (Day 1): Apply first thin coat of Topcoat Polyurethane (Water-Based).
- 4:00 PM (Day 1): Topcoat dry to touch. If conditions are dry, you can proceed.
- 5:00 PM (Day 1): Apply second, slightly heavier coat of Topcoat.
- 8:00 AM (Day 2): Test for final hardness. If dry and smooth, the project is finished sealing! It will fully cure over the next 24 hours, but ready for light handling now.
Frequently Asked Questions (FAQ) for Beginners
Q1: Can I use a hairdryer to dry my wood sealer faster?
A: A hairdryer on a low heat setting can help localized airflow, but never use direct, high heat. High heat causes bubbling and skins the surface too fast, trapping liquid underneath. Gentle, continuous fan circulation is much safer and more effective than localized hot air.
Q2: Do outdoor sealers dry slower than indoor sealers?
A: Often, yes, especially oil-based deck sealers. Because they are designed to penetrate deep into dense exterior wood (like decking) and handle constant moisture exposure, they use more solvent that needs to evaporate, leading to longer dry times before the next coat can be safely applied.
Q3: What is the most critical part of the drying process I shouldn’t skip?
A: The recoat time! Most beginners check for “dry to the touch” and apply the next coat immediately. Skipping the manufacturer’s recommended recoat time leads to the finish failing because the solvents underneath soften or repel the new layer. Always follow that recoat window.
Q4: If my sealer dries clear, does that mean it’s cured?
A: No, clarity only means the visual solvents (like water or thinner) have evaporated. Curing—the chemical hardening process—is still underway, especially with oil-based products. A finish can look clear for days but still scratch easily if it hasn’t fully cured.
Q5: Does sanding the wood before sealing affect how fast the sealer dries?
A: Yes, lightly. If you sand wood to a very high grit (like 320 or 400), the surface becomes incredibly smooth, reducing the surface area for the sealer to absorb and bond. This smoother surface might dry slower or struggle to adhere than wood sanded to the recommended 180 or 220 grit.
Q6: If I live in a cold basement, will my water-based sealer ever dry?
A: It will dry, but very slowly. Cold temperatures slow chemical reactions significantly. If the temperature is below 55°F (13°C), curing can almost halt entirely. Your best bet is to move the project temporarily to a warmer area (around 70°F) with decent ventilation until it cures.
Conclusion: Confidence in Your Finishing Timeline
There you have it! Figuring out “how long does wood sealer take to dry?” boils down to three simple things: knowing if your sealer is water-based (fast) or oil-based (slow), paying close attention to the temperature and humidity in your shop, and reading the instructions on the can—that label is your absolute best resource. As a mentor, my biggest takeaway for you is this: Patience pays off more than speed.
If you feel an urge to rush to the next step, step away, wait just one more hour, and test the surface lightly. By respecting the curing process, you ensure your craftsmanship shines through with a durable, professional finish that lasts for years. Now, grab those fans, get that airflow moving, and enjoy the reward of a perfectly sealed project!