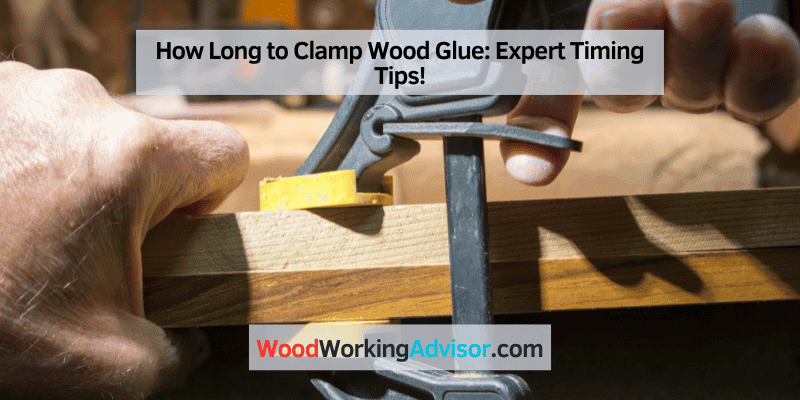
How Long to Clamp Wood Glue: Expert Timing Tips!
Clamp wood glue for at least 30 minutes to 1 hour for a strong bond. Wood glue needs to be clamped for a specific amount of time in order to create a strong and secure bond between the pieces of wood being joined together.
The clamping time required varies depending on the type and brand of wood glue being used, as well as the temperature and humidity. In general, it is recommended to leave the clamps on for at least 30 minutes to 1 hour.
This allows the glue to dry and cure properly, ensuring a solid connection. However, it is always best to follow the manufacturer’s instructions for the specific wood glue you are using. By adhering to the recommended clamping time, you can ensure the best results and a sturdy joint that will last.
Different Types Of Wood Glue
When it comes to woodworking projects, choosing the right type of wood glue is crucial for ensuring a strong and durable bond. There are several different types of wood glue available, each with its own unique properties and recommended clamping time. In this article, we will explore the different types of wood glue and discuss how long they need to be clamped for optimal results.
Pva Glues
PVA (Polyvinyl Acetate) glues, also known as yellow glues or carpenter’s glues, are the most commonly used wood glues. They are easy to use, dry clear, and offer a strong bond for most woodworking applications. PVA glues require clamping for approximately 30 minutes to 1 hour to achieve full strength. It is important to note that the exact clamping time may vary depending on factors such as humidity and the type of wood being glued.
Epoxy Resins
Epoxy resins are a popular choice for bonding wood as they provide excellent strength and resistance to moisture, heat, and chemicals. Unlike PVA glues, epoxy resin glues typically have longer clamping times. It is recommended to clamp epoxy resin glues for at least 2 hours to ensure a proper bond. However, for maximum strength, allowing the glued joint to cure overnight or up to 24 hours is recommended.
Polyurethane Glues
Polyurethane glues are known for their superior strength, versatility, and resistance to water. They create a foaming action when exposed to moisture, which helps fill gaps and provides increased bond strength. Polyurethane glues usually require clamping for 1 to 2 hours. However, it is advisable to check the manufacturer’s instructions for specific clamping time recommendations.
Hide Glues
Hide glues, traditionally made from animal products, have been used for centuries in woodworking. They offer excellent initial tack and are reversible, allowing for repairs or disassembly if needed. Hide glues typically require clamping for 30 minutes to 1 hour. However, they have a relatively short open time, so it is important to work quickly when using hide glues.
Cyanoacrylate (ca)
Cyanoacrylate (CA) glues, also known as super glues, are known for their fast bonding and high strength. They are suitable for bonding small parts or making quick repairs. CA glues usually set within seconds, eliminating the need for clamping in most cases. However, clamping may still be necessary for certain applications to ensure proper alignment.
Importance Of Proper Clamping
When it comes to woodworking projects, proper clamping is a critical step in ensuring the strength and longevity of your bonds. The way you clamp wood glue can significantly impact the overall quality and durability of your woodworking projects. In this article, we’ll explore the importance of proper clamping and how it affects the strength of bonds, woodworking project longevity, and avoidance of joint failures.
Strength Of Bonds
Proper clamping plays a crucial role in enhancing the strength of bonds in woodworking projects. When wood glue is applied between two surfaces and clamped together, it begins to cure and create a strong adhesive bond. However, without sufficient and consistent pressure from clamping, the bond may not develop to its full potential. Inadequate clamping can result in weak joints that are prone to separation or failure under stress.
Woodworking Project Longevity
Investing time in proper clamping not only ensures strong bonds but also contributes to the longevity of your woodworking projects. When joints are securely clamped, the adhesive bond can fully cure and provide long-lasting strength. This significantly reduces the risk of joints loosening or breaking over time, allowing your projects to withstand the test of time and usage.
Avoidance Of Joint Failures
Improper clamping can lead to joint failures, causing frustration and potential damage to your woodworking projects. When joints are not adequately clamped, the wood glue may not distribute evenly, resulting in weak spots or gaps within the bond. These weak areas are more prone to cracking, breaking, or separating, compromising the integrity of your work. Additionally, proper clamping ensures that the glue remains in the joint, preventing it from being squeezed out and leaving bare spots.
Assessing Clamp Time Per Glue Type
When it comes to woodworking projects, using the correct clamp time for wood glue is crucial for achieving strong and durable bonds. Different types of glue have varying curing characteristics and set times, so it’s important to understand the specific requirements of each glue type. In this article, we will explore the recommended clamp times for popular wood glues, including Time Guidelines for PVA Glue, Epoxy Resin Curing Characteristics, Polyurethane Adhesive Set Times, and Quick Tips for CA Glues.
Time Guidelines For Pva Glue
PVA glue, short for polyvinyl acetate, is widely used in woodworking due to its ease of use, affordability, and excellent bonding properties. When using PVA glue, it is recommended to clamp the wood joints for a minimum of 30 minutes. However, to achieve optimal results and ensure a strong bond, letting the glue dry and cure overnight is highly advised. This extended clamp time allows the PVA glue to reach its maximum strength, making it ideal for critical joints and load-bearing applications.
Epoxy Resin Curing Characteristics
Epoxy resin is a popular choice for woodworking projects that require an incredibly strong and durable bond, as well as resistance to moisture, chemicals, and heat. Unlike PVA glue, epoxy adhesive sets through a chemical reaction between resin and hardener. The curing time for epoxy resin can vary depending on factors such as temperature and humidity. However, as a general guideline, it is recommended to leave the clamps on for at least 4 to 6 hours. For larger and more complex projects, allowing the epoxy resin to cure overnight is advisable to ensure maximum bond strength.
Polyurethane Adhesive Set Times
Polyurethane adhesive is known for its versatility and ability to bond a wide range of materials, including wood, metal, plastic, and more. The set time for polyurethane adhesive can be influenced by factors such as temperature, humidity, and the thickness of the glue line. As a general rule of thumb, it is recommended to clamp the joints for a minimum of 1 to 2 hours. However, for optimal results, leaving the clamps on for 4 to 6 hours is preferable, especially when working with larger or more intricate assemblies.
Quick Tips For Ca Glues
CA glue, also known as cyanoacrylate adhesive or super glue, is popular for its rapid bonding properties. Unlike other glues, CA glue sets almost instantly when it comes into contact with moisture. When using CA glue, clamp time may not be necessary for most applications, as the bond forms quickly. However, to ensure the strongest possible bond, applying light pressure for 5 to 10 minutes can be beneficial. Keep in mind that the full strength of the CA glue bond may take up to 24 hours to develop.
In conclusion, assessing clamp time per glue type is essential for achieving strong and durable bonds in woodworking projects. Following the recommended clamp times for PVA glue, epoxy resin, polyurethane adhesive, and CA glue ensures optimal bonding results. Remember to consider the specific curing characteristics and set times of each glue type, as well as any additional factors that may affect the bonding process.
Factors Influencing Clamping Duration
Factors influencing clamping duration for wood glue include temperature, humidity, the type of wood, adhesive spread, and surface preparation. Proper clamping ensures a strong bond, allowing the glue to fully cure for recommended times. Maximize your woodworking projects by understanding these key factors.
When working with wood glue, understanding the factors that influence clamping duration is essential to ensure a strong and durable bond. Several key factors play a crucial role in determining how long you should clamp your wood glue, including wood species and porosity, ambient temperature and humidity, as well as the size and complexity of the joint. By considering these factors, you can optimize the clamping process and achieve the best possible results.
Wood Species And Porosity
The type of wood you are working with has a significant impact on how long you should keep your clamps in place. Different wood species possess varying porosities, affecting the rate of glue absorption. For example, softwoods like pine tend to be more porous and absorb glue more quickly, whereas hardwoods like oak have denser fibers and might require longer clamping durations. It is essential to consider the specific characteristics of the wood species to determine the appropriate clamping time.
Ambient Temperature And Humidity
The surrounding environmental conditions, such as temperature and humidity, can influence the drying time of wood glue. Higher temperatures generally accelerate the drying process, while lower temperatures can slow it down. Similarly, high humidity levels can extend the curing time of the glue, whereas low humidity can expedite it. Taking into account the prevailing ambient conditions is essential when determining how long to keep your clamps in place, as variations in temperature and humidity directly impact the bonding process.
Size And Complexity Of The Joint
The size and complexity of the joint also play a role in determining the clamping duration. Larger and more intricate joints require additional time for the glue to penetrate and spread evenly throughout the contact surfaces. Moreover, complex joints with multiple angles or hard-to-reach areas may need longer clamping durations to ensure a strong and secure bond. Be sure to consider the size and complexity of the joint as you determine the optimal clamping time for your project.
How To Apply Clamps Effectively
When it comes to woodworking projects, applying clamps effectively is crucial for achieving strong and durable bonds. Proper clamp application ensures even pressure distribution, minimizes clamp marks, and optimizes the strength of the glued joint. In this section, we will explore these key factors in detail to help you master the art of clamping wood glue.
Even Pressure Distribution
To achieve a strong bond, it is essential to distribute the clamping pressure evenly across the glued joint. Uneven pressure can result in gaps in the bond or weak spots that compromise the strength of the joint. To ensure even pressure distribution, follow these guidelines:
- Apply consistent pressure along the entire length of the clamp.
- Position the clamps at regular intervals across the joint to prevent any areas from being under excessive pressure.
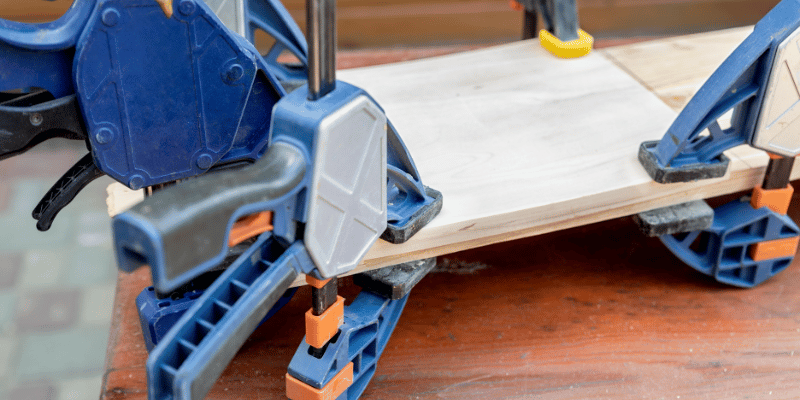
- Use multiple clamps spaced out along the joint, especially for long or wide pieces.
- Consider using cauls or scrap wood pieces between the clamps and the workpiece to distribute pressure more evenly.
Minimizing Clamp Marks
Clamp marks can mar the appearance of your finished project, so it’s important to minimize their occurrence. These unsightly indentations or discolorations can be avoided by taking the following steps:
- Place protective padding, such as scrap wood or felt, between the clamps and the workpiece to cushion the pressure points.
- Ensure the clamps are clean and free from any debris or previous glue residue that could transfer onto the wood surface.
- Consider using specialized clamp covers or soft jaw pads to further protect the workpiece.
- Regulate the clamping pressure to avoid excessive force that can leave deep clamp marks.
Clamp Placement For Optimal Strength
The placement of clamps plays a significant role in determining the strength of the bond. Consider the following factors for optimal clamp placement:
- Select the appropriate number of clamps based on the size and complexity of the project.
- Position the clamps directly over the glue line, ensuring they exert pressure on the joint and not on adjacent areas.
- Place the clamps closer to the ends of the workpiece rather than in the middle to prevent warping or bowing.
- If possible, apply clamps on both sides of the joint to ensure equal pressure distribution.
By following these guidelines, you can effectively apply clamps to achieve strong and visually appealing wood glue bonds. Remember to always consult the instructions provided with your specific glue and clamps for any additional recommendations or precautions.
Common Clamping Mistakes To Avoid
The success of any woodworking project heavily relies on the proper clamping of wood glue. While it may seem like a straightforward process, there are some common clamping mistakes that can lead to subpar results. In this post, we will discuss these common mistakes and how you can avoid them to achieve strong and durable glue joints.
Over-tightening And Wood Damage
One of the most common mistakes when clamping wood glue is over-tightening the clamps. While it’s important to apply sufficient pressure to ensure a strong bond, applying excessive pressure can actually damage the wood and compromise the joint. This is especially true for soft or delicate woods that are prone to crushing or splitting under excessive pressure.
To avoid this mistake, it’s important to find the right balance between applying enough pressure to achieve a good bond and avoiding wood damage. As a general rule of thumb, tighten the clamps until you see a small amount of glue squeeze out along the joint. This indicates that the joint is properly saturated and that sufficient pressure has been applied.
Insufficient Clamping Pressure
On the other hand, insufficient clamping pressure can result in weak glue joints that are prone to failure. When the clamps are not tightened enough, the glue may not spread evenly across the joint, leading to weak spots. Additionally, inadequate pressure can impede the bond formation, resulting in a weaker overall joint.
To ensure sufficient clamping pressure, make sure to evenly distribute the clamps along the joint and tighten them until you feel resistance. This will help ensure that the glue is evenly spread and that a strong bond is achieved. If you’re working with larger or wider joints, using additional clamps or cauls can help distribute the pressure more evenly.
Uneven Glue Application
Another common mistake to avoid when clamping wood glue is uneven glue application. If the glue is applied unevenly or too sparingly, it can result in weak spots and a compromised bond. Uneven glue application can occur when using a brush, roller, or even when applying glue directly from the bottle.
To ensure even glue application, start by applying a thin and even layer of glue to both surfaces that are being joined. Use a spreader or a brush to evenly distribute the glue across the entire surface. Make sure to coat the edges of the wood as well, as these areas tend to absorb more glue. This will help ensure a strong and even bond across the entire joint.
The Curing Process Explained
When using wood glue, it’s vital to understand the curing process to ensure your projects are strong and durable. The curing process refers to the time it takes for the glue to dry and fully bond the wood pieces together. This crucial step determines the strength and longevity of your woodworking projects. In this article, we will explore the curing process and answer some common questions such as how long to clamp wood glue, when to remove the clamps, and how to handle the wood during curing.
Initial Set Vs. Full Cure Time
When applying wood glue to your project, you may notice that the glue starts to set relatively quickly. This is known as the initial set time, and it varies depending on the type of wood glue you are using. In general, most wood glues have an initial set time of about 30 minutes to an hour. During this initial set period, the glue starts to harden, and you can remove some clamps or reposition the wood pieces if necessary.
However, it’s important to note that the initial set time is not the same as the full cure time. While the glue may appear dry after the initial set, it hasn’t fully cured yet. The full cure time refers to the period it takes for the glue to reach its maximum strength and bonding capability. It usually takes 24 hours to achieve a full cure for most wood glues.
Handling The Wood During Curing
Proper handling of the wood during the curing process is crucial to ensure a strong bond. While the glue is drying, it’s essential to avoid applying excess pressure or stress to the wood. Doing so can compromise the bond and weaken the joint. To prevent any damage, consider the following tips:
- Avoid moving or manipulating the project during the initial set time
- Avoid placing heavy objects on the glued area until the full cure is achieved
- Handle the wood with care, avoiding impacts or sudden movements
- Store the project in a cool, dry place during the curing process to ensure optimal conditions for glue drying
When To Remove The Clamps
Removing the clamps too soon can lead to weak joints and potential project failure. While the initial set time allows for some clamps to be removed, it’s crucial to keep the remaining clamps in place until the glue has fully cured. Removing the clamps before the full cure can result in the wood pieces shifting or separating, compromising the strength of the joint.
As a general rule of thumb, wait at least 24 hours before removing all clamps from your woodworking project. This provides sufficient time for the glue to reach its full cure and ensures a strong, lasting bond between the wood pieces.
By understanding the curing process and following these guidelines, you can achieve successful woodworking projects with long-lasting results. Remember to allow enough time for the glue to fully cure, handle the wood with care during the drying process, and remove the clamps only after the recommended 24-hour period. With these steps in mind, you’ll be on your way to creating sturdy and professional-looking woodwork pieces.
Final Steps After Clamping
After clamping wood glue, it is important to consider the length of time needed for curing. The duration can range from 30 minutes to 24 hours, depending on the type of wood glue and environmental factors. Properly adhering to the recommended clamping time ensures the strongest bond for your woodworking projects.
Once you have clamped your wood project and allowed enough time for the wood glue to cure, it’s time to proceed with the final steps. These steps are crucial to ensure a clean finish and a strong bond between the pieces of wood. In this section, we will explore three key aspects of finishing your project: excess glue cleanup, sanding techniques post clamping, and testing the joint integrity.
Excess Glue Cleanup
Before you can move on to the next phase of your project, it’s important to remove any excess glue that may have seeped out during the clamping process. If left unattended, this glue can dry and harden, leading to an unsightly finish or interfering with the wood’s ability to absorb stains or finishes.
To clean up excess glue efficiently, follow these steps:
- Wait for the glue to dry completely. This usually takes about 30 minutes to an hour, depending on the type of wood glue used.
- Gently scrape off the excess glue using a chisel or a putty knife. Be careful not to gouge or damage the wood in the process.
- For any remaining traces of glue, use a damp cloth or sponge to wipe the wood surface. Avoid using excessive water as it may cause the wood to warp or swell.
Sanding Techniques Post Clamping
After cleaning up the excess glue, the next step involves sanding the wood to achieve a smooth and polished finish. Sanding not only removes any visible glue residue but also prepares the surface for staining or finishing.
Here are some sanding techniques you can follow:
- Start with a coarse-grit sandpaper (around 80 or 120 grit) to remove any rough areas or imperfections in the wood surface.
- Move on to a finer-grit sandpaper (around 220 grit) to smoothen the wood further. Sand with the grain of the wood for optimal results.
- Use a sanding block or an orbital sander for larger surfaces to maintain even pressure and prevent uneven sanding.
- Inspect the wood surface carefully and repeat the sanding process if necessary, gradually moving to finer grits (such as 320 or 400 grit) for a silky-smooth finish.
Testing The Joint Integrity
Once you have completed the cleanup and sanding stages, it’s essential to test the integrity of the joint. Testing ensures that the bond between the pieces of wood is strong and secure, minimizing the risk of future structural issues.
Here’s how you can test the joint integrity:
- Apply pressure to the joint by pushing or pulling the pieces of wood in different directions. This simulates the stress the joint may experience during use.
- Check for any visible movement or gaps between the joined pieces. A well-glued joint should remain tight and show no signs of separation.
- If you notice any weaknesses or gaps in the joint, consider reapplying glue and clamping the area again. It’s better to address any issues now rather than after the project is completed.
Frequently Asked Questions Of How Long To Clamp Wood Glue
Can You Clamp Wood Glue Too Long?
Clamping wood glue for too long is not recommended. It can lead to excessive adhesive squeeze-out, longer drying times, and weak bond formation. Follow the recommended drying time on the glue bottle or consult the manufacturer’s instructions to ensure a strong and durable bond.
How Long Does It Take For Wood Glue To Dry Clamp?
Wood glue typically takes around 30 minutes to dry when clamped properly.
How Long Does Wood Glue Need To Bond?
Wood glue typically needs around 24 hours to fully bond. It’s important to allow sufficient drying time for a strong and durable bond.
What Happens If You Don’t Clamp Wood Glue?
Not clamping wood glue can result in weak or incomplete bonds, leading to joint failure or gaps in the woodwork. Proper clamping ensures even pressure for a secure and durable bond.
Conclusion
To ensure a strong bond, the clamp time for wood glue is crucial. Understanding how long to clamp wood glue can save you from potential glue failure and weak joints. Remember, different glues have different clamp times, so always refer to the manufacturer’s instructions.
Spending the recommended clamp time will give you sturdy and durable results, ensuring your wood projects stand the test of time. Happy woodworking!

