How Many Coats of Polyurethane on Hardwood Floors? (2-4)
Hardwood floors need 3–4 coats of water-based polyurethane or 2–3 coats of oil-based — but spraying instead of brushing adds a coat, since sprayed layers go on thinner. Too few coats leave wood exposed to scratches and moisture; too many can cause peeling or a cloudy finish. This guide covers the right coat count by finish type and traffic level, the recoat window for each, and the sanding routine that keeps every coat bonding properly.
Coat Count by Polyurethane Type
Best Floor Polyurethane Pick
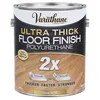
Varathane Ultra Thick Floor Finish Polyurethane, Satin
A heavier-build water-based formula that cuts a standard 3–4 coat job down to 1–2 coats on smaller rooms.
- Best for: DIYers who want fewer coats without losing durability
- Why we picked it: matches the ultra-thick coat-count math covered above
- Main drawback: heavier coats show brush/roller lines more than thin coats if you rush the application
Compare more coat-count essentials
 Option 1 Varathane Water-Based Floor Polyurethane, Matte
|
 Option 2 Duratool T-Bar Floor Applicator
|
 Option 3 Klein Tools Pinless Moisture Meter
|
As an Amazon Associate we earn from qualifying purchases.
Water-based and oil-based polyurethane build film thickness differently, which is why they need a different number of coats to reach the same level of protection. Water-based products are thinner and dry fast, so each coat adds less material — you need more of them. Oil-based polyurethane is thicker and self-levels more, so fewer coats reach the same protective film.
| Finish Type | Coats Needed | Recoat Window | Full Cure |
|---|---|---|---|
| Water-based, brushed | 3–4 | 2–4 hours | ~7 days |
| Water-based, sprayed | 4 (thinner per coat) | 2–4 hours | ~7 days |
| Oil-based, brushed | 2–3 | 8–12 hours | Up to 7 days |
| Ultra-thick, one-coat formulas | 1–2 | 4–6 hours | ~7 days |
The last row is the one most guides skip: ultra-thick water-based formulas (like Varathane’s Floor Finish line) lay down a heavier film per coat than a standard water-based product, so manufacturers rate them for one to two coats instead of the usual three to four. That’s a real shortcut for a small room, not a reason to skip the second coat on a high-traffic floor.
How Traffic and Household Habits Change the Number
The finish type sets the baseline; how the room gets used adjusts it up or down.
- Low-traffic rooms (guest bedrooms, formal dining rooms): the low end of the range — 2 coats water-based, 2 coats oil-based — is usually enough.
- Average household (living rooms, hallways, normal foot traffic): 3 coats of either type is the standard recommendation and the point where most manufacturers stop testing durability gains.
- Pets, kids, or a busy entryway: add one coat — 4 coats water-based or 3 coats oil-based — for a thicker wear layer against claws, grit, and dropped toys.
- Commercial or rental floors: 4 coats minimum, sometimes with a maintenance recoat scheduled every 3–5 years rather than a full refinish.
Floor hardness plays a secondary role too — softer species dent before the finish ever fails, so an extra coat protects the wood underneath as much as the surface.
Step-by-Step: Applying Each Coat Correctly
The coat count only works if each coat is applied and prepped the same way. Skipping a step here is the real reason floors look uneven — not the number of coats.
- Sand and clean the bare floor: sand to 120–150 grit, then vacuum and wipe with a tack cloth — any dust left behind gets sealed under the first coat.
- Check moisture before coat one: confirm the subfloor and boards read within the wood’s normal moisture range before applying anything — finishing over damp wood traps moisture and causes peeling later.
- Apply the first (seal) coat thin: this coat soaks into open wood grain more than it builds film, so resist the urge to lay it on heavy.
- Let it dry fully, then scuff-sand with 220-grit: light sanding between every coat except the last gives the next layer something to grip.
- Remove all dust before recoating: vacuum, then tack cloth — a single missed dust bunny shows up as a bump under the finish.
- Apply remaining coats thin and even, following the grain: thin coats level out and dry clear; thick coats trap solvent and can wrinkle or stay soft.
- Skip sanding after the final coat: let the last coat cure undisturbed for the glossiest, most even sheen.
In our shop, the single most common reason a water-based finish comes out hazy instead of glass-clear is skipping the scuff-sand before that final coat — 220-grit, a fresh tack cloth, then go. It takes ten extra minutes and it’s the difference between a flat finish and a floor that actually looks like it has 3 coats on it.

How Long to Wait Between Coats (and Before Walking on the Floor)
Water-based polyurethane recoats in 2–4 hours and is safe for light foot traffic (socks, no shoes) after about 24 hours, though full cure — when it’s safe to put rugs and furniture back — takes closer to a week. Oil-based needs 8–12 hours between coats and 24–48 hours before light traffic, with full cure also landing around a week. For a deeper breakdown by room and season, see our full coat-drying timeline guide, and for general dry-time factors like humidity and temperature, see how long polyurethane takes to dry.
According to the National Wood Flooring Association, most site-finished hardwood floors need a minimum of two coats of finish, with three considered the standard for full wear-layer protection in a residential setting — which lines up with the traffic-based counts above.
Common Mistakes That Ruin a Multi-Coat Finish
- Skipping the scuff-sand between coats: each new coat needs mechanical grip, not just a dry surface — skip it and coats can delaminate later. See our full guide on sanding between polyurethane coats for floor-vs-furniture technique.
- Applying coats too thick to “save a coat”: a heavy coat doesn’t equal two thin ones — it traps solvent, dries soft, and is more likely to show brush marks or wrinkle.
- Not checking room humidity: high humidity slows curing and can cause a cloudy, “blushing” finish, especially with oil-based products.
- Walking on the floor (or setting down rugs) too soon: light dry-to-touch isn’t the same as cured — give the full cure window before furniture and rugs go back.
- Switching brush to spray mid-job without adjusting the coat count: spray coats go on thinner, so a spray-applied floor needs one more coat than the same product brushed on.
Frequently Asked Questions
How long do you have to wait to put a second coat of polyurethane on?
Wait 2–4 hours for water-based polyurethane or 8–12 hours for oil-based before applying a second coat. Confirm the first coat is dry to the touch, lightly sand with 220-grit for adhesion, and remove all dust with a tack cloth before recoating.
Should I do 3 or 4 coats of polyurethane?
Use 3 coats for average residential traffic and 4 coats for households with kids, pets, or a busy entryway. Water-based floors sit at the higher end of that range by default since each coat builds less film than oil-based finish.
Can you put too many coats of polyurethane on wood?
Yes. Beyond 4–5 coats, extra layers add thickness without adding meaningful protection, and can cause peeling, cracking, or a cloudy build-up over time. Three to four coats is the practical ceiling for most residential floors.
Do I need to sand between every coat of polyurethane?
Sand lightly between every coat except the final one, using 220-grit sandpaper. This scuffs the surface just enough for the next coat to bond; skip the final sand and let that last layer cure undisturbed for the smoothest sheen.
Does spraying polyurethane need more coats than brushing?
Yes, usually one more. Sprayed coats go on thinner and more evenly than brushed coats, so a water-based floor that needs 3 coats brushed typically needs 4 coats sprayed to reach the same film thickness.
How many coats of polyurethane does a high-traffic hallway or kitchen need?
Plan on 4 coats of water-based or 3 coats of oil-based polyurethane for hallways, kitchens, and entryways. These areas see more grit and abrasion than living rooms, so the extra coat adds wear-layer thickness where it matters most.
Conclusion
The right number of coats comes down to two questions: what type of polyurethane are you using, and how hard will the room get used? Water-based floors generally need 3–4 coats, oil-based needs 2–3, and high-traffic areas or spray application push toward the top of each range. Sand lightly between coats, skip the final sand, and let the floor fully cure before furniture goes back — that routine matters more than chasing one extra coat.
Sponsored / affiliate links. As an Amazon Associate I earn from qualifying purchases. I may earn additional commission from eligible campaigns.