How to Cedar Shingle Siding: A Step-by-Step Guide for Beginners
Cedar shingle siding is a genuinely doable DIY project if you work methodically: straight starter course, consistent overlap, and correctly fastened corners. Cedar’s natural resistance to rot and insects, combined with real curb-appeal value, is why it remains a popular choice despite taking more labor to install than lap siding or panels.
Tools and Materials You’ll Need
Don’t Use Plain Steel Nails
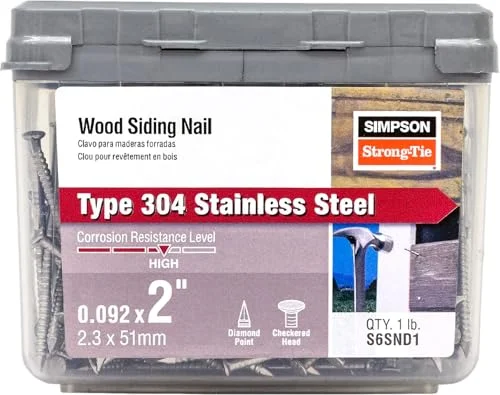 |
Simpson Strong-Tie Stainless Steel Ring-Shank Siding Nails Cedar’s natural tannins corrode plain steel fasteners over time, leaving ugly streaks and weakened joints – stainless steel avoids that entirely.
|
- Cedar shingles (enough for your square footage, plus 10-15% extra for cuts and waste)
- Corrosion-resistant siding nails – stainless steel or hot-dip galvanized, never plain steel
- Measuring tape, chalk line, and a level
- Hammer or a pneumatic siding nailer
- Utility knife (for thin shingles) and a fine-tooth saw (for thicker stock)
- Pry bar, safety goggles, and work gloves
Single vs. Double Coursing
Most DIY cedar shingle installs use single coursing: each row of shingles overlaps the row below it by roughly half its length, so only the bottom portion (the “exposure”) of each shingle is visible once the wall is finished. Double coursing is a different technique where a first, cheaper layer of undercourse shingles is installed flush, then a second layer of high-grade shingles is nailed directly over it at a larger exposure – this allows a deeper shadow line and a longer visible exposure per shingle, but uses more material and labor. If you’re not sure which method a supplier or contractor is referencing, single coursing is the standard, simpler method most homeowners use.
Preparing the Wall
Cedar shingles need a weather-resistant barrier (housewrap or building paper) installed over the sheathing before any shingles go up – this is what actually keeps water out of the wall assembly, not the shingles alone. Clean the sheathing surface, fix any uneven spots, and confirm the wall is dry before starting. Check local code for any additional requirements like furring strips, which some regions require behind cedar shingles for drainage and ventilation behind the siding.
Furring strips (thin horizontal strips fastened over the housewrap before shingling) create a small air gap behind the siding, letting any moisture that does get past the shingles drain and evaporate rather than sitting trapped against the sheathing. This gap also helps the back side of the cedar dry out after rain, which extends the siding’s service life noticeably compared to shingles nailed directly against the wall.
Safety Basics
Wear safety glasses and gloves throughout, and use a properly footed ladder on level ground for any work above reach. Keep a helper nearby for extended ladder work, and check that any power tools have functioning safety guards before use.
Measuring and Cutting Shingles
Measure the wall section and mark each shingle before cutting rather than cutting to a guess. Thinner cedar shingles can be scored with a utility knife and snapped along the line; thicker stock needs a fine-tooth saw for a clean edge. Cut a few extra pieces for corners and awkward sections – having spares on hand saves a mid-project trip back to the lumberyard.
Installing the Starter Course
The first row sets the reference line for every row above it, so get it right before moving on. Snap a chalk line along the bottom edge of the wall and align the starter course to it, checking level as you go rather than trusting the wall’s original bottom edge to be perfectly straight.
Fasten each shingle with two corrosion-resistant nails, placed about an inch in from each edge and roughly 3/4 inch above where the top of the next course below will land (in practice, high enough that the following course’s nails won’t be exposed). Leave a small gap, typically 1/8 to 1/4 inch, between adjacent shingles in the same course to allow for natural expansion as the wood absorbs and releases moisture.
Nail placement height matters more than it looks: nails driven too low on a shingle end up exposed once the next course goes on, and an exposed nail head is both a cosmetic flaw and a spot where water can work its way in around the fastener over time. Aim consistently at the same height on every shingle so the concealed nailing line stays even across the whole course.
Laying Subsequent Courses
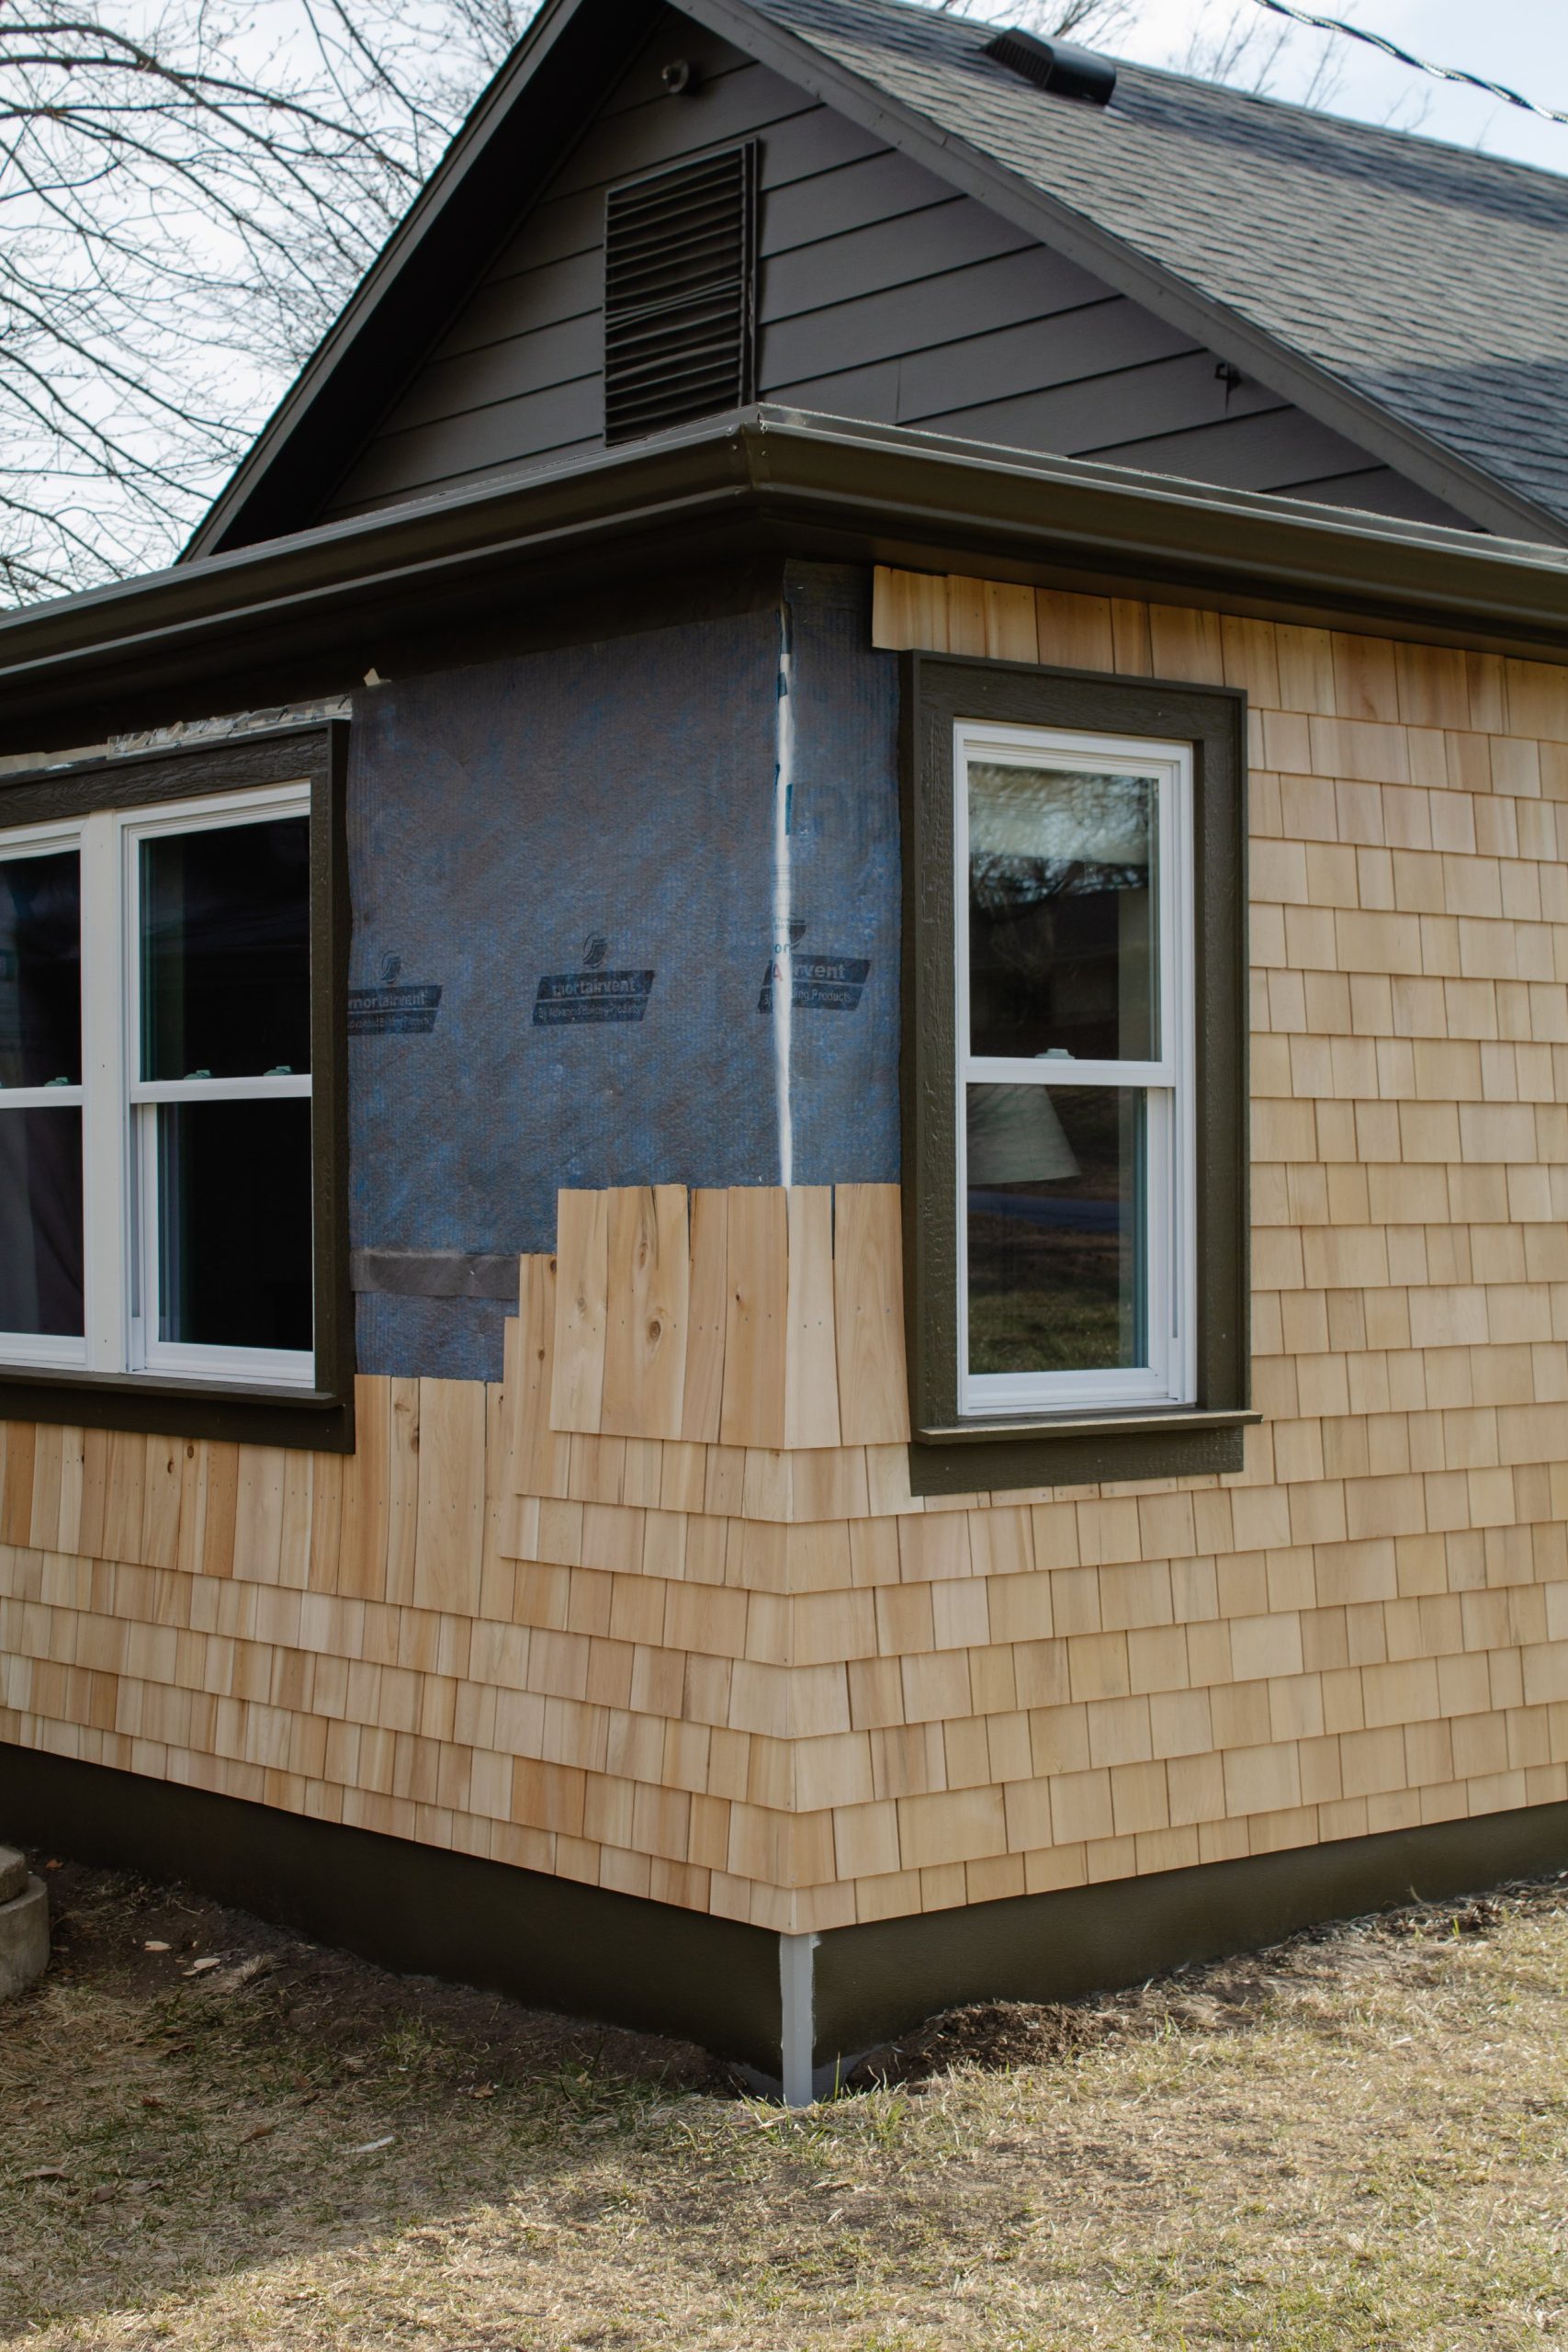
Each course should overlap the course below by roughly half the shingle’s length, leaving a consistent exposure from row to row – this overlap is what actually sheds water down the face of the wall instead of behind it. Offset the vertical joints between shingles from one course to the next (staggering them, rather than stacking gaps directly above each other) to avoid creating a straight seam that water can work its way through.
Re-snap a chalk line every few courses to keep the reveal consistent up the wall – small errors compound quickly over many rows if you’re only eyeballing spacing.
Around windows and doors, plan your course spacing before you reach the opening rather than adjusting after the fact – working backward from a window’s top or bottom edge to figure out where a course needs to land looks far more deliberate than a visibly squeezed or stretched row right at the opening.
Corners and Edges
Inside Corners
Cut a shingle to fit tightly into the corner, check it’s plumb with a level, and nail it securely before overlapping the adjoining wall’s shingle from the other side. Keep the two sides tight together at the joint to block moisture from working into the corner, and repeat this pairing up the full height of the wall.
Outside Corners
Outside corners typically use dedicated corner boards rather than mitered or woven shingles, which is both easier for a DIYer and more weather-resistant long term. Install the corner boards first, then run shingles up to them on both sides, cutting each course to fit flush against the board with no gaps for water to enter.
Finishing: Sealing and Staining
Some cedar shingles come pre-primed or factory-finished; unfinished shingles benefit from a water-repellent sealant or a semi-transparent stain applied evenly with a brush or sprayer, following the product’s coverage and dry-time instructions. Staining adds color and UV protection on top of cedar’s natural rot resistance, and it’s far easier to apply evenly before the shingles are fully weathered and gray.
Inspect the finished wall once the sealant or stain has dried – check for missed spots, uneven coverage, and any drips along corners or trim, and touch up before considering the section complete.
Maintenance Tips
- Inspect periodically for damage, splitting, or loose shingles, especially after severe weather.
- Clear debris like leaves and twigs that trap moisture against the siding.
- Trim back trees and shrubs that touch or overhang the wall – contact keeps the wood damp longer than it should be.
- Replace damaged shingles promptly rather than leaving a gap that lets water into the wall assembly.
- Reapply sealant or stain every few years, since UV exposure and weathering gradually wear away the original finish’s protection.
Frequently Asked Questions
What tools are needed for cedar shingle siding?
You will need a hammer or nailer, corrosion-resistant siding nails, a utility knife or saw, a measuring tape, a chalk line, and a ladder. Safety gear like gloves and goggles is essential.
How do you prepare the surface?
Clean the sheathing thoroughly, fix uneven spots, and confirm it’s dry. Install a weather-resistant barrier (housewrap or building paper) over the sheathing before any shingles go up.
What’s the difference between single and double coursing?
Single coursing is one layer of shingles per row, with each row overlapping the one below by about half its length. Double coursing uses an undercourse layer of cheaper shingles topped by a second layer of high-grade shingles, allowing a deeper shadow line and longer exposure, at the cost of more material and labor.
How do you maintain cedar shingle siding?
Regularly inspect for damage or moisture buildup, clean with a mild detergent and water, keep vegetation trimmed away from the wall, and reapply a protective sealant or stain every few years.
Conclusion
Cedar shingle siding rewards careful, methodical work more than speed: a straight starter course, consistent overlap, and properly detailed corners are what separate a professional-looking result from a rough one. Take the time to get the first few courses right, keep your chalk lines fresh, and the rest of the wall follows the same pattern all the way up.
Sponsored / affiliate links. As an Amazon Associate I earn from qualifying purchases. I may earn additional commission from eligible campaigns.