How To Change A Ryobi Drill Bit In Under 60 Seconds
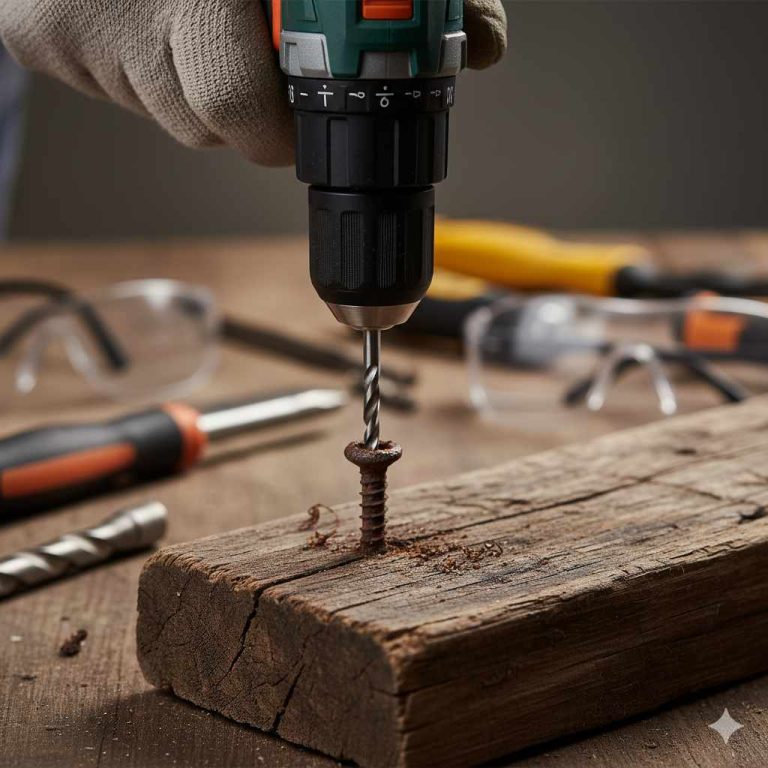
It’s a common sight in many homes and workshops across America: a trusty Ryobi drill ready for action. Whether you’re a DIY enthusiast or a seasoned pro, you know how important it is to have the right drill bit for the job. But what happens when you need to switch from drilling a pilot hole to driving a screw?
If changing a drill bit feels like a slow, fiddly chore, you’re not alone. Many people struggle with this simple task. But it doesn’t have to be that way!
With a few easy steps, you can learn how to change a Ryobi drill bit quickly and efficiently, saving you time and frustration. This guide will show you exactly how to do it, so you can get back to your project in a flash.
Changing a Ryobi drill bit is a quick process that usually involves loosening the chuck, removing the old bit, inserting the new one, and tightening the chuck. Most Ryobi drills have a keyless chuck that allows for easy, tool-free bit changes. Understanding how your specific Ryobi drill model works is key to a fast and smooth bit swap.
Understanding Your Ryobi Drill Chuck
At the heart of your Ryobi drill is the chuck. This is the part that holds the drill bit in place. Most modern Ryobi drills use what’s called a keyless chuck.
This means you don’t need a separate key to tighten or loosen it, which is great for speed. The chuck usually has a sleeve that you can grip and twist.
There are generally two main types of keyless chucks you’ll find on Ryobi drills: a single-sleeve and a dual-sleeve design. The single-sleeve chuck has one part that you turn. The dual-sleeve chuck has two parts that you can grip and turn, often with one locking the other.
No matter the exact design, the principle is the same. You need to open the chuck jaws wide enough to get the old bit out and then close them down tightly on the new bit. The way you open and close them is what we’ll focus on next.
The Step-by-Step Process for Changing a Ryobi Drill Bit
Let’s break down the simple steps. It’s really not complicated once you know the drill. Think of it like changing a pen tip – you just twist and pull.
Step 1: Power Off and Safety First
This is the most crucial step. Always make sure your drill is turned OFF. For cordless drills, this means removing the battery.
For corded drills, unplug it from the wall. This prevents the drill from accidentally starting while you’re working with your hands near the chuck. Safety first, always!
It’s also a good idea to wear safety glasses. Small metal shavings or dust can fly off sometimes. Even though it’s a simple bit change, being prepared is smart.
This prevents any surprises and keeps you safe while you’re focused on the task.
Step 2: Identify Your Chuck Type
Look closely at the chuck on your Ryobi drill. Can you see one part that spins, or two? Most Ryobi drills have a metal sleeve at the front of the drill head.
This is the part you’ll be using to loosen and tighten.
If you have a single-sleeve chuck, you’ll typically grip the back part of the sleeve and twist the front part. If you have a dual-sleeve chuck, you might grip both sleeves and twist them in opposite directions to open or close. Some models have markings to show which way to turn.
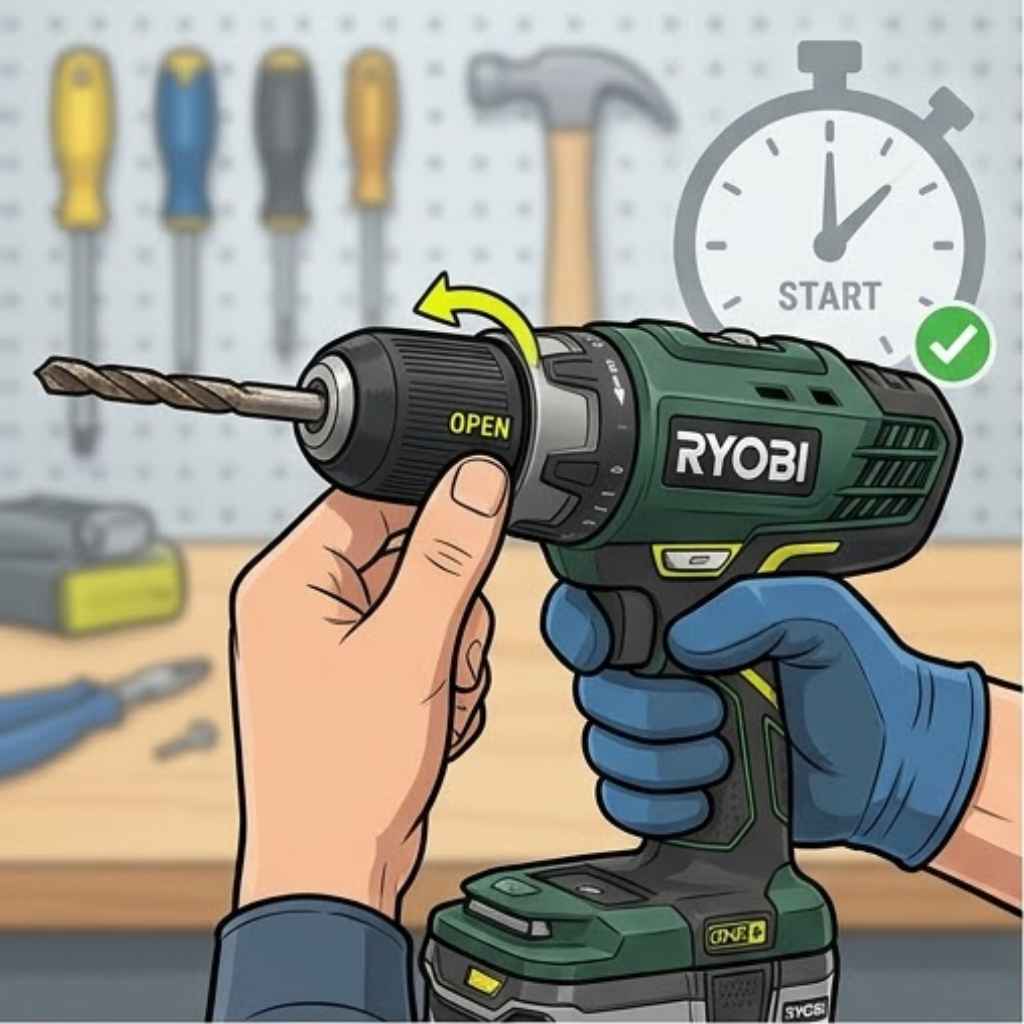
Step 3: Loosen the Chuck
Now it’s time to open the chuck. Grab the sleeve firmly. You’ll need a good grip.
For single-sleeve chucks, grip the main body of the chuck with one hand. Then, with your other hand, twist the front sleeve. You usually twist it counter-clockwise to loosen.
You’ll feel it give way.
If you have a dual-sleeve chuck, you might grip the rear sleeve to keep it stable and twist the front sleeve counter-clockwise. You might hear a ratcheting sound as it opens. Keep twisting until the jaws inside the chuck open up wide enough.
You want them to be very wide, so the bit can slide out easily.
Some people find it easier to grip the chuck with a cloth for better traction. If the chuck is stiff, a bit of gentle force should do the trick. Don’t force it too hard, but be firm.
You’re aiming to see the gap between the chuck jaws open up significantly.
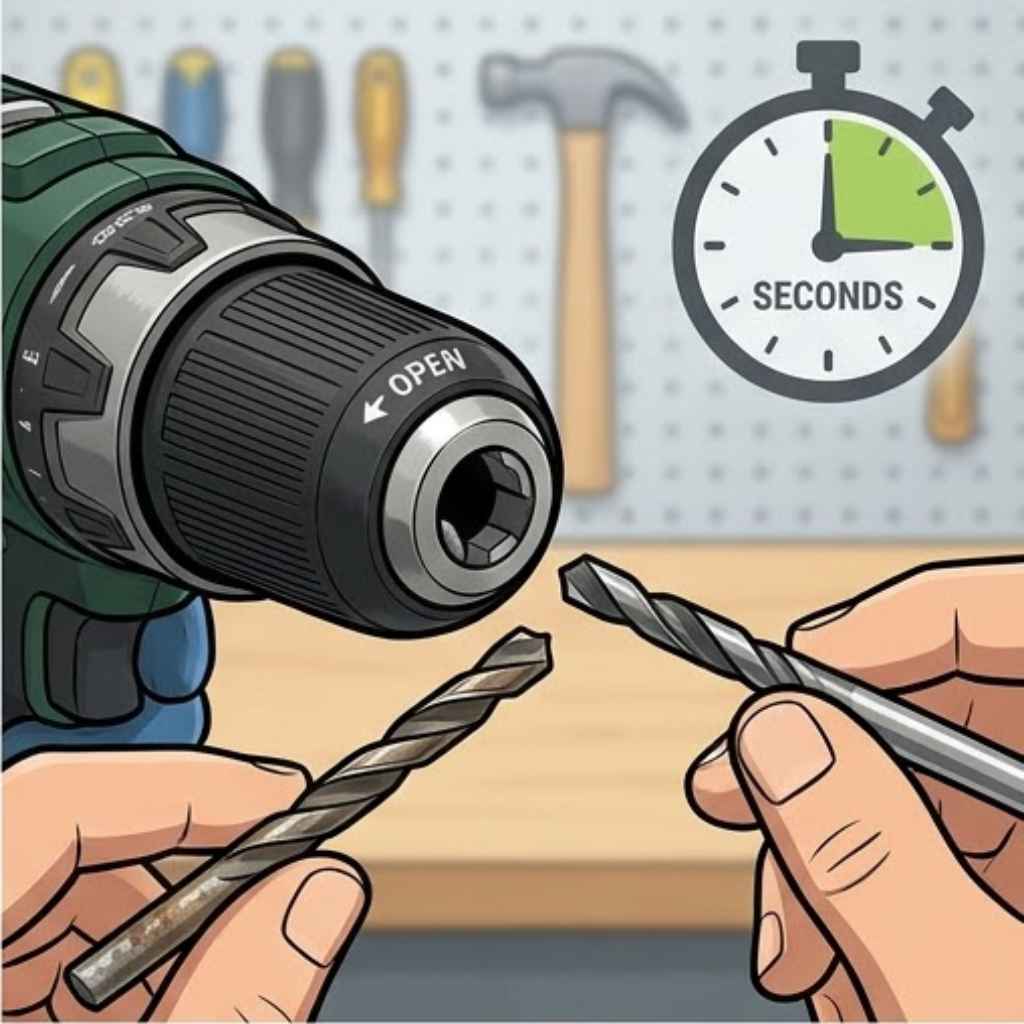
Step 4: Remove the Old Drill Bit
With the chuck jaws opened wide, the old drill bit should now be loose. Gently pull the drill bit straight out of the chuck. It might still be a little snug, so a slight wiggle can help.
If it feels stuck, open the chuck jaws a bit wider.
Once the bit is out, set it aside. Make sure you know where it is so you don’t lose it. If you’re switching to a different type of bit, like from a drill bit to a screwdriver bit, you’ll want to store the old one safely.
It’s a good moment to quickly inspect the chuck jaws. Make sure there’s no debris or dust stuck inside. A clean chuck works better.
You can just wipe it with a dry cloth. This small check ensures the new bit will seat properly.
Step 5: Insert the New Drill Bit
Take your new drill bit. Look at the end that goes into the chuck. It’s usually a smooth shank, or sometimes has a hex shape if it’s a driver bit.
Line up the shank of the new bit with the opening of the chuck. Push it in as far as it will go.
Make sure the bit is centered as you push it in. You want it to sit straight and true. The chuck jaws should be holding the bit firmly.
You should feel it seat securely against the back of the chuck or inside the jaws.
Some drill bits have a specific flat spot or hex shape on the shank that helps them grip better. Make sure this part, if present, is properly engaged by the chuck jaws. For standard round-shank drill bits, just push them in until they stop.
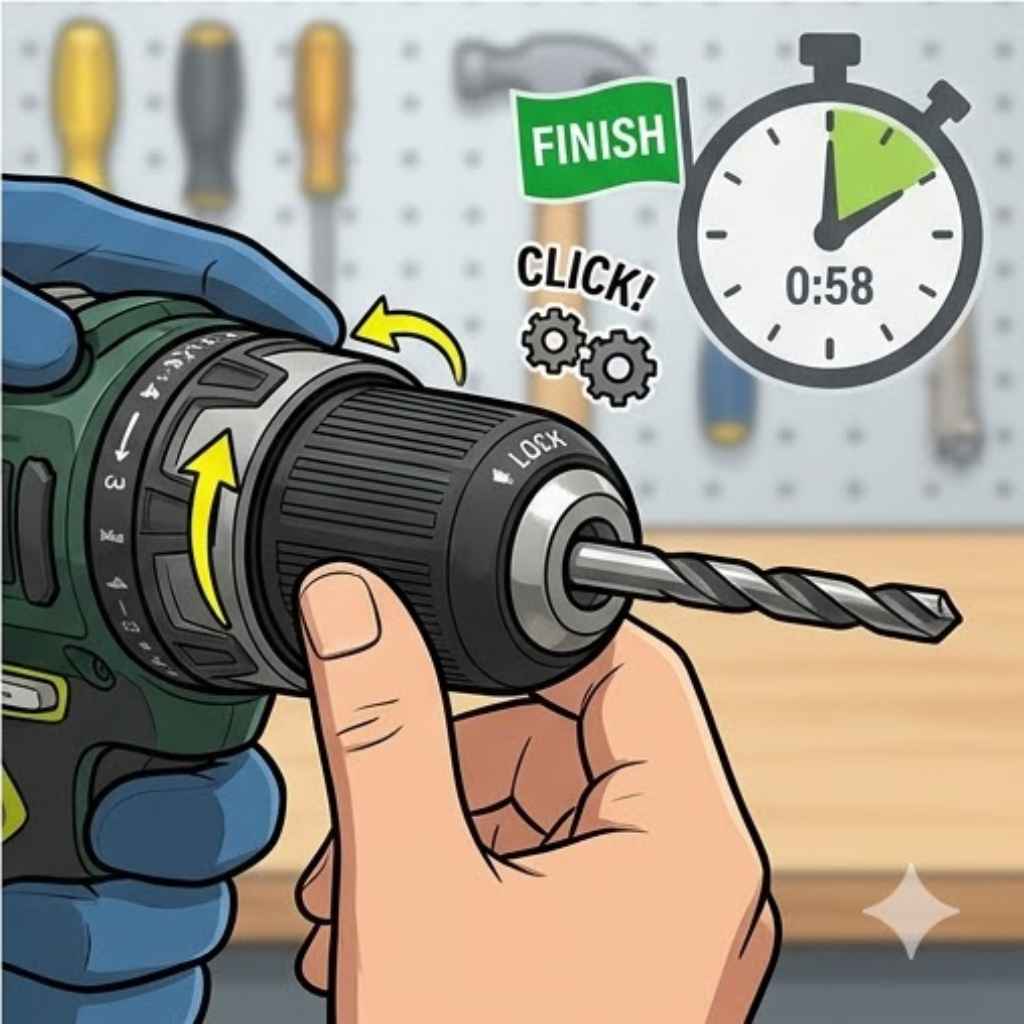
Step 6: Tighten the Chuck
This is where you secure the new bit. Again, hold the main body of the chuck with one hand. With your other hand, twist the sleeve.
For most Ryobi drills, you twist this sleeve clockwise to tighten.
Keep twisting until it feels snug and secure. You want it tight enough so the bit won’t slip when you start drilling or driving. You should feel resistance as you tighten.
Many chucks will make a clicking sound as they tighten, indicating they are locking the bit in place.
For dual-sleeve chucks, you might need to twist both sleeves in opposite directions to lock. The goal is a firm, secure grip on the bit. Don’t over-tighten to the point of straining, but ensure it’s not loose.
A good rule of thumb is to tighten it until you feel solid resistance, and then maybe a little bit more.
Step 7: Test the Fit
Before you power up the drill, give the bit a gentle tug and try to wiggle it. It should feel solid and not move at all. If it still feels loose or wobbly, you need to tighten the chuck a bit more.
Repeat Step 6 until the bit is held firmly.
Once you’re confident the bit is secure, you can reinsert the battery or plug the drill back in. Briefly, and at a very low speed, run the drill. This can help you feel if the bit is running true and centered.
If it wobbles, turn it off and re-tighten.
This final check is quick but important. It ensures everything is set up correctly before you put any real force on the bit. It’s that final peace of mind that you’ve done it right.
Quick Bit Swap Checklist
Preparation:
- Drill OFF (battery out or unplugged).
- Safety glasses on.
Changing the Bit:
- Grip chuck body.
- Twist sleeve counter-clockwise (loosen).
- Pull old bit out.
- Insert new bit fully.
- Grip chuck body again.
- Twist sleeve clockwise (tighten).
Final Check:
- Tug and wiggle bit.
- If loose, tighten more.
- Re-insert battery/plug in.
- Briefly run drill at low speed.
When the Chuck Seems Stuck: Troubleshooting Tips
Sometimes, the chuck on your Ryobi drill might feel a bit stiff or even stuck. This can happen due to dirt, dust, or dried lubricant. Don’t panic; there are usually easy fixes.
I’ve run into this myself more times than I can count, especially after a messy project.
The first thing I try is a bit more grip. A rubber glove or even a dry cloth wrapped around the chuck sleeve can give you the traction you need. Sometimes, the chuck just needs a firmer hand.
If that doesn’t work, a little tap can help. You can gently tap the sleeve with the handle of a screwdriver or a small rubber mallet. The vibration can sometimes loosen up grime that’s causing it to stick.
Be gentle though; you don’t want to damage anything.
For stubborn chucks, sometimes a light application of penetrating oil (like WD-40, but be careful not to get it on the drill motor itself) can help loosen things up. Spray a tiny bit onto the moving parts of the chuck, let it sit for a few minutes, and then try twisting again. Always wipe away any excess oil.
Make sure you are twisting the correct part. On some dual-sleeve chucks, one sleeve needs to be held while the other turns. If you’re twisting the wrong part, it won’t budge.
Always refer to your drill’s manual if you’re unsure.
Common Chuck Issues & Fixes
Issue: Chuck is stiff to turn.
Fix: Use a rubber glove or cloth for better grip. Try gentle taps with a rubber mallet.
Issue: Chuck won’t open or close fully.
Fix: Check for debris inside the jaws. Apply a tiny amount of penetrating oil. Ensure you are twisting the correct sleeve on dual-sleeve chucks.
Issue: Drill bit slips during use.
Fix: Ensure the chuck is tightened fully. Check if the drill bit shank is damaged or dirty. Try a different drill bit.
Ryobi Drill Bit Types and When to Use Them
Ryobi offers a wide range of drill bits, and knowing which one to use is as important as knowing how to change them. This helps you work efficiently and get the best results.
Twist Drill Bits: These are your all-purpose bits for drilling holes in wood, plastic, and soft metals. They have a spiral flute that removes material as you drill. You’ll find them in various sizes.
For wood, they are great. For metal, you might need specialized metal-cutting bits.
Spade Bits (Paddle Bits): These are flat, broad bits designed for drilling larger holes, usually in wood. They are good for quick, rough holes, like when you need to run wires or pipes. They can be a bit messy, so be prepared for sawdust.
Auger Bits: These are specialized for drilling deep, clean holes in wood. They have a screw-like tip that pulls the bit into the material, making them self-feeding. They are excellent for drilling through thick lumber.
Forstner Bits: These create flat-bottomed, precise holes in wood. They are used for making shallow holes for hinges or in fine woodworking where a clean, flat surface is needed. They are more precise than spade bits.
Driver Bits: These aren’t technically drill bits, but they are changed in the same way. They are used to drive screws. You’ll see Phillips head, Torx (star), and flathead (slotted) driver bits.
They have a shank that fits snugly into the chuck.
When changing bits, consider the material you’re working with. Wood needs different bits than metal or masonry. Also, think about the size of the hole or screw you need.
Having a good assortment of Ryobi bits will make your life much easier.
Common Ryobi Bit Matchups
Task: Drilling pilot holes in wood for screws
Bit: Small twist drill bit (slightly smaller than screw shank)
Task: Driving screws into drywall
Bit: Phillips or Torx driver bit (matching screw head)
Task: Creating large holes for pipes in a 2×4
Bit: Spade bit or large twist drill bit
Task: Installing cabinet hinges
Bit: Forstner bit (for the hinge cup)
Experience: The Time I Almost Ruined a Project Because of a Bit Change
I remember one Saturday afternoon, I was trying to finish building a bookshelf. I had all the pieces cut and was ready to start assembling. My plan was to drill pilot holes with a small bit, then switch to a Phillips head driver bit to put it all together.
I’d done this a hundred times before. But this time, I was in a hurry. I’d just finished drilling the pilot holes, and the chuck felt a little stiff as I tried to loosen it.
Instead of taking a moment to be gentle, I yanked and twisted harder than I should have. There was a sudden, sharp “snap!”
My heart sank. I looked at the drill, and the chuck sleeve had a visible crack. I had forced it too hard, and now a key part of my drill was damaged.
I felt a wave of frustration and regret wash over me. I couldn’t change bits properly anymore. The bookshelf sat there, half-finished, mocking me.
That day taught me a valuable lesson. Rushing a simple task like changing a drill bit can lead to bigger problems. It’s better to take that extra 30 seconds to be careful and deliberate.
The bookshelf eventually got finished, but only after I carefully used pliers and eventually replaced the chuck. It was a costly mistake born from impatience.
How Often Should You Change Drill Bits?
The frequency of changing drill bits isn’t about a strict schedule. It’s all about the job you’re doing. If you’re drilling multiple holes of the same size in the same material, you won’t need to change bits often.
You’ll need to change bits when you switch tasks. For example, if you move from drilling holes to driving screws, that’s a bit change. If you need a different size hole, that’s another change.
Sometimes, a bit might get dull or damaged, and you’ll need to swap it out for a fresh one.
I’ve also found that if I’m switching from drilling in soft wood to drilling in something harder like metal or even harder wood, I might need to switch to a bit specifically designed for that material. Using the wrong bit for too long can damage the bit and the material you’re working on.
Think of it this way: you change tools based on the job. A hammer isn’t useful for turning a screw. Similarly, a small twist drill bit isn’t ideal for driving large lag bolts.
Each bit has its purpose, and switching between them is just part of efficient work.
When to Consider a Bit Change
Switching from Drilling to Driving: Always change from a drill bit to a driver bit.
Changing Hole Size: If you need a different diameter hole, swap the bit.
Material Change: Moving from wood to metal or masonry requires different bits.
Bit Wear or Damage: If a bit is dull, bent, or broken, replace it.
Specific Task Needs: Using spade bits for large holes vs. twist bits for small ones.
What This Means for You and Your Projects
Understanding how to quickly change a drill bit means fewer interruptions. It keeps your workflow smooth and allows you to tackle jobs more efficiently. If you’re a homeowner, this skill means you can handle many tasks around the house without needing to call for help or wait for parts.
For hobbyists and DIYers, it means more time spent creating and less time fiddling with tools. Imagine building that piece of furniture or completing that home repair without getting bogged down by slow tool changes. It’s about reclaiming your time and your project momentum.
When it’s normal to need to change bits, it’s usually because you’re moving from one stage of a project to another. Drilling pilot holes and then driving screws is a prime example. Needing a larger or smaller hole is another very common reason.
When you should worry is if your drill bit is excessively loose even after tightening the chuck, or if the chuck itself is damaged. If the bit wobbles severely, it can make your work inaccurate and even be unsafe. If the chuck won’t tighten or loosen at all, that’s a sign it needs professional attention or replacement.
A simple check you can do regularly is to ensure your chuck isn’t gummed up. A quick wipe down after a dusty job can prevent future sticking issues. Keeping your tools clean is a simple habit that pays off in reliability.
Quick Tips for Faster Ryobi Bit Changes
Speed comes from preparation and practice. Here are a few tips to shave seconds off your bit changes:
1. Keep Your Bits Organized: Have a bit organizer or case. When you need a bit, you can grab the right one quickly instead of rummaging through a toolbox.
Knowing where your bits are saves a lot of time.
2. Have Common Bits Readily Available: For projects where you’ll be drilling and driving a lot, keep the bits you’ll use most often right next to you. Maybe on a workbench or in your tool belt.
3. Practice the “Two-Handed” Grip: As I mentioned, holding the main body of the chuck steady with one hand while turning the sleeve with the other is key for leverage and speed. Get used to this motion.
4. Clean Chuck Jaws Regularly: A quick swipe with a dry cloth after use prevents dust and debris from building up, which makes the chuck smoother to operate next time.
5. Know Your Drill Model: Different Ryobi models might have slight variations in their chucks. Spend a minute to understand how your specific drill’s chuck operates.
This familiarity breeds speed.
6. Don’t Over-Tighten or Under-Tighten: Find that sweet spot. Too loose and the bit slips; too tight and you make the next change harder.
Just snug is often enough.
These aren’t complex tricks. They are simple habits that, when practiced, make the entire process feel almost automatic. Before you know it, you’ll be changing bits in under a minute without even thinking about it.
Habits for Speedy Bit Swaps
Organized Bits: Use a bit caddy or organizer.
Accessible Bits: Keep frequently used bits nearby.
Secure Grip: Master the two-handed chuck grip.
Cleanliness: Wipe chuck jaws after use.
Familiarity: Understand your specific drill model.
Just Right Tightness: Avoid extreme over or under-tightening.
Frequently Asked Questions About Ryobi Drill Bits
How do I know which way to turn the Ryobi drill chuck to loosen it?
For most Ryobi drills, you turn the chuck sleeve counter-clockwise to loosen and clockwise to tighten. Think of the standard screw threading: righty-tighty, lefty-loosey. If you’re unsure, try a slight turn in one direction; if it doesn’t loosen, try the other.
My Ryobi drill chuck feels really hard to turn. What can I do?
This is often due to dirt or grime. Try cleaning the chuck jaws with a dry cloth. For a bit more help, you can use a rubber glove or a dry cloth for better grip.
If it’s still stuck, a tiny drop of penetrating oil on the moving parts of the chuck can help, but be sure to wipe away any excess.
Can I use drill bits from other brands with my Ryobi drill?
Yes, in most cases. Ryobi drills use standard chuck sizes and types that are compatible with drill bits from other reputable brands. The key is ensuring the shank of the drill bit fits securely into the chuck jaws.
Just make sure the bit isn’t excessively worn or damaged.
Do I need to remove the battery every time I change a drill bit on my Ryobi drill?
It is always best practice and safest to remove the battery from your cordless Ryobi drill before changing a bit. This prevents the drill from accidentally turning on while your hands are near the chuck, which could cause injury or damage. For corded drills, unplugging them is the equivalent safety step.
What is the difference between a single-sleeve and a dual-sleeve chuck on a Ryobi drill?
A single-sleeve chuck has one main part that you grip and twist to open or close the jaws. A dual-sleeve chuck has two sections you can grip. Often, you hold the rear section steady and twist the front section, or twist both in opposite directions to operate.
Both achieve the same goal: securing the bit.
My new drill bit seems loose in the chuck even after tightening. What’s wrong?
This can happen if the drill bit shank is too small for the chuck, if the bit is damaged, or if the chuck jaws are worn. Ensure you’re using the correct size bit for the chuck. Try a different drill bit to see if the issue persists.
If the chuck itself seems faulty, it might need service.
Conclusion: Master the Bit Change, Master Your Project
Changing a Ryobi drill bit is a fundamental skill that unlocks faster, smoother projects. It’s a small step, but mastering it saves you time and frustration. You now know how to safely and efficiently swap out your drill bits, troubleshoot common issues, and even choose the right bit for the job.
With a little practice, this task will become second nature. You’ll be moving from one step of your project to the next with confidence and speed. So go ahead, power up your Ryobi, and get creating!