How To Change A Drill Head Safely And Without Any Tools
It’s a common frustration. You’re in the middle of a project, maybe hanging shelves or fixing a wobbly chair. You need a different drill bit, but you can’t figure out how to swap it out.
The chuck seems stuck, or you just don’t have the right tool. You might even worry about hurting yourself. This happens to many people.
But the good news is, changing a drill head is usually very simple, even without special tools. Let’s walk through how to do it right.
Understanding Your Drill Chuck
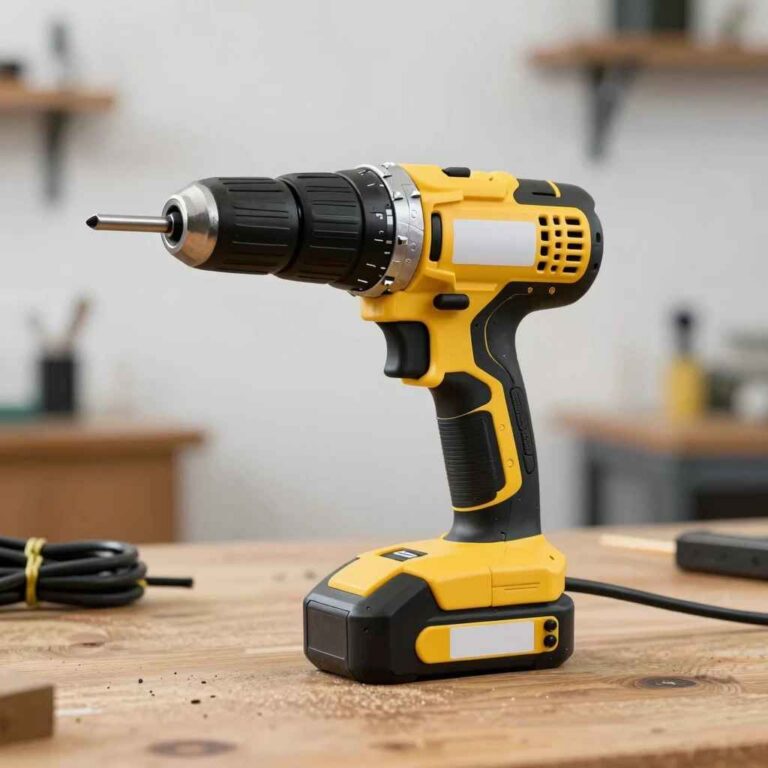
Most modern drills use a keyless chuck. This is the part that holds the drill bit. It’s designed for quick changes.
You usually just twist it by hand. It has metal jaws inside. These jaws grip the bit tightly.
They move in and out when you turn the chuck sleeve.
Older drills might have used a chuck key. This is a small, crank-like tool. You insert it into holes on the chuck.
Turning the key tightens or loosens the jaws. If your drill has this, you’ll need the key. But for most home users, a keyless chuck is standard.
The chuck has two parts you can usually turn. There’s the main body, and then a sleeve that spins around it. The sleeve is what you’ll work with.
It often has ridges for a better grip. Sometimes, one part locks while the other turns. This keeps the bit secure when you’re drilling.
The Simple Twist Method: Changing a Drill Head Safely
The most common way to change a drill head is by hand. You don’t need any extra tools for this. It’s designed to be quick and easy.
This method works for the vast majority of cordless and corded drills you’ll find today.
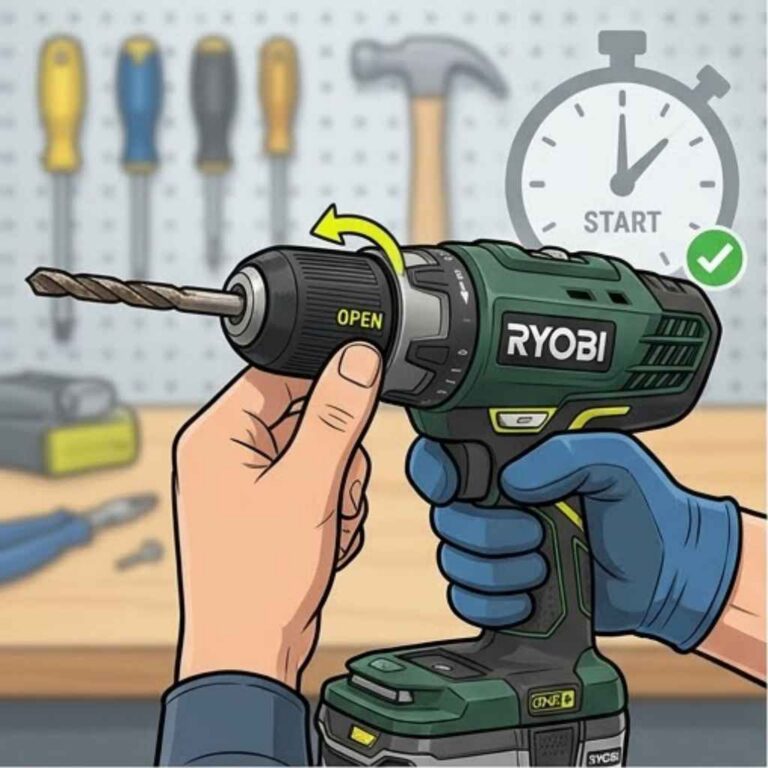
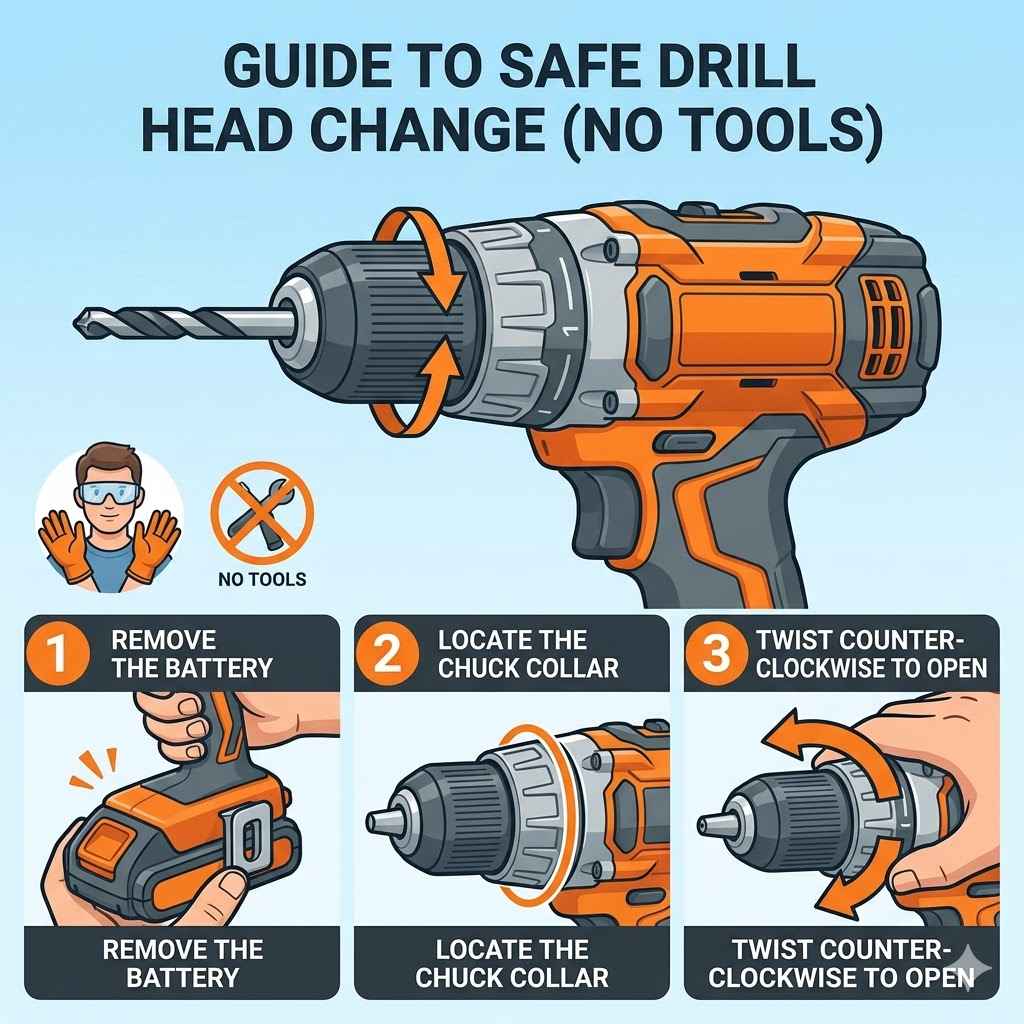
First, make sure your drill is off. Better yet, unplug it if it’s a corded drill. For cordless drills, remove the battery.
This is a crucial safety step. You don’t want the drill to accidentally start while you’re changing the bit. This can cause serious injury.
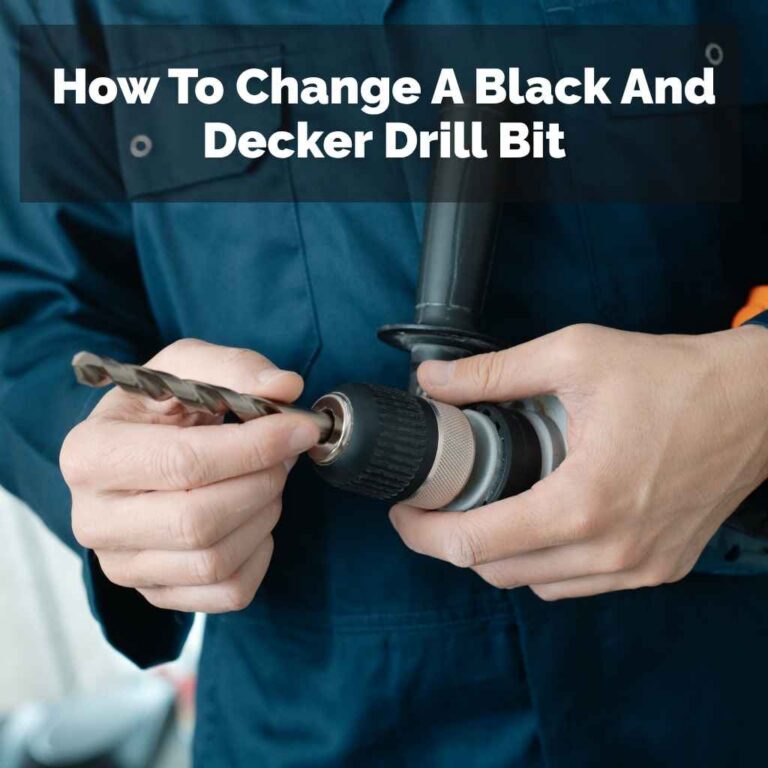
Now, look at the chuck. It’s the part at the very front of the drill. It grips the drill bit.
You should see two sections. One section is the main body of the chuck, which the drill bit goes into. The other is a sleeve that rotates around it.
This sleeve is what you’ll turn.
Grip the main body of the chuck firmly with one hand. Use your other hand to grab the rotating sleeve. You’ll need to twist the sleeve.
Most keyless chucks open by twisting counter-clockwise. So, turn the sleeve to the left. You might need to apply a little firm pressure.
Some chucks have a ratcheting sound as they open. This is normal.
Keep twisting until the jaws open wide enough. You should see a gap appear between the jaws. This gap is where the shank of the drill bit sits.
If the old bit is still in there, you can usually pull it straight out once the jaws are open enough. Sometimes, you might need to wiggle it a bit.
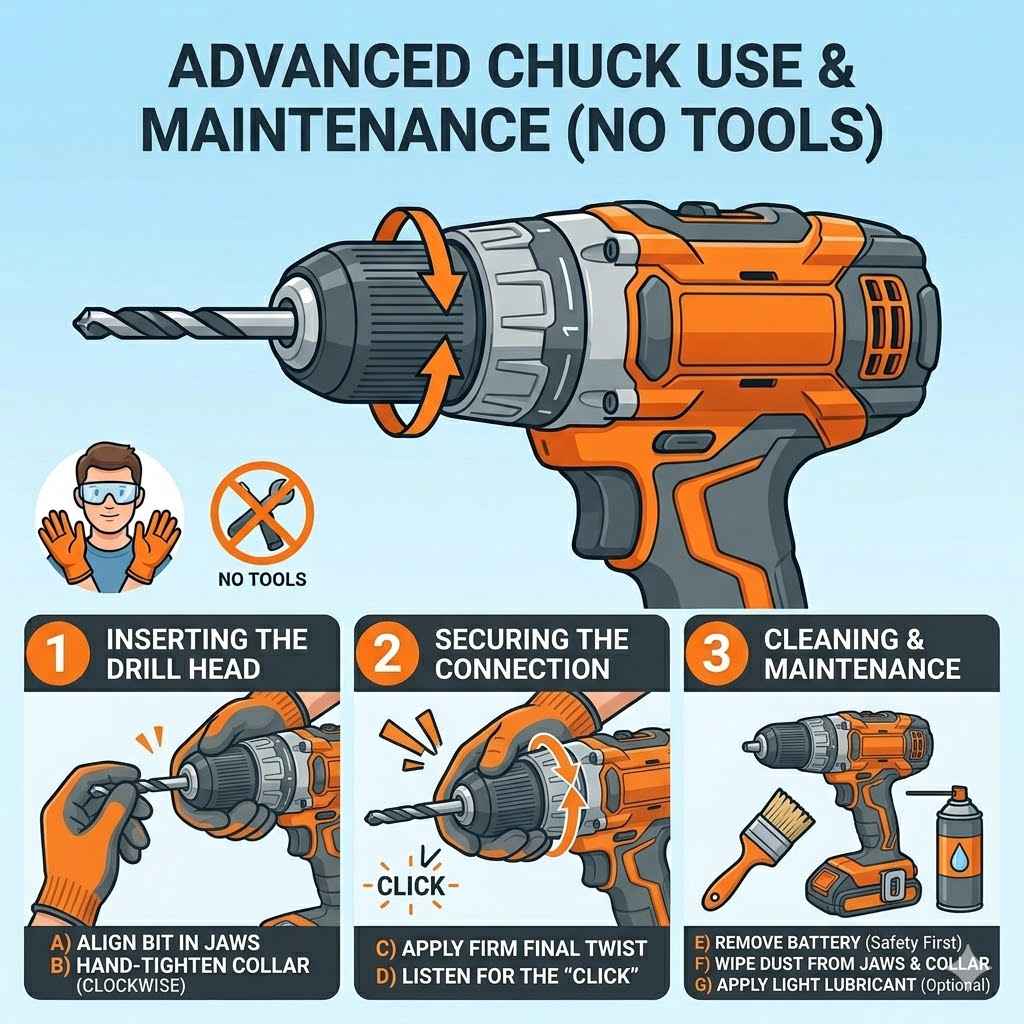
Now, take your new drill bit. Insert its shank into the opening. Push it in as far as it will go.
Make sure it’s centered within the jaws. Once the new bit is in place, you need to tighten the chuck. This grips the new bit securely.
To tighten, reverse the process. Grip the main body of the chuck again. Use your other hand to twist the sleeve clockwise.
Turn it to the right. You’ll feel and hear the jaws closing around the bit. Keep turning until it feels snug.
You want it tight enough so the bit won’t slip. But don’t overtighten with all your might. It just needs to be secure.
A good test is to give the bit a gentle tug. It shouldn’t wiggle or feel loose. If it does, tighten the chuck a bit more.
Most drills have a point where the chuck feels like it’s at its tightest. You don’t need to force it past that point. You’ve successfully changed your drill head!
When a Bit Feels Stuck: Common Issues and Solutions
Sometimes, the chuck sleeve can be a bit stubborn. This is especially true if the drill hasn’t been used for a while, or if it’s gotten dusty or dirty. Here are a few things that might be happening and how to fix them.
Problem: The chuck sleeve won’t turn at all.
This can be frustrating. It might feel like it’s seized up. First, double-check that you are turning the correct part.
Make sure you’re gripping the main body of the chuck and turning the sleeve around it. Sometimes, people try to turn the entire chuck assembly, which won’t work.
If you are turning the right parts, it could be due to dirt or corrosion. A little bit of lubricant might help. Use a light penetrating oil, like WD-40.
Spray a small amount around the seam where the sleeve meets the chuck body. Let it sit for a few minutes. Then, try twisting again.
You might need to apply firm, steady pressure. Avoid jerky movements, which could damage the chuck.
Problem: The chuck is loose, but the jaws won’t open wide enough.
This usually means there’s something obstructing the jaws. Often, it’s a small piece of wood, metal shaving, or old grime. With the drill unplugged, try to gently probe the inside of the chuck with a thin, non-metallic object, like a toothpick or a plastic pick.
You want to dislodge anything that’s stuck between the jaws.
Sometimes, one of the jaws might be slightly out of alignment. If you can see this, try gently wiggling that jaw while turning the sleeve. You might be able to coax it back into place.
Then, try opening and closing the chuck a few times to help it reset.
Problem: The bit keeps slipping even after tightening.
This could mean a few things. The jaws themselves might be worn or damaged. If they look rough or chipped, they won’t grip the bit properly.
In this case, the chuck might need to be replaced. This is a more advanced repair. For most home users, it might be easier to replace the drill itself if the chuck is broken.
Another possibility is that the bit shank is damaged. If the end of the drill bit is rounded off or has a groove worn into it, the chuck won’t be able to get a good grip. Always inspect your drill bits before inserting them.
If a bit is damaged, it’s best to replace it.
Problem: The drill has a chuck key, not a keyless chuck.
If you have an older drill, you might have a keyed chuck. You’ll see holes on the side of the chuck. You’ll need the matching chuck key.
Insert the key into one of the holes. Turn the key counter-clockwise to loosen the chuck. Insert your new bit and then turn the key clockwise to tighten it.
Make sure you use the correct holes. There are usually three. Using the wrong one might not tighten it properly.
Also, ensure the key is the right size for your chuck. If you’ve lost the key, you might be able to find a replacement online by looking up your drill’s model number.
Quick Chuck Maintenance Tips
Clean Regularly: After using your drill, especially in dusty environments, give the chuck a quick wipe-down. A small brush can help remove debris.
Lubricate Sparingly: Once or twice a year, apply a tiny amount of light machine oil or lithium grease to the chuck sleeve threads. This keeps it moving smoothly.
Inspect Bits: Always check your drill bits for damage before inserting them. A worn bit can cause the chuck to slip.
Proper Tightening: Tighten the chuck until the bit feels secure. Overtightening can wear out the chuck faster.
Safety First: Always Prioritize Your Well-being
When working with power tools, safety should always be your top priority. Changing a drill bit is usually very safe, but a few simple habits can prevent accidents. It’s worth repeating these for peace of mind.
Unplug or Remove Battery: This is the golden rule. Never work on your drill’s chuck with the power connected. A sudden start-up can cause cuts, abrasions, or worse.
Double-check that the battery is out or the cord is unplugged.
Wear Safety Glasses: Even when just changing a bit, small metal shavings or dust can fly. Safety glasses protect your eyes from debris. They are a small effort for significant protection.
Secure Your Workpiece: If you’re using the drill for a project, make sure the material you’re drilling into is stable. Use clamps if necessary. This prevents the material from spinning if the bit catches.
Avoid Loose Clothing and Jewelry: Long sleeves, dangling jewelry, or loose drawstrings can get caught in the drill. Keep your work area clear of anything that could snag.
Know Your Drill’s Limits: Not all drills are created equal. Some are designed for light DIY tasks, while others are for heavy-duty construction. Understand what your drill is capable of to avoid putting undue stress on it, which could lead to malfunctions.
Read the Manual: If you’re unsure about any aspect of your drill, consult its user manual. It will have specific instructions for your model, including how to change bits safely.
When a Different Tool Might Be Needed
While most modern drills are designed for tool-free bit changes, there are exceptions. If you have an older drill or a specialized tool, you might need an accessory. This is rare for standard home drills, but it’s good to be aware of.
Chuck Keys: As mentioned, some drills come with a chuck key. If you have one of these, it’s essential for changing bits. You can’t bypass it.
If you’ve lost yours, a replacement is usually easy to find.
Impact Drivers: These tools often have a special collet system, not a traditional chuck. They are designed for fast bit changes. You usually pull the front collar back to release the bit and push it in to lock a new one.
This is even faster than a standard keyless chuck.
Hammer Drills: Most hammer drills function like regular drills but have an added hammer action. The chuck changing process is usually the same as a standard drill. However, if you’re using a masonry bit with a hammer drill, ensure the bit is fully seated and the chuck is very tight.
Rotary Hammers: These are heavy-duty tools for concrete. They use SDS (slotted drive system) bits. Changing these bits is typically a quick twist-and-pull motion.
They don’t use a traditional chuck or key.
For the average homeowner with a cordless drill, the simple hand-twist method should always work. If you encounter a drill that seems different, take a moment to identify its type. This will save you confusion and potential frustration.
Quick-Scan Table: Identifying Your Chuck Type
| Chuck Type | How to Change Bit | Tools Needed |
| Keyless Chuck | Twist sleeve counter-clockwise to open, clockwise to close. | None (Hand-operated) |
| Keyed Chuck | Use chuck key in holes to loosen/tighten. | Chuck Key |
| Impact Driver (Collet) | Pull front collar back to release, push bit in to lock. | None (Hand-operated) |
Understanding Drill Bits: Types and Uses
Knowing how to change a drill head is only half the story. What you put in the drill head matters just as much. Different tasks require different drill bits.
Using the wrong bit can damage your material, the bit itself, or even the drill.
Twist Drill Bits: These are the most common. They have a spiral groove. They’re great for drilling holes in wood, plastic, and metal.
For wood, you might see bits with a sharper point. For metal, they are usually made of harder steel.
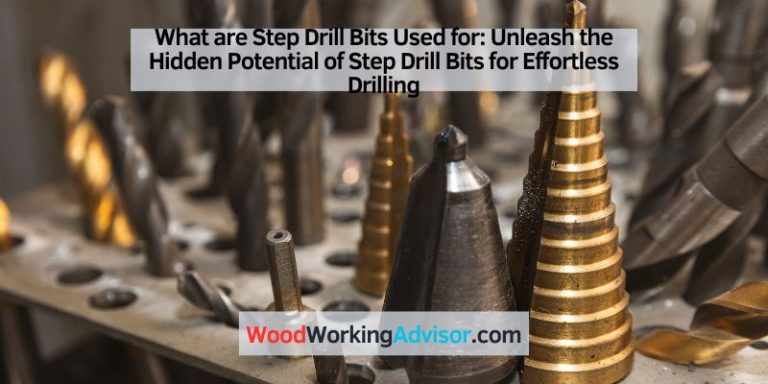
Spade Bits (Paddle Bits): These are flat, wide bits. They’re used for drilling larger holes in wood. They’re not as precise as twist bits but are fast for making, say, holes for pipes or wires.
Masonry Bits: These have a carbide tip. They are designed for drilling into hard materials like concrete, brick, and stone. You’ll typically use these with a hammer drill.
Hole Saws: These look like a small cylinder with a saw blade on the edge. They are for cutting very large holes in wood, plastic, or thin metal. A pilot bit in the center helps guide the cut.
Screwdriver Bits: While not technically drill bits, they are used in drills and impact drivers to drive screws. You’ll see Phillips head, flat head, Torx, and other types.
When you change your drill head, think about the job you’re doing. Are you drilling into drywall? A standard wood bit is usually fine.
Drilling into a brick wall? You need a masonry bit and a hammer drill. Choosing the right bit ensures a clean hole and a safer, more efficient job.
Drill Bit Selection Basics
Task: Drilling pilot holes in wood.
Bit Type: Standard twist drill bit (smaller diameter).
Task: Making a large hole for a doorknob.
Bit Type: Spade bit or hole saw (larger diameter).
Task: Drilling into concrete.
Bit Type: Masonry bit (with hammer drill setting).
Task: Driving screws.
Bit Type: Screwdriver bit (matching screw head).
Troubleshooting When Things Don’t Feel Right
Sometimes, even with the right method, things can feel off. It’s good to have a few more tips in your back pocket. These address those nagging little problems that can crop up.
The Bit Doesn’t Go In Straight: Ensure the jaws are fully open. Sometimes, if they are only partially open, the bit can enter at an angle. Wiggle the bit gently as you tighten the chuck.
The jaws should naturally center it.
You Hear Grinding Sounds: This often means dirt or debris is in the chuck. Try cleaning it out with a brush or compressed air. If the sound persists even after cleaning, the internal gears of the chuck might be damaged.
This could mean it’s time for a new chuck or a new drill.
The Bit Seems Too Loose: You’ve tightened it, but it still feels wobbly. Check the bit shank for damage. If it’s rounded or worn, the jaws can’t grip it well.
Try a different bit. If multiple bits are loose, the chuck itself might be worn out and needs replacement.
Difficulty Releasing the Bit: Sometimes, a bit can get jammed in the chuck. With the chuck loosened as much as possible, try gently twisting the bit back and forth while pulling it out. A small amount of penetrating oil might help if it’s really stuck.
Ensure you’re turning the chuck in the right direction to loosen.
Troubleshooting Checklist
Issue: Bit won’t insert straight.
Check: Jaws fully open? Wiggle bit while tightening?
Issue: Grinding sounds.
Check: Clean chuck? Inspect internal gears if sound persists.
Issue: Bit feels loose.
Check: Bit shank damaged? Chuck worn out?
Issue: Bit stuck.
Check: Chuck fully loosened? Try wiggling bit.
Experience: That Time I Almost Stripped a Screw Head
I remember one afternoon, I was trying to assemble a new bookshelf. It was one of those flat-pack jobs. I was working pretty quickly, eager to get it done.
I had just finished drilling a pilot hole for one of the screws. I needed to switch from the drill bit to a Phillips head screwdriver bit.
I grabbed the drill and, without really thinking, twisted the chuck. It felt a little stiff, but I gave it a good yank. I popped out the drill bit and pushed in the screwdriver bit.
Then, I started driving the screw. About halfway in, I heard a terrible scraping sound. The screw head looked like it was starting to round off.
My stomach dropped. I had tightened the chuck too much, but not perfectly tight. The screwdriver bit was slipping just enough to chew up the soft metal of the screw head.
I felt a wave of panic mixed with annoyance. This was going to make the whole shelf wobbly if I couldn’t get that screw in properly.
I immediately stopped drilling. I carefully removed the battery from the drill. I looked at the screw head.
It was definitely damaged. I then looked at the chuck. I realized I had been so focused on just getting the bit in that I hadn’t paid attention to how securely it was gripped.
I hadn’t tightened the chuck sleeve enough after inserting the screwdriver bit.
So, I took the screwdriver bit out. I made sure the chuck jaws were fully open. I then re-inserted the screwdriver bit, making sure it was seated properly.
This time, I gripped the main body of the chuck firmly and twisted the sleeve with all my might, clockwise, until it felt truly solid. I even gave the bit a little tug to test it. It didn’t budge.
With renewed caution, I put the battery back in. I approached the screw hole again. This time, I applied gentle, steady pressure.
The drill bit engaged the screw head perfectly. It drove the screw in smoothly, with no slippage. I breathed a sigh of relief.
It was a good lesson: don’t rush, and always ensure the bit is securely tightened.
What This Means for Your DIY Projects
Understanding how to change a drill head safely and effectively opens up a world of possibilities for your DIY projects. It removes a common barrier that might have made you hesitate to tackle tasks.
Increased Efficiency: When you can swap bits quickly, your project time is cut down significantly. No more fumbling for tools or searching for instructions. You just twist and go.
More Project Options: Need to drill a pilot hole, then drive a screw? You can do it with one tool and two quick changes. This makes tasks like furniture assembly, hanging pictures, or minor repairs much simpler.
Reduced Frustration: A smooth bit change process means less stopping and starting. This keeps your momentum going and makes the whole experience more enjoyable. Frustration often leads to mistakes, so a smooth process is also a safer one.
Better Results: A securely gripped bit means cleaner holes and straighter screws. This leads to professional-looking results. When the bit is loose, it can wobble, causing damage to your material.
Empowerment: Knowing how to use your tools properly is empowering. It gives you the confidence to take on more complex tasks around your home. You become more self-reliant.
When to Consider Professional Help (or a New Drill)
While most chuck issues are fixable with basic knowledge, there are times when you might need more. This usually involves a worn-out chuck or a drill that’s seen better days.
Chuck is Damaged: If you see cracks in the chuck, or if the jaws are visibly bent or broken, it’s time for a replacement. Trying to force a damaged chuck can be dangerous.
Chuck Won’t Tighten Properly: If you’ve tried all the troubleshooting steps and the chuck still won’t grip bits securely, the internal mechanism is likely worn out. For many drills, replacing the chuck itself is possible but can be a bit involved. You might need a specific chuck removal tool.
Drill Itself is Failing: If the drill motor is weak, makes strange noises, or the chuck issues are persistent, the entire drill might be nearing the end of its life. For older or cheaper drills, the cost of repair might exceed the cost of a new, more reliable one.
Specialized Applications: If your DIY projects are growing and you find yourself needing more power, precision, or specific functions (like heavy-duty hammer drilling), it might be time to invest in a more specialized tool. This isn’t about fixing a problem, but about upgrading for future projects.
Frequently Asked Questions
Can I use pliers to tighten a stuck drill chuck?
It’s generally not recommended to use pliers on a standard keyless chuck. Pliers can easily damage the chuck sleeve, making it harder to grip or even breaking it. Always try to use the textured grip on the sleeve itself.
If it’s truly stuck, a penetrating lubricant is a better first step.
How do I know if my drill has a keyless chuck?
A keyless chuck is the most common type on modern drills. You’ll notice a part of the chuck that rotates around the bit holder. It usually has ridges for grip.
If you don’t see any holes on the chuck for a separate key tool, it’s almost certainly a keyless chuck.
Is it normal for the drill bit to wobble slightly after tightening?
A very slight wobble might be acceptable in some less precise applications, but generally, no. A properly tightened drill bit should feel very secure and not wobble at all. If you notice significant wobble, re-tighten the chuck.
If it persists, check the drill bit shank and the chuck itself for damage.
My drill chuck is really hard to turn. What’s the best way to loosen it?
Start by ensuring you’re turning the correct parts. Grip the main body of the chuck and twist the sleeve counter-clockwise. If it’s still stiff, try a penetrating lubricant.
Apply a small amount to the seam where the sleeve meets the body and let it sit for a few minutes. Then, try twisting again with firm, steady pressure.
Can I change drill heads on an impact driver?
Impact drivers typically don’t have traditional drill chucks. They use a quick-release collet system. To change a bit, you usually pull the front collar back, insert the bit until it clicks, and then let the collar snap forward.
It’s a very fast, tool-free process designed for this specific purpose.
What kind of lubricant should I use on my drill chuck?
A light machine oil or a specialized tool lubricant is best for drill chucks. Avoid heavy greases, which can attract a lot of dust and debris. For a stuck chuck, a penetrating oil like WD-40 can help loosen it, but it’s not ideal for long-term lubrication.
After using penetrating oil, clean the chuck and apply a light machine oil.
Conclusion
Changing a drill head is a fundamental skill for anyone using a power drill. It’s designed to be simple and quick, often requiring no tools at all. By understanding your drill’s chuck and following a few safety steps, you can easily swap bits for any task.
This simple process empowers you to tackle more DIY projects efficiently and with confidence. Keep your drill clean, your bits sharp, and your chuck snug. You’ll be a pro in no time.