How to Cut Plywood for Gable Ends (Match the Actual Roof Pitch)
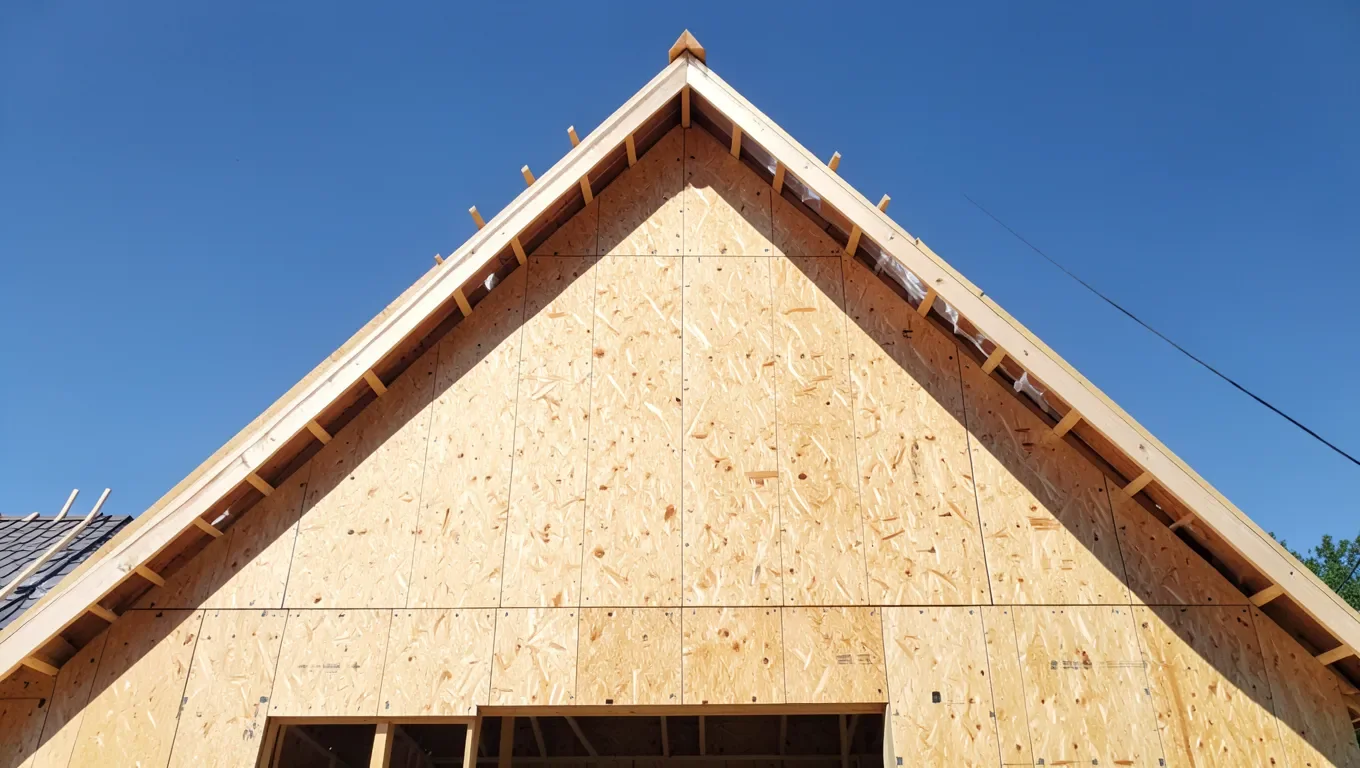
Cutting plywood for a gable end goes wrong most often for one reason: the angle doesn’t match the roof that’s actually built. A blueprint gives you a target pitch, but real framing has tolerance – a truss can sit a degree or two off spec, and that’s enough to leave a visible gap at the ridge or a sheet that binds against the fascia. The fix is straightforward: measure the pitch on the actual rafters or trusses, transfer that angle to the plywood with a speed square, and cut the sheet slightly oversized so you can trim it to a tight fit instead of committing to one exact line on the first pass.
What You Need to Cut Plywood for a Gable End
Best Rafter Angle Speed Square Pick
 |
Swanson 7 Inch Speed Square – $9.98 Reads the actual on-site roof pitch and doubles as a saw guide, which is exactly what transferring a real gable pitch onto plywood calls for.
|
Beyond the saw itself, the tools below are what separate a clean, tight-fitting gable cut from one that needs shims and caulk to hide the gaps:
- Circular saw with a sharp, fine-tooth blade rated for plywood – a dull blade is the single biggest cause of splintering.
- Speed square (rafter angle square) to read the actual pitch and guide the saw along an angled line.
- Torpedo level to confirm the square is reading a true pitch, not a tilted one.
- Tape measure and pencil for laying out dimensions before any cut is made.
- Straightedge or rip guide with clamps for long cuts across a full 4×8 sheet – freehanding a saw along a pencil line rarely stays straight for eight feet.
- Safety glasses, hearing protection, and a dust mask – non-negotiable for angled rip cuts, covered in more detail below.
Measure the Real Roof Pitch, Not Just the Blueprint
Roof pitch is expressed as rise over a 12-inch run – a 6/12 pitch rises 6 inches for every 12 inches of horizontal run, which works out to roughly a 26.5-degree angle. A 12/12 pitch is a full 45 degrees. Most speed squares print this rise-per-foot scale right on the tool, so you don’t need to do the trigonometry yourself.
The part framers rely on that a lot of DIY guides skip: check the pitch on the actual structure before you cut anything. Hold the square’s pivot point against a rafter, fascia board, or the roof sheathing that’s already up, then rest a torpedo level along the square’s edge and rotate the square until the level reads true. Whatever number lines up on the pitch scale at that point is the real, as-built angle – not the number printed on the plans. Lumber crown, how a truss actually seated during installation, and small field adjustments made by the framing crew can all shift the finished pitch by a degree or more from spec, and on a full sheet of plywood that difference shows up as a visible gap or a cut that has to be forced into place.
Transfer the Pitch to the Plywood
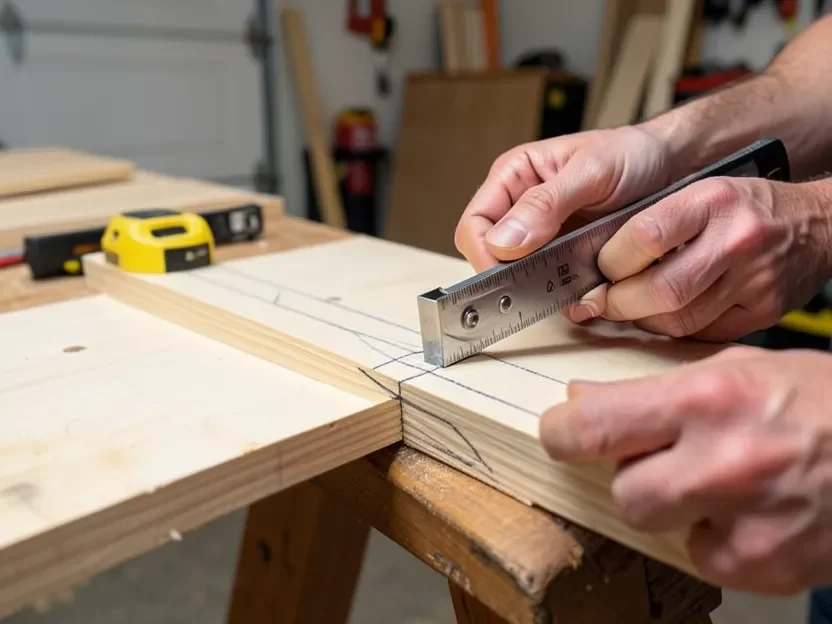
Once you have the real pitch, lay the plywood flat across sawhorses and set the square’s pivot corner on the edge you’re cutting. Swing the square until the pitch number you measured lines up with the sheet’s edge, then trace the angled line with a pencil the full width of the cut. For a sheet that spans the full width of the gable, you’ll usually need two different angled cuts – one for each side of the roof – meeting at the ridge, so mark both before you pick up the saw.
On a full 4×8 sheet, don’t rely on the speed square alone to guide an 8-foot cut. Clamp a straight board or a dedicated rip guide down along the marked line instead, and run the saw’s shoe against that. It keeps the cut straight over the full length in a way that eyeballing a pencil line against a small square usually can’t.
Cut Oversized, Then Trim-Fit
This is the practical margin-for-error trick working framers use and most tutorials leave out: cut about 1/8 to 3/16 inch proud of your marked line instead of exactly on it. Angle-finder and speed-square readings always carry a small amount of human error, and a sheet cut exactly to a slightly-off line either leaves a gap or has to be forced into place, sometimes cracking the plywood’s edge. A sheet cut a hair oversized can be sneaked down to a tight fit afterward with a block plane, a rasp, or a second light pass with the saw – but there’s no way to add material back to a cut that came in short.
Kickback and Cutting Safety on Angled Rip Cuts
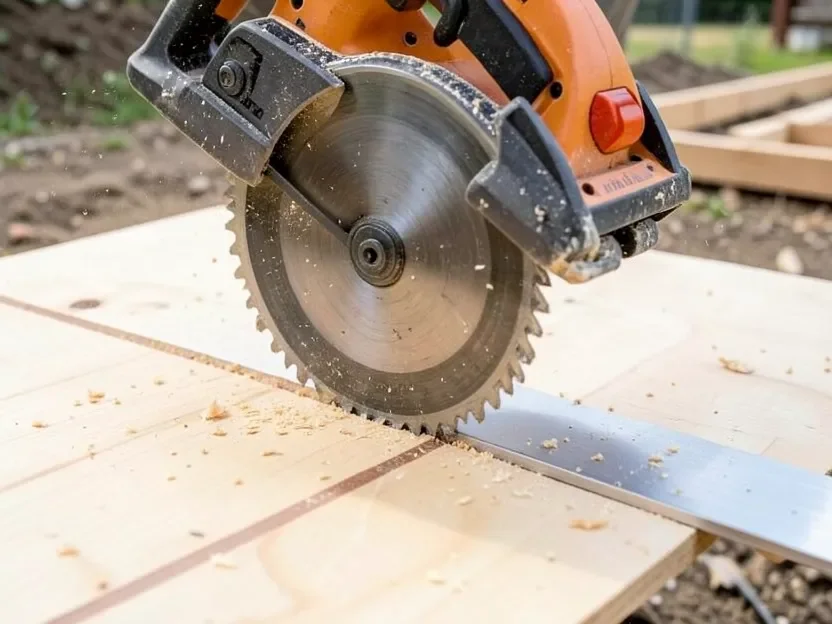
Angled rip cuts carry more kickback risk than a straight 90-degree crosscut. As the blade travels along a steep diagonal, the offcut can pinch against the blade if the sheet isn’t fully supported on both sides of the cut line, and a binding blade can throw the saw straight back at the operator. A few habits keep that risk down: support the plywood on sawhorses positioned so both sides of the cut stay stable as you finish the pass, keep the blade depth set just past the plywood’s thickness rather than fully extended, use a sharp blade so the saw isn’t fighting the material, and stand slightly to the side of the saw’s line of travel rather than directly behind it. Safety glasses and hearing protection are baseline for any circular saw work, and a dust mask is worth wearing through a full sheet of plywood – sawing that much sheet material generates a lot of fine dust in a short time.
Common Mistakes When Cutting Gable-End Plywood
Splintering along the cut edge. Score the cut line with a utility knife before sawing, or run a strip of painter’s tape over the line, and cut with the plywood’s good face down when using a circular saw – the blade exits upward through the top face, so the underside gets the cleaner edge.
Assuming both gable ends are identical. Even on the same house, framing tolerance means the two gable ends can measure slightly differently. Check the pitch and dimensions on each one separately rather than cutting one sheet and using it as a template for the other.
Ignoring an out-of-plumb wall. If the wall framing below the gable isn’t perfectly plumb, a plywood sheet cut to exact spec can still sit slightly proud or recessed at one edge. Dry-fit the sheet before fastening it, and shim behind low spots rather than forcing screws to pull an uneven sheet flat.
Installing and Sealing the Cut Sheathing
- Use exterior-grade screws or ring-shank nails rated for sheathing, spaced roughly 6 to 8 inches apart along the edges and 12 inches in the field.
- Pre-drill near edges and corners to avoid splitting the plywood, especially near the angled peak cut.
- Run flashing tape over the seam where the two angled sheets meet at the ridge before any siding or trim goes on, to keep water from tracking into the joint.
- Prime and paint, or stain, any exposed edge grain – cut edges absorb moisture faster than the factory-sealed face of the sheet.
Frequently Asked Questions
How do I find the actual roof pitch before cutting plywood for a gable end?
Hold a speed square’s pivot point against a rafter, fascia board, or the existing roof sheathing, then rest a torpedo level on the square’s edge and rotate the square until the level reads true. The number that lines up on the square’s pitch scale at that point is the real, as-built pitch. Check it directly on the framing rather than trusting the blueprint spec alone, since actual framing can be a degree or more off plan.
What tools do I need to cut plywood for a gable end?
A circular saw with a sharp fine-tooth blade, a speed square to read and transfer the roof pitch, a torpedo level to confirm the pitch reading, a tape measure, a straightedge or rip guide with clamps for long cuts, and safety glasses, hearing protection, and a dust mask.
Why should I cut the plywood oversized instead of exactly on the line?
Angle-finder and speed-square readings carry a small amount of human error, so a sheet cut exactly to the line can end up with a visible gap or a too-tight fit that cracks the edge. Cutting about 1/8 to 3/16 inch proud of the line leaves material you can trim down with a block plane or a second light pass for a precise final fit – material removed after the fact beats a cut that came in short.
Is there a kickback risk when cutting angled rip cuts on plywood?
Yes, angled rip cuts carry more kickback risk than a straight crosscut, since the offcut can pinch against the blade if the sheet isn’t fully supported on both sides of the cut. Support the plywood on sawhorses so both sides stay stable through the full cut, use a sharp blade, keep the blade depth just past the plywood’s thickness, and stand slightly to the side of the saw’s line of travel rather than directly behind it.
Conclusion
Cutting plywood for a gable end comes down to measuring the roof you actually have, not just the one on paper. Read the real pitch with a speed square, transfer it carefully, and leave yourself a little extra material to trim rather than cutting to the exact line on the first pass.
Take the extra few minutes to verify the pitch on-site and cut oversized, and your gable ends will fit tight against the roof framing with no visible gaps to caulk over later.
Sponsored / affiliate links. As an Amazon Associate I earn from qualifying purchases. I may earn additional commission from eligible campaigns.