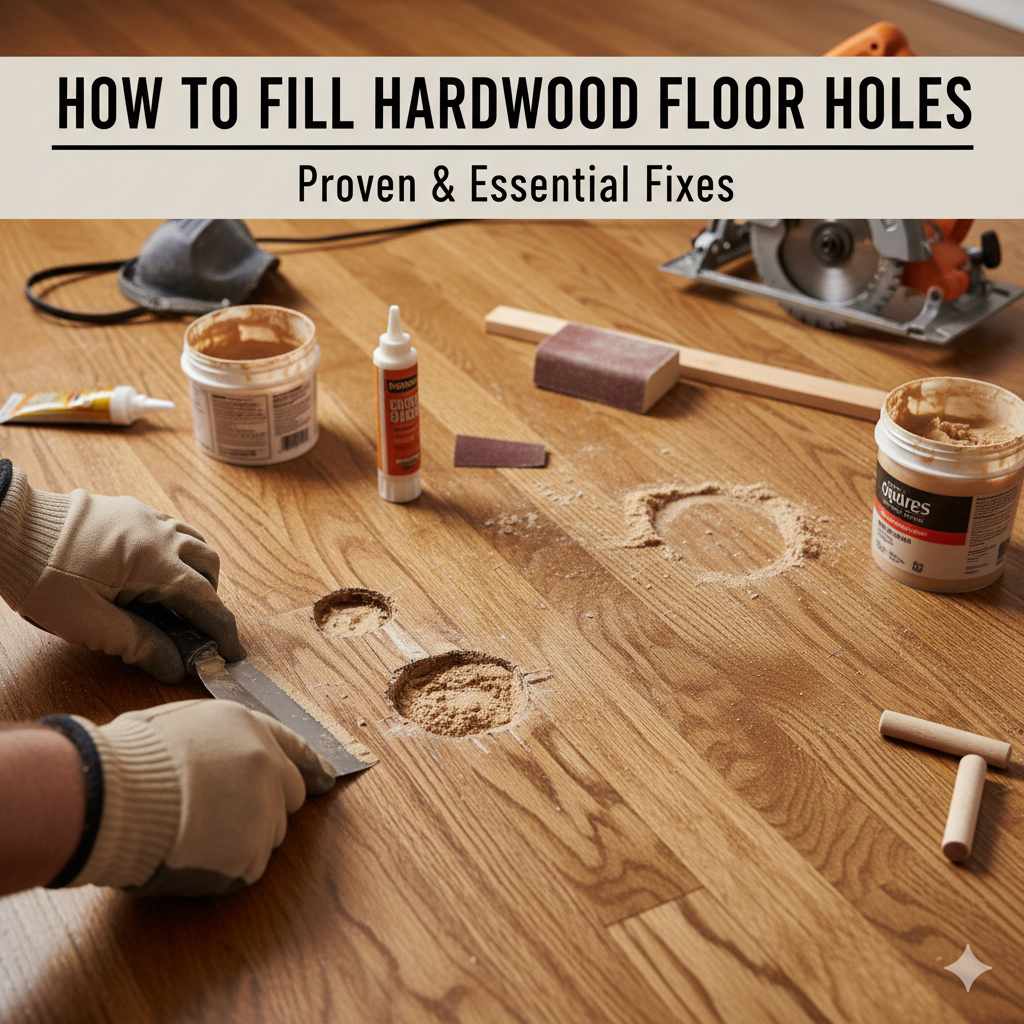
How to Fill Hardwood Floor Holes: Proven & Essential Fixes
Fill hardwood floor holes easily! This guide offers simple, effective methods for fixing dents, gouges, and larger holes using wood filler, epoxy, or wood plugs. Learn essential techniques for a smooth, beautiful floor finish in no time.
Hey there, DIY adventurers! Md Meraj here, your woodworking buddy. Ever walk across your beautiful hardwood floors and notice an unwelcome divot or hole? It happens to the best of us! Maybe something heavy dropped, or perhaps those floor vents needed a little attention. Whatever the reason, seeing damage on your floors can be a bit disheartening. But don’t worry! You don’t need to be a master carpenter to fix these common issues. With a few simple tools and the right approach, you can restore the smooth, polished look of your hardwood floors. Today, we’ll walk through proven fixes that are perfect for beginners. Get ready to feel that sense of accomplishment!
Why Do Hardwood Floors Get Holes?
Hardwood floors are gorgeous, but they can be susceptible to damage. Here are a few common culprits:
- Impacts: Dropping heavy objects, furniture moving, or even high heels can cause dents and gouges.
- Wear and Tear: Over time, high-traffic areas can show wear, leading to small divots.
- Installation Issues: Sometimes, nails or screws used during installation might become exposed or loosen.
- Pest Damage: In rare cases, wood-boring insects can create holes, though this is less common in finished floors.
- Previous Repairs: Older repairs might not have held up perfectly.
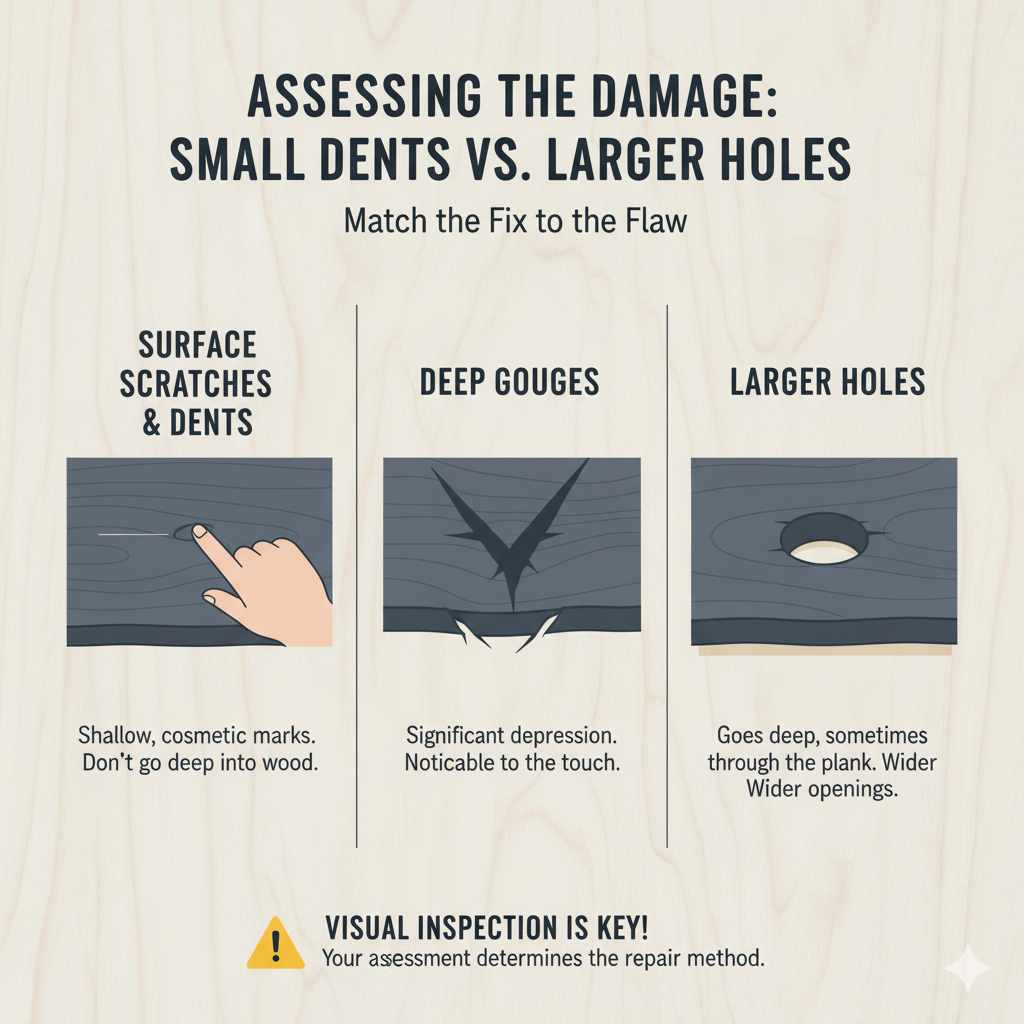
Assessing the Damage: Small Dents vs. Larger Holes
Before you grab any tools, take a good look at the damage. The size and depth of the hole will determine the best repair method. This simple assessment will save you time and effort.
- Surface Scratches and Dents: These are shallow and usually don’t go through the wood’s surface layer significantly.
- Deep Gouges: These are more significant, leaving a noticeable depression in the wood.
- Larger Holes: These go deeper, sometimes all the way through the plank, or are wider openings.
Gathering Your Essential Tools and Materials
Having the right supplies on hand makes the job much smoother. Here’s what you’ll likely need:
For Minor Repairs (Dents & Scratches)
- Wood filler or putty (matching your floor’s color)
- Putty knife or scraper
- Fine-grit sandpaper (120-220 grit)
- Clean cloths
- Optional: Wood stain pen or touch-up paint
For Deeper Holes and Gouges
- Wood filler (heavy-duty or 2-part for stability) OR Wood epoxy
- Putty knife or spatula
- Sandpaper (various grits: 80, 120, 220)
- Orbital sander (for larger areas, optional)
- Vacuum cleaner
- Masking tape
- Safety glasses
- Dust mask
- Gloves
- Optional: Wood plugs and wood glue for very large holes
Proven Method 1: Filling Small Holes and Gouges with Wood Filler
Wood filler is your best friend for smaller imperfections. It’s flexible, easy to use, and can be sanded and finished to blend in.
Step 1: Clean the Area
Using a clean cloth, wipe the damaged area to remove any dust, debris, or loose wood fibers. A clean surface ensures the filler adheres properly. You can use a vacuum to get into tight spots.
Step 2: Choose the Right Wood Filler
Wood fillers come in many colors. Try to find one that closely matches your floor’s existing color. For deeper holes, a hardening filler (like a 2-part epoxy filler) or a solvent-based filler is often more durable than a water-based one. Some fillers can be tinted, which gives you more control over the final color.
“Choosing the right color upfront is key. If you can’t find an exact match, a slightly darker shade is often better than too light, as it can hide the repair more effectively once finished,” advises the Woodworking Network on finishing techniques.
Step 3: Apply the Wood Filler
Load a putty knife or spatula with a generous amount of wood filler. Press the filler firmly into the hole or gouge, ensuring it fills the entire cavity. Slightly overfill the hole, creating a small mound, as wood filler can shrink slightly as it dries.
Use smooth, even strokes to spread the filler. For deeper gouges, you might need to apply it in thin layers, letting each layer set for a bit according to the product instructions. This prevents excessive shrinkage.
Step 4: Let it Dry
This is crucial! Drying times vary depending on the type of filler and the depth of the repair. Check the product packaging for specific instructions. Rushing this step can lead to a poor finish.
Step 5: Sand the Repaired Area
Once the filler is completely dry, use fine-grit sandpaper (around 120-grit to start) to sand the mounded filler down. Sand in the direction of the wood grain. Your goal is to make the filler flush with the surrounding floor surface. You can use a sanding block for control or an orbital sander for larger repairs. Gradually move to finer grits (like 220-grit) for a smooth finish.
Safety Tip: Always wear a dust mask and safety glasses when sanding to protect yourself from wood dust.
Step 6: Clean and Finish
After sanding, wipe away all dust with a tack cloth or a slightly damp cloth. Inspect the repair. If it looks good and is flush, you’re ready for the final touch. If there are minor color discrepancies, you can use a matching wood stain pen or touch-up paint to help it blend in. Be subtle with your application.
Proven Method 2: Using Wood Epoxy for Deeper Holes
For holes that are too deep for standard wood filler, or where extra strength is needed, a good quality wood epoxy is an excellent choice. Epoxies are typically a two-part system that creates a very strong, durable bond.
Step 1: Prepare the Hole
Clean out the hole thoroughly. Remove any loose wood particles, dust, or debris. You want a clean surface for the epoxy to adhere to. Using a stiff brush or a vacuum cleaner can help here.
Step 2: Mix the Epoxy
Wood epoxies usually come in two containers: a resin and a hardener. It’s vital to mix them in the exact ratio specified by the manufacturer. Mix them thoroughly on a disposable surface or palette until you achieve a uniform color and consistency. Do this just before you plan to apply it, as mixed epoxy has a limited working time.
Here’s a quick guide to mixing ratios, though always refer to your product:
| Epoxy Type | Resin Ratio | Hardener Ratio |
|---|---|---|
| Standard 2-Part Wood Epoxy | 1:1 | 1:1 |
| Some Specialized Epoxies | 2:1 or 3:1 (or vice versa) | 2:1 or 3:1 (or vice versa) |
For more detailed information on working with epoxies and their properties, the U.S. Environmental Protection Agency (EPA) offers resources on adhesives and sealants.
Step 3: Apply the Epoxy
Carefully apply the mixed epoxy into the hole using a small spatula or a putty knife. Press it in firmly to ensure it fills the entire void and makes good contact with the wood surrounding the hole. Overfill slightly, as epoxy can sometimes settle.
Step 4: Allow to Cure
Epoxy requires a specific curing time to reach its full strength. This can range from a few hours to 24 hours or more, depending on the product and ambient temperature. Avoid putting any weight or stress on the repaired area during this time.
Step 5: Sand and Finish
Once the epoxy has fully cured, it will be rock hard. Sand it down using progressively finer grits of sandpaper, starting with 80 or 120 grit if needed to knock down any high spots, then moving to 220 grit for smoothness. Sand until the surface is level with the surrounding floor.
Clean the sanded area thoroughly. If the epoxy is clear or a different color than your floor, you may need to use matching wood stain or paint to camouflage the repair. Apply with care.
Proven Method 3: Using Wood Plugs for Larger, Deeper Holes
For very large, deep holes or when you want a very strong, integrated repair, using a wooden plug is a fantastic method. This involves cutting a hole to a uniform shape and then fitting a precisely cut wooden plug into it.
Step 1: Prepare the Hole
If the hole is irregular, use a sharp chisel or a utility knife to carefully square it off. For very large damaged areas, you might need to cut out a larger, clean section of damaged wood. The goal is to create a clean, defined cavity for the plug.
Step 2: Create or Purchase a Wood Plug
You can purchase pre-made wood plugs at most hardware or woodworking stores. These come in various wood types and sizes. Alternatively, you can create your own plug using a hole saw or a plug cutter on a scrap piece of wood that matches your flooring. The plug should be a tight friction fit or slightly larger than the hole.
A good plug cutter set is invaluable for this type of work. The Wood Magazine offers excellent advice on using various drill bit types, including plug cutters.
Step 3: Secure the Plug
Apply a quality wood glue to the inside edges of the hole and to the sides of the wood plug. Insert the plug into the hole, tapping it gently with a rubber mallet until it’s seated firmly. If it’s slightly proud, you can try to tap it down further. Wipe away any excess glue immediately with a damp cloth.
Step 4: Let the Glue Dry
Allow the wood glue to cure completely according to the manufacturer’s instructions. This usually takes at least a few hours, but overnight is best for maximum strength.
Step 5: Sand and Finish
Once the glue is dry, the plug will be a permanent part of your floor. Sand the plug down until it is perfectly flush with the surrounding floor. Start with a coarser grit sandpaper (like 80 or 100) if the plug is significantly proud, then move to finer grits (120, then 220) for a smooth finish. Sanding in the direction of the wood grain at all times.
After sanding and cleaning as in the previous methods, you may need to stain or refinish the plug and the surrounding area to achieve a seamless look. This might involve a careful application of stain, polyurethane, or the use of a wood filler crayon to blend any minor imperfections.
Choosing the Right Repair Method: A Quick Guide
Here’s a handy table to help you decide which method is best for your situation:
| Type of Damage | Recommended Repair Method | Key Benefits | Considerations |
|---|---|---|---|
| Shallow Scratches/Dents (less than 1/8 inch deep) | Wood Filler or Putty | Easy to apply, quick drying, good color matching options. | May shrink slightly; might not be durable enough for high-impact areas. |
| Deeper Gouges (1/8 inch to 1/2 inch deep) | Hardening Wood Filler or 2-Part Epoxy | More durable and less prone to shrinkage than standard filler. Fills voids well. | Longer drying/curing times. Requires careful mixing/application for epoxy. |
| Large Holes (over 1/2 inch diameter) or Structurally Damaged Areas | Wood Plugs with Glue or Epoxy | Very strong, durable, and can look seamless if done well. | Requires more skill and precision. May need specialized tools. Can be time-consuming. |
| Exposed Nail/Screw Heads | Wood Filler or Wood Plug (if hole is large) | Covers unsightly metal, protects the wood. | Ensure filler/plug is well-bedded and sanded smooth. |
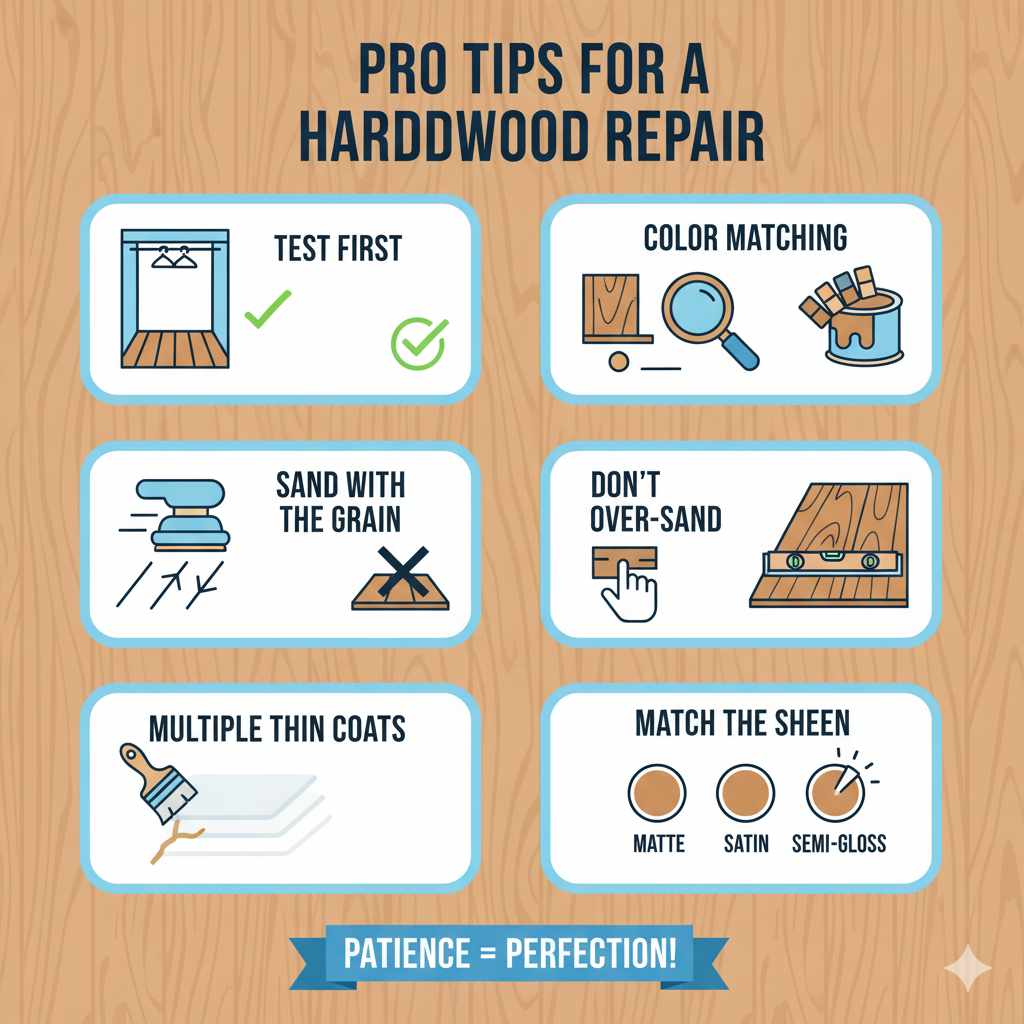
Tips for a Flawless Finish
Achieving a repair that blends perfectly with your existing floor takes a little patience. Here are some pro tips:
- Test in an Inconspicuous Area: If possible, practice your chosen method on a scrap piece of wood or in a closet before tackling highly visible spots.
- Color Matching is Key: Take a small sample of your floor (if you have a leftover piece) or a good photo to the paint or hardwood store. Many fillers and stains can be custom-mixed.
- Sanding Technique Matters: Always sand with the grain of the wood. Start with a coarser grit if needed for leveling, but always finish with a fine grit (220+) for smoothness.
- Don’t Overt-Sand: Be careful not to sand down too far, creating a depression. Feather the edges of your sanded area.
- Multiple Thin Coats: For wood filler, applying in thin layers with drying time in between often results in less shrinkage and a better finish than one thick application.
- Consider the Finish: If your floor has a distinct sheen (matte, satin, semi-gloss), try to match it when you apply any finish over the repair.
Frequently Asked Questions (FAQ)
How do I make wood filler match my floor color?
Many wood fillers come in pre-mixed colors. You can also find wood fillers that can be tinted with universal colorants or wood stains. For a great match, try to find a filler that’s slightly darker than your floor, as it will blend better than one that’s too light. You can also use a wood stain pen after the filler has dried and been sanded.
Can I use regular spackle for hardwood floor holes?
It’s generally not recommended. Regular spackle is designed for drywall and is too soft and not durable enough for wood floors. It will likely crack, chip, or wear away quickly under foot traffic. Always use a product specifically made for wood, like wood filler or epoxy.
How deep can wood filler be used?
Standard water-based wood fillers are best for shallow holes and gouges (typically up to 1/4 inch deep). For deeper holes, it’s better to use a hardening wood filler, a 2-part wood filler system, or a wood epoxy. These products are formulated to resist shrinkage and provide more strength.
Do I need to seal the repaired area?
Yes, for most repairs, especially those involving wood filler or plugs, you will want to seal the area after sanding and coloring to protect the repair and match the sheen of your floor. This typically involves applying a clear coat of polyurethane (matching your floor’s finish) or a floor wax.
What’s the difference between wood filler and wood putty?
Wood filler is generally used for filling holes and gaps and usually hardens to a sandable state. Wood putty is often softer, remains slightly pliable, and is better for surface imperfections or minor cosmetic touch-ups where sanding isn’t the primary goal. For floor repairs, a sandable wood filler is usually preferred.
How long does it take for wood filler to dry?
Drying times vary greatly. Water-based wood fillers can dry in as little as 15-30 minutes for thin layers, but deeper fills may take several hours. Solvent-based fillers and 2-part epoxies typically have longer drying or curing times, sometimes up to 24 hours, so always check the product instructions.
Conclusion: Enjoy Your Restored Floors!
There you have it! Fixing holes in your hardwood floors doesn’t have to be a daunting task. Whether you’re dealing with a small dent or a more significant gouge, the methods we’ve covered – using wood filler, epoxy, or wood plugs – offer practical and effective solutions. Remember to assess the damage carefully, gather the right materials, and take your time with each step, especially sanding and finishing. Doing so will not only repair your floor but also build your confidence as a DIYer.